
An important phase in project planning is the management of resources, so it's meaningful to carefully define the available resources. Each task requires for its completion the use of human resources to do the work, and/or material resources. Depending on the availability of resources, the initial estimates on the duration of individual tasks and their scheduling in time may necessitate modifications.
A team member is a person that belongs to an organization - team members are assigned at the organization level and can be shared across multiple projects.
A resource is a person, equipment or materials that belongs to a project. Resources are defined and maintained at the project level.
The whole project plan really starts when you've added resources and tasks are assigned to them.
Project Plan 365 offers support for all types of resources: material, work and cost.
Read more about cost resources at: https://www.projectplan365.com/articles/cost-resources/
Work resources are the most useful, and should be used to categorize people who will spend time working on tasks. The work resources are the ones that will burn effort and represent the people required to complete tasks in the project. On a small project, this type of resource could refer to each team member by name. On a larger project, this resource could specify different subcontractors. On the other hand, material resources are time independent and should refer to materials that get used up during work, such as lumber, nails, concrete and gasoline. The default value for an inserted resource is work type.
Before you begin to assign resources, you can enter all of the resource information for your project at once by creating a resource list. This will save you time when assigning resources to your tasks.
Step by step on how to add team members from Organization into your project plans:
1. Select a task from Gantt Chart view.
2. Go to menu Team - Assign - Team Member.
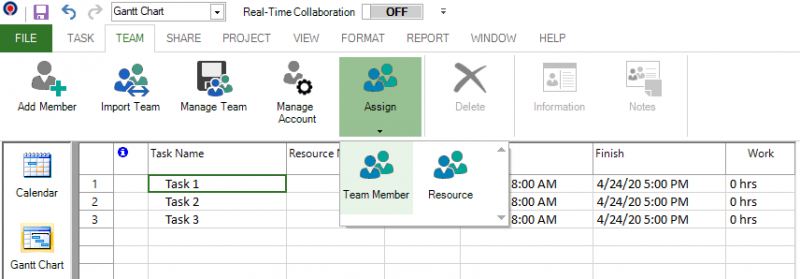
3. The Assign Team Members to This Task dialog will be opened.
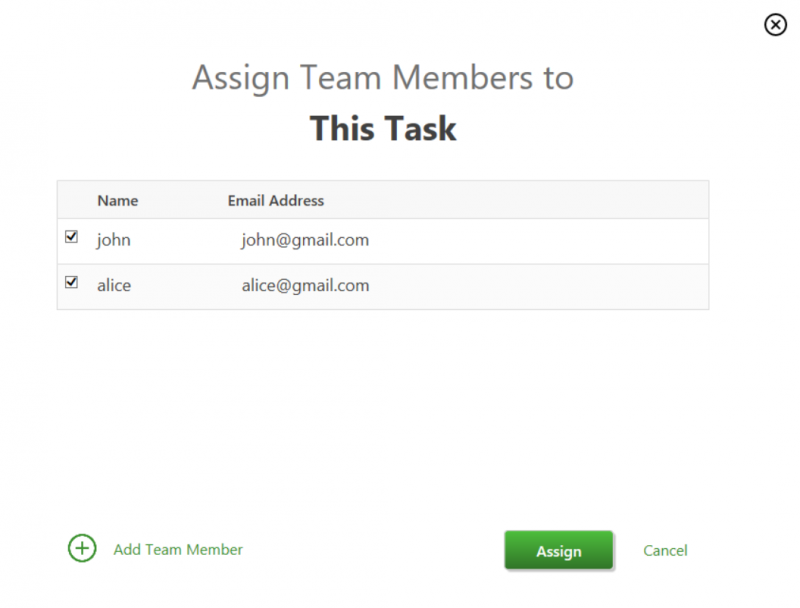
4. Select the team members that you want to assign to the task and click on the Assign button.
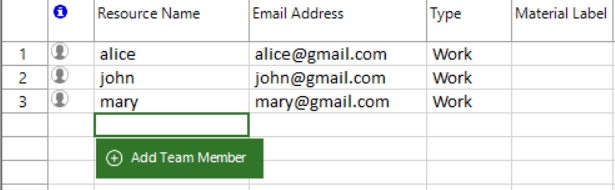
4. Once you click Assign, all the selected Team Members are added as Work Resources into the current project.

Step by step on how to add team members into your project using the Resource Name column in Gantt Chart view:
1. You can add Team Members by adding them from the Gantt Chart view.
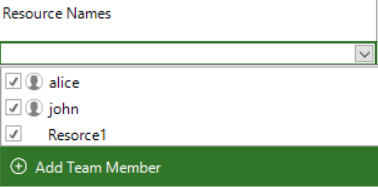
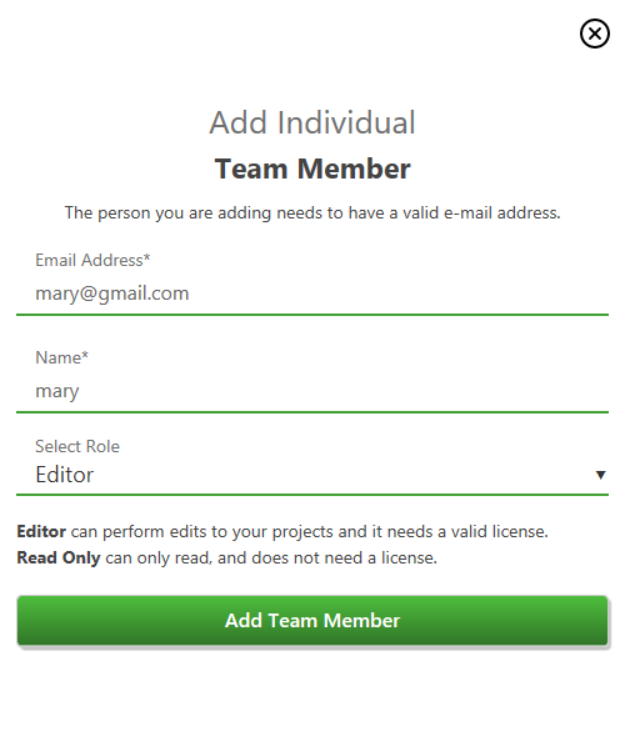
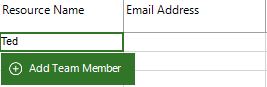
2. When you open the Resource Names drop-down menu, you will get a list of all resources in your project and the Team Members (marked with an icon). Note that all the Team Members are visible in this list (added or not). Selecting any Team Member in this list will add it to the current project (only once). If you want to add a new Team Member, click Add Team Member button and the following dialog will be opened:
3. After clicking on the Add Team Member button, John will be added as a Team Member.
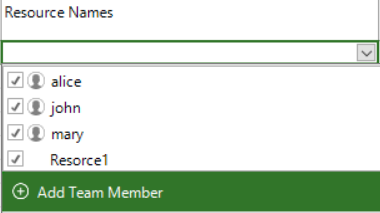
Note that Added Team Members that are assigned to tasks are shown in the Resource Names with a distinct icon in front of their name.

Step by step on how to add team members into your project using the Resource Sheet view:
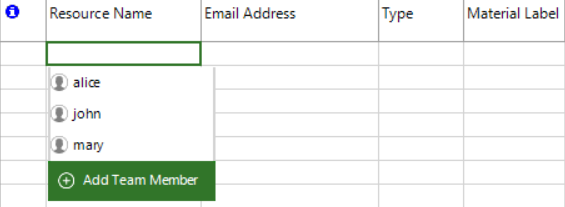
1. You can add Team Members by adding them from Resource Sheet view.
2. The Resource Name editing control provides a list of not added Team Members and the Add Team Member button. If there are no Team Members to suggest, the button alone is displayed.
3. As you type in the input box, the suggestions list is automatically refreshed so it matches the input.
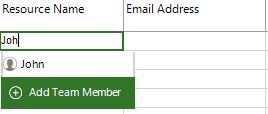
4. If you type in a resource name that does not correspond to any existing team member (that is available for adding), you can click the Add Team Member button and proceed to add it to the organization.
5. The Name field in the dialog is automatically prefilled with the resource name. Same behavior is available for existing project resources – you open the Resource Name editing control for an existing resource, click on the Add Team Member button and information is automatically filled in the dialog.
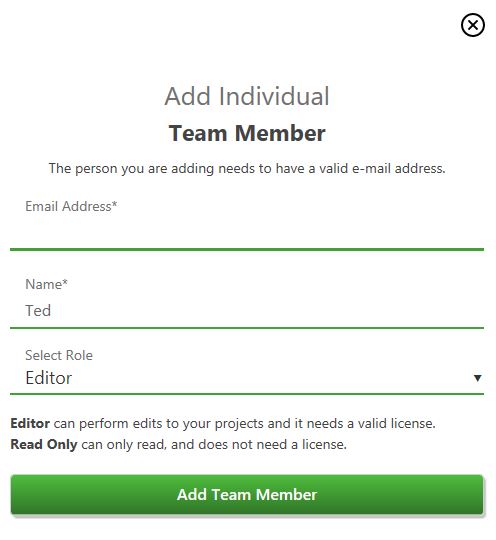
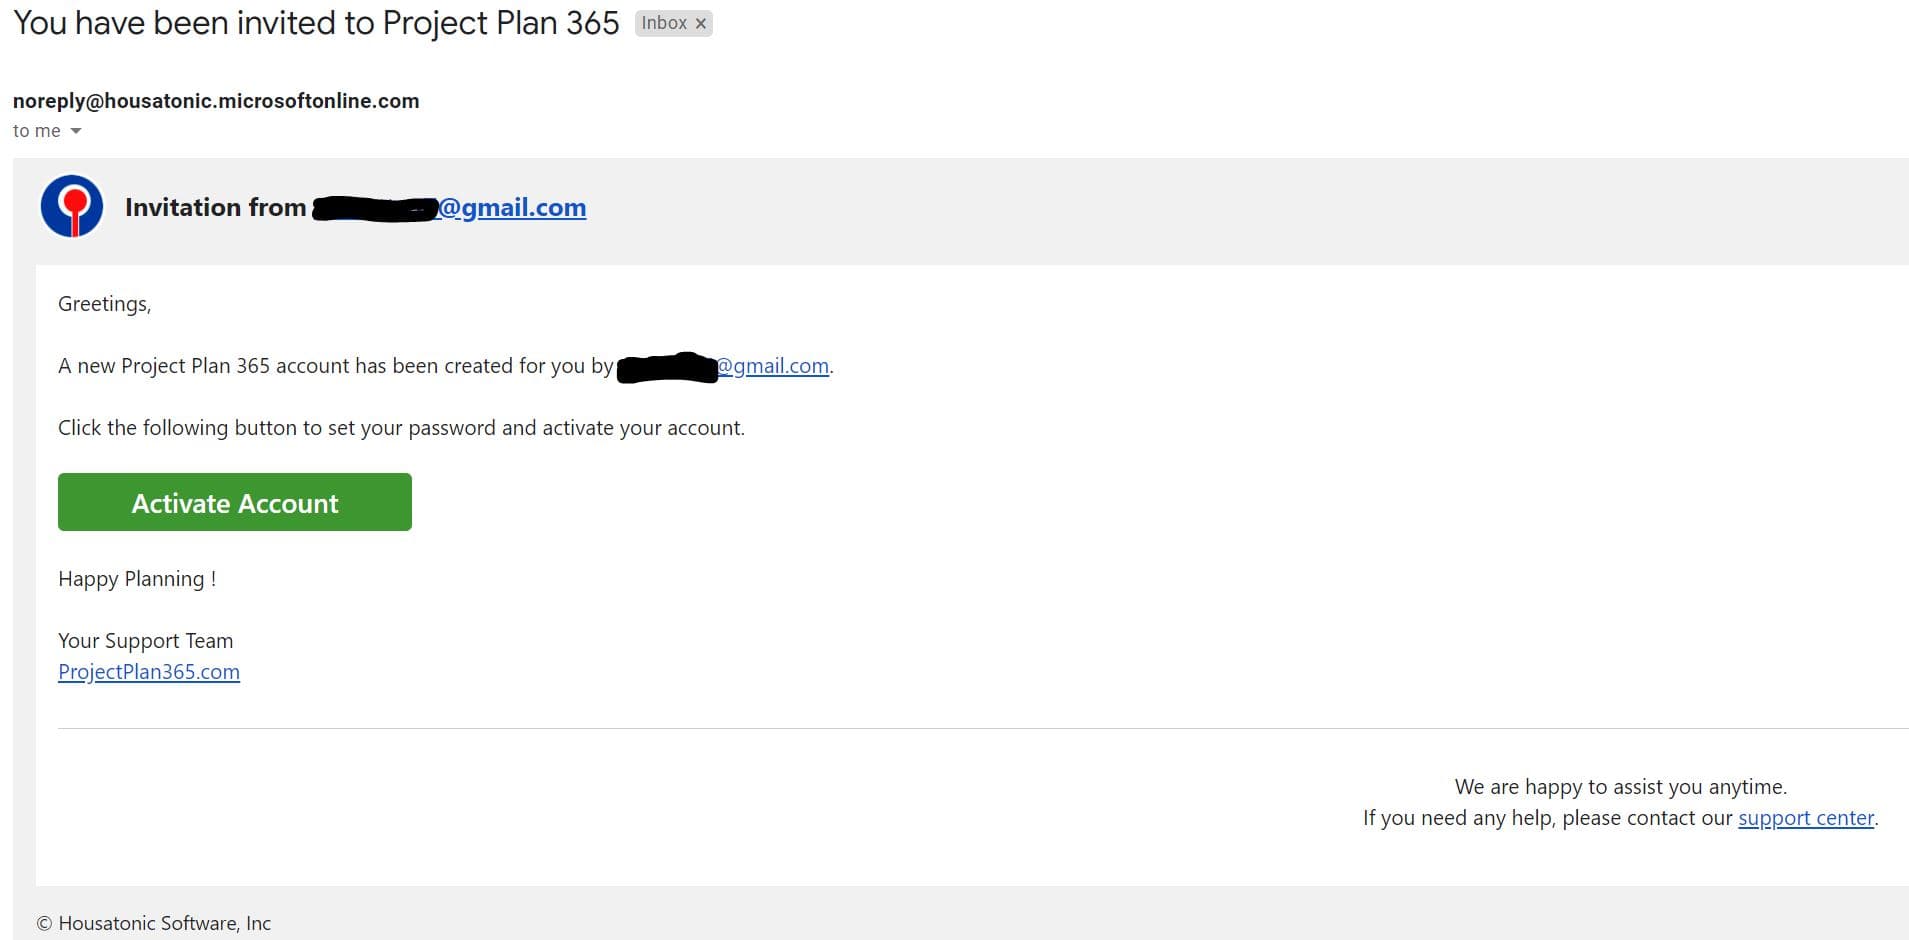
Note: The invited team member will receive an email and he/she needs to activate his/her account.
- Resource Name: resource names cannot contain brackets ([ ]), commas (,), or semi-colons (;)
- Type: three available values (Work, Material and Cost)
- Material Label: the units of measure for a material resource
- Initials: you can put initials for the resource
- Group: if you are going to have a group of resources (like Purchase, Vendors, Painters etc.) here is the place to put the name of the group
- Standard Rate: this is Standard fee (money) for the resource. You can put a fee like, for example 100/hour, /day etc. This is true only for Work type resources. If, for example, resource has $50/hour, and it will work 5 days and 8 hours per day, cost for this resource will be 40 hours X $50 = $2.000.
- Cost/Use: that is also known as a Setup fee. For example, if you have Resource named: John - the plumber, and it has $100/hour as a standard fee, and he is charging his travel to your home $50, no matter how long he is going to drive, then you will put $50 in that field.
- Code: if you have any specific code for your resource put it here
You can add resources in your plan directly at resource allocation (the resource created this way is by default of type work):
a. by typing a new resource name in the Entry table in Gantt chart on Resource Names column; each time a new name is typed, a new resource of type work is created
b. by using Resource menu → Assign Resources dialogue
c. by using Task Information dialog when double-clicking on a task; check on the Resources tab and give the resource names (the name of the person who is assigned the task) and click OK
When you assign a resource to a task, if the resource is a new one and it does not exist previously in your project, it will be automatically added to the resources list in the Resource Sheet and by default it will be a work resource.
You can enter in your project a resource of type material and cost only from Resource Sheet view.
When you add a resource, Project Plan 365 automatically renumbers the resource ID numbers.
Besides adding one single resource in the resources list from your project, you also have the possibility of inserting multiple resources at a time. To achieve this, select multiple consecutive rows using either CTRL or SHIFT keys on your keyboard and then click on Insert option from the Resource menu, or press on Insert key or use the New Resource option from the contextual menu to insert multiple resources at a time. These resources will be positioned above the selected rows in the resources list.
The number of newly inserted resources will be equal to the number of selected rows. The remaining resources will have their IDs automatically renumbered.
All the Inserted resources will have "" as name and will be of type work.
To delete a resource, simply select the resource and press Delete key or from the Resource menu click on Delete option. In this way the selected resource/resources (in case of multiple selected resources) will be removed from the project. All the assignments of the deleted resource are removed.
After you delete a resource, Project Plan 365 automatically renumbers the remaining resources.
During entering resources in your project, you can use the Undo or Redo options under Task tab if you want to go one step forward or backward relative to your recent changes.
 Practice
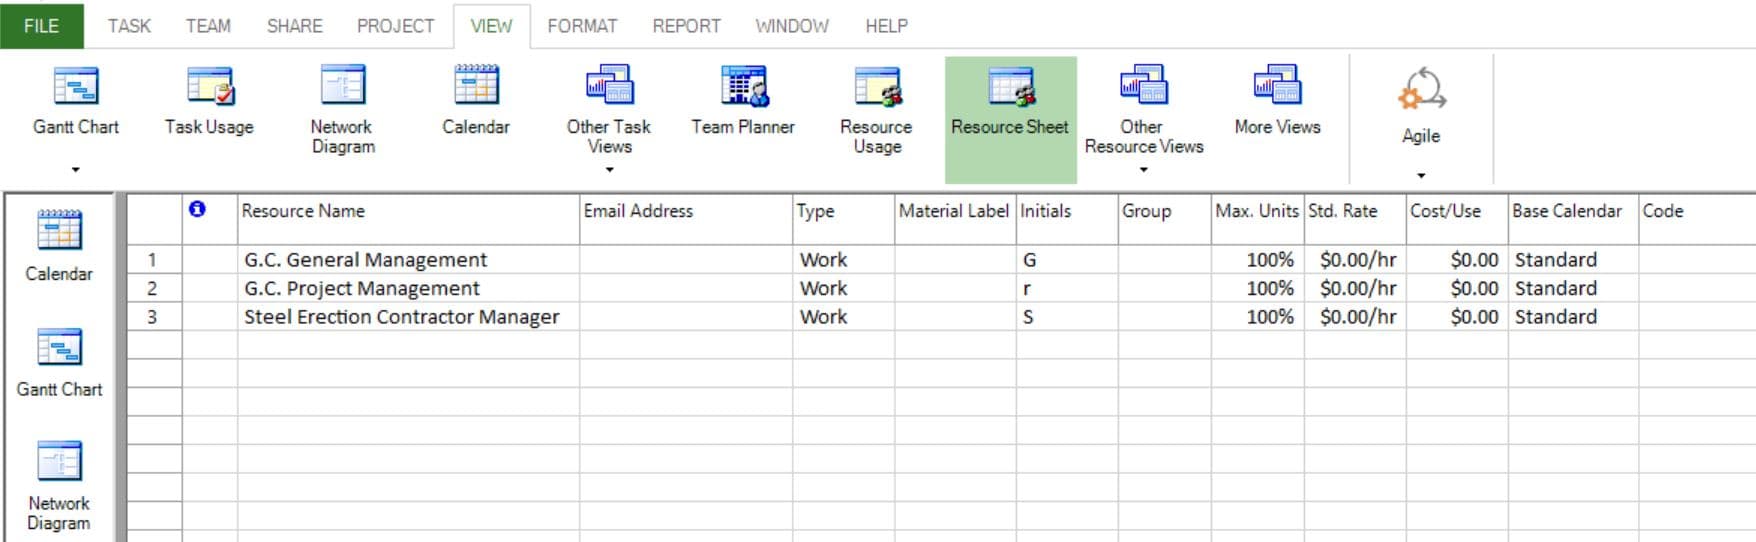
1. Add resources in your plan using Resource Sheet view. To switch from the Gantt Chart, which is your current view, to Resource Sheet view, select Resource Sheet option from the View menu or from the left side menu bar click on Resource Sheet. So far no resource was added into your project, so you will notice there is no resource displayed in the table of Resource Sheet view.

2. Enter in Resource Sheet view the required resources in the project. Most of the resources are of type work and 2 resources are of type material. By default a new added resource is of work type. We will add our resources by typing a resource name in the Resource Name column. Let's type as resource name the following: G.C. General Management, G.C. Project Management, and then Steel Erection Contractor Management. You can resize the Resource Name column by dragging it, to aid you when entering the resource names. Our Resource Sheet will contain three resources, each one on its row. The Resource Name editing control provides a list of not added Team Members and the Add Team Member button. If there are no Team Members to suggest, the button alone is displayed.
3. Another possibility of inserting a resource in your project is to use the Insert Resource option in the contextual menu. This option allows you to insert a resource at any position in the list of resources from your project: either on top of the list, in the middle or at the bottom of the list. Let’s select the second row in Resource Sheet and press on Insert Resource option.
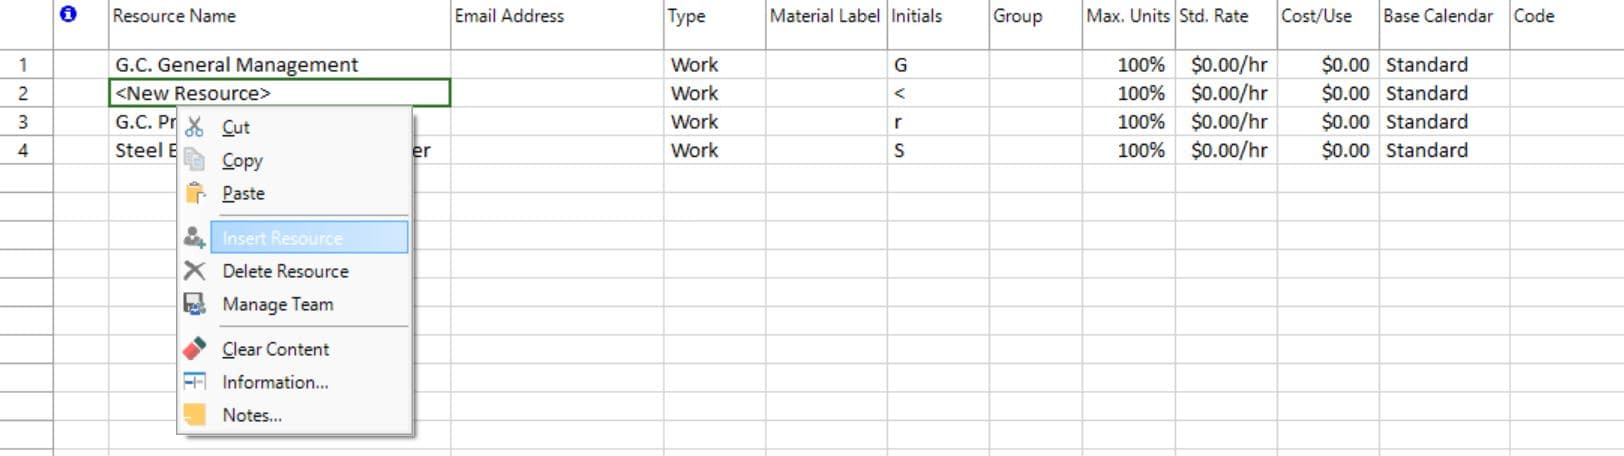
You will notice that the newly added resource will be inserted in the resource list above the selected row. The newly added resource has the name "". We will edit this default name and type instead Roofing Contractor Management.

4. So far, we’ve added only work resources in our project, as you can see indicated in the Type column.On the last row type Concrete in the Resource Name cell. To make a resource of material type, click on the cell from the Type column and a drop-down list will appear from where you should choose Material.
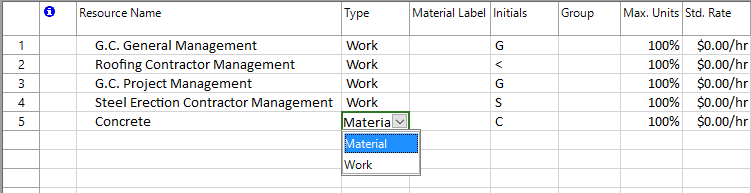
5. We will add another material resource, which we will name it Painting Material and like before we will set for its type Material. Thus, we will have in our project two material resources:

6. Besides adding one single resource in the resources list from your project, you also have the possibility of inserting multiple resources at a time, as in case of tasks. To achieve this, we will select multiple consecutive rows using SHIFT, more exactly the rows from id = 2 to 4, and then click on Insert option from the Resource menu. These resources will be positioned above the selected rows in the resources list. As you can see, all the inserted resources will have "" as name and will be of type work. The number of newly inserted resources will be equal to the number of selected rows, which is three in our case.
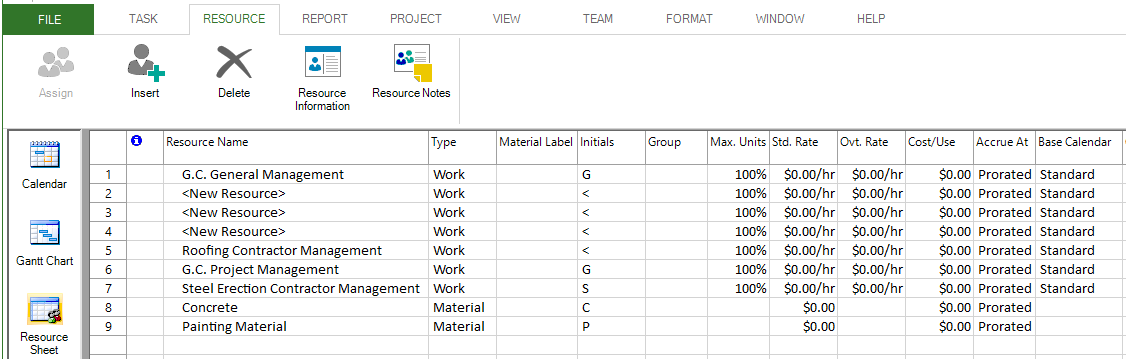
We can replace their names to fit our needs: the first we will call it Elevator Contractor Management, for the second one let’s type Plumbing Contractor Management and for the third one we will enter Electric Contractor Management:

7. You can also copy and paste the name of several resources from an external source such as a CSV file, instead of having to type the resource names by hand one by one. Let’s suppose that we have this CSV file, which contains a list of other resources involved in our project.
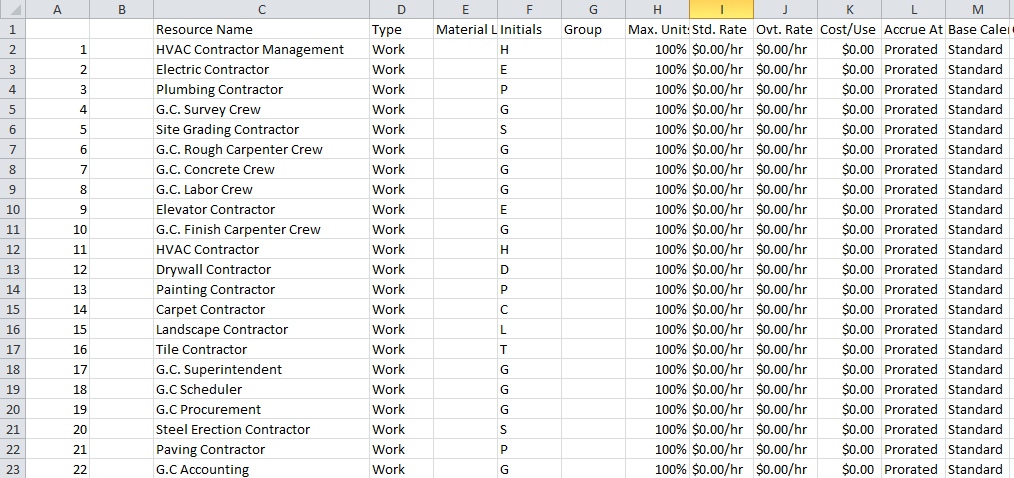
Copy all the resource names from this CSV file. Then in Project Plan 365, select the next empty resource name cell and from the Task menu press on Paste. After doing this, you will notice that the whole list of resource names will be inserted for you at the end of resource list, resulting in a total of 31 resources:
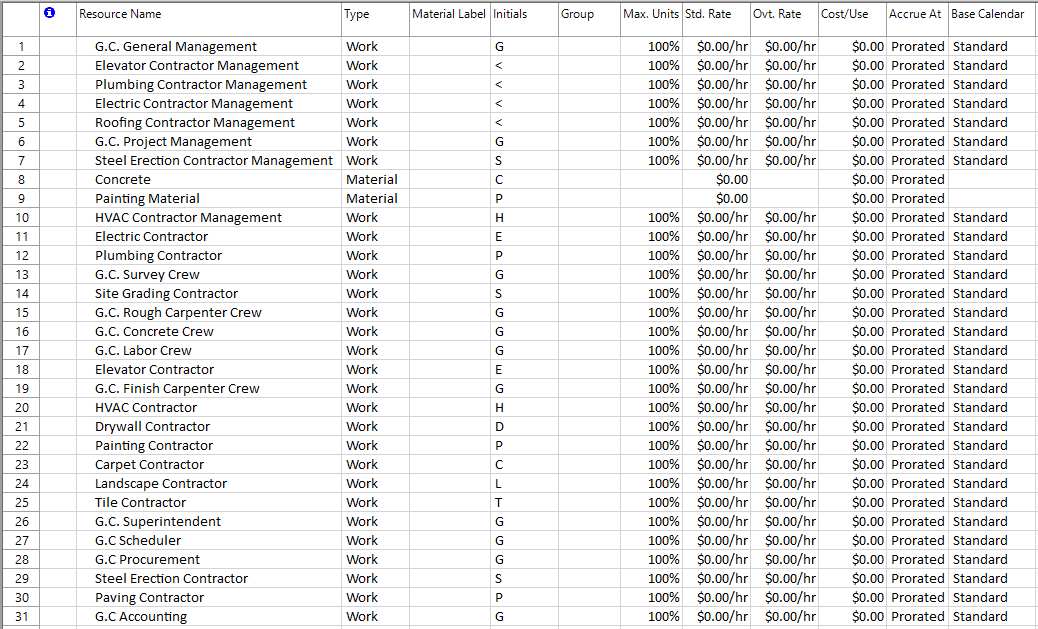
8. This method of quickly inserting a list of resources by copy and paste from an external source is especially useful if you have a large project with a lot of resources that must be added in your schedule. Notice that for the inserted resources, the cells from columns such as Initials, Max. Units (only for work resources), Std. Rate and Cost/Use are filled for you with default values.
The list with the resources in your project should look like below, among which 2 resources are of material type:
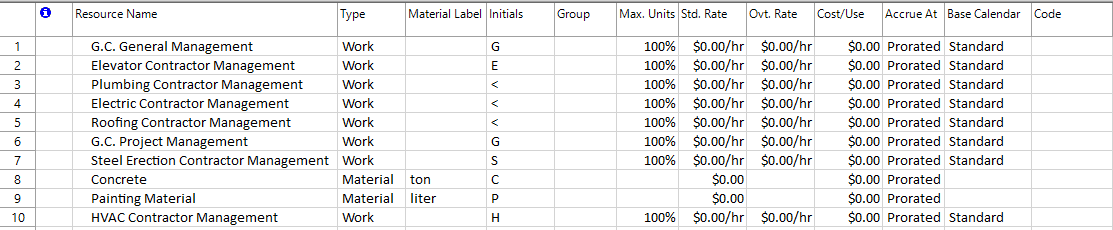
9. Besides entering the name of each resource, we can also enter other related information to a resource such as its initials, email address, code (if you have any specific code for your resources) or group (if you are going to have a group of resources, like Purchase, Vendors, Painter). For the resource called Elevator Contractor Management type E in the Initials cell.

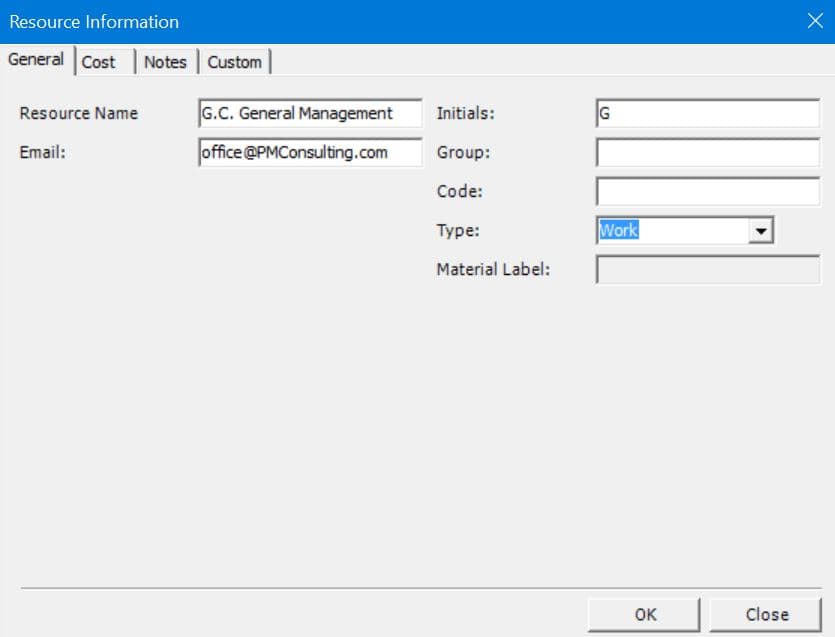
10. Then let’s specify an email address for the resource called G.C. General Management. In this sense, press on Resource Information option under Resource menu to bring up the Resource Information dialog, where we will enter specific information for this resource. Let's type for the email this address: office@PMConsulting.com .
11. In addition, for a material resource we can specify a material label, as the units of measure. For the resource called Concrete enter ton in the Material Label column, and for Painting Material resource type liter.
 Video
Video
If you prefer to see things in action, rather than reading text, watch out this video, which covers some of the topics from this section.