What does the “Page Setup” functionality do?
The “Page Setup” functionality controls the appearance of printed views and reports. Use this command to specify page orientation, margins, headers, footers, and legends. You can also specify options for printing sheet columns and for printing the Calendar.
Do the settings modified in Page Setup apply to all the views?
The settings made in Page Setup apply only to the active view. The name of the active view appears in the Page Setup title bar: for example, Page Setup - Gantt Chart.
Where can I find the Page Setup option?
In order to access the Page Setup option, go to the File menu – Print – Page Setup.
What settings can I configure in Page Setup?
The following settings that you can make in Page Setup dialog are saved with your project, when the current view is Gantt Chart: Orientation, Paper size, Adjust to, Scaling, Fit to, Borders (on every page / none), Print first X columns, Print all sheet columns, Print blank pages, Print notes.
How do I only include specific items in the legend?
You can include only some specific items in the legend by going to Page Setup - Legend tab. Make the desired changes and click on the Ok button.
How do I change the paper size in PDF format?
To change the paper size when you want to print or to export to PDF, go to menu File - Print - Page Setup and select another Paper Size.
How to get a Header and Footer on the documents?
The Header and Footer customization can be found on File - Print - Page Setup.
Can I setup printing to not print all columns?
To not print all columns, go to File - Print - Page Setup - View and make sure that “Print all sheet columns” is cleared out. This option is available only for views with a timescale.
Page setup gives me an unhandled exception.
If you encounter any issue with our application, please contact our Support Team.
How can I insert a logo?
To insert a logo, go to the File menu - Print - Page Setup dialog. Select Header/Footer tabs, click on "Insert Image" icon and then click on "OK" button.
What does the “Help” button inside the “Page Setup” dialog?
The “Help” button inside the “Page Setup” dialog redirects you to the “Page Setup” article in our Online Help page.
How can I set the margins in Page Setup dialog?
In order to set the margins, go to the File menu - Print and select Page Setup option. Select "Margins" tab, configure the page margins to each side (top, bottom, left, right) by changing the corresponding values and click on "OK" button.
How to change the height of the legend?
In order to change the height of the legend, go to the File menu - Print - Page Setup dialog. Click on "Legend" tab and from "Width" select the desired value and press "OK".
How do I access Page Setup for reports on Mac?
You can access only the Print dialog where you can adjust the Page Orientation and Paper Size.
To do this, you need to select the desired report and then press “Select”. Then, the Print dialog will appear where you can make the adjustment. You can then press the “Print” or “Save as PDF” options.
Why is the legend not showing in the first sheet?
If the legend doesn't appear on every page, please check if Legend is set to appear on every page. In order to do that, please go to the Page Setup dialog, select the “Legend” tab, click on “Every Page” and after that click “OK”.
How do I change the right section in the Header tab in Page Setup dialog?
Please go to menu File – Print – Page Setup and then go to Header tab, select the Right section and change the text.
What does the "Print first x columns on all pages" option do?
The “Print first x columns on all pages” option allows you to print a specified number of columns on all pages, where (number) equals the number of columns you want to print.
How do I set the Paper Size to A3?
In order to set the Paper Size to A3, go to the File menu - Print - Page Setup and from "Page" tab, "Paper Size" field, select A3 and press "OK" in order for changes to take effect.
How to set the timescale to be limited only to my project duration when exporting it to PDF?
If you want to print only a specific interval from your project timescale, please go to the File menu – Print – Page Setup – View tab and from “Timescale” section select “Dates” radio button and after that select the desired dates from “From” and “To” fields.
How do I save the Gantt Chart view as PDF in size A3?
In order to set the Paper Size to A3, go to the File menu - Print - Page Setup and from "Page" tab, "Paper Size" field, select A3 and press "OK" in order for changes to take effect. After that, go to the File menu - Export and select the "Export to PDF" option.
How can I increase number of the printed pages for clarity?
If you want your printed file to be more clearly, you can change the Paper Size from the “Page Setup” dialog and then use the “Print Preview” option in order to see the changes made in the Page Setup dialog.
Also, please make sure you don’t have checked the “Fit to” option and that “Adjust to” is set to “100%”.
Why is the legend text so blurry?
The entire header/footer is treated like an image in order to accommodate the possibility to add user images. This thing causes the event the text like project name, page number etc. to appear more pixelated next to the view content, which is directly drawn on the paper.
I have a big file and I cannot fit the entire project to one page.
For Windows devices, the paper size depends on the installed printer or PDF drivers. If you don’t see the desired paper size in the paper size list, it means that there is no printer or PDF driver that supports that paper size.
As a solution, you could install a third party app that supports a larger number of paper sizes, for example Win2PDF. After installing a third party app follow the steps below:
- Open the Project Plan 365 app and go to menu "File" – "Print" – "Print";
- From the "Printer Name" list select Win2PDF (or the preferred app) then press "Properties";
- The Print dialog should appear and select "Properties" again;
- In the next dialog, click on "Advanced" button then, from the "Paper Size" list, select the desired paper size;
- After selecting the paper size, press "OK" in all dialogs, give a name for the PDF file and press “Save”;
- The project should then be exported/printed to PDF with the desired page size.
How to define a custom page size on Mac?
On Mac, to define a custom page size with the dimensions you need, follow the steps below:
- Go to File – Print and from the Paper Size drop-down list select “Manage Custom Sizes…” option;
- Type a name and set the desired paper size;
- After that, open again the Paper Size drop-down list and select the custom paper size.
Step by step on how to change the Page Tab settings on Windows:
1. To access the Page Setup for a View, select the desired vie and click File – Print – Page Setup .
To access the Page Setup for a report, click on the desired report from the Report tab – select the desired report and click on the Page Setup button.
2. Select Page tab.
3. Change the Orientation to Portrait or Landscape.
4. On Scaling section, you can specify to fit the entire project on one page or otherwise scale to a certain percent of the normal size.
5. On Other Section select the Paper Size and set the First Page Number.
Note: To see how your view or report will look when printed, use the Print Preview button.
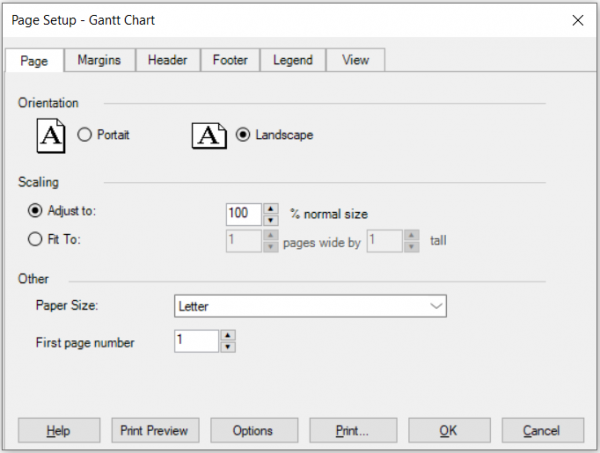
- Orientation:
Select Portrait (vertical) or Landscape (horizontal).
- Scaling:
Select the Adjust To option to decrease or increase the printed image size. If you select this option, the application automatically calculates the number of pages required to print the view, based on the number you enter. Type 100 if you don't want to decrease or increase the image size.
Select the Fit To option to specify the number of pages across and the number of vertical pages that you want the view printed on. If you select this option, the application automatically reduces the image size to fit on the number of pages you enter.
Note: In the Fit To option, you must specify the number of pages across and the number of vertical pages.
Step by step on how to change the Margins Tab settings on Windows:
1. Go to menu File – Print – Page Setup.
2. Select Margins tab.
3. Configure the page margins to each side (top, bottom, left, right) by changing the corresponding values. The guiding lines adjust as the values change.
4. In the “Borders around” section, select whether borders should be present on every page or not at all.
Note: The Margins Tab specifies margins and borders for printed views and reports.
To see how your view or report will look when printed, use the Print Preview button.
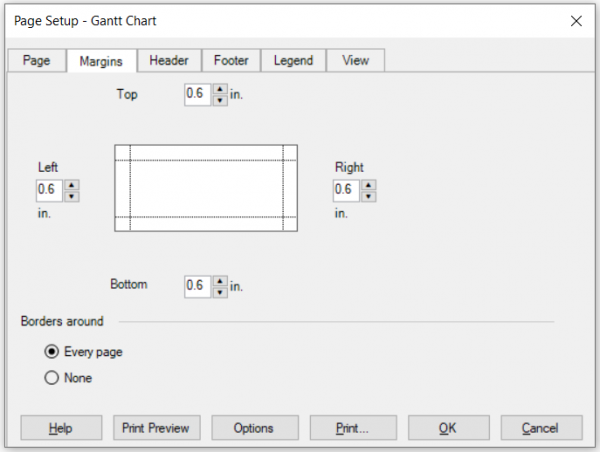
- Top, Bottom, Left, Right:
Type the margin size you want.
- Borders Around:
Select the border option you want: Every Page or None.
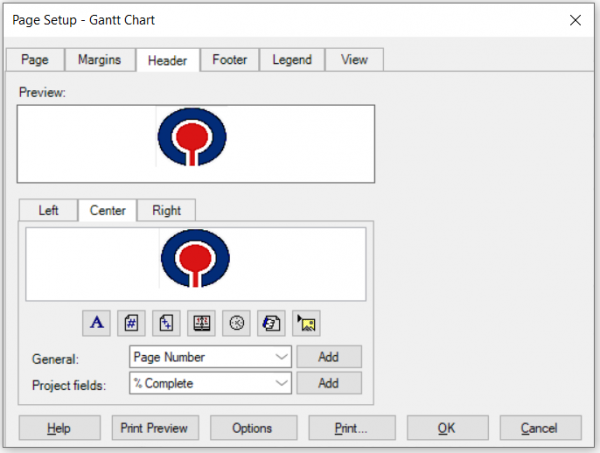
Step by step on how to change the Header Tab settings on Windows:
1. Go to menu File – Print – Page Setup.
2. Select the Header tab.
3. Customize the left, center and right sections of the header by inserting general information (current page number, total page count, current date, file name, etc.), project fields (Work, % Complete), logos and pictures, as detailed below for each option.
Note: The Header Tab specifies and formats page headers for printed views and reports.
To see how your view or report will look when printed, use the Print Preview button.

- Preview:
Shows how the header will look when printed.
- Alignment:
Select the Left, Center or Right tab to specify the header's location on the page.
You can type header text directly in the Alignment box, or you can use the buttons and list box to insert specific types of information.
For example, to print the current date in the upper-left corner of each page each time you print the view or report, select the Left tab and then choose the Insert Current Date button. The code &[Date] appears in the Alignment box and the current date appears in the Preview box.
To print the company name at the top and center of each page, select the Center tab. Then select Company Name from the General dropdown list and click on the Add button. The code &[Company] appears in the Alignment box and the company name appears in the Preview box. If you have not entered a company name in the Project Info tab under Options dialog box, no name is displayed.
The available buttons are:
Format Text Font: Opens the Text Styles dialog box, allowing you to select a font, font style, size, and color for the text.
Insert Page Number: Prints the page number on each page.
Insert Total Page Count: Prints the total number of pages.
Insert Current Date: Prints the current date.
Insert Current Time: Prints the current time.
Insert File Name: Prints the path and filename of the project.
Insert Picture: Allows an image to be printed inside the header of the current view or report. The image can be resized by dragging the sizing handles surrounding it.
- Add:
Adds the code for the selected item to the Alignment box (Left, Center or Right).
Step by step on how to change the Footer Tab settings on Windows:
1. Go to menu File – Print – Page Setup.
2. Select the Footer tab.
3. Customize the left, center and right sections of the footer by inserting general information (current page number, total page count, current date, file name, etc.), project fields (Work, % Complete), logos and pictures, as detailed below for each option.
Note: The Footer Tab specifies and formats page footers for printed views and reports.
To see how your view or report will look when printed, use the Print Preview button.
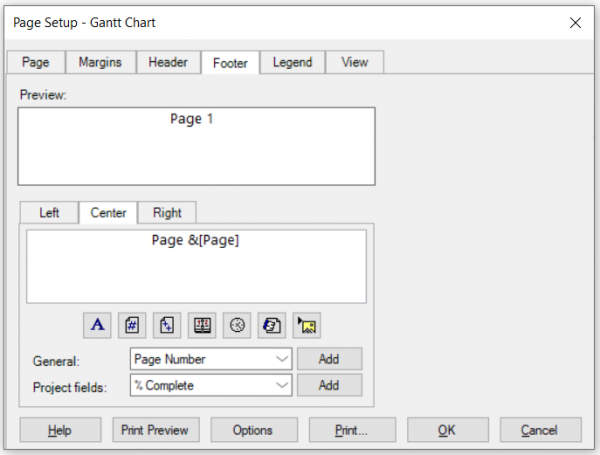
- Preview:
Shows how the footer will look when printed.
- Alignment:
Select the Left, Center or Right tab to specify the footer's location on the page.
You can type footer text directly in the Alignment box, or you can use the buttons and list box to insert specific types of information.
By default, the Center box shows the Page Number.
The available buttons are:
Format Text Font: Opens the Text Styles dialog box, allowing you to select a font, font style, size, and color for the text.
Insert Page Number: Prints the page number on each page.
Insert Total Page Count: Prints the total number of pages.
Insert Current Date: Prints the current date.
Insert Current Time: Prints the current time.
Insert File Name: Prints the path and filename of the project.
Insert Picture: Allows an image to be printed inside the footer of the current view or report. The image can be resized by dragging the sizing handles surrounding it.
- Add:
Adds the code for the selected item to the Alignment box (Left, Center or Right).
Step by step on how to change the Legend Tab settings on Windows:
1. Go to menu File – Print – Page Setup.
2. Select the Legend tab.
3. Customize the left, center and right sections of the legend panel by inserting general information (current page number, total page count, current date, file name, etc.), project fields (Work, % Complete), logos and pictures, as detailed below for each option.
4. Choose where you want to see the legend (on every page / on a dedicated legend page / not at all).
5. Set a legend width.
6. Click on “Legend labels” button and format the labels in your preferred font, size, styles and colors.
Note: The Legend Tab specifies and formats a legend for the Gantt Chart and Network Diagram views.
To see how your view or report will look when printed, use the Print Preview button.
By default, the legend is set to Legend Page. This means that the legend appears only on the Legend Page.
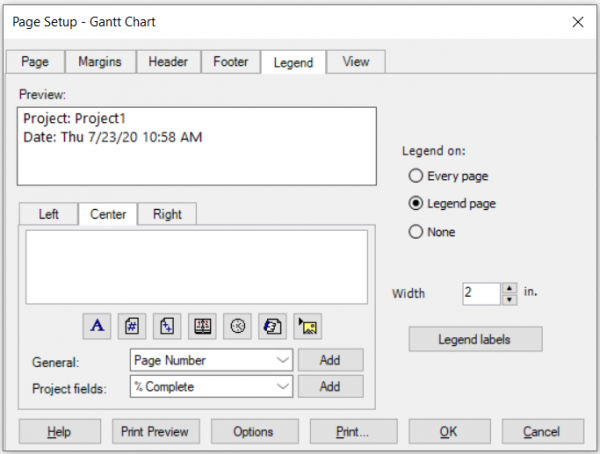
- Preview:
Shows how the legend will look when printed.
- Alignment:
Select the Left, Center, or Right tab to specify the legend's location on the page. You can type legend text directly in the Alignment box, or you can use the buttons and list box to insert specific types of information.
For example, to print the current date in the left corner of the legend, select the Left tab and then choose the button. The code & [Date] appears in the Alignment box and the current date appears in the Sample box.
To print the project manager's name at the right corner of the legend, select the Right tab. Then select Manager Name from the list and choose the Add button. The code & [Manager] appears in the Alignment box and the manager's name appears in the Sample box. If you have not entered a manager's name in the Summary tab of the Properties dialog box, no name is displayed.
The available buttons are:
Format Text Font: Opens the Text Styles dialog box, allowing you to select a font, font style, size, and color for the legend text.
Insert Page Number: Prints the page number on each page.
Insert Total Page Count: Prints the total number of pages.
Insert Current Date: Prints the current date.
Insert Current Time: Prints the current time.
Insert File Name: Prints the path and filename of the project.
Insert Picture: Allows an image to be printed inside the legend of the current view. The image can be resized by dragging the sizing handles surrounding it.
- Legend On:
Select Every Page option to print the legend on every page. Use this option when plotting or printing on large paper.
Select the Legend Page option to print the legend on a separate sheet. Use this option when plotting or printing on small paper.
Select the None option if you don't want to print a legend.
- Width:
Type the width for the legend text area. You can choose a width between 0 and 5 inches or 0 and 10 centimeters. To specify centimeters rather than inches, go to Region dialog in the Windows Control Panel, and then click on the Additional Settings button. On numbers tab select the Metric Measurement System.
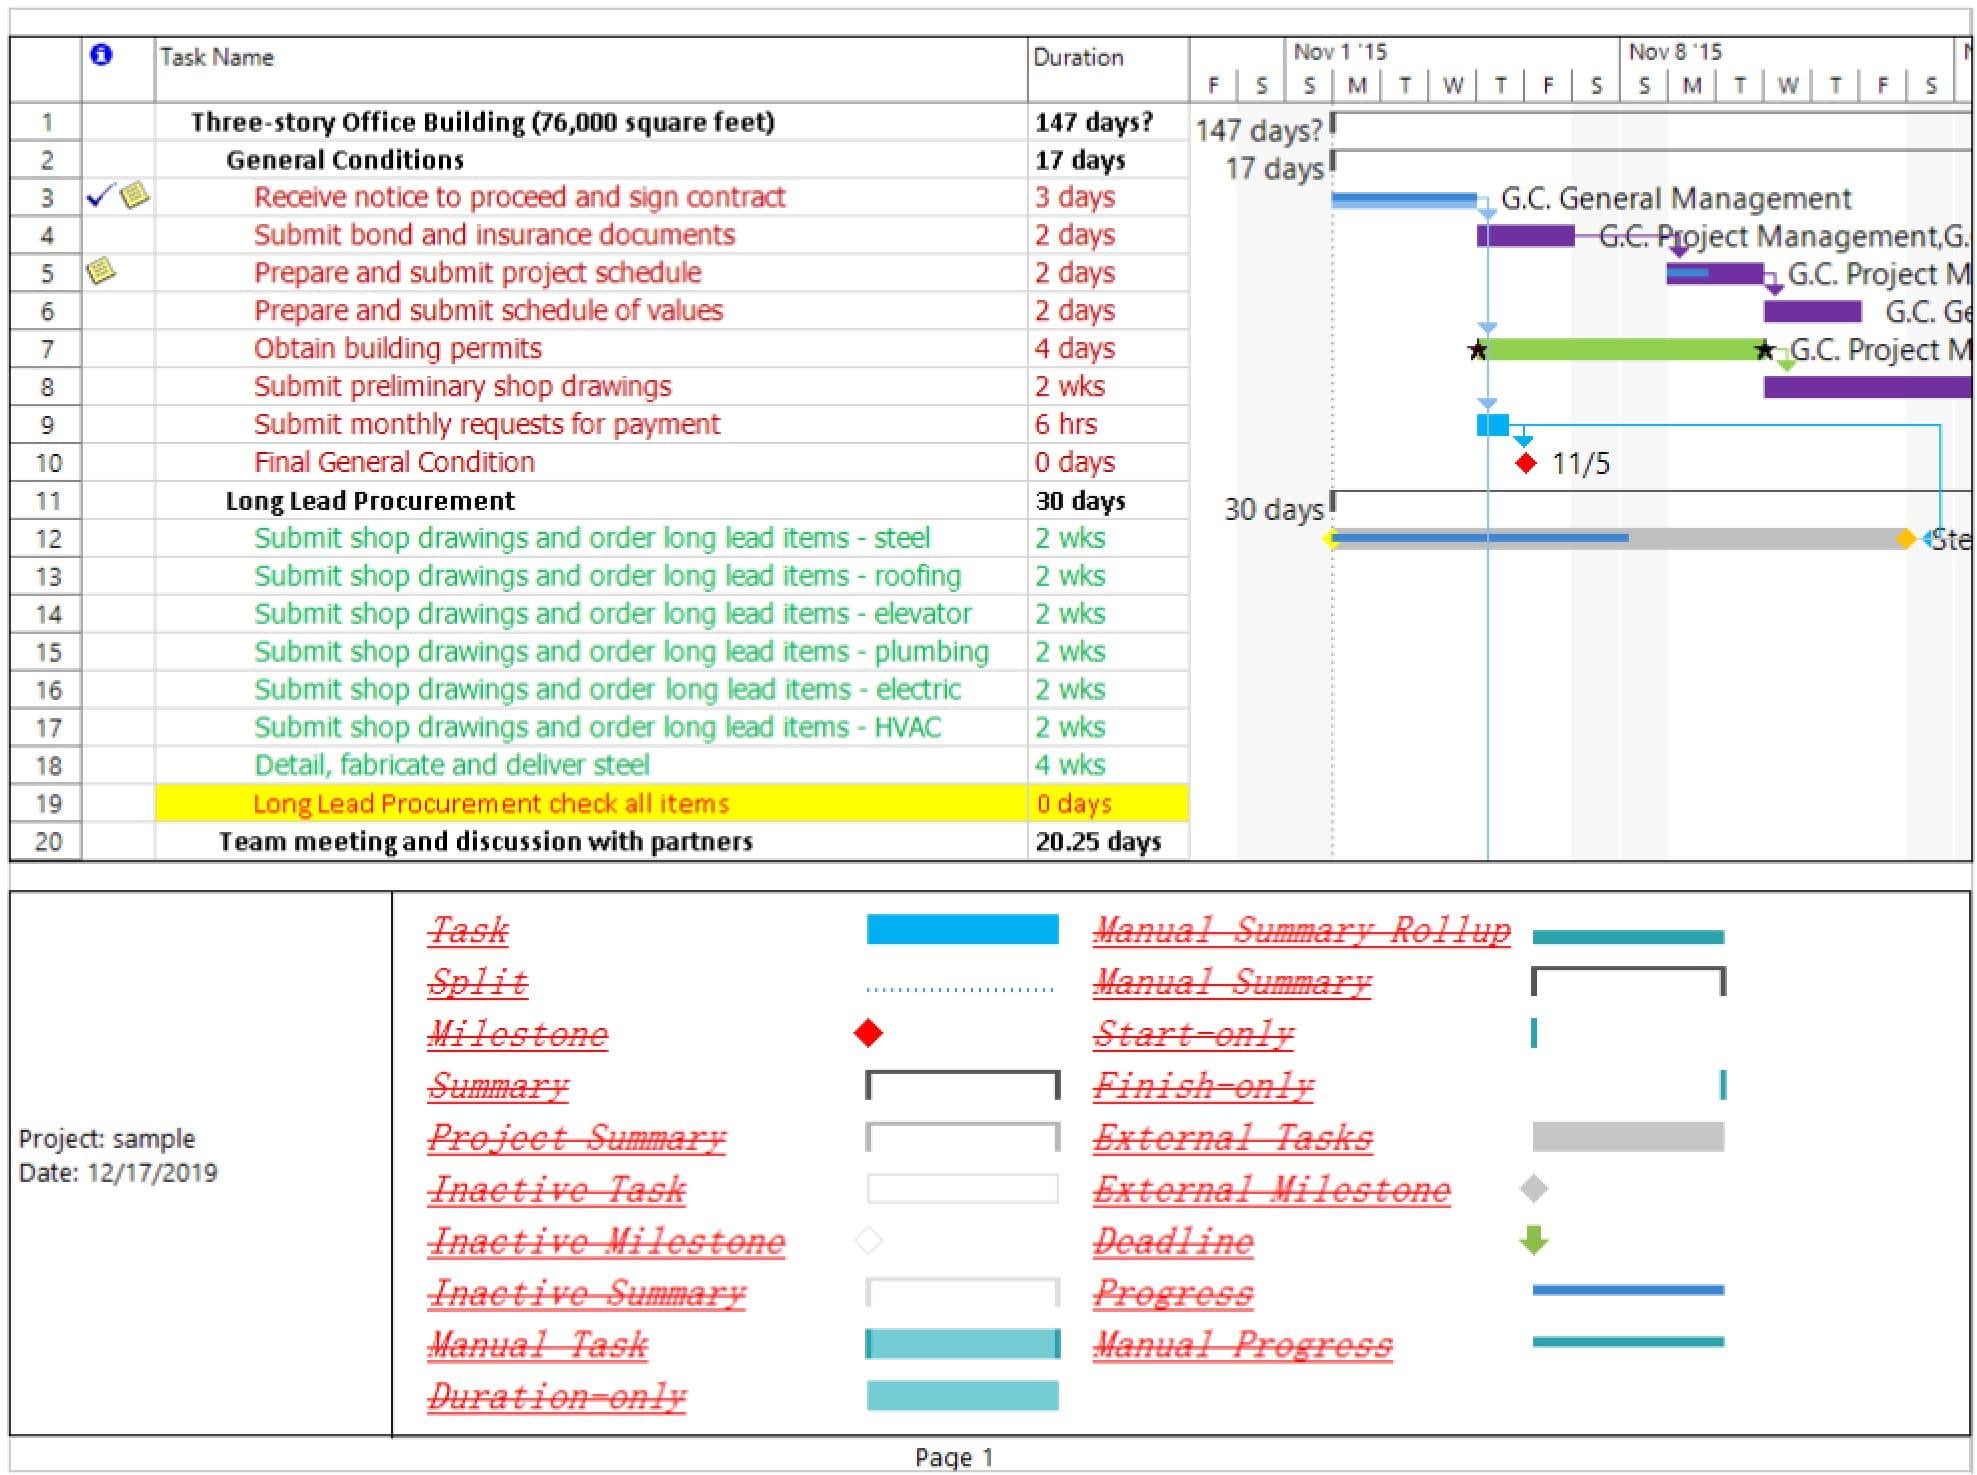
- Legend labels: Provides a way to generally format the Legend text, by styling its font name, size, effects, colors and styles.
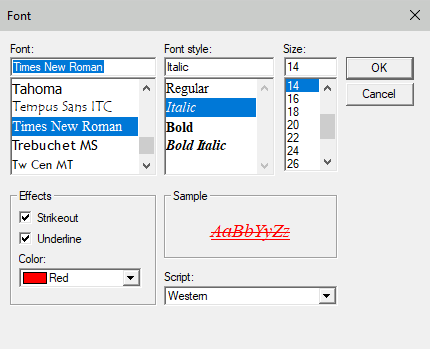
The selection above in Legend Labels dialog will result in the following legend formatting:
Step by step on how to change the View Tab settings on Windows:
1. Go to menu File – Print – Page Setup.
2. Select the View tab.
3. Customize your sheet-related preferences (whether all columns should be printed or just some of them, whether notes or blank pages should be printed or not), as explained later in this section.
4. Choose whether to print the entire project timescale or a specific interval.
Note: The View Tab specifies options for printing views that contain sheets, such as the Gantt Chart or Resource Usage view.
To see how your view or report will look when printed, use the Print Preview button.
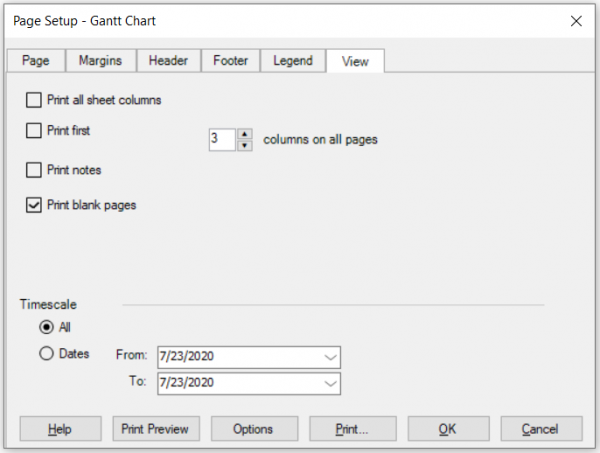
- Print All Sheet Columns:
Select to print all columns of a sheet in the view. Clear this option to print only the visible columns. For example, your Gantt Chart might have only two visible Gantt table columns. If you select this option, all columns will be printed. If you clear this option, only the two visible columns will be printed.
This option is available only for views with a timescale.
- Print First (number) Columns on All Pages:
Select to print a specified number of columns on all pages, where (number) equals the number of columns you want to print.
This option is available only for views with a timescale.
Note: If you have a project that prints on multiple pages both horizontally and vertically, the pages that encompass the left edge of the project will show the number of columns that are visible in the Gantt Chart, no matter what number is specified in Print First (number) Columns on All Pages. However, all other pages will show the number of columns you specify.
- Print Blank Pages:
Select to print the pages in a view or report that don't contain data - for example, in a large Gantt Chart.
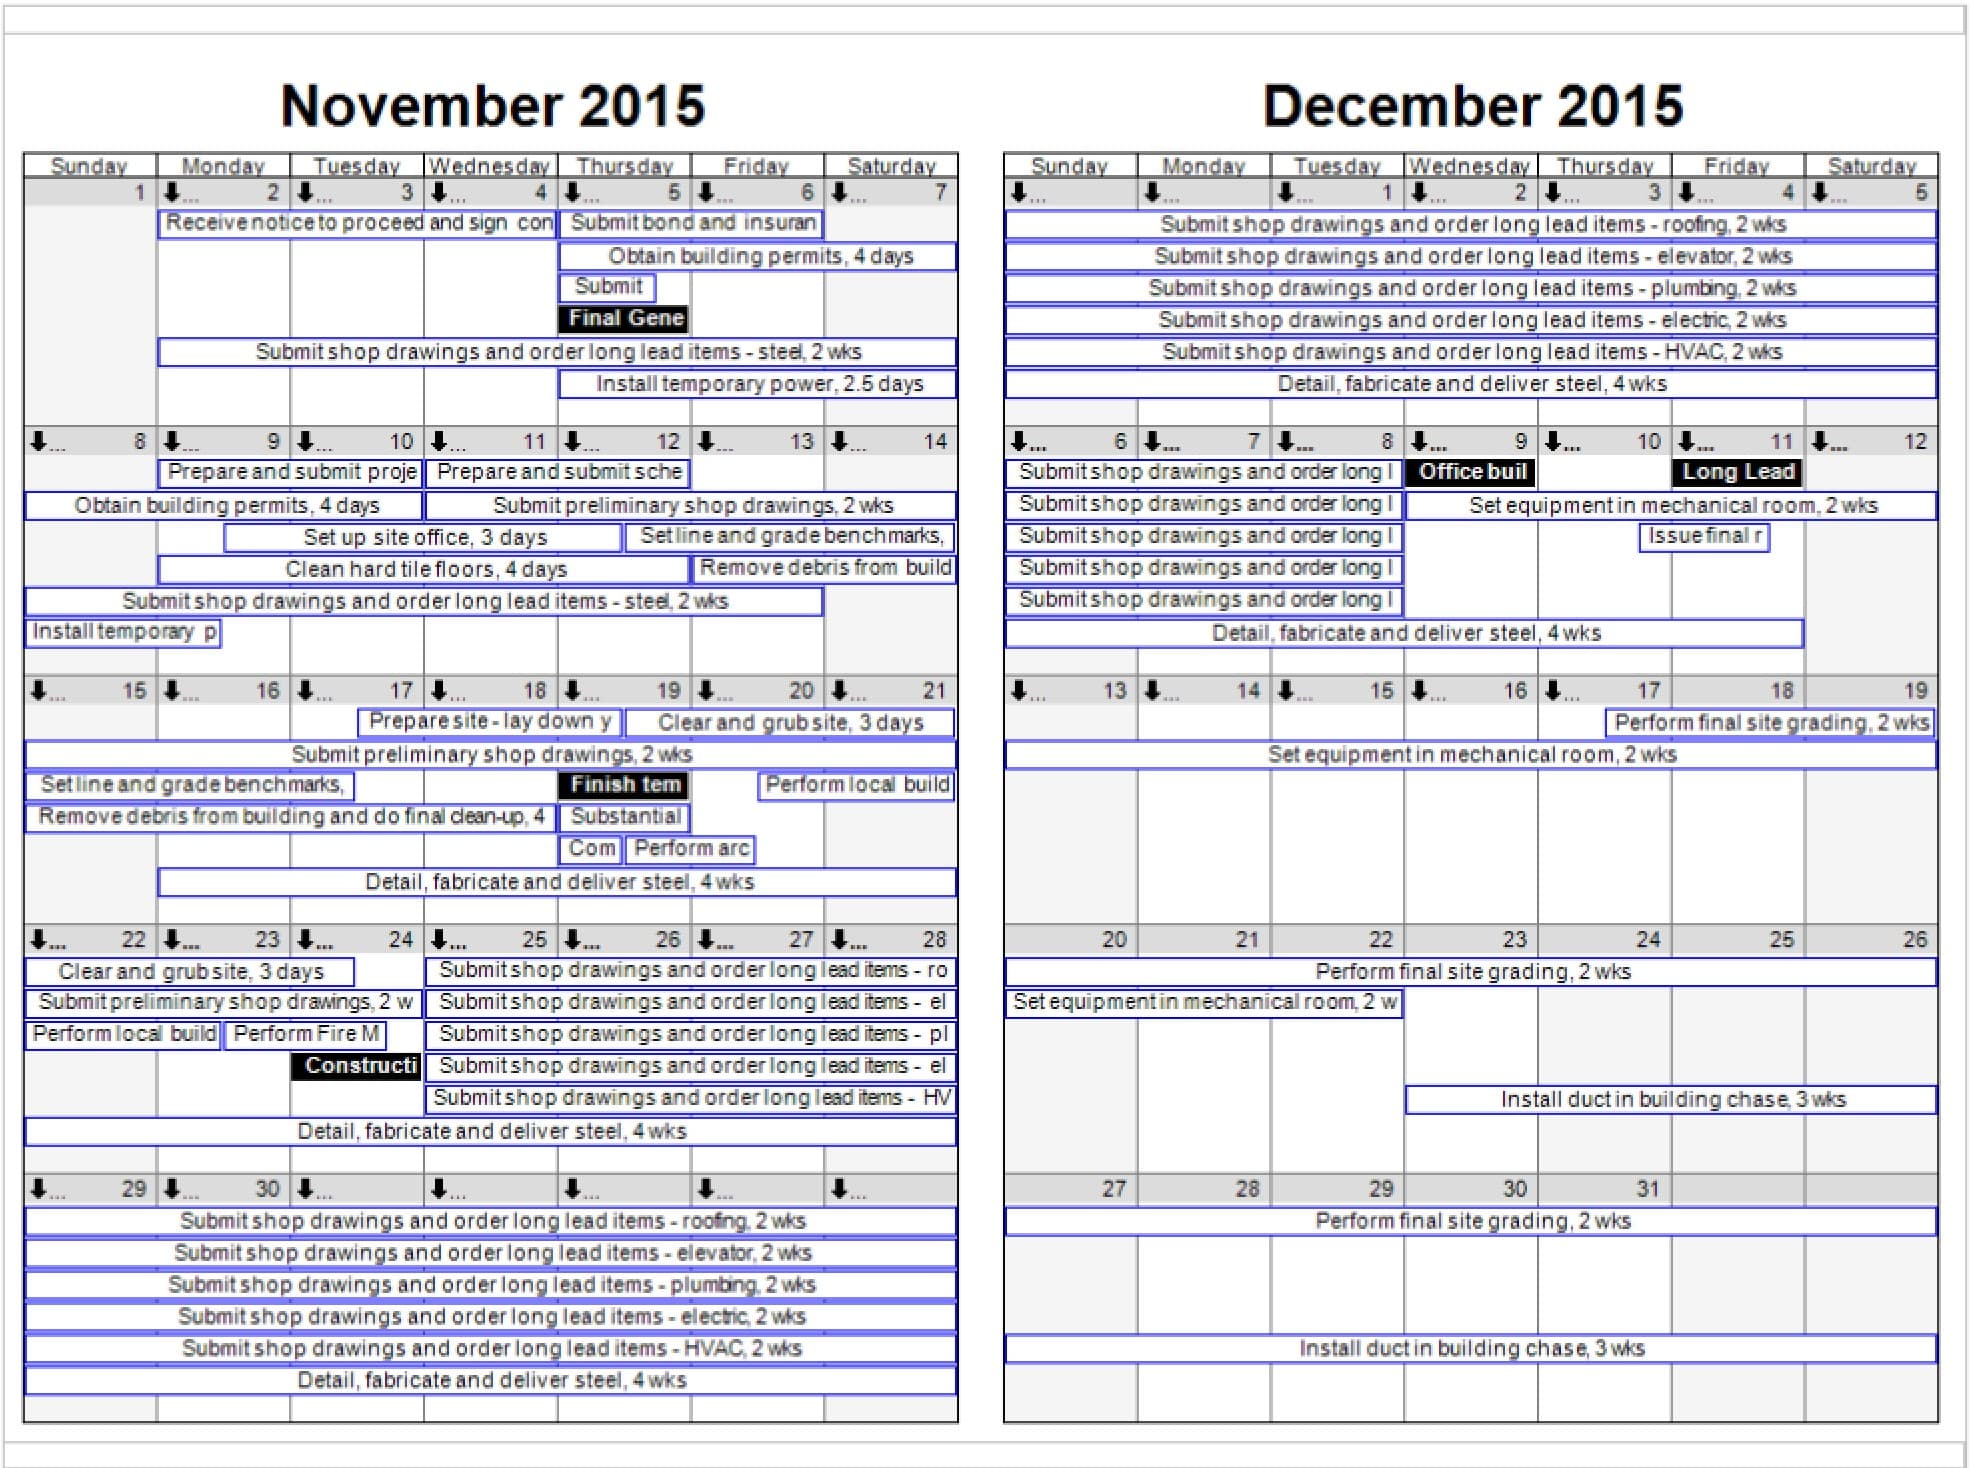
Step by step on how to change the View Tab settings on Calendar view on Windows:
1. Go to menu View – Calendar.
2. Go to menu File – Print – Page Setup.
3. Select the View tab.
4. Choose whether you want to have 1 or 2 months per page.
5. In the Details group, adjust the calendar-specific options, as explained later in this section.
6. Choose whether to print the entire project timescale or a specific interval.
Note: The Calendar view offers specific printing options, such as the number of months fitted per page or whether to include a list of tasks whose bars are not displayed in the Calendar.
To see how your selections on the View tab will affect the printed calendar, use the Print Preview button.
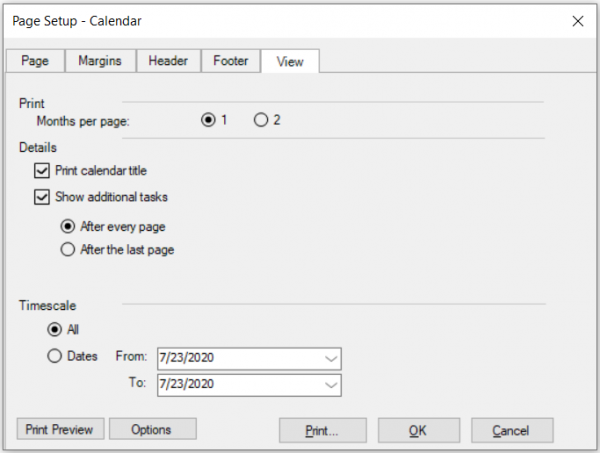
- Print:
In the Months Per Page section select one of options to print either one or two months on a page.
- Details:
Select the Print Calendar Title checkbox to print the month name at the top of each month.
Select the Show Additional Tasks checkbox to print a list of the tasks whose bars are not visible in the Calendar. Then select the location where you want these task names to appear (after every page or after the last page).