
What does the "Tables" functionality do?
The "Tables" functionality allows you to see some specific information about tasks, resources, and assignments in a sheet view. You can use predefined tables to show only the fields you want, or you can create your own tables.
Can I import standard tables across different languages?
In Project Plan 365 app you can import standard tables across different languages.
How many types of tables are available in Project Plan 365?
There are two types of tables available in the app: Task Tables (which are applied to task type views) and Resource Tables (which are applied to resource type views).
What are the Task Tables available in the app?
The Task Tables are: Baseline, Constraint Dates, Cost, Delay, Earned Value, Earned Value Schedule Indicators, Entry, Export, Hyperlink, Rollup, Schedule, Summary, Tracking, Usage, Variance, Work, Agile Tasks, Backlog and Status.
What are the Resource Tables available in the app?
The Resource Tables are: Cost, Earned Value, Entry - Material Resources, Entry - Work Resources, Earned Value Cost Indicators, Entry, Export, Hyperlink, Summary, Usage, Work.
How do I use another standard table?
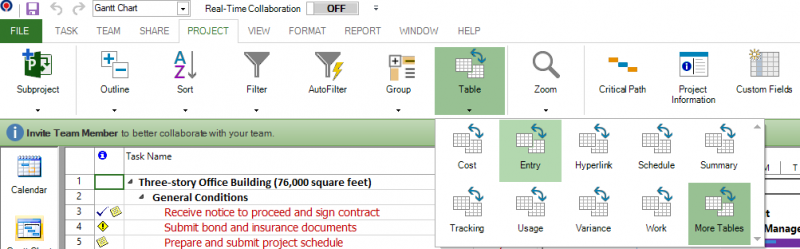
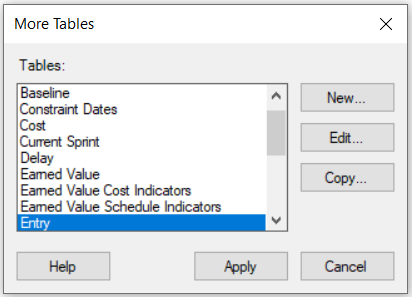
In order to use another table or to view all the standard tables, go to menu Project - Tables - More Tables. Select the desired table and click on the Apply button.
How do I create a new table?
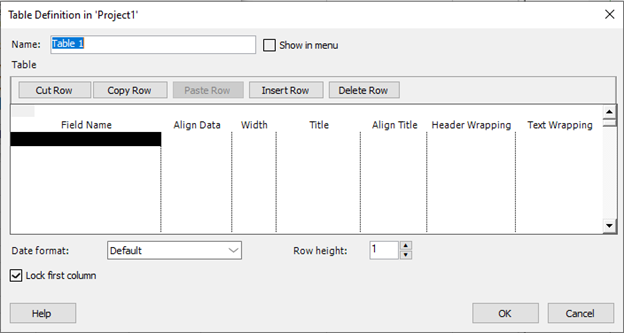
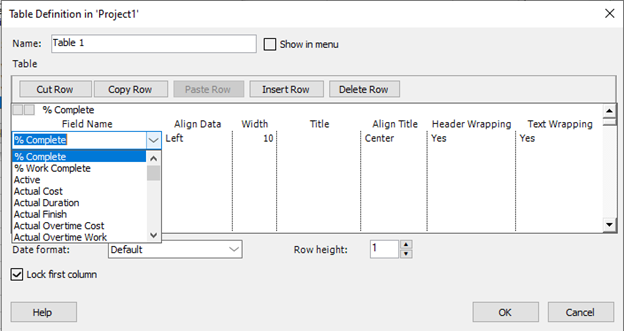
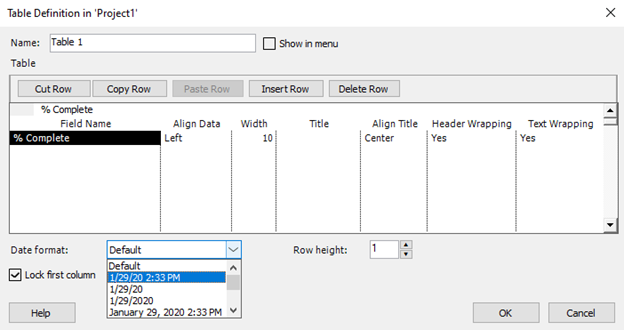
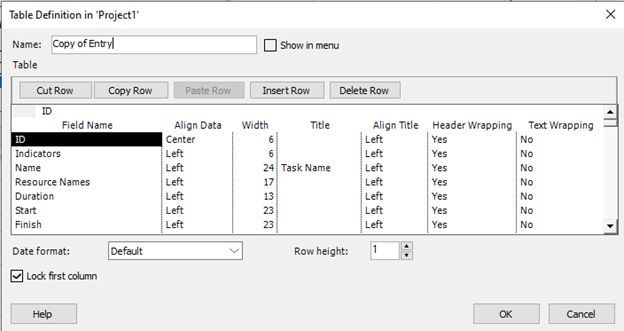
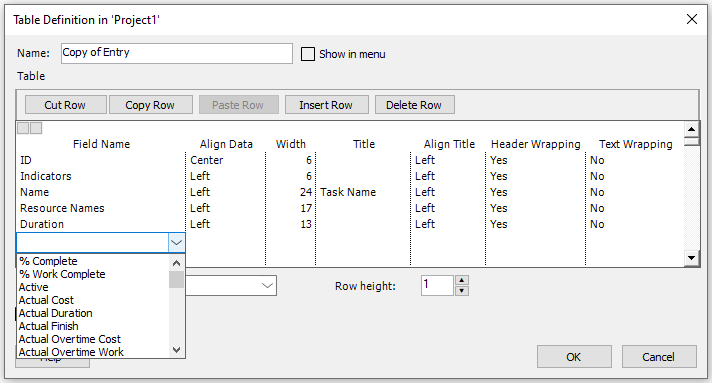
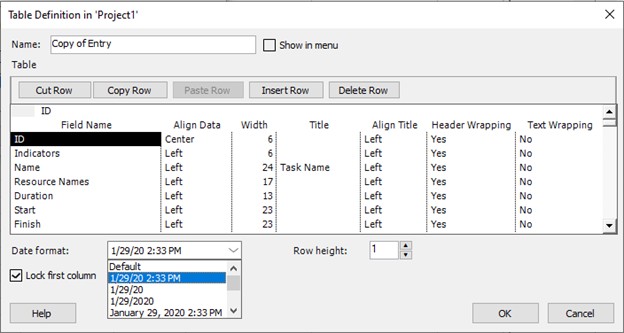
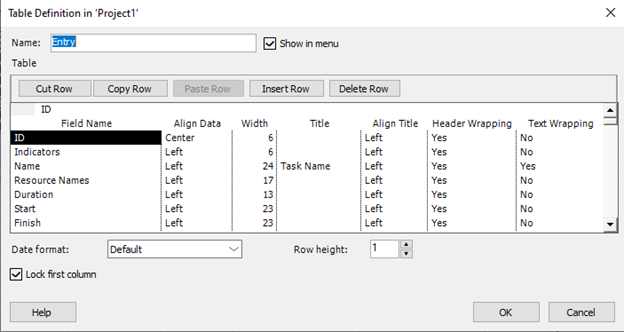
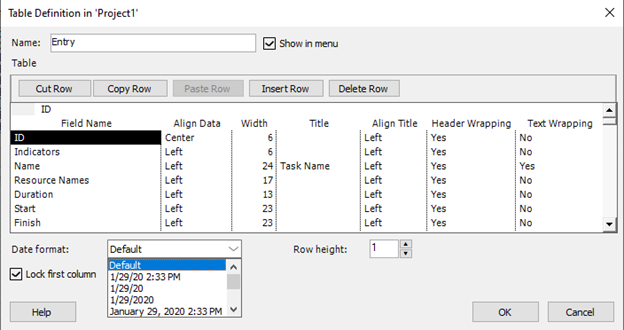
In order to create a new table, go to menu Project - Tables - More Tables. Click on the New button. Insert the name of the table and select the column name, data alignment and column width. Select "Yes" in the Header Wrapping field in order to wrap the text in that column. Select the date format for date fields in Date format box. You can also change the row height by changing the Row height box.
How can I customize a table in the app?
To customize a table in Project Plan 365, click on the “Table” option under the “Project” menu and then choose the “More tables” option. Then choose the “Edit” option to make the changes you need.
Where can I find Cost table?
The Cost table can be found in the Project menu - Table option.
How do I copy an existing table?
In order to copy an existing table, go to menu Project - Tables - More Tables. Select the desired table that you want to copy and click on the Copy button. Insert the new name and make the formatting changes you desire and click on the OK button.
How to make all cells bigger and smaller?
To customize a table in Project Plan 365, click on the “Table” option under the “Project” menu and then choose the “More tables” option. Then choose the “Edit” option to make the changes you need. In the Row Height field insert the desired size and click on the Ok button.
On what platforms can I create or copy a table?
You can create or copy a table on Windows, Mac, iOS and web platforms.
Where can I find the "Tracking" table?
The Tracking Table can be found in the Project menu - Table option.
Where can I find "Summary" table?
The Summary Table can be found in Project menu - Table Option.
Why I can’t see the “Table” button in ribbon on the Mac platform?
If the “Table” button is not visible in ribbon, please press "More" button. You should be able to find in the dropdown the button that doesn't fit inside the ribbon because of the small window size.
How do I see the total cost for each resource?
In Resource Sheet view go to menu Project-Table-Cost and look on the Cost field.
What does the “Help” button inside the “More Tables” dialog do?
The “Help” button inside the “More Tables” dialog redirects you to the “Tables” article in our Online Help page.
Where can I find the "Status" table?
The Status Table can be found in the Project menu - Table – More tables option. Please note that the Status table is currently only available for Project Plan 365 for Mac, Windows and iOS apps.
Where is table variance?
The Variance table can be found in the Project menu – Table option.
What does the "Text Wrapping" field in the Table Definition dialog do?
The Text Wrapping field in the Table Definition dialog allows you to adjust text to fit within designated spaces, enhancing readability and preventing overflow.
How can I use the “Text Wrapping” option when editing a table?
To use the "Text Wrapping" option when editing a table, follow these steps: Navigate to the Project menu, select Tables, and then click on More Tables. Choose the desired table from the list and click the "Edit" button. In the "Table Definition" dialog, locate the "Text Wrapping" field for the specific Field name and change its value from "No" to "Yes". Finally, click the "OK" button to save your changes.
Step by step on how to apply an existing table:
1. Go to menu Project - Tables - More Tables.
2. Select the desired table and click on the Apply button.

Step by step on how to create a new table:
1. Go to menu Project - Tables - More tables.
2. Click on the New button.
3. Insert the name of your new table.
4. Select the columns that you want to appear in this table, data alignment, column width and row height.
5. Select the date format in Date format box.
6. Click Ok.
Step by step on how to copy a table:
1. Go to menu Project - Tables - More tables.
2. Select the desired table that you want to copy.
3. Click on the Copy button.
4. Insert the name of your new table.
5. Select the columns that you want to appear in this table, data alignment, column width and row height.
6. Select the date format in Date format box.
7. Click Ok.
Step by step on how to customize a table:
1. Go to menu Project - Tables - More tables.
2. Select the desired table that you want to copy.
3. Click on the Edit button.
4. Insert the name of your table.
5. Select the columns that you want to appear in this table, data alignment, column width and row height.
6. Select the date format in Date format box.
7. Click Ok.