What does the Team Member Planner Dialog functionality do?
The Team Member Planner Dialog functionality allows to see when a team member is free to work on the current project and in the other projects saved in Drive 365.
Where can I find the Team Member Planner dialog?
To open the Team Member Planner dialog, go to menu “Team” – “Team Member Planner”.
Note: You can also access the Team Member Planner Dialog from the Work Schedule Calendar dialog.
What information is displayed In the Team Member Planner Dialog?
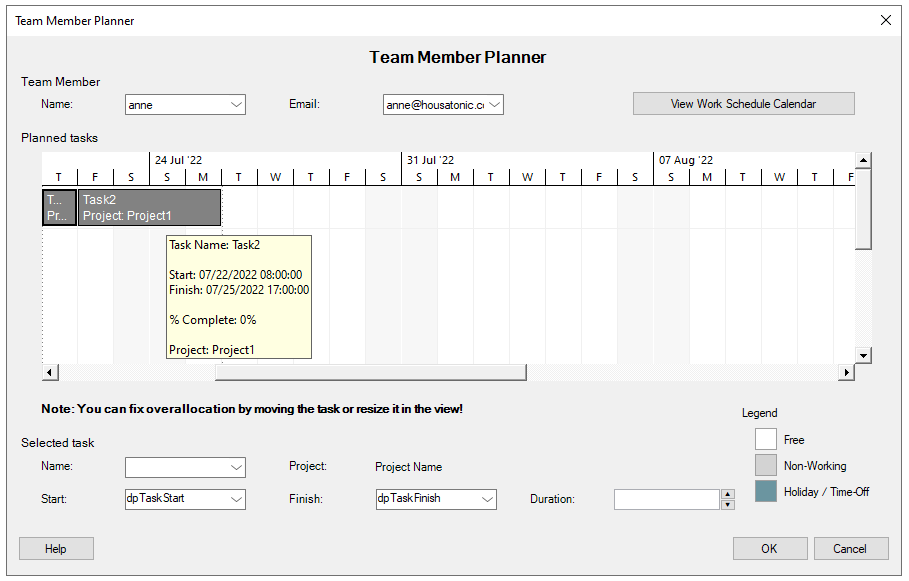
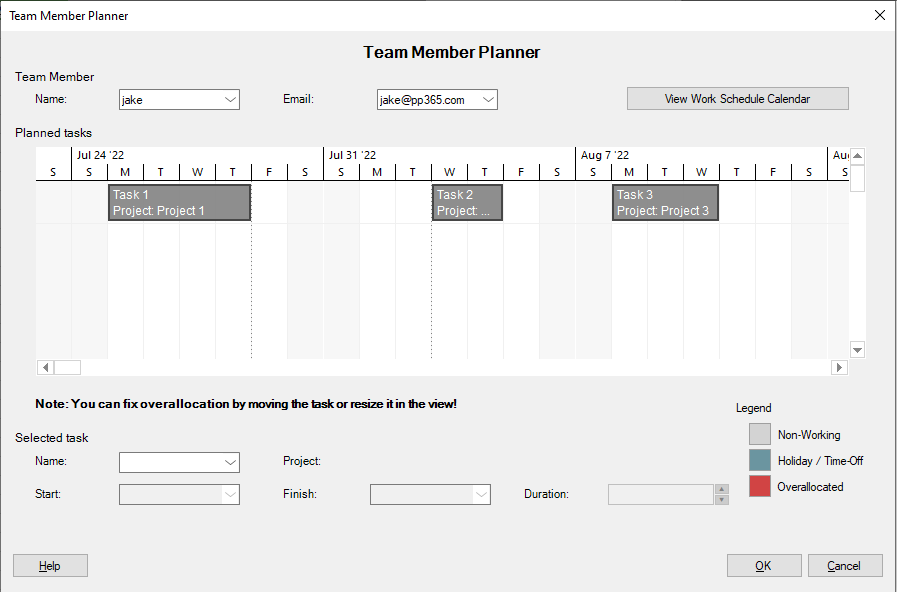
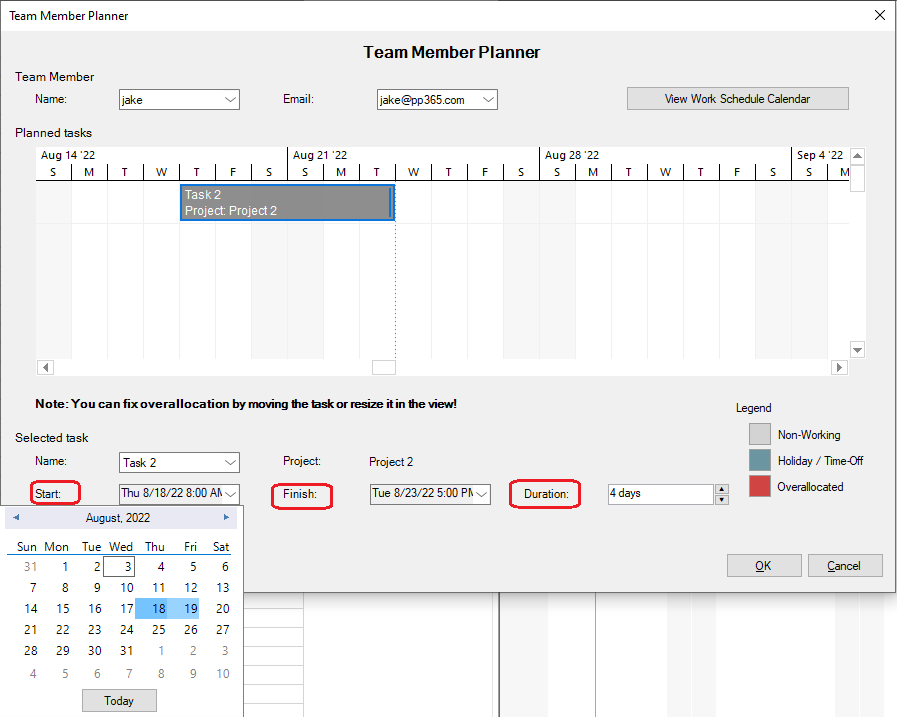
The Team Member Planner dialog displays a timeline with all the tasks for the selected team member. Also, you can find a task editing section where you can edit the tasks from the current project in order to adjust the team member’s schedule.
How can I know if a team member is already scheduled to work?
To find out if a team member is already scheduled to work, go to the menu Team – Team Member Planner Dialog. There, you will see all the tasks to which a team member is assigned to work, along with the start and finish dates.
Why does a warning appears when assigning a team member to a task?
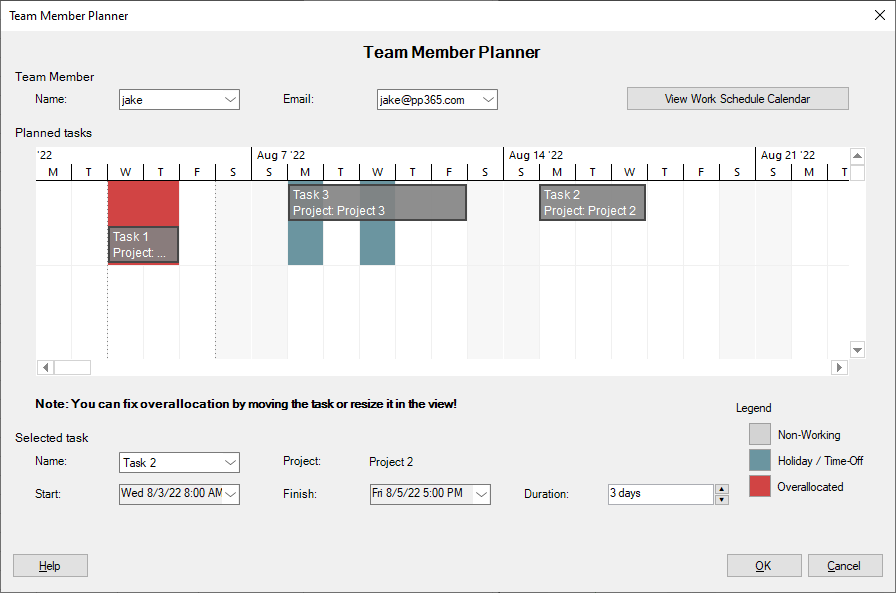
When assigning a team member to a task, that is already scheduled to work on another task, a warning will appear that will open the Team Member Planner dialog with details on the team member’s assignment. You can the adjust the start / finish dates and duration of the tasks from the current project only to fix the overallocation.
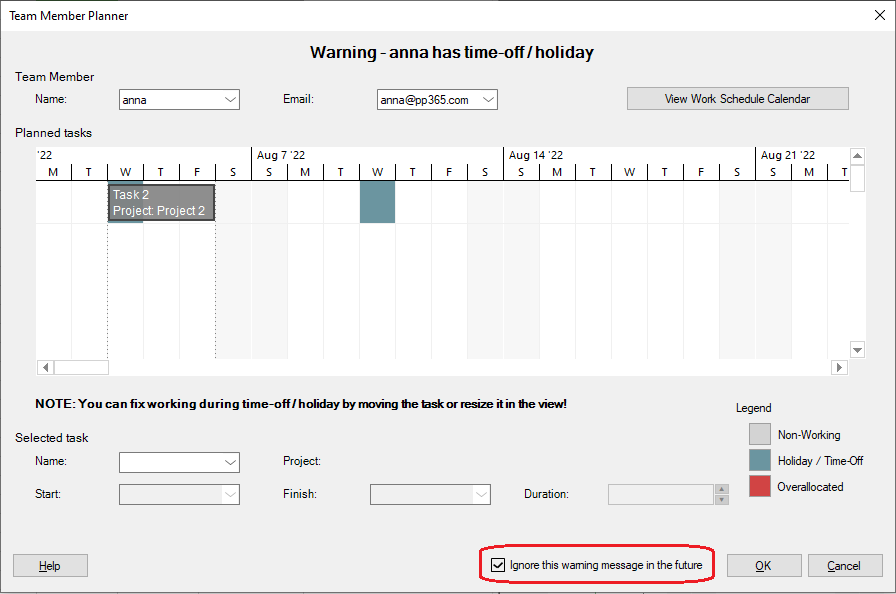
Why does a warning appears when assigning a team member to work during a time-off / holiday?
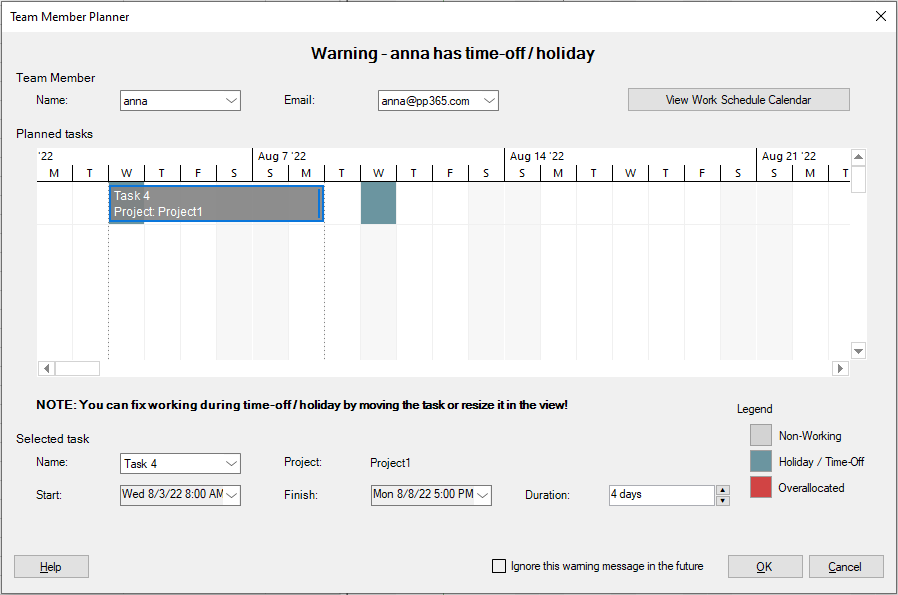
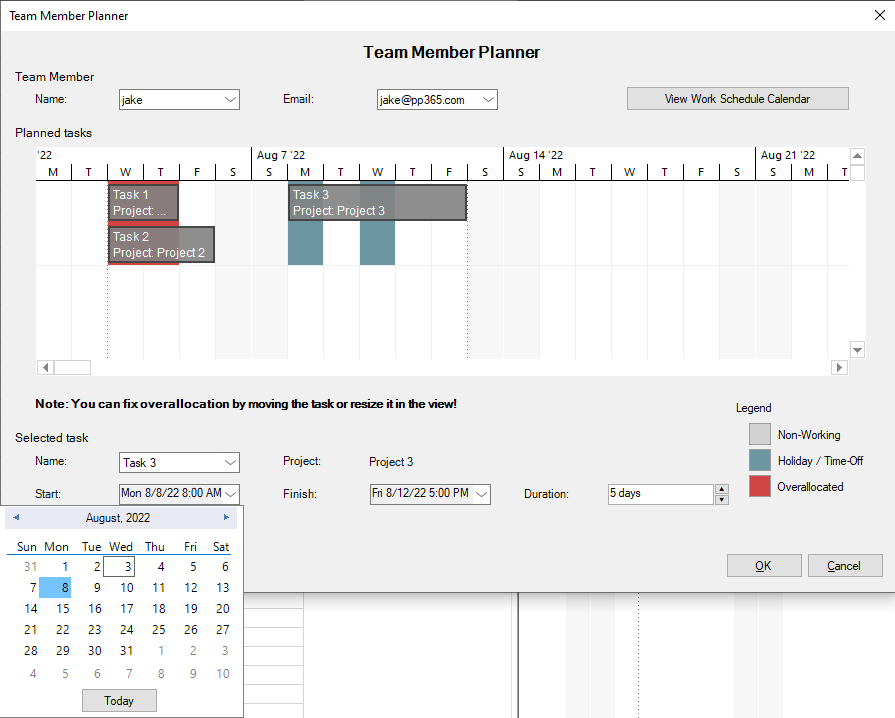
When assigning a team member to work on a task during a time-off / holiday, a warning will appear that will open the Team Member Planner dialog with time off/ holiday details on the team member’s assignment. Select the task only from the current project and change the start / finish dates and duration from the “Selected task” section to fix the scheduling issue.
How can I edit a task using the Team Member Planner dialog?
To edit a task using the Team Member Planner dialog go to menu “Team” – “Team Member Planner”. Select the desired team member from the drop-down list. In the Timeline panel, select the desired task only from the current project and change its start date / finish date and duration and then click “Ok”.
Note: Complete tasks that have %Complete - 100% are not displayed in the Team Member Planner dialog.
How do I fix overallocation using the Team Member Planner dialog?
To fix overallocation using the Team Member Planner dialog, go to menu “Team” – “Team Member Planner”. Select the desired team member from the drop-down list. In the Timeline panel , select a task only from the current project and change the start date / finish date and duration to fix the overallocation issue and then click “Ok”.
How can I hide the schedule in time-off / holiday alert?
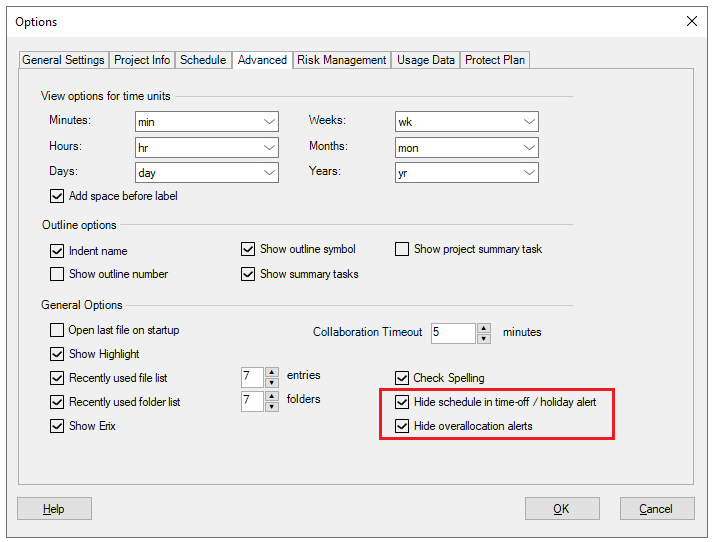
If you don’t want the schedule in time-off / holiday alert to appear, you can hide it by going menu “File” - “Options” – “Advanced” tab and check the “Hide schedule in time off/holiday alert” checkbox then click “OK”.
How can I hide the overallocation alerts?
If you don’t want the overallocation alerts to appear, you can hide them by going menu “File” - “Options” – “Advanced” tab and check the “Hide overallocation alerts” checkbox then click “OK”.
How can I add new tasks in the Team Member Planner dialog?
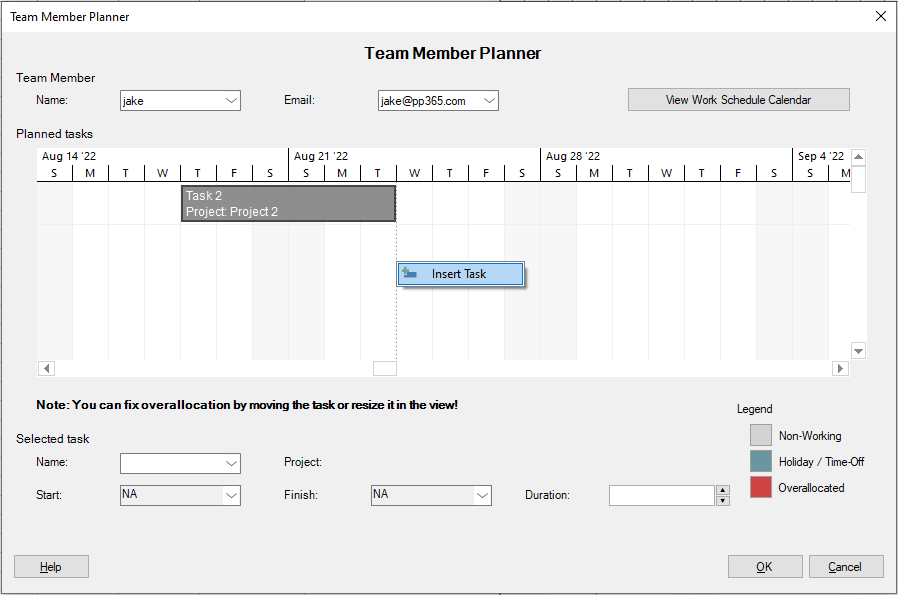
To add a new task in the Team Member Planner dialog, go to menu “Team” – “Team Member Dialog”. Right click in the Timeline panel and click “Insert Task”.
Can I move tasks directly in the Timeline panel in the Team Member Planner dialog?
To move tasks directly in the Timeline panel, locate the task from the current project that you want to move and drag it to the left or right as you want. Release the mouse when you find the desired date you want to move the task to.
How do I change the duration of a task by resizing it directly in the Timeline panel in the Team Member Planner dialog?
To change the duration of a task by resizing it, move your mouse at the end portion of the task from the current project, hold down the mouse and move the task to the right if you want to increase the duration, or to the left if you want to shorten the duration of your task. Release the mouse when you are satisfied to the resulted duration of your task.
What does the color markings in the Team Member Planner dialog mean?
The color markings in the Team Member Planner dialog have the following meanings:
Blue: Holidays/Time off – based on the global settings/team member time off values
Gray: Nonworking – if in resource calendar from the project that day is nonworking or is an exception
Red: Overallocated – if the resource is overallocated in the current project or between projects saved in Drive 365
Does the Team Member Planner dialog shows all the tasks that a team member is assigned to?
The Team Member planner dialog, shows all the tasks to which a team members is assigned in the current project and in all the projects saved in Drive365.
When a team member is overallocated?
There can be 2 overallocation cases for team members:
- When a team member is assigned to 2 or more tasks that overlap in the current project.
- When a team member is already assigned to a task in another project saved to Drive365 that overlaps with the task in the current project.
How can I see more information about a task directly in the Team Member Planner dialog?
To see more information about a task directly in the Team Member Planner dialog, hover the mouse over the desired task and a tooltip with task information will appear.
How can I move a task in progress directly from the Team Member planner dialog?
The tasks in progress cannot be moved. If you want to move a task in progress, please remove the % complete value, move the task and then set again the % complete value for your task.
Why I am not allowed to move or edit all tasks in the Team Member Planner dialog?
If you are not allowed to move or edit a task in the Team Member Planner dialog, it means that is an external task. Please know that an external task cannot be modified outside its project. Only the tasks in the current project can be edited in the Team Member Planner dialog.
What does the “Help” button inside the “Team Member Planner” dialog do?
The “Help” button inside the “Team Member Planner” dialog redirects to the “Team Member Planner” article in our Online Help page.
I can’t find the Team Member Planner dialog in the Team menu.
If the Team Member Planner functionality isn’t available in the Project Plan 365 application, please make sure you have the latest version of the application installed on your device: Download
On what platforms is Team Member Planner dialog available?
The Team Member Planner dialog is available on Project Plan 365 for Windows and Mac.
Step by step on how to see a team member’s schedule using the Team Member Planner dialog:
- Go to menu Team – Team Member Planner.

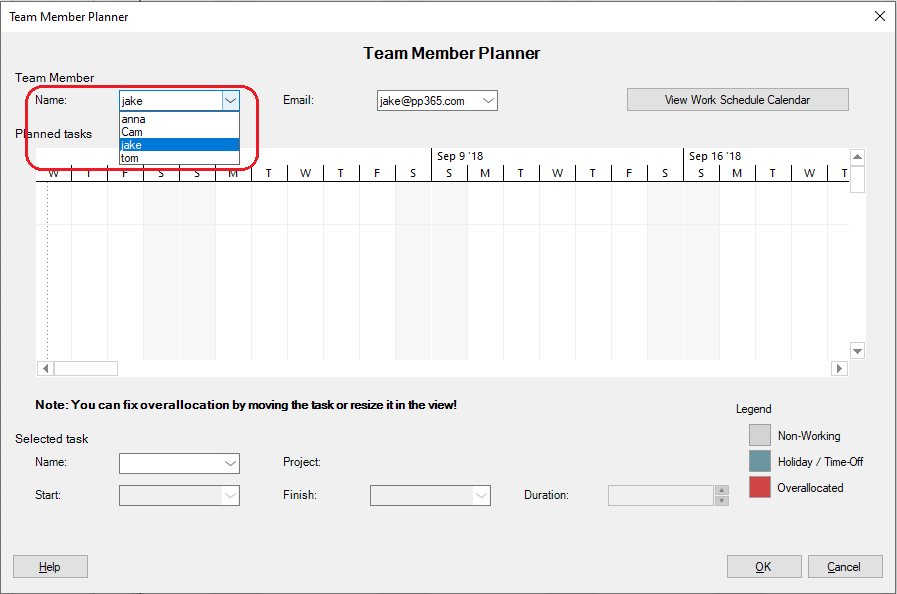
- Select the desired team member from the drop-down list.

- In the Timeline panel you will see all the tasks to which a team member is assigned to work along with the start and finish dates.


Note: Complete tasks that have %Complete - 100% are not displayed in the Team Member Planner dialog.
Step by step on how to assign a team member to work during a time-off / holiday:
- When assigning a team member to work on a task during a time-off / holiday, a warning will appear that will open the Team Member Planner dialog with details on the team member’s assignment.
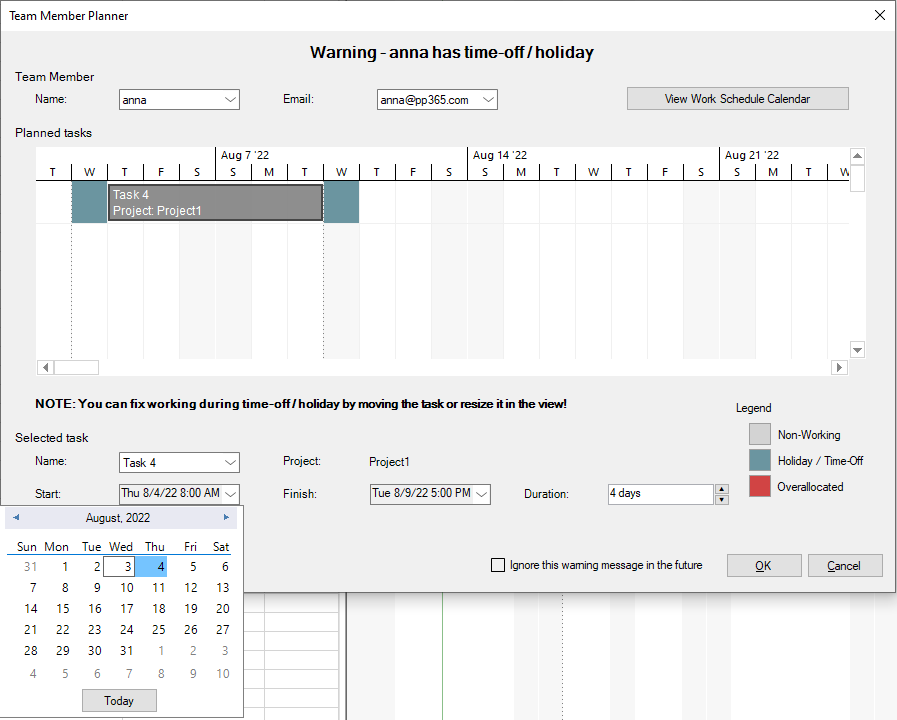
- In the dialog select the desired task and change the start / finish dates and duration from the Selected task.

- Click OK to save the changes.
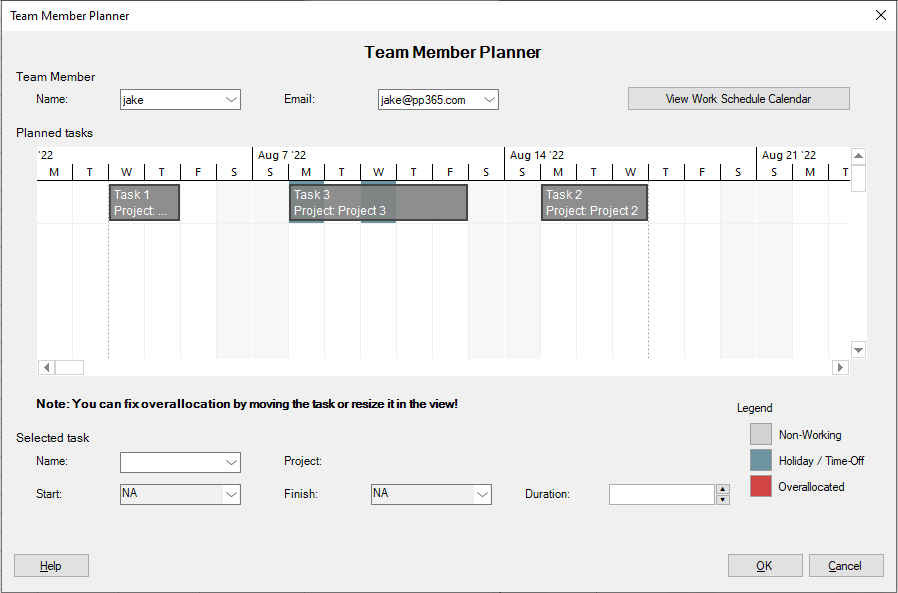
Step by step on how to fix overallocation using the Team Member Planner dialog:
- Go to menu Team – Team Member Planner.
- Select the desired team member from the drop-down list.
- In the Timeline panel, select a task and change the start date / finish date and duration from the Selected task section to fix overallocation.
Or, drag and drop the desired task to a free day:

- Click OK to save the changes.
Step by step on how to edit a task using the Team Member Planner dialog:
- Go to menu Team – Team Member Planner.
- Select the desired team member from the drop-down list.
- Move the task directly in the Timeline panel by holding and dragging the mouse to the left or right as you want.

- Change the task duration directly in the Timeline panel by holding down the mouse on the end portion of the task and moving it to the right to increase the duration or to the left to shorten the duration.
- You can also edit the task in the Selected task section by changing the start / finish dates and duration.

Step by step on how to add a new task using the Team Member Planner dialog:
- Go to menu Team – Team Member Planner.
- In the Timeline panel, right-click and click Insert Task.
- Set the start / finish dates and click OK to save the changes.
Step by step on how to hide the schedule in time-off / holiday / overallocation alerts:
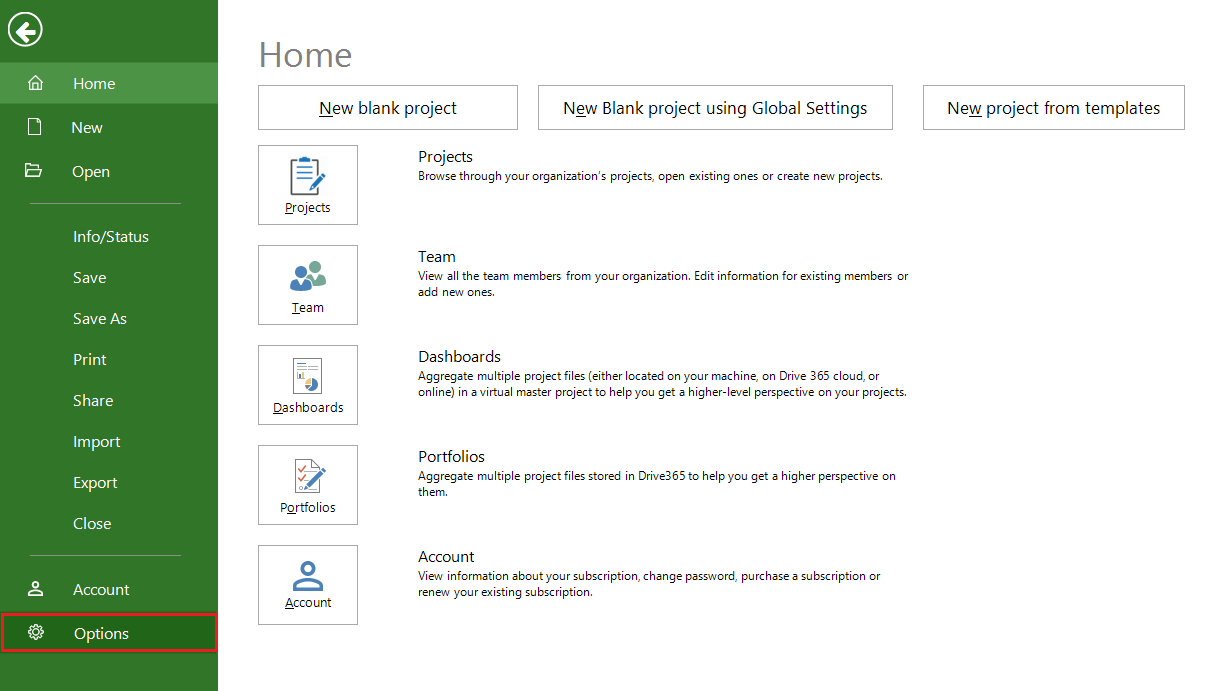
- Go to menu File - Options.

- In the Advanced tab check the Hide schedule in time off/holiday alert / Hide overallocation alerts checkbox then click OK.

- You can also set the holiday / time-off alerts to not appear when assigning a team member to a task that is scheduled on a holiday / time-off by checking the "Ignore this warning message in the future" checkbox and clicking OK.