What does “Timeline” functionality do?
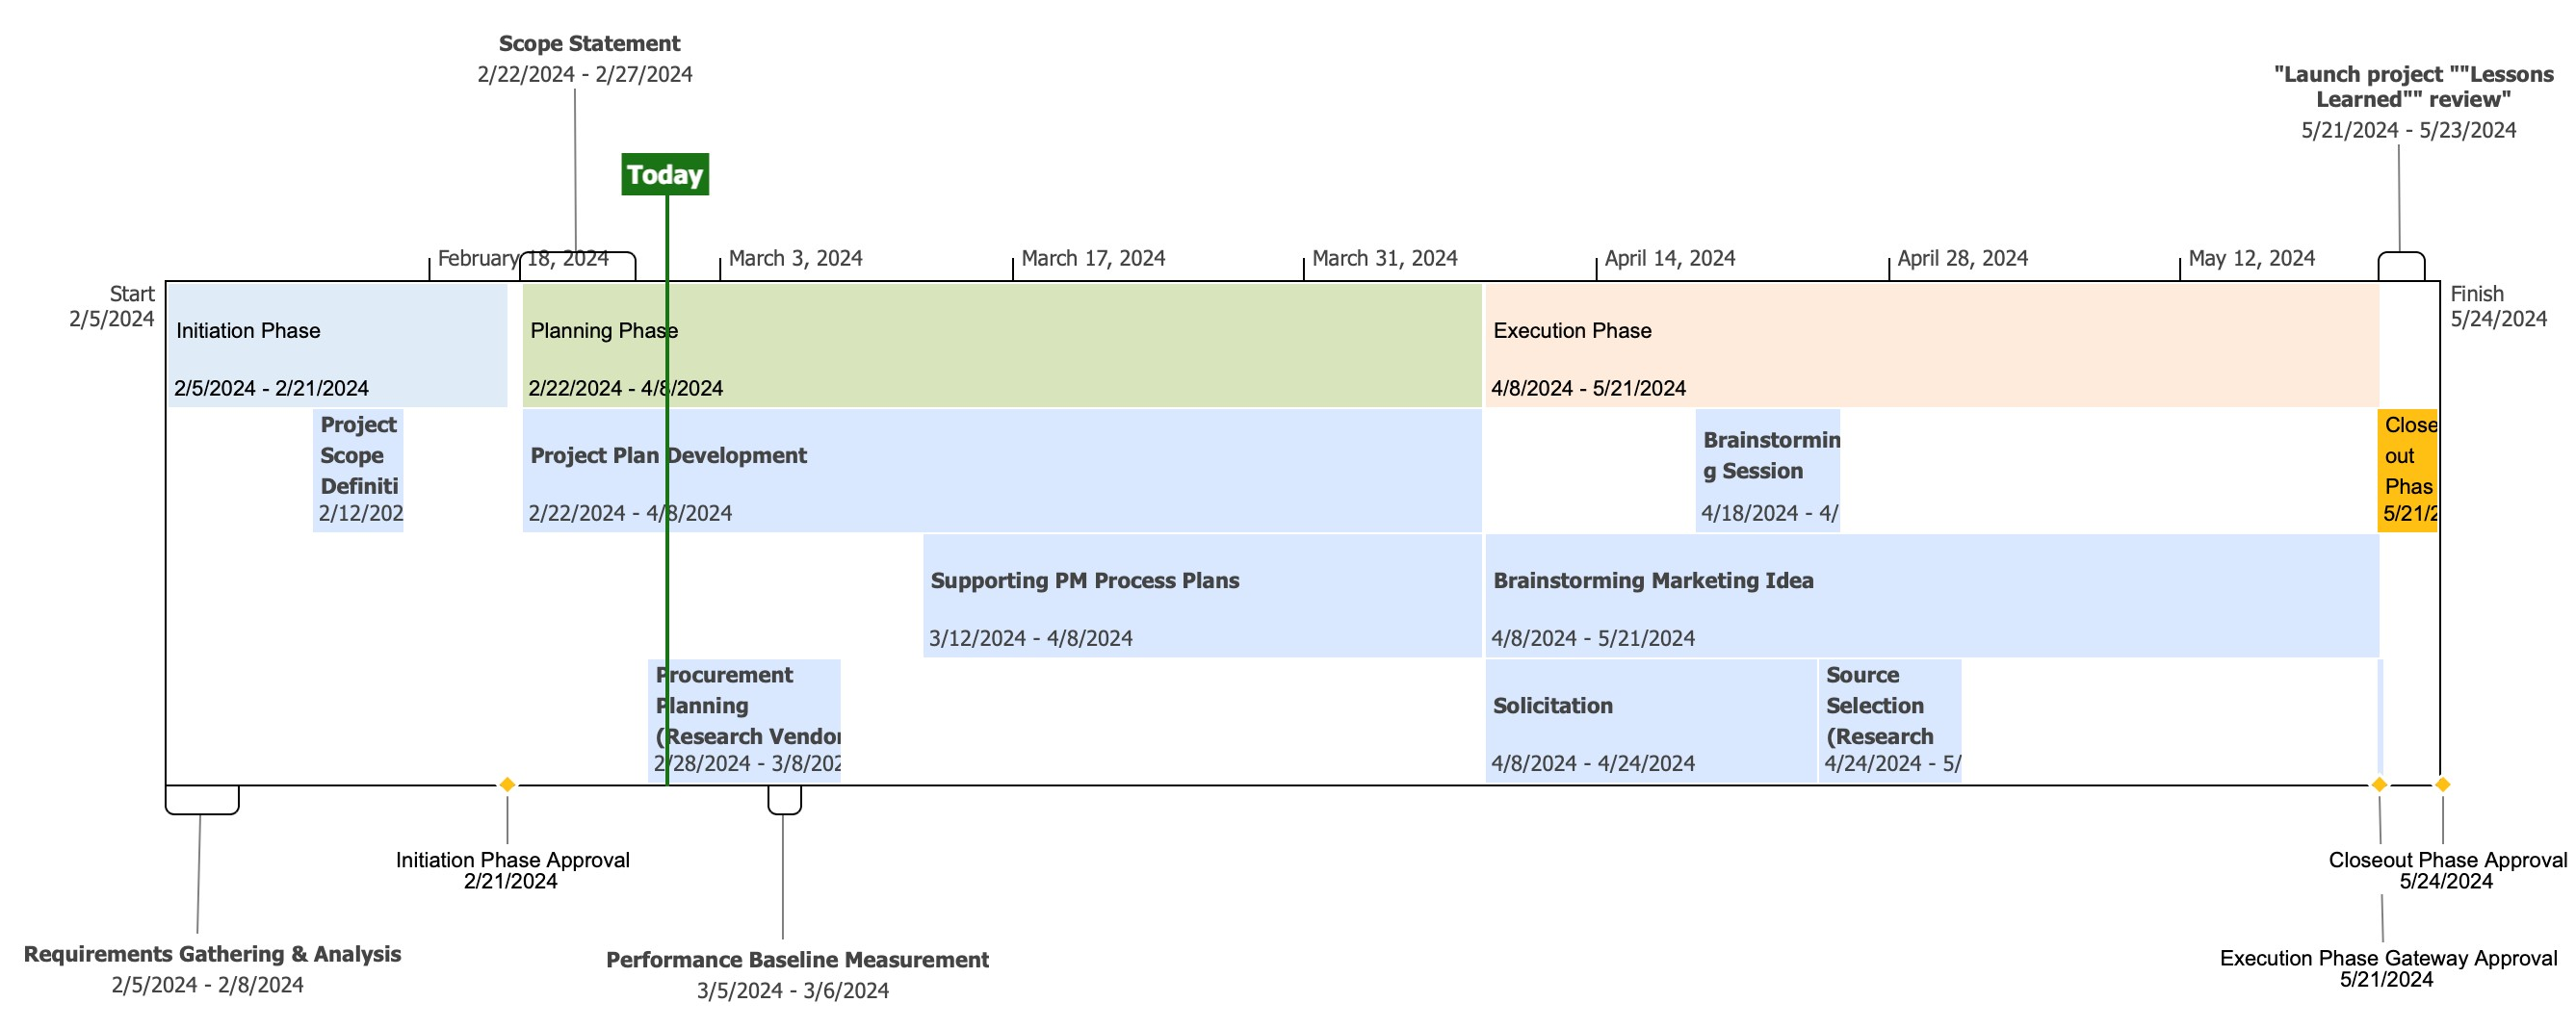
Timeline is a professional-looking snapshot that presents only the key milestones or deliverables of a project.
What is Timeline?
A Timeline is a professional looking snapshot of key tasks and milestones commonly used in status meetings.
Is Timeline view available in the app?
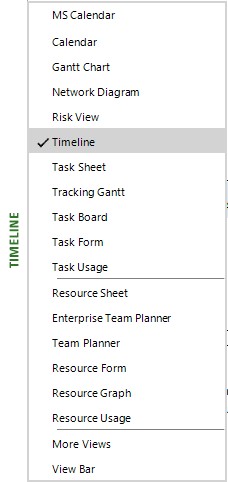
The Timeline view can be found in the view bar from the left side of the app, together with the other supported views.
How can tasks be added to the Timeline view?
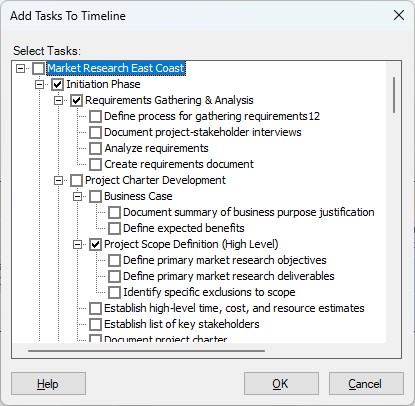
You can select which tasks from your project will be displayed in the Timeline. Tasks can be added to the Timeline view by clicking on the Existing Tasks button available in the Timeline tab.
Note: You can also add existing tasks by right clicking on the Timeline and selecting the Insert Task – Existing Task option from the contextual menu.
How can tasks be removed from Timeline view?
Tasks that were already added to the Timeline view can be removed by right clicking on the desired task and then selecting Remove from Timeline. Another way to do this is to go to Existing Tasks button from the Timeline menu and unchecking them from the Add Tasks to Timeline dialog or by clicking on the Remove from Timeline button from the Timeline menu.
Can Zoom be used in Timeline view?
In the Timeline view, you can use the Zoom options from the Project menu. You can Zoom in or Zoom out to see the tasks in more or less details.
How to reverse the Zoom in the Timeline View?
To reverse the Zoom in the Timeline View, right click on the Timeline and from the contextual menu click on Zoom to Screen, or go to menu Project – Zoom – Zoom to Screen.
Where I can find the “Date range” option?
Date range is used to set the Start and Finish dates of the project. You can find the Date range option in the Timeline menu right after you set the Timeline view.
How can I copy the Timeline?
You can copy the Timeline into other documents like Word document, E-mail or PowerPoint presentation by right clicking in the Timeline area to select it and then press Copy as Image. You will have two options: Copy Visible or Copy Full Size. Select the desired option and then go and open the document in which you want to copy the Timeline, right click on the blank page and press Paste.
Note: The Copy Timeline option can be also found in Timeline tab.
How can I move a task from the Timeline?
In the Timeline View, Task Bars can be rearranged by using drag-and-drop to move them up/down inside the Timeline. Callout Tasks can be moved anywhere outside the Timeline Section using drag-and-drop.
Note: At this point, we do not support moving Tasks to another date in the Timeline View.
Can the tasks from the Timeline be customized?
In the app, tasks from the Timeline can be customized by going to menu Timeline - Text Styles, or using the Font Control panel from the Timeline menu.
Can I change the Timescale for the Timeline view?
We are sorry, but at this point the application does not support changing the Timescale in Timeline view.
Where can I find the “Scaling” option?
To find the Scaling option you have to go to the File menu and choose the Print option. Click the Page setup option and a dialog will open, and you will see that there is the Scaling option which includes the Adjust to and Fit to commands.
Where can I find the “Print between two dates for Timeline View” option?
To find the Print between two dates option, open the app then go to the File menu, select the Print option and then choose the Page setup option. A dialog will appear. Go to the View tab to reach the Print between two dates function.
How to print the Timeline view?
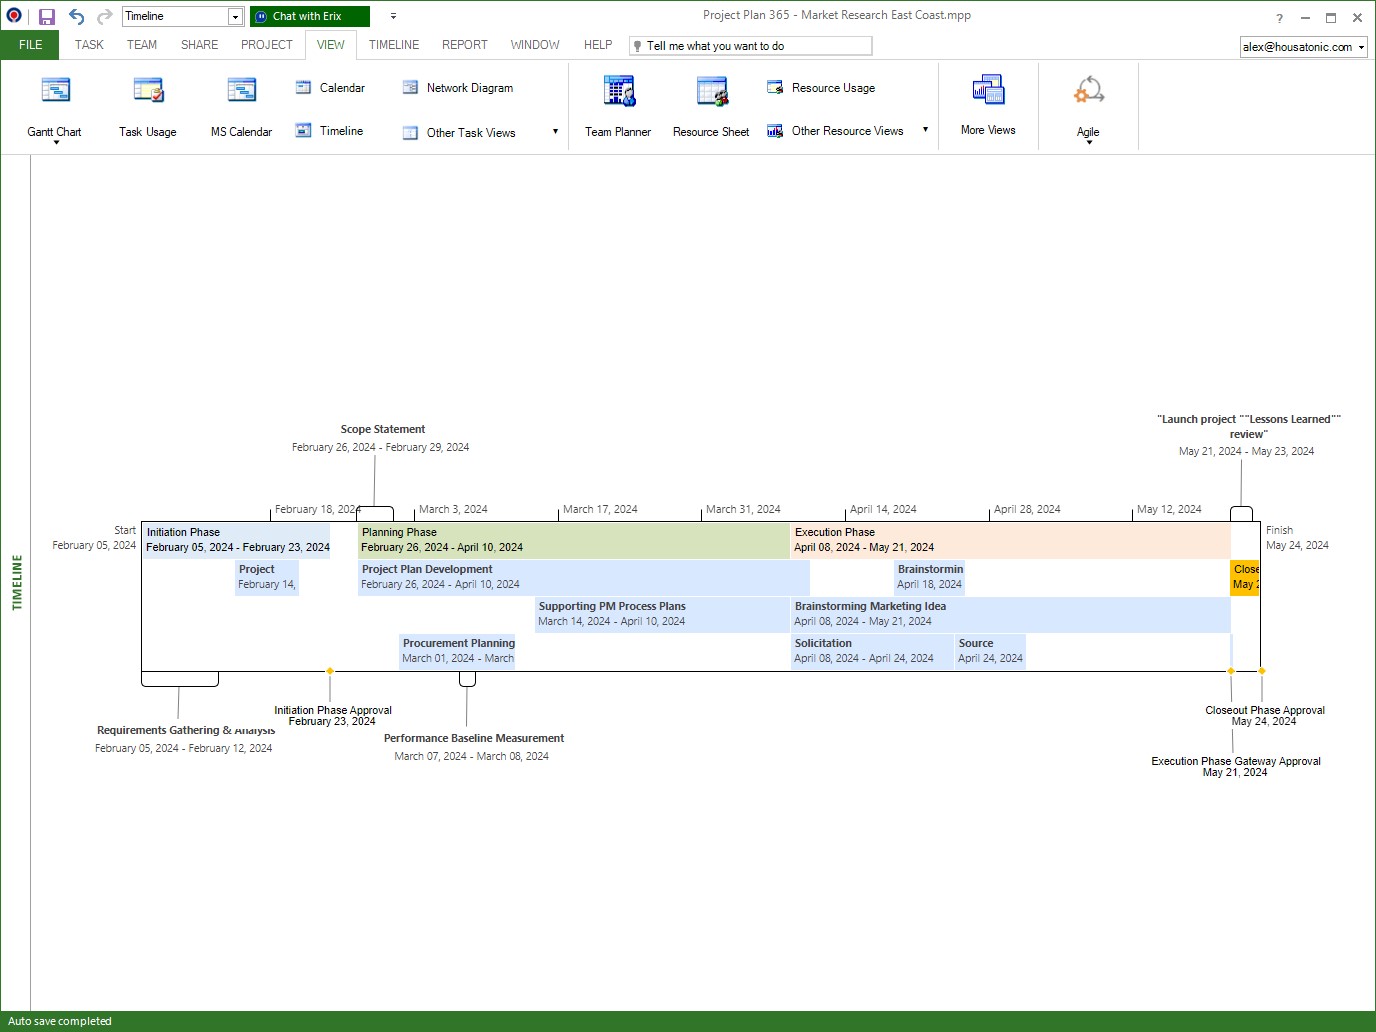
To print the Timeline view, open the application and select the Timeline view, go to menu File->Print dialog.
How do I create a timeline?
To access the Timeline, click on View – Timeline.
You can select which tasks from your project will be displayed in the Timeline. Tasks can be added to the Timeline view by clicking on the Existing Tasks button available in the Timeline tab.
How do I selective format the task background color in the Timeline view?
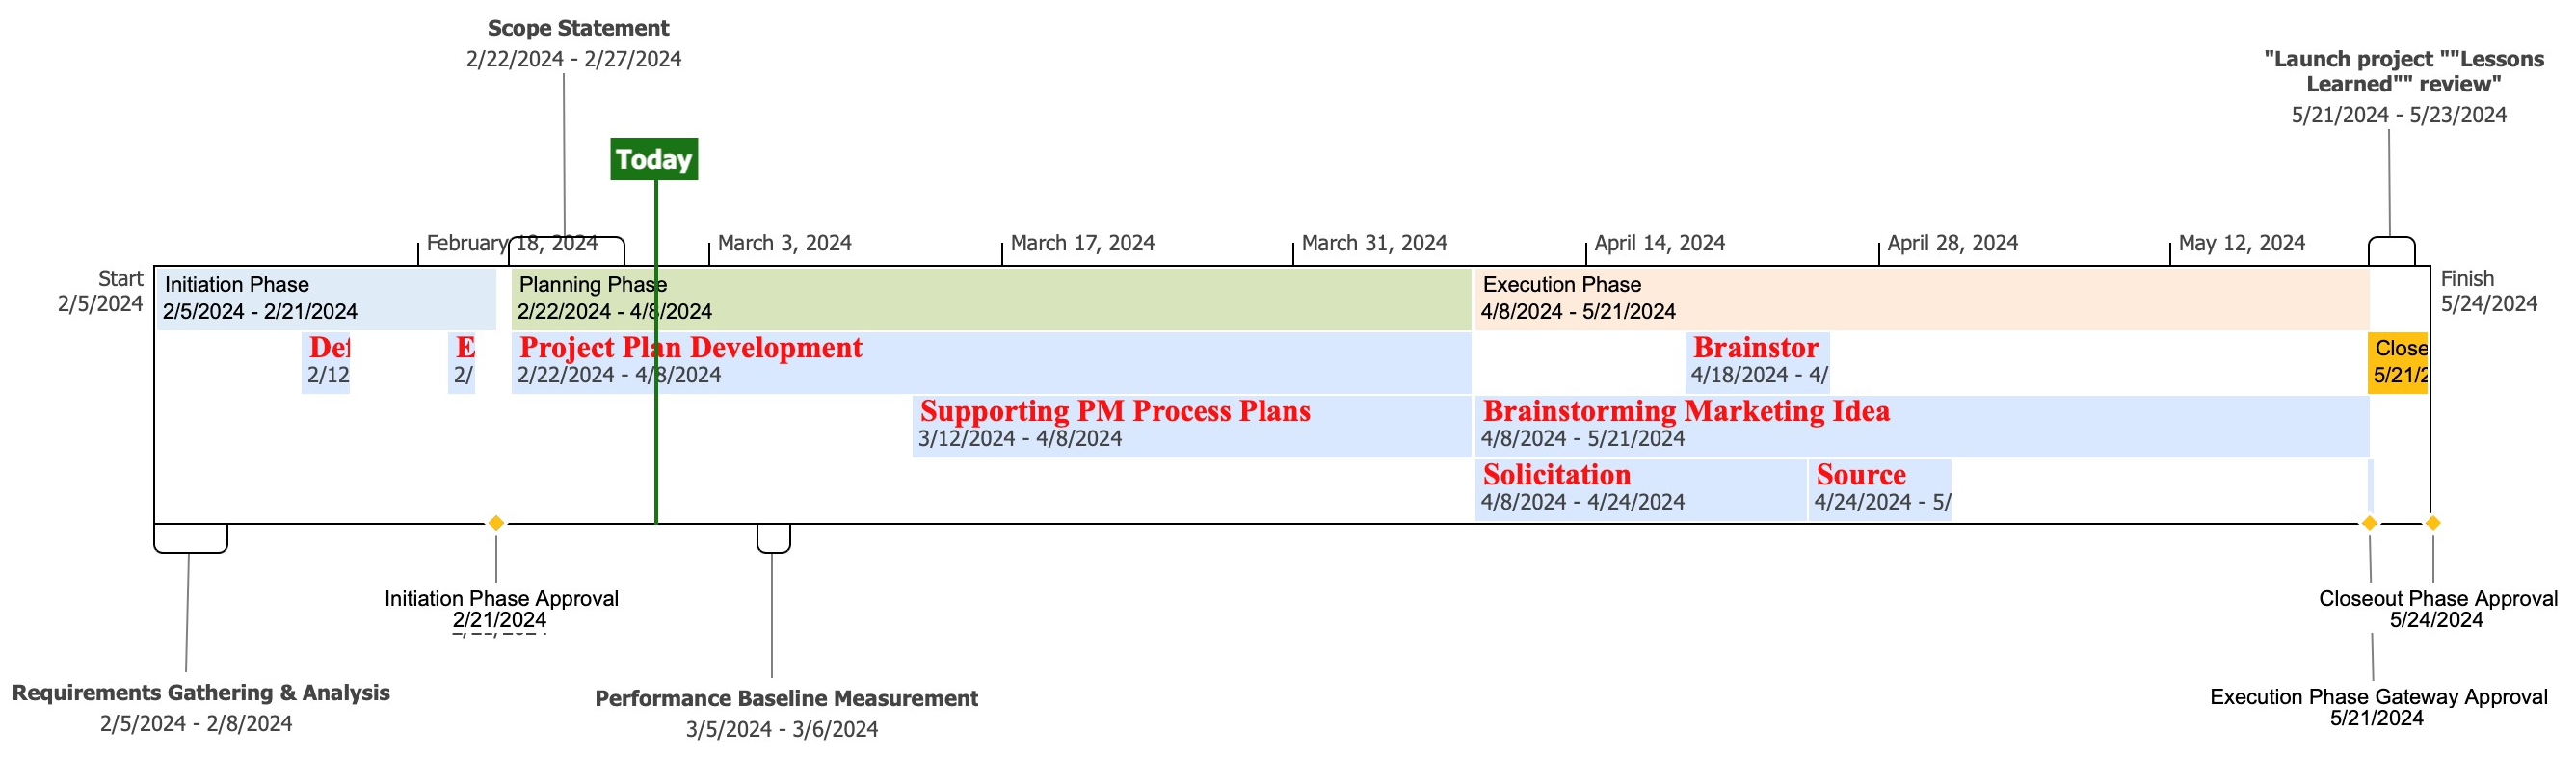
If you want to customize individual tasks in Timeline view, select the task you want to customize and use the Font Control Panel in the Timeline menu to change the Font, Font Style, Size, Text color and the Background color for the selected task.
Is there any way to set a default view?
To set a view by default, the Editor needs to save the file with that specific view being opened.
How can I change the start date in Timeline view?
To change the Start and Finish dates in Timeline view, please use the Date Range option. In order to do that, go to the Timeline menu and click on the Date Range option. Click on Set custom dates, then from Start and Finish fields, select the desired dates and click OK in the dialog.
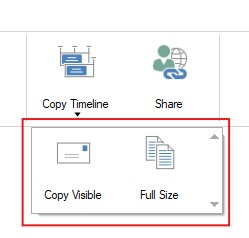
Why I can’t see the “Copy Timeline” button in ribbon on the Mac platform?
If the Copy Timeline button is not visible in ribbon, please press More button. You should be able to find in the dropdown the button that doesn't fit inside the ribbon because of the small window size.
Why I can’t see the “Date Range” button in ribbon on the Mac platform?
If the Date Range button is not visible in ribbon, please press More button. You should be able to find in the dropdown the button that doesn't fit inside the ribbon because of the small window size.
Why is "Date Range" option greyed out?
The Date Range option is available only for Timeline view.
Where can I find a report for the Timeline view?
We are sorry but we don't have any reports available in our application that look the same as the Timeline view.
You can export the Timeline view to PDF or as Image.
In order to do that, select the Timeline view from the left side view bar, go to the File menu – Export – Export to PDF or Export as Image. Type the name of the file and press “Save”.
How can I zoom to see the tasks in Timeline View?
To make task names more visible in the Timeline you can use the Zoom functionality.
Go to Project menu – Zoom then click on the “Zoom In” button to make tasks appear wider in the Timeline View.
How can I change the row order of tasks in Timeline View?
In the Timeline View, to change the order of Task Bars use drag-and-drop to move them up/down inside the Timeline.
How do I create multiple Timeline views in Project Plan 365?
We are really sorry but creating multiple Timeline views is not possible in our application at this point.
Does the Standard version include the Timeline view?
The Timeline View is available for both Standard and Business subscription options.
How do I add a new task in the Timeline view?
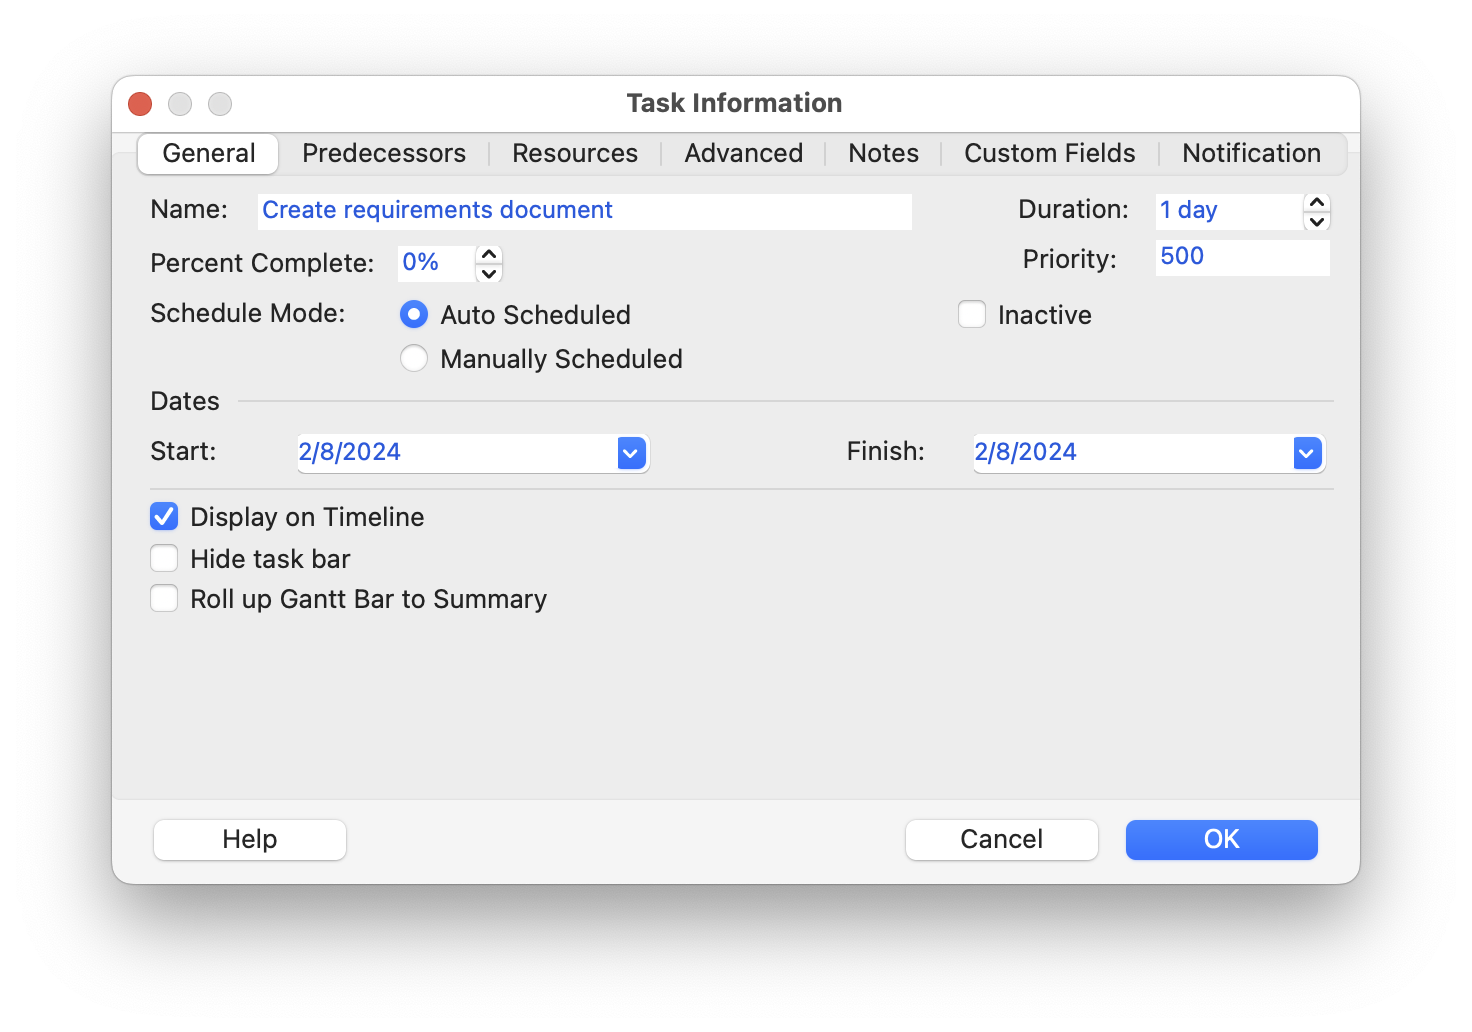
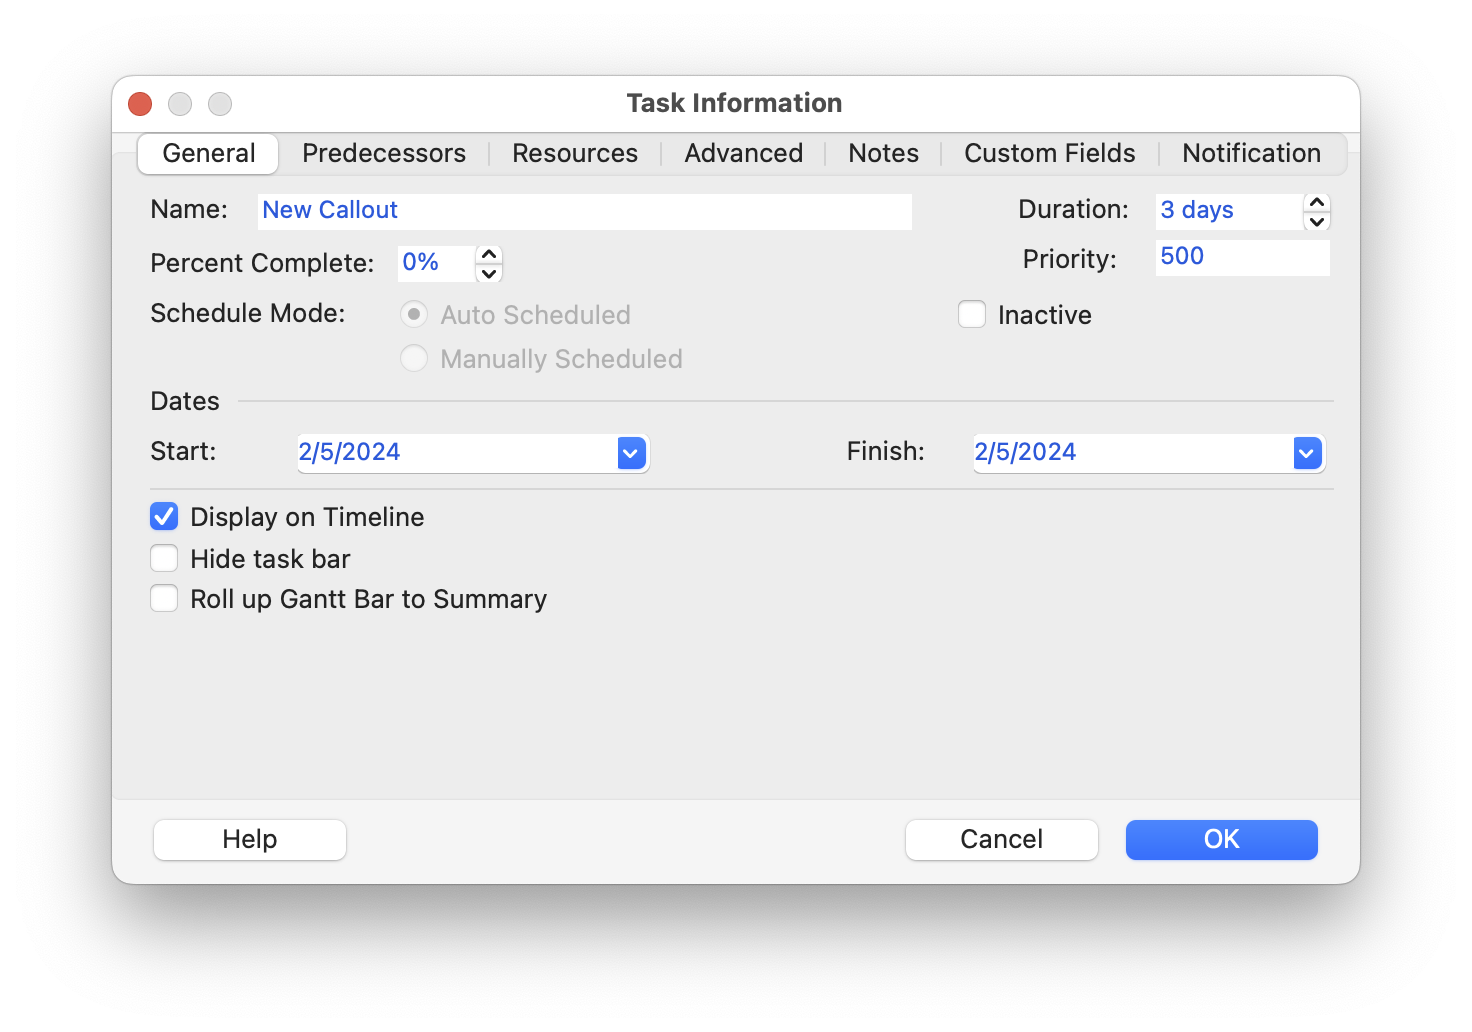
To add a new task in the Timeline view, click on the Task button available in the Timeline menu. The Task Information dialog will appear. Add the task name, dates, and other field values and then click the OK button.
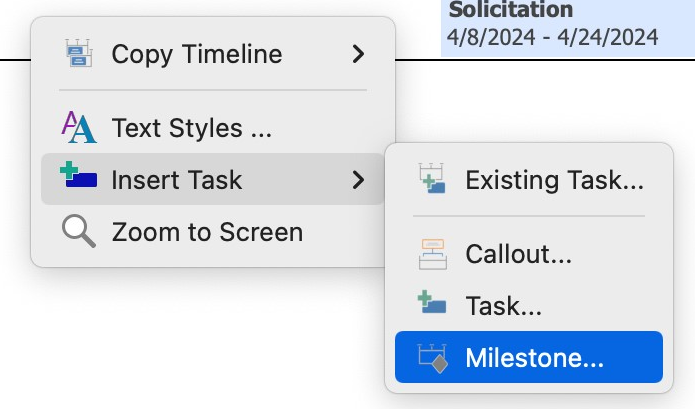
Note: You can also add a new task by right clicking on the Timeline and selecting the Insert Task – Task option from the contextual menu.
How do I add a new milestone in the Timeline view?
To add a new milestone task in the Timeline view, click on the Milestone button available in the Timeline menu. The Task Information dialog will appear. Add the task name, dates, and other field values and then click the OK button.
Note: You can also add a new milestone task by right clicking on the Timeline and selecting the Insert Task – Milestone option from the contextual menu.
How do I add a new callout task in the Timeline view?
To add a new callout task in the Timeline view, click on the Callout Task button available in the Timeline menu. The Task Information dialog will appear. Add the task name, dates, and other field values and then click the OK button.
Note: You can also add a new callout task by right clicking on the Timeline and selecting the Insert Task – Callout Task option from the contextual menu.
How do I move a task outside of the Timeline?
Only Callout Tasks can be moved anywhere outside the Timeline Section using drag-and-drop.
How do I display an existing task as callout task?
To display an existing task as a Callout task, select the task in the Timeline view and drag it outside of the Timeline.
Note: You can also display an existing task as Callout task by selecting the task and clicking on the Callout Task button in the Timeline menu.
How do I display an existing task as milestone?
To display an existing task as a Milestone task, select the task in the Timeline view and drag it outside of the Timeline.
How can I delete a milestone task from the Timeline view?
Deleting a milestone task from Timeline view is possible using:
- Click on the Remove from Timeline button in the Timeline menu;
- Right click on the milestone task and select Remove from Timeline from the contextual menu;
- Select the milestone task and press the “Delete” key on your keyboard;
- Uncheck the milestone task from Add task to Timeline dialog and click OK.
How can I delete a callout task from the Timeline view?
Deleting a Callout task from Timeline view is possible using:
- Click on the Remove from Timeline button in the Timeline menu;
- Right click on the Callout task and select Remove from Timeline from the contextual menu;
- Select the Callout task and press the “Delete” key on your keyboard;
- Uncheck the Callout task from Add task to Timeline dialog and click OK.
How can I change the Date Format in the Timeline view?
To change the Date Format in the Timeline view, go to the Timeline menu and click on the Date Formats button. Select the desired date format from the list and click on the OK button.
How can I show/hide the Today line in the Timeline view?
To show/hide the Today line in the Timeline view, go to the Timeline menu and click on the Date Formats button. Check/uncheck the Today Line checkbox and click on the OK button.
How can I show/hide the task dates in the Timeline view?
To show/hide the task dates in the Timeline view, go to the Timeline menu and click on the Date Formats button. Check/uncheck the Task Dates checkbox and click on the OK button.
How can I show/hide the Timescale in the Timeline view?
To show/hide the Timescale in the Timeline view, go to the Timeline menu and click on the Date Formats button. Check/uncheck the Timescale checkbox and click on the OK button.
How can I show/hide the task progress I the Timeline view?
To show/hide the task progress in the Timeline view, go to the Timeline menu and click on the Date Formats button. Check/uncheck the Task Progress checkbox and click on the OK button.
How can I set text lines for timeline task bars?
To set the text lines for timeline task bars, go to the Timeline menu and set the desired value from the Text Lines dropdown list.
Note: The Text Lines value applies to taskbar only and not for Callout or Milestone tasks.
Step by step on how to apply Timeline view:
1. Go to menu View – Other Task Views - Timeline or in View Bar click on Timeline button.

2. You will notice that the view changes.
Step by step on how to add tasks to Timeline:
1. Go to menu Timeline - Existing Tasks button.

2. In Add Tasks to Timeline dialog, choose the tasks and milestones you want to add to Timeline.
Or go to Gantt Chart view, open Task Information dialog for the desired task/milestone and then check the Display on Timeline option.
3. Click OK to add the chosen tasks and milestones to the Timeline.
Step by step on how to remove tasks from Timeline:
1. Right-click on the task or milestone you want to remove from Timeline.
2. Select Remove from Timeline option from the popover.
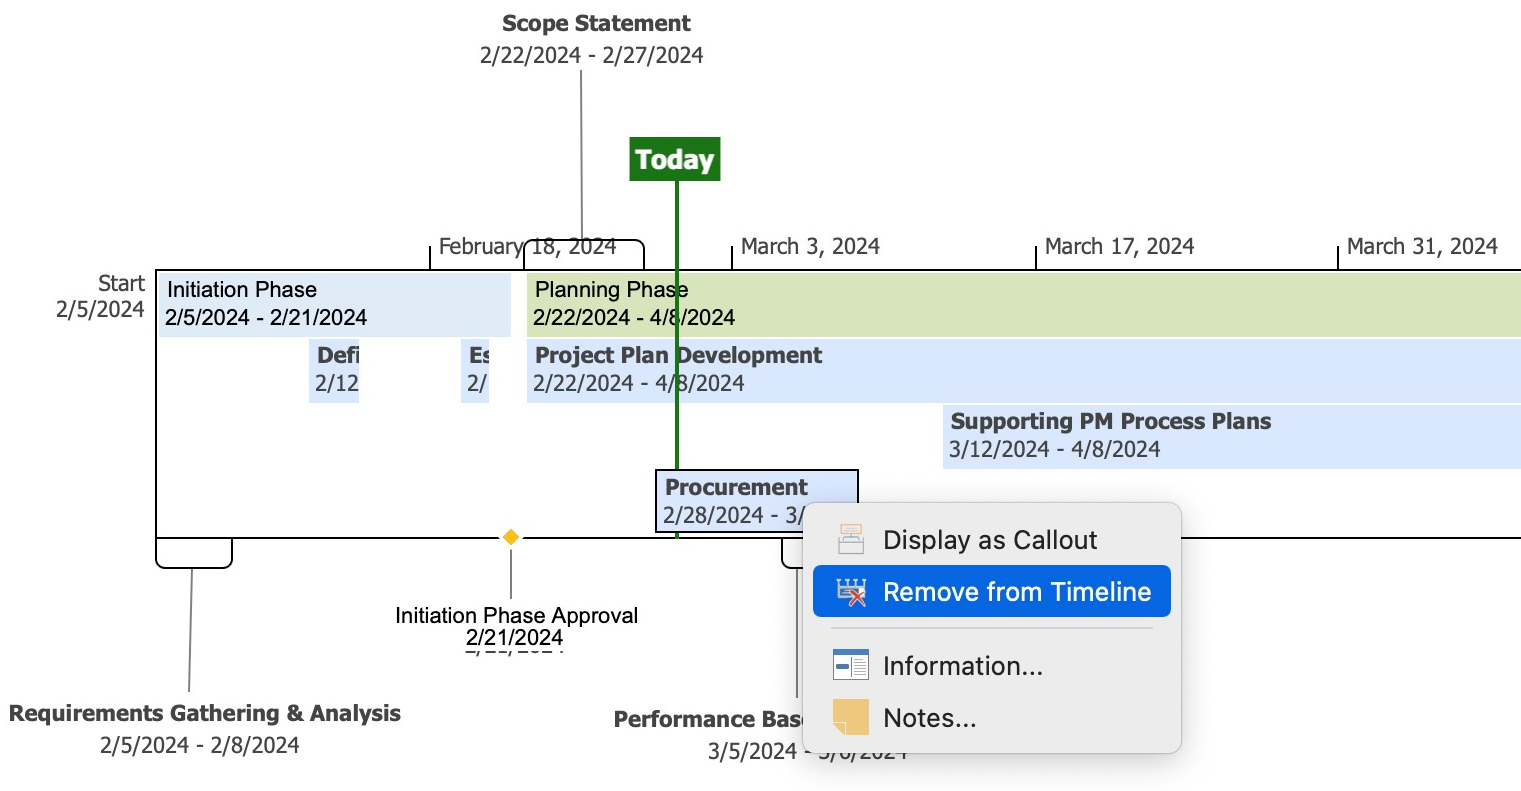
Or go to menu Timeline - Remove from Timeline button.

3. You will notice that the task/milestone has been removed.
Step by step on how to customize the Timeline:
1. Go to menu Timeline – Text Styles - to customize all the tasks or use the Font Control Panel - to customize only one task.

2. Select the Items to change, Font, Font Style, Size, Text and Background colors.
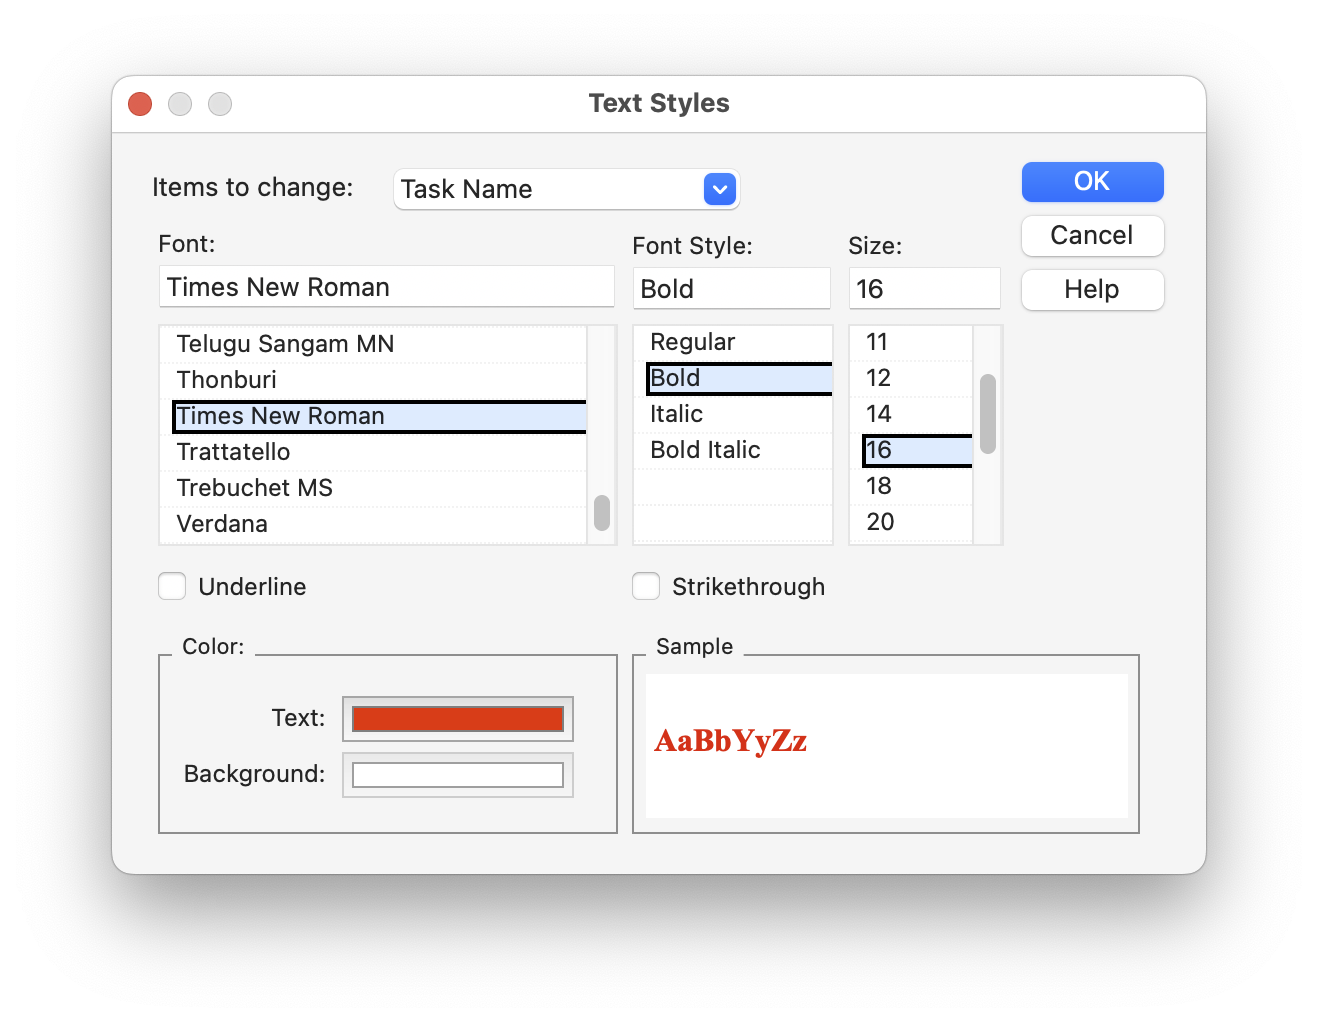
3. Click OK for the changes to be applied.
Step by step on how to change the Date Range for the Timeline:
1. Go to menu Timeline – Date Range button.

2. In the Set Timeline Dates dialog you can Use project’s start and finish dates or select Set custom dates.
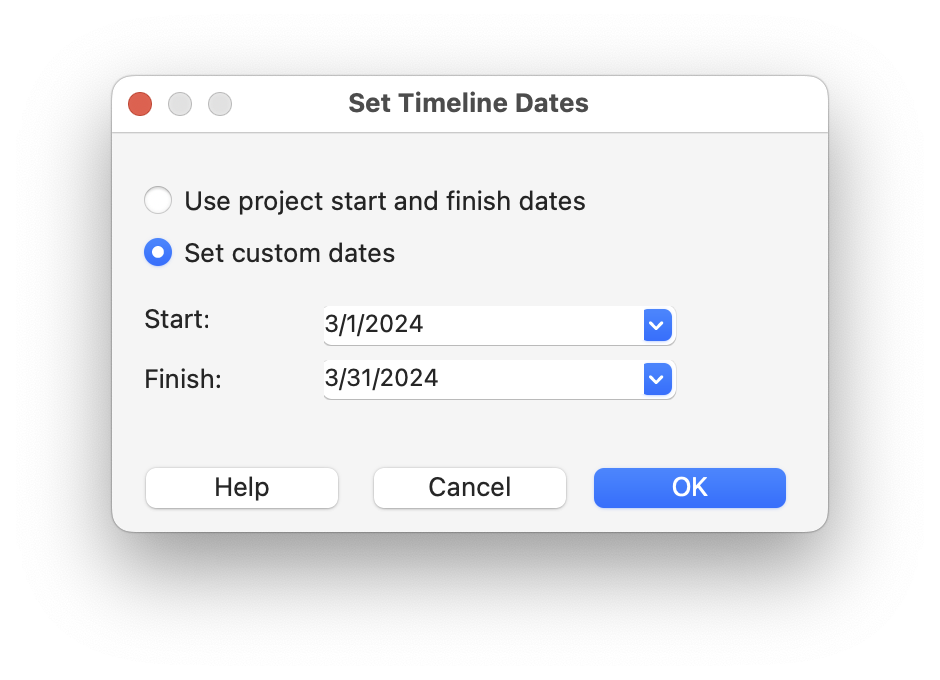
3. Click OK to save the changes.
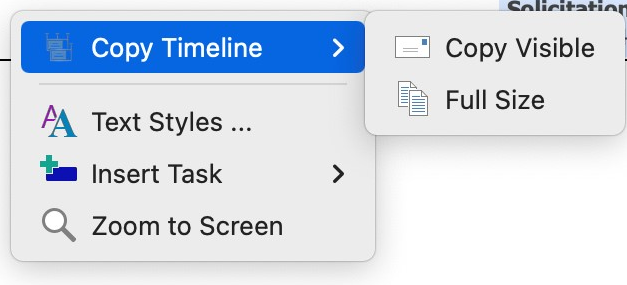
Step by step on how to copy the Timeline:
1. Go to menu Timeline - Copy Timeline option.

2. Choose to either copy the Full Size or only Copy Visible part of the timeline.
3. Or right click on the Timeline canvas and click on the Copy as Image option from the contextual menu.
Step by step on how to add a new callout task:
- Go to menu Timeline - Callout Task button.

Or right click on the Timeline and from the contextual menu select Insert Task – Callout Task option.
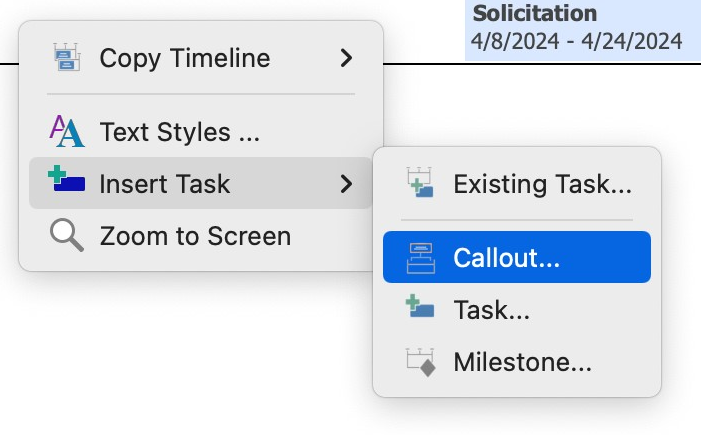
2. In the Task Information dialog add the task name, dates, and other field values and then click the OK button.
Step by step on how to display a task as a Callout:
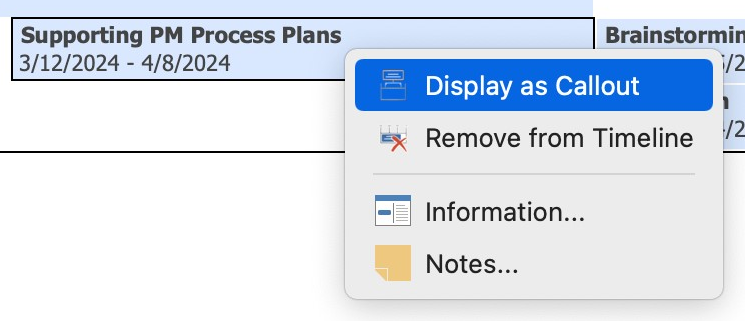
1. Select the desired Task from the Timeline and go to menu Timeline – Display as Callout.

2. You can also right click on the desired Task Bar and from the contextual menu click on Display as Callout.
Or, use drag-and-drop a Task Bar anywhere outside the timeline.
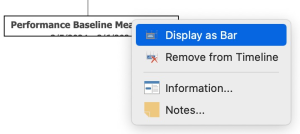
3. To display a Callout Task back as a Task Bar, select the callout task and either go to menu Timeline – Display as Bar:

Right-click – Display as Bar:
Or drag-and-drop the Callout Task inside the Timeline:
Step by step on how to add a new milestone task:
1. Go to menu Timeline - Milestone Task button.

Or right click on the Timeline and from the contextual menu select Insert Task – Milestone option.
2. In the Task Information dialog add the task name, dates, and other field values and then click the OK button.

Step by step on how to move tasks in the timeline view:
1. Select the desired Task Bar and change the order of tasks by moving it up/down.
2. Select the Desired Callout Task/Milestone and move it anywhere outside the Timeline.

Step by step on how to change the Date Format:
1. Go to menu Timeline – Date Format.

2. Select the desired format and click OK.

3. You can also select to show/hide the Task Dates, Today Line, Timescale and Task Progress from the Date Format dialog by checking/unchecking the option.
Step by step on how to change Text lines in Timeline View:
1. Go to menu Timeline – Text Lines field.

2. Select the desired number of text lines to be displayed in a Task Bar.