
What does the "Agile" functionality do?
In Project Plan 365, the "Agile" functionality allows you to use agile project management to track your projects. You can create new agile projects or turn on agile views for an existing project (traditional "waterfall" project).
For more information about the Agile functionality and its benefits, please see the Agile Project Management page, which also includes a video.
What is Scrum?
Scrum is an agile methodology that uses sprints (time-boxed iterations, typically two weeks long) to organize tasks and allows for quick goal shifting.
What is Kanban?
Kanban is an agile methodology that uses a backlog and board statuses to manage work in progress.
How do I create a Waterfall Project?
To create a new Waterfall project click File - New - Waterfall Project.
How do I create a Scrum project?
To create a new Scrum project click File - New - Scrum Project.
Where is the task board?
In order to see the Agile boards, please go to menu Project - Agile.
How can I add a sprint?
New sprints cannot be added manually. The number of sprints in a project is calculated automatically based on the finish date of the project and the duration of each sprint.
In order to add new sprints please modify the duration of existing sprints to make room for a new one. You can also choose "Custom data" instead of finish date. This way new sprints can be created automatically if the custom date is bigger than the finish date.
What does Backlog Sheet?
The Backlog Sheet helps you visualize your workflow and limit the amount of work in progress. It contains a prioritized list of items that the team has agreed to work on next. The items ranked highest on the list represent the most important or urgent items for the team to complete.
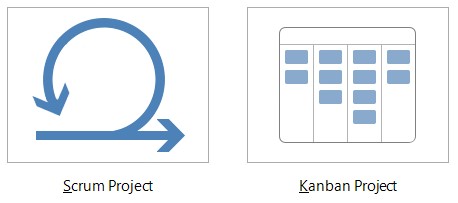
How do I create a new Agile project?
To create a new agile project, go to File - New and choose Scrum Project or Kanban Project.
How do I enable Agile to an existing project?
To enable Agile for an existing project, open the desired project and go to menu Project - Agile. In the Agile Methodology dialog, choose from Scrum, Kanban and None options.
Another way to enable Agile for an existing project is to go to the View menu, click on Agile arrow to open the dropdown and after that, select Scrum or Kanban methods.
What views are available for Agile projects?
The available Views for Agile projects are: Task Board, Backlog Board, Sprint Planning Board, Current Sprint Board, Agile Tasks, Backlog Sheet, Sprint Planning Sheet, Current Sprint Sheet.
Why I can’t see the “Agile” button in ribbon on the Mac platform?
If the “Agile” button is not visible in ribbon, please press "More" button. You should be able to find in the dropdown the button that doesn't fit inside the ribbon because of the small window size.
What does the “Help” button inside the “Agile Methodology” dialog do?
The “Help” button inside the “Agile Methodology” dialog redirects you to the “Use Agile In Project Plan 365” article in our Online Help page.
How do I delete sprints?
We are sorry but the delete sprints option isn't available in our application at this point.
What is Agile?
Agile is an iterative development methodology that values human communication and feedback.
How can I open an Agile project in the Web application?
We are sorry but at the moment we don't support the Agile functionality in our Web application.
What is a Sprint?
A Sprint is a short, time-boxed period during which a Scrum Team works to complete the set amount of work.
How do I add a board status for a task?
In order to add a board status for a task, go to the View menu - Agile and select Kanban. After that, from "Kanban" tab select "Backlog Board" and use drag and drop method in order to add a task to one of the columns: "In Progress, Next up, Done".
Another way to add a board status is to select "Backlog Sheet" and add the desired status for each task by selecting it from "Board Status" field.
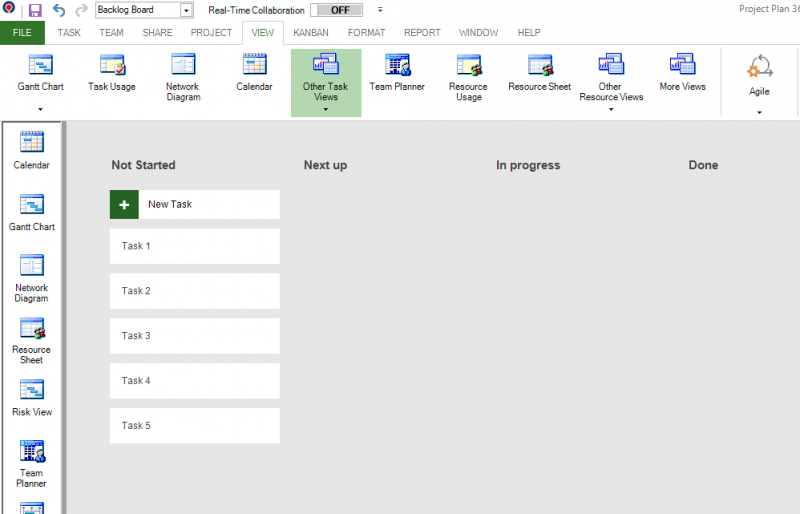
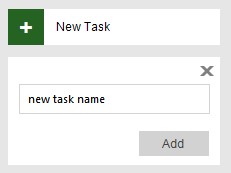
How can I add a new task in Task Board view?
In order to add a new task in Task Board view, click on the "New Task" option available in "Not Started" column, type the name of the task and click on "Add" button.
Why aren't my "Done" tasks visible in the Backlog sheet?
The Backlog view is actually the Task Board view but with a filter applied and this is the reason why the completed tasks aren’t shown in the view.
If you want to view all the tasks by categories (Not Started, In Progress, Done), please use the Task Board view.
You can find the Task Board view in the left side view bar or in the View menu – Other Task Views – Task Board.
How can I rename a column in Backlog Board view?
In order to rename a column in Backlog View, right click on the column you want to rename and from the contextual menu select Rename option. Type the desired text and press the ENTER key.
How can I move columns in Backlog Board view?
The columns in the Backlog View can be moved only to the right or left. In order to move the columns, right click on the desired column and from the contextual menu select Move right or Move left option.
How can I print the Backlog Board?
We are sorry but printing the Backlog Board is not possible at this point in our application.
How to export to Task Board View to PDF?
We are sorry but exporting the Task Board View to PDF is not possible at this point in our application.
Step by step on how to create a new Agile project:
1. Go to menu File - New.
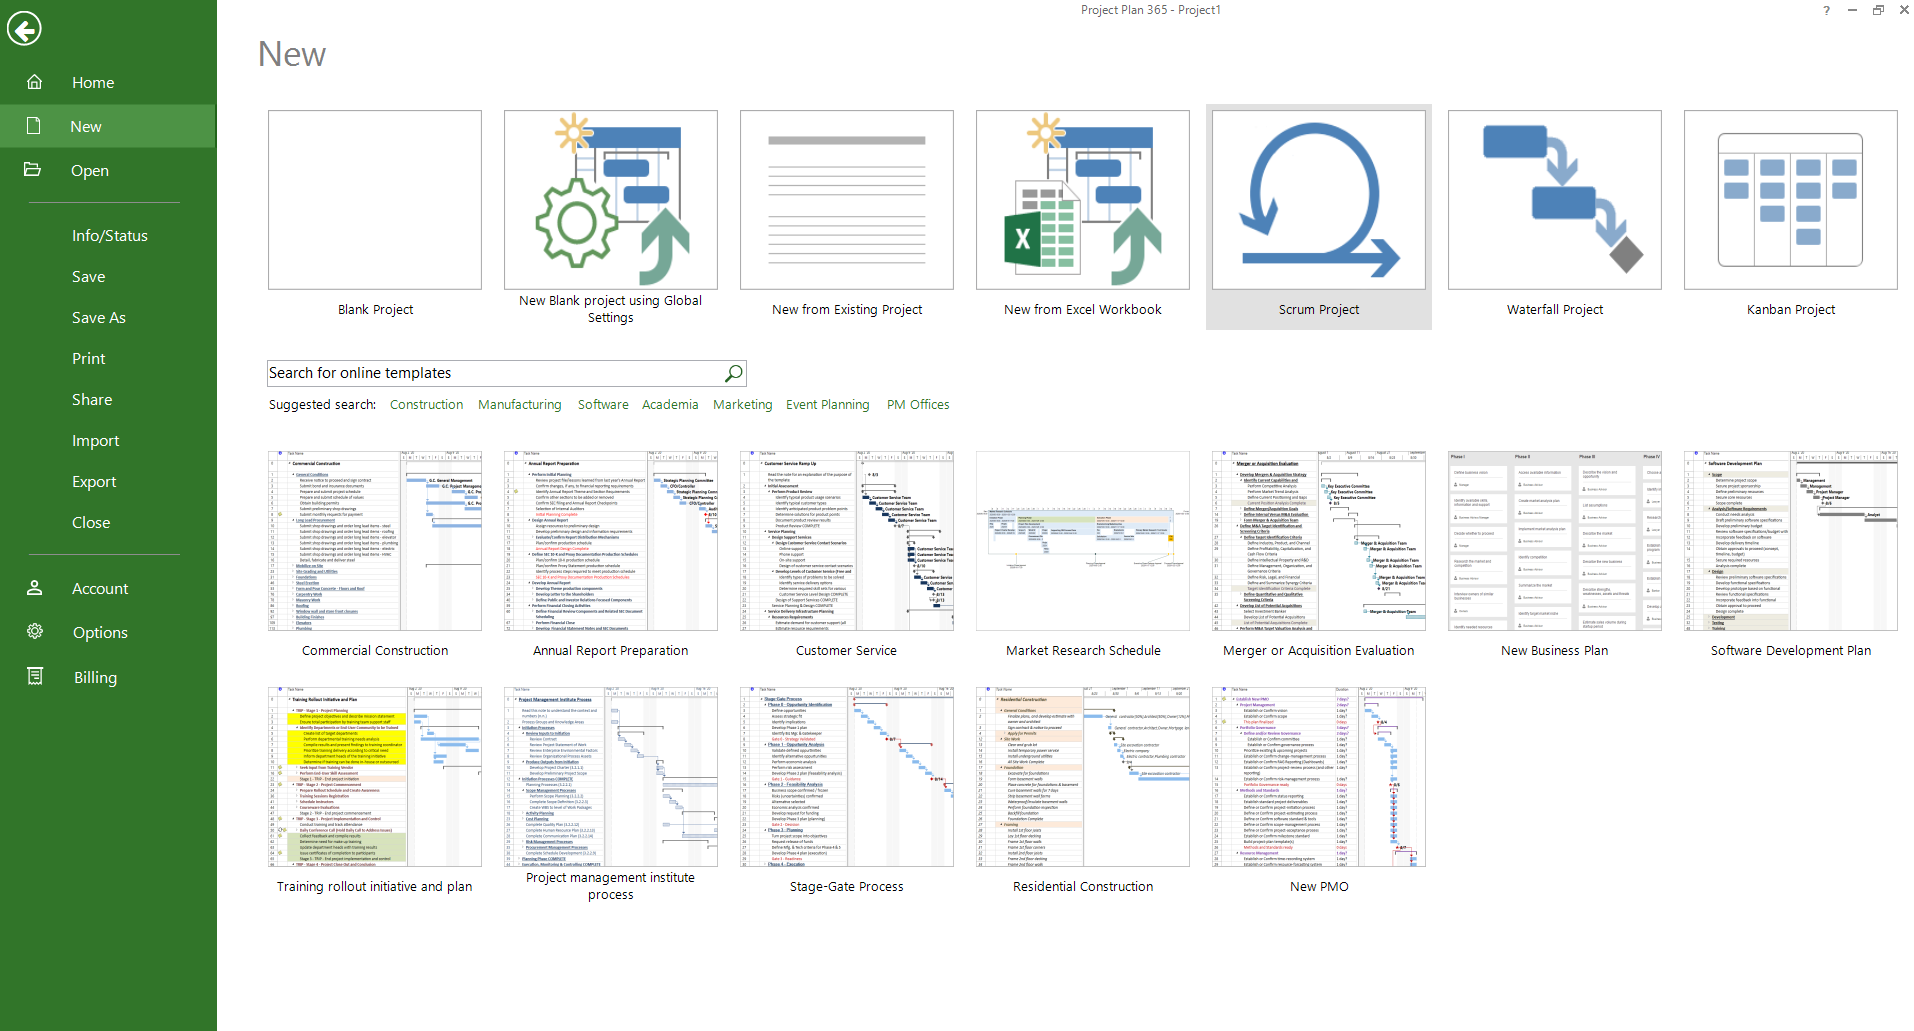
2. Select Scrum Project or Kanban Project.
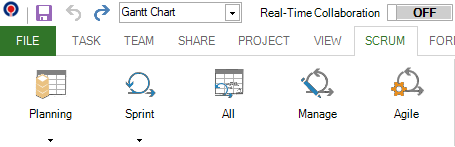
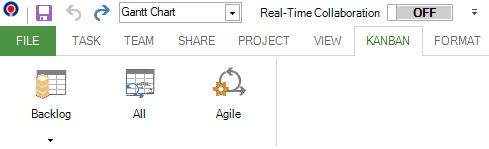
3. Choosing any of them will enable a ribbon tab (Scrum or Kanban) with different options.
Step by step on how to add Agile to an existing project:
1. Open the desired project.
2. Go to menu Project - Agile.

3. On Agile Methodology dialog select Scrum, Kanban or None.
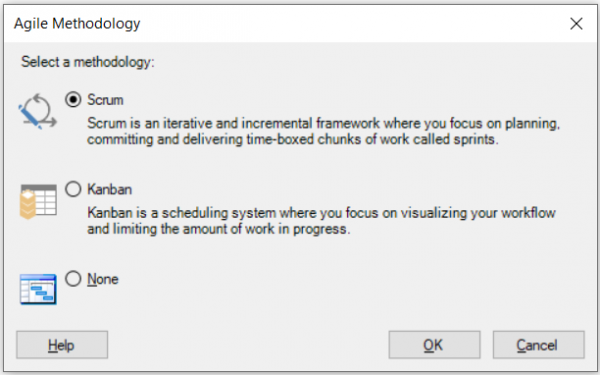
You can also use this dialog to switch from one methodology to the other.
Notes: Removing or switching the agile methodology from a project will not remove agile related data. This means that even if your project's agile methodology is set to None you will still be able to visualize and modify agile related data (sprints, board statuses, agile views).
Agile views
Project Plan 365 provides several views for agile project analysis:
- Task Board;
- Backlog Board;
- Sprint Planning Board;
- Current Sprint Board;
- Agile Tasks;
- Backlog Sheet;
- Sprint Planning Sheet;
- Current Sprint Sheet.
Sheet-based views allow tabular display using predefined tables and filters, while board-based views provide a more visual representation of the agile project – tasks are organized on board columns that can be either sprints or statuses.
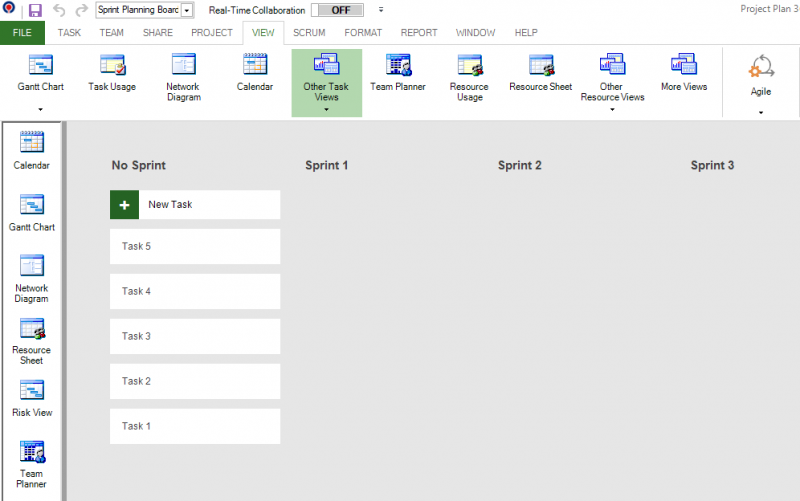
Sprint Planning Board
Task Board
Step by step on how to work with agile in Project Plan 365:
1. To create an agile project in Project Plan 365, you first need to add tasks to the backlog, then assign tasks to sprints (Scrum only), and finally move tasks across the board as your team works on and completes them.
2. You can see all of your agile tasks in the Gantt chart view and manage them using both traditional waterfall methods and agile methods. You can also run only a subset of a traditional project using an agile method. See manage your agile tasks in the Gantt chart.
3. Add tasks to the backlog.
Your backlog for a project is the list of tasks that your team maintains related to the accomplishment of that project. In Kanban and Scrum, this will be one large prioritized list.
4. Adding new tasks in board-based views.
Do one of the following:
- On the Scrum tab, choose Planning, then Sprint Planning Board.
- On the Kanban tab, choose Backlog, then Backlog Board.
In the first column, either No Sprint for Scrum or Backlog for Kanban, select New Task, type a task name, and then choose Add or press Enter.
5. Edit tasks in board-based views..
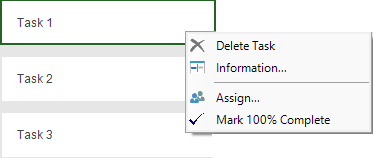
To add more information to your task you can double click the newly added task and Task Information dialog will be shown. You can also select more options (delete task, open Task Information dialog, assign resources, mark 100% complete) by right clicking a task:
Below you have an example of how various tasks (from left to right – simple task, task with resources assigned, task 100% completed) will look like in a board view:

6. Move tasks across the board.
You can move tasks across the board to either update their board status, to assign the selected task to a specific sprint or to reorder them in the current board column. To move a task just click on it and drag on the desired position (drag-and-drop).
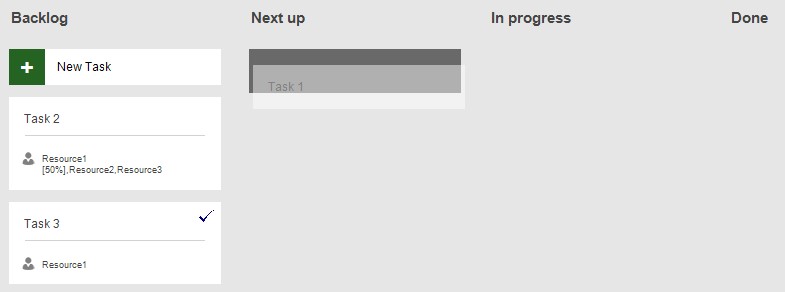
Backlog Board view
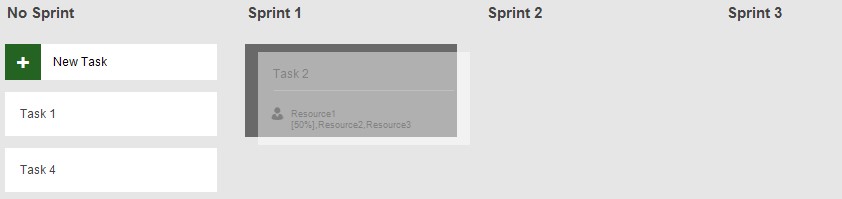
Sprint Planning Board view
7. Search for a task in the current board.
If you need to quickly find a task you can use the real-time search functionality offered by all board-based views. In the right-top corner click on the search icon and type in the text box what you are looking for. As you type you can see that the board will only contain tasks matching your search:
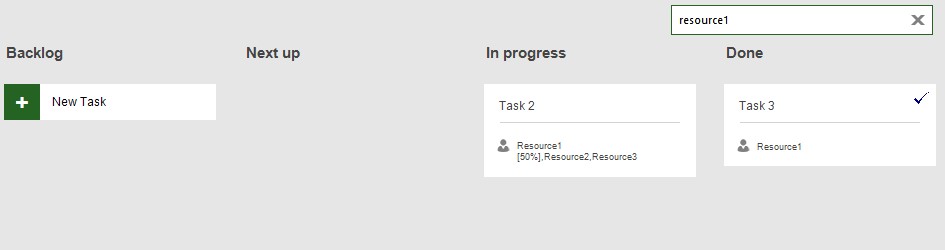
in this example – search tasks that have "resource1" assigned
To exit/discard a search just click on the "X" symbol.
8. Edit board status columns.
You can customize your Backlog Board by:
- Add new board status columns;
- Rename board status columns;
- Delete board status columns;
- Move board status columns.
To add a new board status column, go to Backlog Board view and click on the last board column "Add New Column". You will be prompted for a name then you can click anywhere on the board and the new board column will be added:


Add New Column
To access the other options listed above go to Backlog Board view, right click on a board status column title and select the desired option:
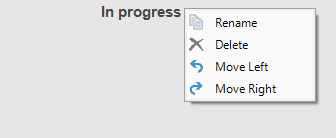
Board Status column contextual menu
Notes:
- First board status column (Backlog) cannot be moved or deleted;
- Only empty board columns can be deleted.
9. Manage sprints.
To manage sprints, you need to open the Manage Sprints dialog (Scrum - Manage or Sprint Planning Board - Right click on sprint title - Manage Sprints).
You can customize your sprints name, length and start date of the first sprint. Project Plan 365 will automatically generate start and finish dates for the rest of your sprints based on the start date of your first sprint.
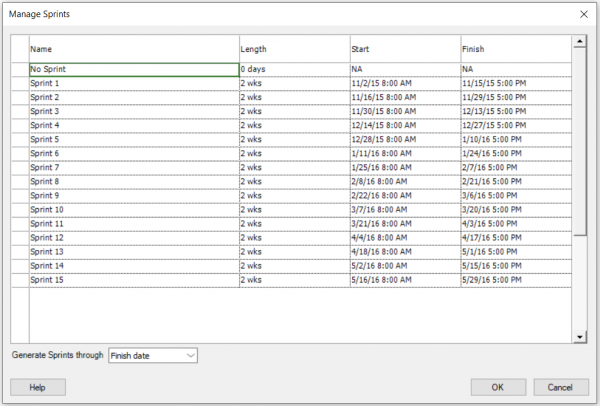
Manage Sprints dialog
By default, Project Plan 365 generates sprints through project's finish date.
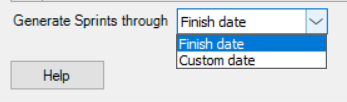
Generate Sprints options
You can also specify a custom date:
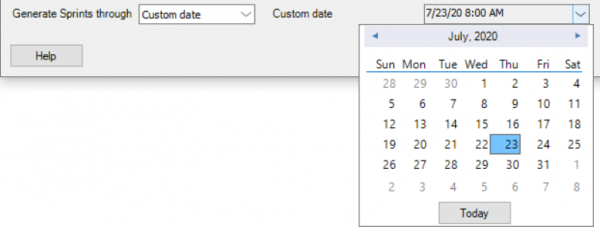
Picking a custom date
Once you finished editing your sprints click OK to apply your changes.
Notes:
The custom date selected must be after the first sprint's start date, else you will receive an error message.