
Once you decided on the work needed to accomplish your project and the necessary stages to achieve intermediate goals of your project, you are ready to create the task list for your project. The task list is an important aspect of your project, an incomplete or badly designed task list can seriously affect your project's progress. Introducing milestones in your project and defining summary tasks helps you to better structure your project and to better evaluate the progress of your project.
The first step in project planning is to create the Work Breakdown Structure (WBS). A typical project consists of a series of related tasks, the building blocks of your schedule. Therefore, the work required in a project is usually divided into several activities. This approach allows for better estimating the duration and the costs of the project and for better tracking its execution.
Therefore, a first step in project planning is entering the task list that will be part of your project and they are required in order to reach to the desired goals in a specified period of time. So, you will have to define the project tasks, such that the project can be seen as a set of tasks, where each task reflects a piece of work that must be done in order to contribute to the project completion.
How many activities should a project have? In a first step a few general phases are delimited, each one having a corresponding working package and some deliverables. i.e., for building a machine, the following phases are necessary: developing the product specs, designing, developing and testing. To estimate the work/duration of each phase it is necessary to subdivide each phase in several smaller tasks. Successive subdivisions may be necessary until the components obtained are manageable in terms of duration, and responsibility. These activities can be conducted in parallel or may depend on one another.
In Project Plan 365 you introduce a new task by simply entering a task name in an empty row. Select the task row where you want to insert a new task and in the Task Name column, type a task name. Press Enter key or press arrow down.
By default, each new task you create will have as start date the Project Start Date and a duration of one day. You can change the duration as you add each task or after you finish entering all of them. You can assign durations to tasks using minutes (mins), hours (hrs), days, weeks (wks) or months (mons) as duration unit. In the Duration column you should be able to specify the time taken for the task to complete. So, for instance enter the number of days followed by "days" unit or in case of shorter tasks enter the number of hours followed by "hrs" duration unit.
After task creation, you may change the Start Date of the task, its name, its duration, assign resources and team members, and impose some time constraints depending on the start/finish time of other tasks in the project by creating links between tasks.

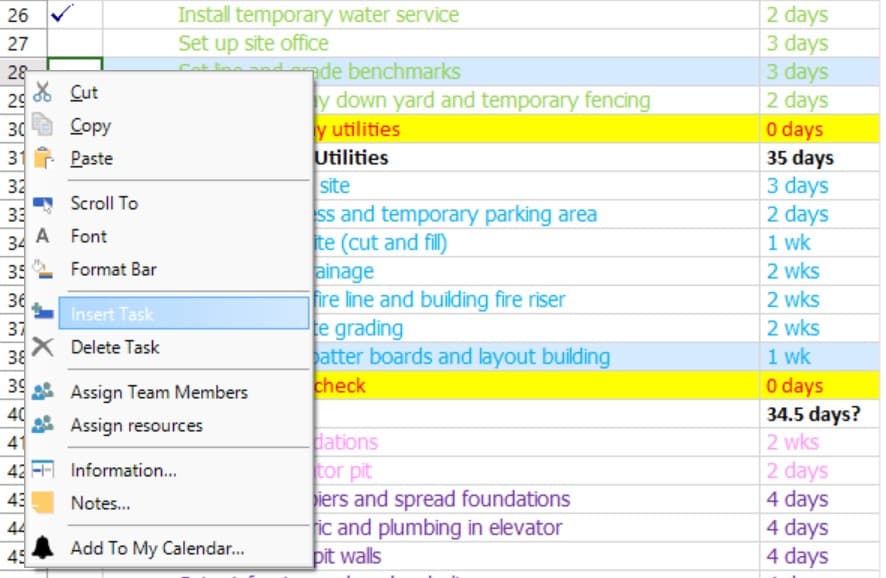
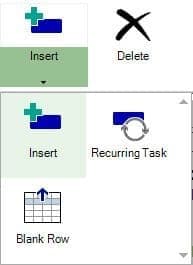
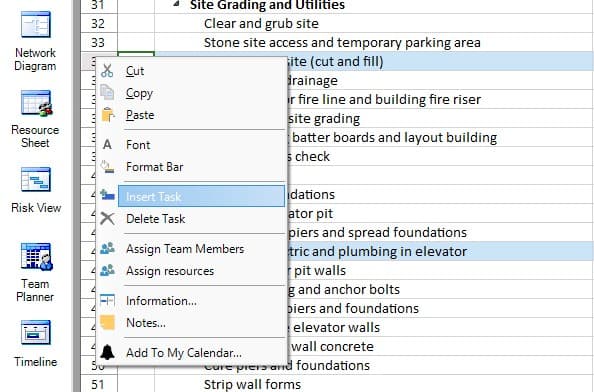
To insert a new task between two existing tasks, you need to select the second task, go to TASK menu, click on the top part of the Insert option and type the name of the new task. Another possibility is to press the Insert key on your keyboard or to right click on a task id in the grid and select Insert Task from the contextual menu that appears.
A new task will be inserted having the title "<New Task>" and duration of 1 day?.
There are three possible positions where you can insert a task in your project:
- at the top of the tasks list in the Gantt grid.
- at the bottom of the tasks list in the Gantt grid.
- in the middle, relative to the selected task position: the task is inserted above the selected row.
You can insert multiple tasks at a time by selecting multiple consecutive rows using either CTRL or SHIFT keys on your keyboard and then clicking on Insert option from the Task menu, or pressing on Insert key or using the Insert Task option from the contextual menu. These tasks will be positioned above the selected rows in the tasks list. The number of newly inserted tasks will be equal to the number of selected rows.
Notes:
- Adding a task is allowed only in Gantt Chart, Tracking Gantt and Task Sheet views.
- We don't have a limit on the number of tasks added to a project.
- While entering task duration, you may use the up-down arrows to increase, respectively decrease task duration by 1 unit.

Step by step on how to insert a task in your project:
1. On the View menu, click Gantt Chart.

2. In an empty Task Name field, type a task name and press ENTER or press the Down arrow key on your keyboard.
3. Another way is to click on Insert option under Task menu.
4. Another way is to press the Insert key on your keyboard or right click on the ID of the task and select Insert Task from the displayed contextual menu.
 Practice
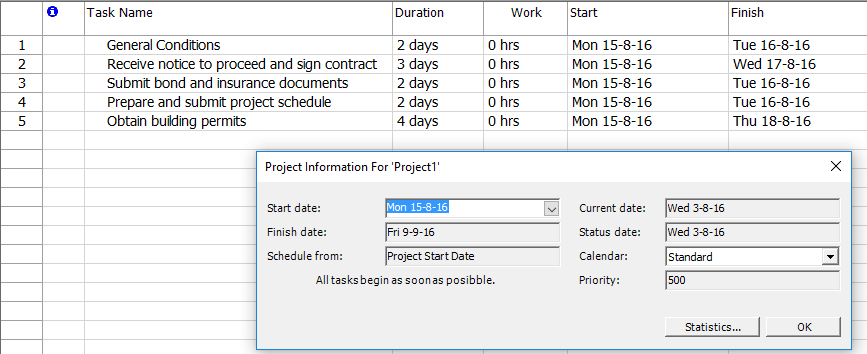
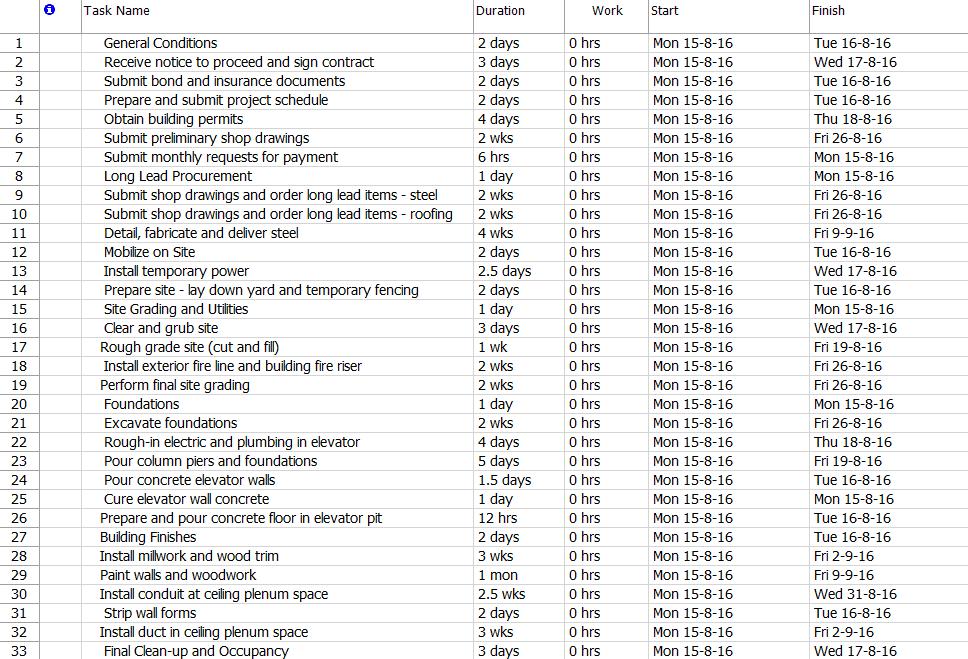
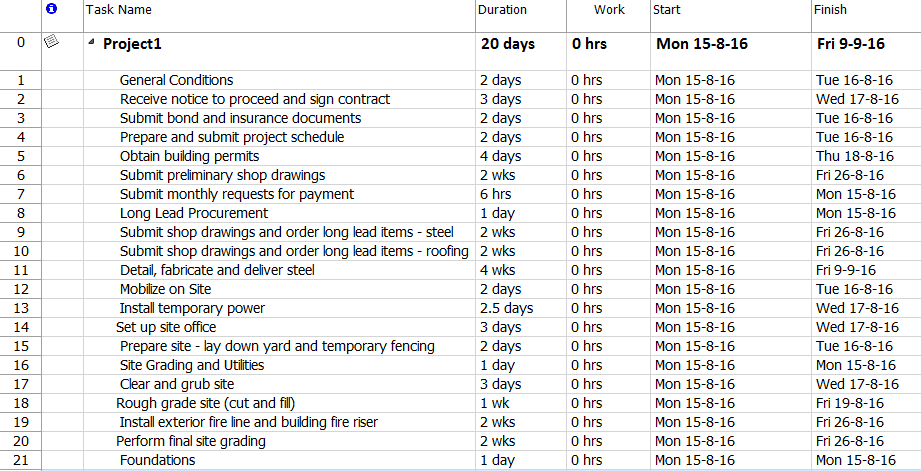
1. In the Gantt Chart view enter the following 5 tasks, which denote activities required in a project plan, describing the construction of an office building: General Conditions of 2 days duration, Receive notice to proceed and sign contract of duration = 3 days, Submit bond and insurance documents of duration = 2 days, Prepare and submit project schedule of duration = 2 days and Obtain building permits which lasts 4 days. Use the Task Name column to enter task names and specify task duration in the Duration column.
You should obtain something like this:

2. Notice that the start date of the tasks is equal to the Project Start Date. To check the Project Start Date, go to Project menu and select Project Information option.
3. As you enter duration for a task, notice how the finish date of the task is automatically adjusted for you, taking into account the start date and the duration of the task. If you look in the right side Gantt Chart, a bar will be drawn for each task that you enter in the left table. The bar's length and position on the timescale indicate when that task begins and ends, as well as its duration.

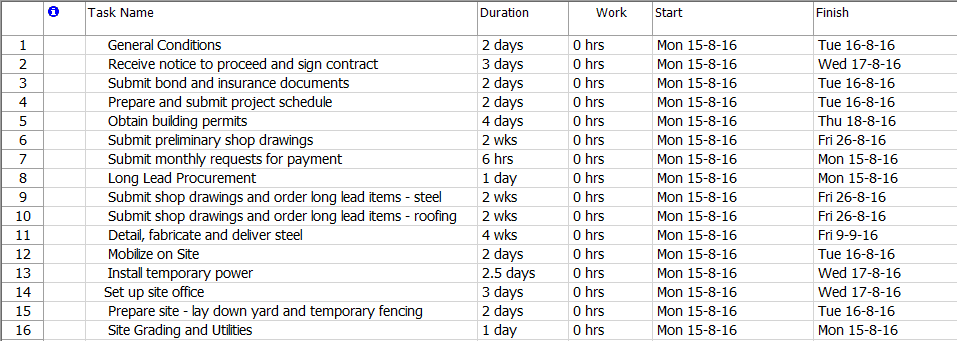
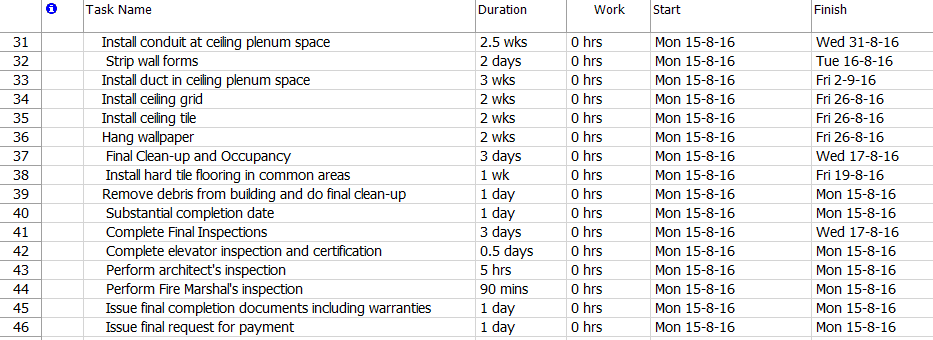
4. Continue introducing the WBS (task list) by entering below, starting with the next blank row, these tasks:
Task Name | Duration |
|---|---|
Submit preliminary shop drawings | 2 wks |
Submit monthly requests for payment | 6 hrs |
Long Lead Procurement | 1 day |
Submit shop drawings and order long lead items - steel | 2 wks |
Submit shop drawings and order long lead items - roofing | 2 wks |
Detail, fabricate and deliver steel | 4 wks |
Mobilize on Site | 2 days |
Install temporary power | 2.5 days |
Prepare site - lay down yard and temporary fencing | 2 days |
Site Grading and Utilities | 1 day |
Clear and grub site | 3 days |
Rough grade site (cut and fill) | 1 wk |
Install exterior fire line and building fire riser | 2 wks |
Perform final site grading | 2 wks |
Foundations | 1 day |
Excavate foundations | 2 wks |
Rough-in electric and plumbing in elevator | 4 days |
Pour column piers and foundations | 5 days |
Pour concrete elevator walls | 1.5 days |
Cure elevator wall concrete | 1 day |
Prepare and pour concrete floor in elevator pit | 12 hrs |
Building Finishes | 2 days |
Install millwork and wood trim | 3 wks |
Paint walls and woodwork | 1 mon |
Install conduit at ceiling plenum space | 2.5 wks |
Strip wall forms | 2 days |
Install duct in ceiling plenum space | 3 wks |
Final Clean-up and Occupancy | 3 days |
Install hard tile flooring in common areas | 1 wk |
Remove debris from building and do final clean-up | 1 day |
Substantial completion date | 1 day |
Complete Final Inspections | 3 days |
Complete elevator inspection and certification | 0.5 days |
Perform architect's inspection | 5 hrs |
Perform Fire Marshal's inspection | 90 min |
Issue final completion documents including warranties | 1 day |
Issue final request for payment | 1 day |
You should obtain a task list like below:
5. Besides this straightforward method of adding a new task by entering a task name on an empty row, you can also insert a new task in the middle of the tasks list. Let’s suppose that we forgot to add a task called Set up site office of duration = 3 days and we want to insert it before the task called Prepare site - lay down yard and temporary fencing. To achieve this, select Prepare site - lay down yard and temporary fencing task and press on top of the Insert option.
You should get something like this:
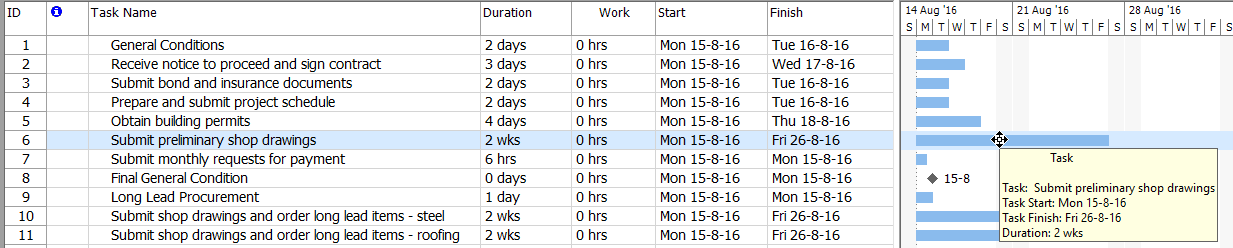
8. Visualize the project summary task by checking the Show Project Summary Task option, available under File - Options - Advanced tab.
You should obtain the following:
Uncheck the Show Project Summary Task option to hide the project summary task.
 Video
Video
If you prefer to see things in action, rather than reading text, watch out this video, which covers some of the topics from this section.