
After you inserted the tasks list from your project, it's time to outline the tasks in your project schedule. In this way you organize your schedule, so you can see the structure of your project, making the schedule easier to manage. With outlining you can arrange tasks in a hierarchical structure so you can see how subtasks fit within broader groups of tasks called summary tasks. Also it allows you to identify the major phases of your project with summary tasks.
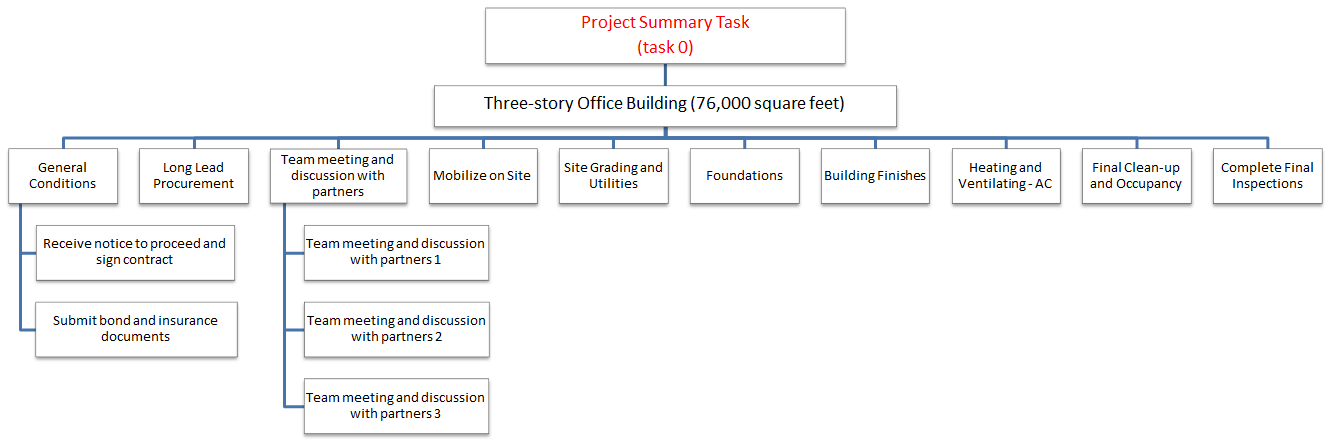
The WBS is such a decomposition of the entire work of the project on several levels, resulting in a tree structure: the work of the project is divided in several activities, with each activity, at its turn, being divided into shorter-term tasks, etc.
Estimates (on duration, costs) are actually required only on the bottom level of the tree; the estimates for tasks on superior levels - also called summary tasks - are obtained based on the estimates of the child tasks. Not all summary task values show the combined total of your subtask values. Although some summary task values (such as cost and work) represent the total subtask values, others (such as duration and baseline) do not. For example, application calculates the duration of a summary task as the total work time between the earliest start date and latest finish date of its subtasks.
A part of a possible WBS for the construction of an office building is illustrated below. More levels can be added to the existent ones such that each activity is planned in more and more detail.
To create the tree structure corresponding to your WBS, you enter at first the summary and child tasks on the same level, each summary followed by its children. Then, you indent the child tasks by using one of the following options:
TASK menu → Indent button

or
Dragging to the right the name of the task by using the mouse
When you indent a task, it becomes a subtask of the nearest preceding task at a higher outline level. The preceding task becomes a summary task and it is highlighted with bold font. You create a summary task by indenting the task directly following it (in the order of task ID numbers). You can move a task to a higher level by outdenting, unless it is already at the highest level.
You can indent the tasks as many levels as you need to reflect the organization of your project. Using outlining, you can create up to 10 indented levels of tasks in your task list.
Step by step how to organize task using Indent / Outdent:
1. Go to menu View - Gantt Chart.

2. Click the row for the task that you want to indent as a subtask or outdent as a summary task.
3. Click Indent to indent the task, making it a subtask.

4. Click Outdent to outdent the task, making it a summary task.


You do not need to create the task on the first level. This corresponds to the Project task that is created by default in Project Plan 365. The project task summarizes all the tasks in the project. It has ID 0 and is the root of the WBS. To view the project task check the "Show project summary task" under FILE menu → Options → Advanced tab. The Project task has assigned by default the name of the project.
You can indent a task quickly with the mouse. Point to the first letter of the task name. When the pointer changes to a double-headed arrow, drag right to indent the task or drag left to outdent the task.
To indent multiple tasks at a time you should first select the tasks that you want to indent. To select multiple tasks press on the cell containing the ID of task then hold SHIFT or CTRL key for contiguous, respectively non-contiguous selection. Then select the Indent option or use the mouse to indent the selected tasks.
![]() Practice
Practice
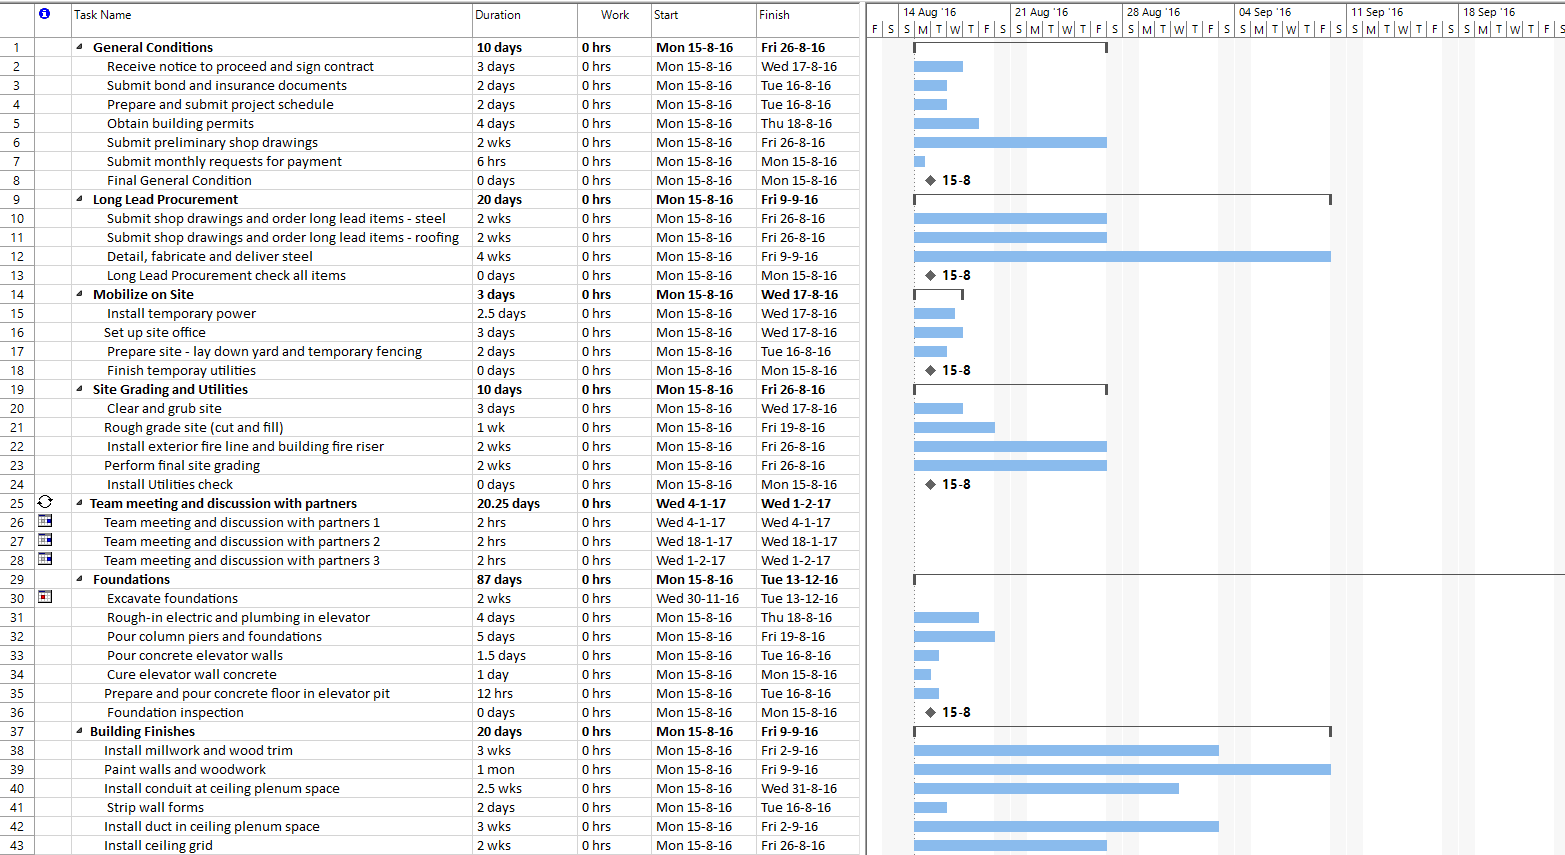
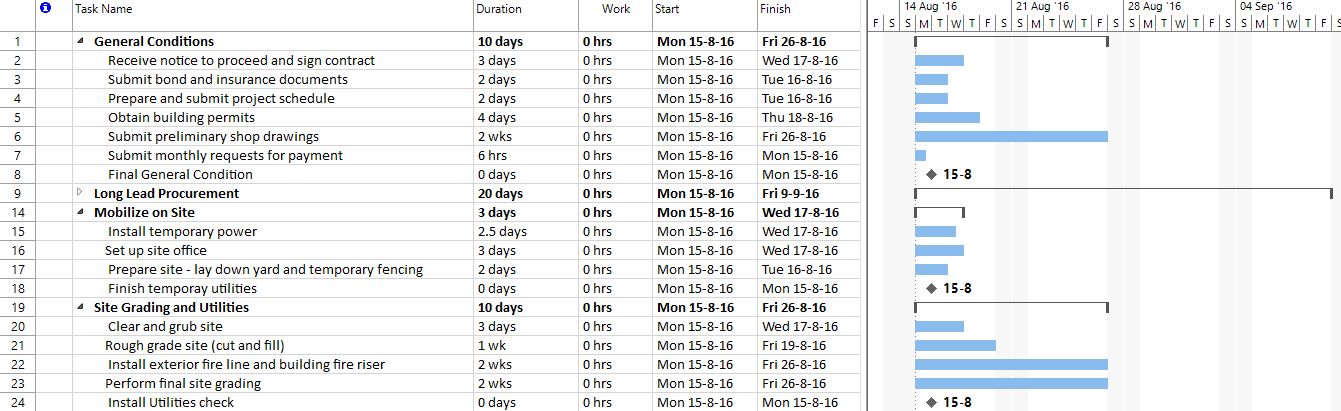
2. Notice the new durations and start and finish dates for the tasks that now have become summary (displayed in the above figure with bold font). Because Project Plan 365 calculates the summary task values, they cannot be edited. If you need to change a summary task's values, such as duration, you need to update the individual subtasks. Summary task values will be then recalculated. In the right side part of the Gantt Chart you will see that the bars corresponding to summary tasks are drawn in black and has a different shape than the rest of the tasks.
3. You can expand or collapse a summary task by pressing on the sign to the left of a task name. By collapsing and expanding an outline, you can hide or display the subtasks of a summary task. You can also collapse or expand specific parts of your outline, highlighting or hiding the tasks or group of tasks you want.
If you collapse task with ID = 9 (Long Lead Procurement) you should get the following. Notice the tasks that currently are not visible anymore in the Gantt Chart view:
Press again the sign next to the task name to expand the task.
4. You can use the Outline option from the Project menu to see only the tasks at a specified outline level. To show only part of the outline (A hierarchical structure for a project that shows the tasks groupings), select from the opened Show window the outline level number up to which you want to view.
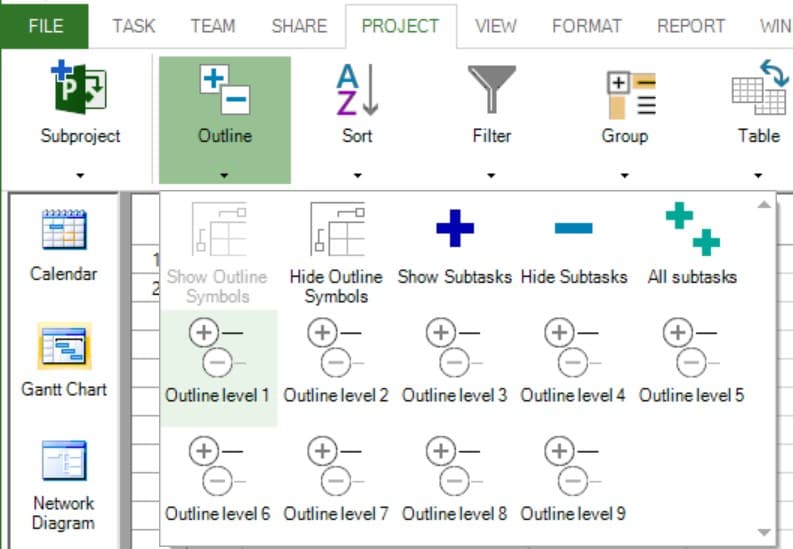
If you choose to select Outline level 1, you should obtain the following:

To display again all tasks in your project select Outline option and in the shown dialog choose All subtasks.
 Video
Video
If you prefer to see things in action, rather than reading text, watch out this video, which covers some of the topics from this section.