
Project Plan 365 supports both automatically and manually scheduled tasks. Automatically scheduled tasks have start, finish and duration values calculated by Project Plan 365 based on dependencies, constraints, calendars, and other factors.
You can have a manually scheduled task (or for short, manual task) placed anywhere in your plan, and Project Plan won't change it. This new improvement gives you greater compatibility with all plans created in Microsoft Project. Manual tasks should be used when you want to explicitly set a task's start and finish dates and not allow it to be changed automatically by the scheduler based on changes to other tasks. When a task is in manually scheduled mode, the Start, Finish, and Duration columns can be blank or include text values in addition to recognizable dates.
The Task Mode field indicates whether a task is scheduled manually or automatically, which gives you the option of deciding how much control you want over task scheduling in a project. By default, tasks are set as auto scheduled, with a start date, finish date, and duration calculated based on inserted fields values.
The Task Mode field is not included by default. Use the Insert Column option to insert and display Task Mode column in views like Gantt Chart, Tracking Gantt or Task Sheet view. The Task Mode column displays an icon indicating whether a task is a manually scheduled task, or an automatically scheduled task.
Step by step on how to insert the Task Mode column:
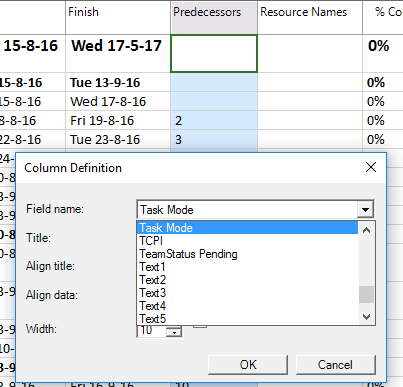
1. Use the Insert column option under Format menu.
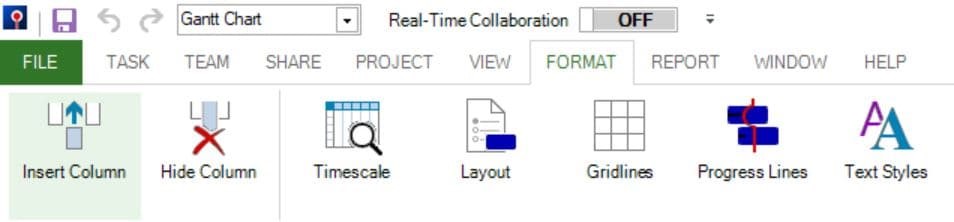
2. Select in the Field Name: Task Mode.
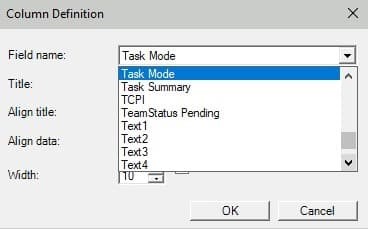
3. Press OK.
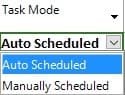
Step by step on how to change the task mode for a task:
1. Click on the Task Mode field in Gantt Chart view.
2. In the list that appears, click Manually Scheduled or Auto Scheduled.
There is also another way to change the task mode for a specific task:
1. Select the desired task, then go to the Task menu and select the Task Information dialog.

2. In the General tab, Schedule mode group, select Manually Scheduled or Auto Scheduled.
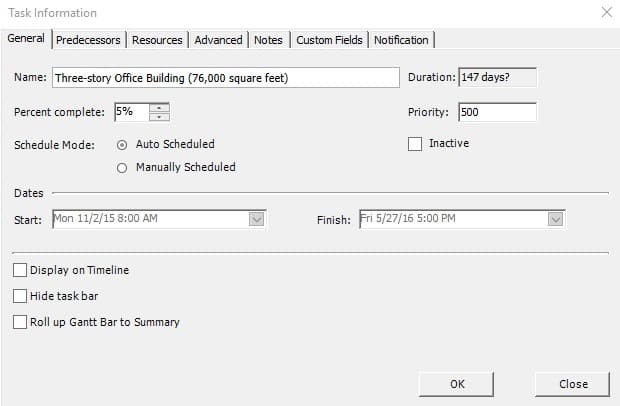
3. Click OK.
Note: In Project Plan 365 app we support both Automatically Scheduled and Manually Scheduled tasks.
If you want to have in your plan only manually scheduled tasks, before you start planning, set the manually scheduled mode from Options dialog, Schedule tab. In this way, all the newly inserted tasks will be set as Manually Scheduled:

 Practice
1. To check that all the tasks from the commercial construction plan are automatically scheduled, which is the default option, insert the Task Mode column in the Gantt Chart view. Select Predecessors column and under Format menu, select Insert Column option. Choose as Field Name Task Mode.
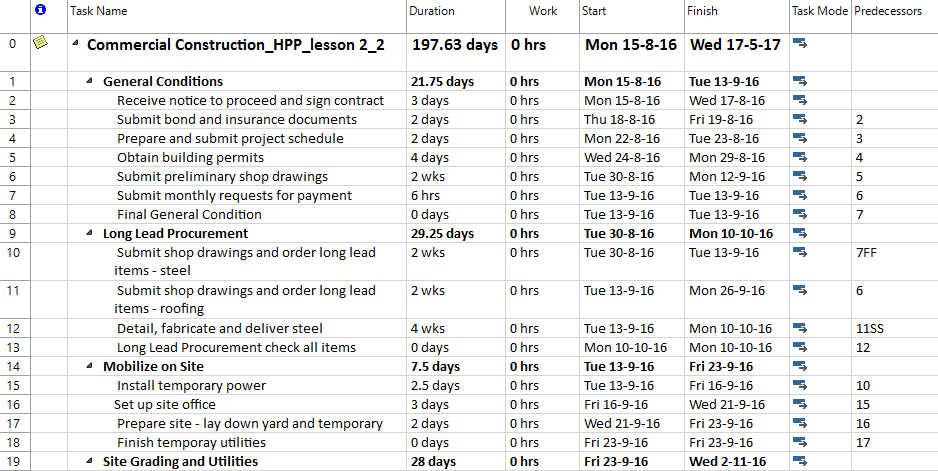
The Task Mode column will be inserted in front of the Predecessors column. As you can notice, the icons in the Task Mode column indicate that all the tasks are automatically scheduled.
Using Hide Column option, hide this column since we will no longer need it.
 Video
Video
If you prefer to see things in action, rather than reading text, watch out this video, which covers some of the topics from this section.