
Since we established the list of activities involved in our project, we can set a deadline for some tasks. Deadline dates are a handy way to alert you to problems in your schedule, but they are often overlooked. If you want a task to start or finish on a certain date but want to retain the flexibility of the schedule, you can enter a deadline date.
A deadline is a target date indicating when you want a task to be completed. Imposing an inflexible constraint such as Must Finish On, that sets the finish date can lock up your schedule in ways you don't want. Instead, if you just need a reminder, you can use the deadline field of a task. This will create a green downward arrow on the Gantt chart, that marks the deadline date. The advantage of deadlines is that they keep track of its finish date without locking the schedule.
If the finish date of a task passes the task deadline, a warning icon will be shown in the Indicators column.
Step by step on how to set a deadline for a task:
- Select a task for which you want to set a deadline.
Note: There are two ways to set a deadline for a task.
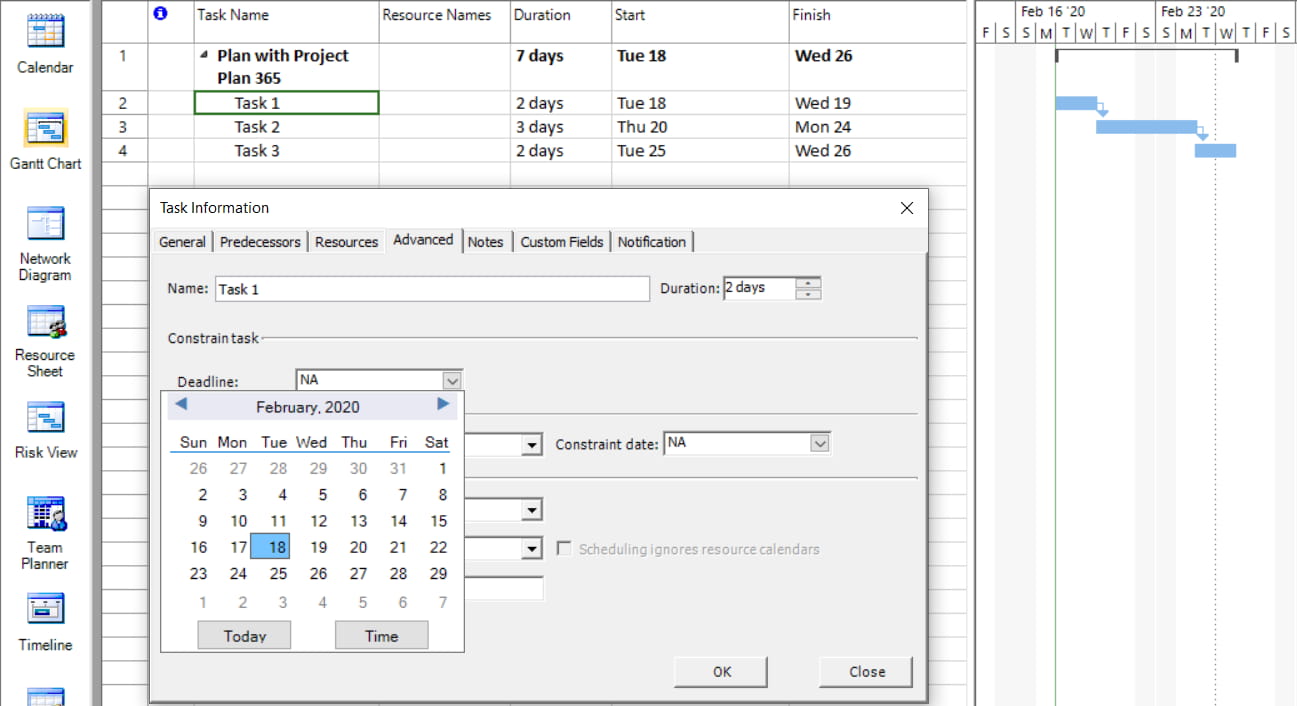
Method 1 – by using Task Information Dialog
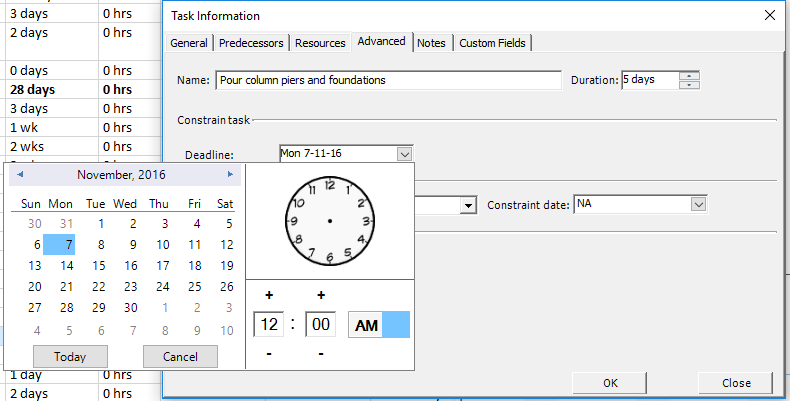
- Go to Task – Task Information or double-click on the task to open the Task Information dialog-box.
- Under the Advanced tab, select a date for the Deadline field.
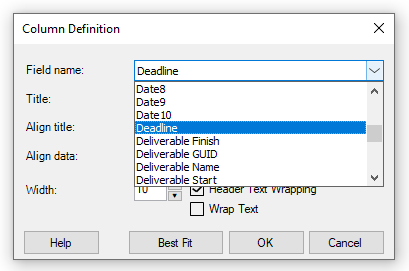
Method 2 - directly in the grid, by using the Deadline column
- Go to Format – Insert Column and select the Deadline for the Field name, then click OK.
- Select a date for the Deadline field.
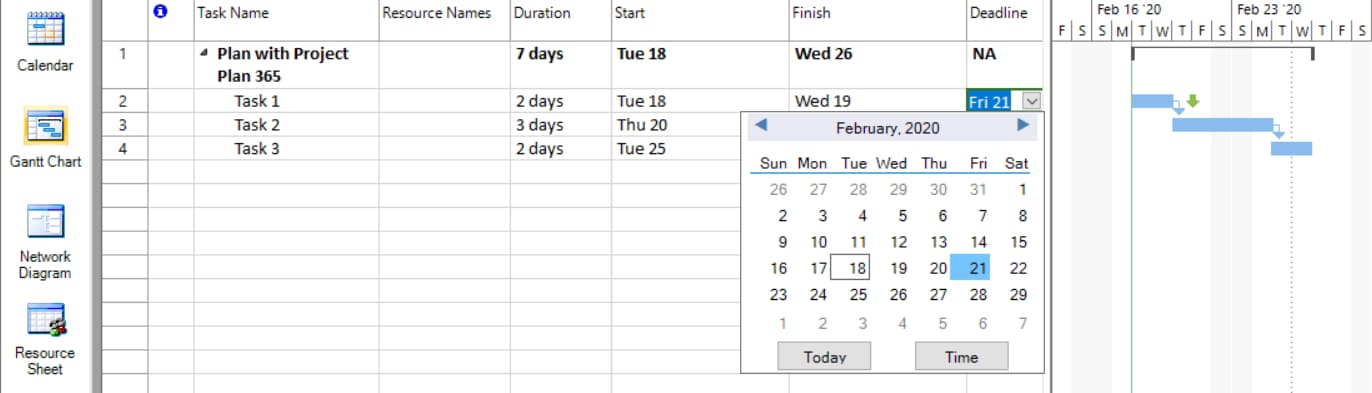
- See that in the Gantt chart a deadline is displayed as a little green arrow. When you hover over the green arrow the deadline date is shown.
![]()
Note: If the deadline is not met, the red exclamation icon will be displayed in the Indicator column. Hovering over this icon in Project Plan 365 will give you information about the issue at hand.

Tip:
Many new Project Plan 365 users accidentally make the mistake of using too many semi-flexible and inflexible task constraints. This often comes from the urge to set Must Finish On constraints or actual Finish dates when creating their tasks. Doing this then often produces an inflexible or semi-flexible constraint on the task.
A better way to set task deadlines is to simply set a deadline date for a task. Then use the default As Soon As Possible (ASAP) constraint. This way, Project Plan 365 can reschedule the task with the greatest flexibility. You can also view the deadline date for the task in the Gantt Chart.
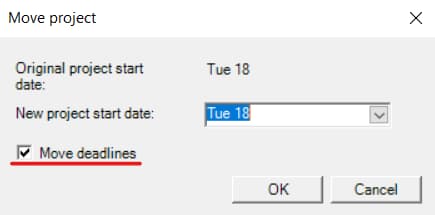
Note: When moving the project, you will be able to select to also move or not the deadlines.
Apply a deadline to a task when you want to track a deadline for a specific task, but don't want to lock your schedule by setting an inflexible constraint such as Must Finish On or Finish No Later Than. Such constraints affect scheduling, while the Deadline field simply causes an indicator to show if a task has not been completed by its deadline. Certain tasks in your project should finish by specific target dates. However, you don't want these dates to actually affect how Project Plan 365 schedules the tasks; you just want to be alerted if the tasks are not completed by these dates. Add the Deadline field to the Entry table of the Gantt Chart view, and set the deadline dates for these tasks.
By setting a task deadline, instead of imposing an inflexible constraint for a task to mark its finish date, you can achieve a more flexible and dynamic project schedule. A dynamic schedule is properly sequenced and is free of any task constraints. The benefit is that the project manager can assess changes to the project end date (via the critical path) without experiencing constraint errors.
Deadlines can be added to any task in the project schedule. You may want to add specific deadlines based on the tasks on the critical path or on important milestones. The deadline gives you flexibility in setting a commitment date that isn’t tied directly to a baseline finish date.
 Practice
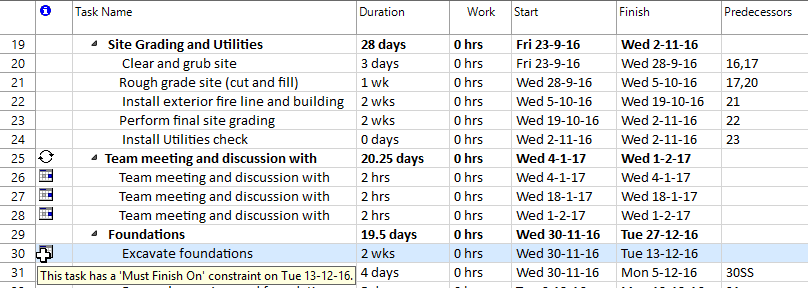
1. Let's consider the task with ID = 30 (Excavate foundations), which has set a Must FInish On constraint. However, this might not be the right choice, given the fact that this is an inflexible constraint, which reduces the flexibility of your schedule and tells Project Plan 365 that this task must finish on that date and not before.
A better approach is to let Project Plan 365 to handle start date with As Soon As Possible constraint and put the deadline information about the task, as a replacement for the Must Finish On constraint and the associated constraint date. For this, let's open the Task Information dialog for this task and then head to the Advanced tab. Here we will indicate 13 December 2016 as the deadline date and change the constraint type to As Soon As Possible:
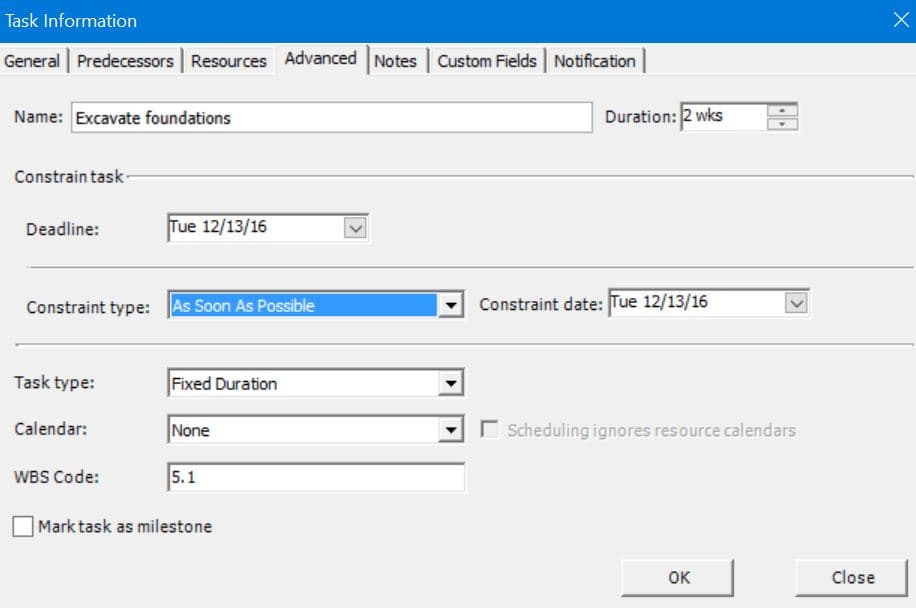
Also we will enter 24 in the Predecessors cell of this task. This is what you should get. Notice that in the Indicators column the icon corresponding to Must Finish On constraint is no longer shown.
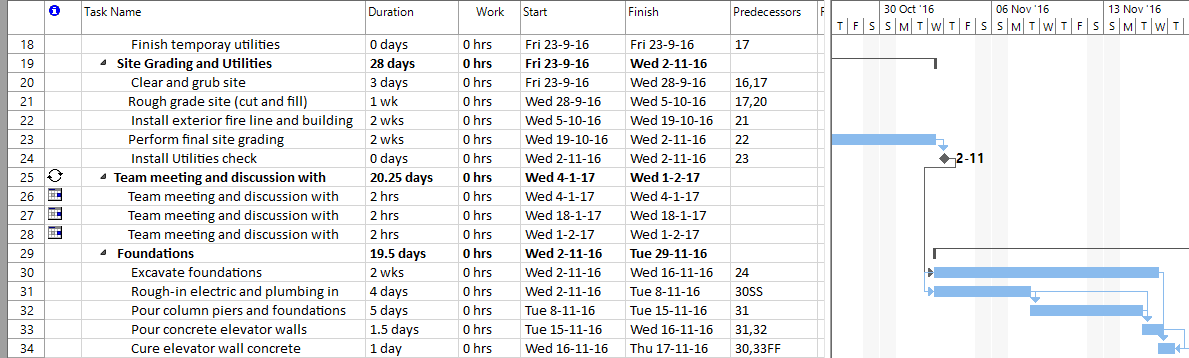
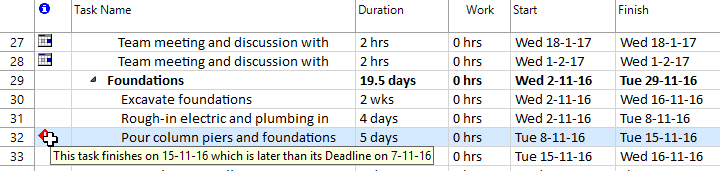
2. Once the deadline is set for the task, we will get the Deadline indicator in our Gantt diagram, marking the deadline date:

3. Notice how this change affects the duration and the finish date of the project.

Once the ‘Deadline’ is set, it shows up on the Gantt chart as a green arrow marking the ‘Deadline’ Date. Since the finish date of the task passes the task deadline a warning icon will be shown in the Indicators column.

If you hover over the indicator, it informs you that the task goes past its deadline.
5. You can also add the Deadline field to a task sheet when you want to enter, view, or change the deadlines of tasks in your project. To achieve this, select Predecessors column, press on the Insert Column option under Format menu and select Deadline from the list:
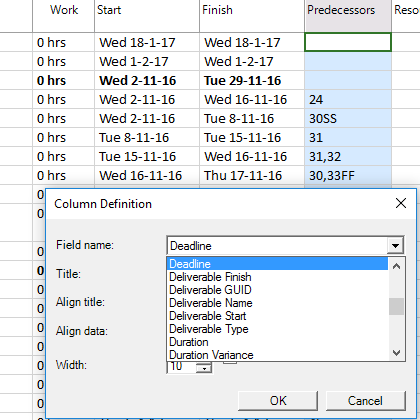
Once you press OK in this dialog, the Deadline column will show up in the task grid. You can notice the deadline values that we've set for the two tasks in our project.

Using Hide Column option from the Format menu, hide this column since we will no longer need it.
 Video
Video
If you prefer to see things in action, rather than reading text, watch out this video, which covers some of the topics from this section.