
To better highlight certain tasks or phases during the execution of your project, Project Plan 365 gives you the possibility to apply font styling to different tasks, such it is possible to set fonts for individual elements from your project. The Font option modifies the font, font size, and color for the selected text. In this way, you can apply formatting for individual tasks, rows, columns or cells in the left grid of the Gantt Chart, such as to better fit your visualizing needs. Use the Font options to format only the selected text.
Individual text formatting overrides formatting applied using the Text Styles command. For example, if you use the Text Styles command to format all noncritical tasks as regular 8-point, you can use the Font command to format a selected noncritical task as 10-point italic. The Font command affects only the task you selected.
To apply a different font to a specific task, cell or group of cells in the left side grid of Gantt Chart, first select the cells which you want to customize their appearance.
Step by step on how to change the font for selected text using Font Control:
1. Select the desired text.
2. Go to the Task menu and from “Font Control” make the desired changes.
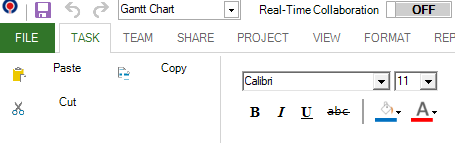
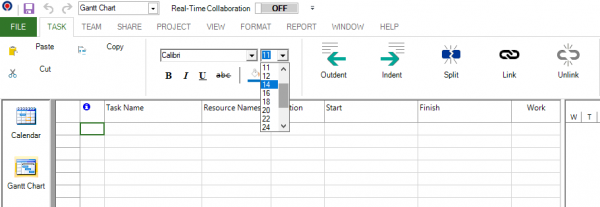
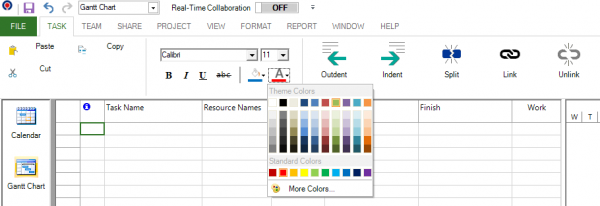
3. Click on the Font arrow to open the dropdown with the available Fonts.

4. Click on the Size arrow to open the dropdown with the available Font Sizes.
5. Click on the Bold and Italic options to change the Font Style.
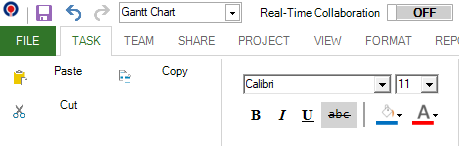
6. Click on the Underline button if you want to underline a specific text.

7. Click on the Strikethrough button if you want to draw a line over your text.
8. Click on the Background color option to change the background color.
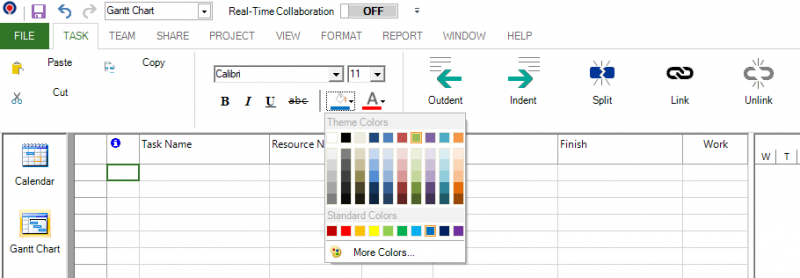
9. Click on the Text Color option to change the text color for a task or a set of tasks.
Step by step on how to change the font for selected text using the “Font” dialog;
1. Select the desired text.
2. Right click on the text and from contextual menu select “Font” option.
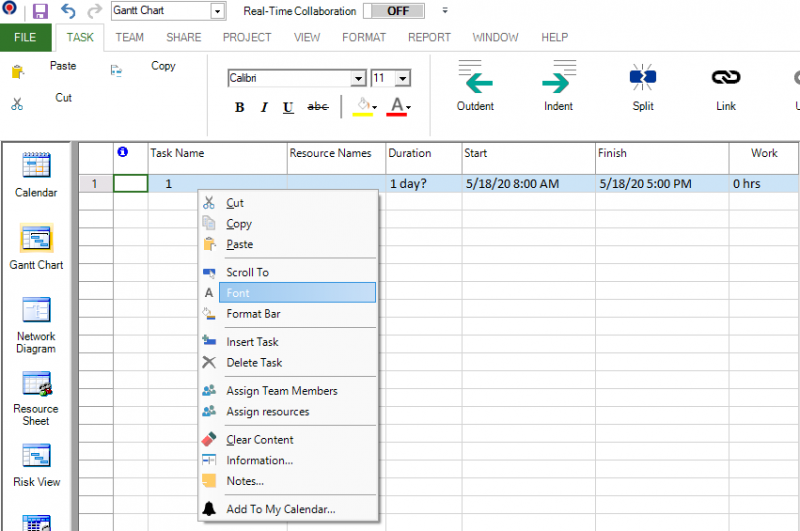
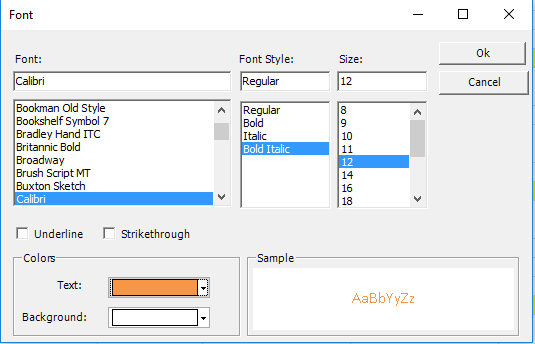
3. The Font dialog box will appear. Select the font, size, or color you want for the selected text in the current view.

4. Make the desired changes and press “OK” in the dialog.
The available options in “Font” dialog are:
1. Font – Allows you to choose the desired Font from the list;
2. Font Style – Allows you to choose the desired Font Style from the list;
3. Font Size – Allows you to choose the desired Size from the list;
4. Underline – Allows you to underline a specific text.
5. Strikethrough – Allows you to draw a line over a text.
6. Text Color – Allows you to change the text color for a task or a set of tasks.
7. Background Color – Allows you to change the background color.
To format all tasks in a particular category, such as summary tasks or critical tasks, use the Text Styles option, which can be found in the Format menu. You can also use the Text Styles command to format column titles, the timescale, and bar text on the Gantt Chart. In this way, rather than using Font option for changes to the current object's text, styles can be applied by task type to show emphasis.
 Practice
1. In the commercial construction project, for the project summary task, which is the first row in the table, let’s select the cells from the duration, work, start and finish columns. Hold down the shift key to select multiple cells at one. Then press on Font option from the contextual menu.
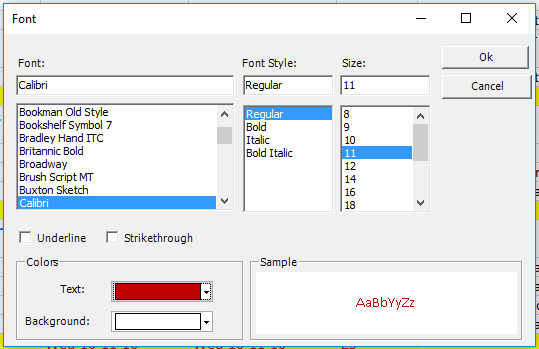
2. In the opened Font dialog, you can see that you can specify a particular font, style, size and colors for the selected text. To emphasize the duration, work, start and end dates for the project, choose Bold Italic for Font Style and orange for the text color.
Press OK in this dialog and notice the change in the row corresponding to task with ID = 0, which is the project summary task:

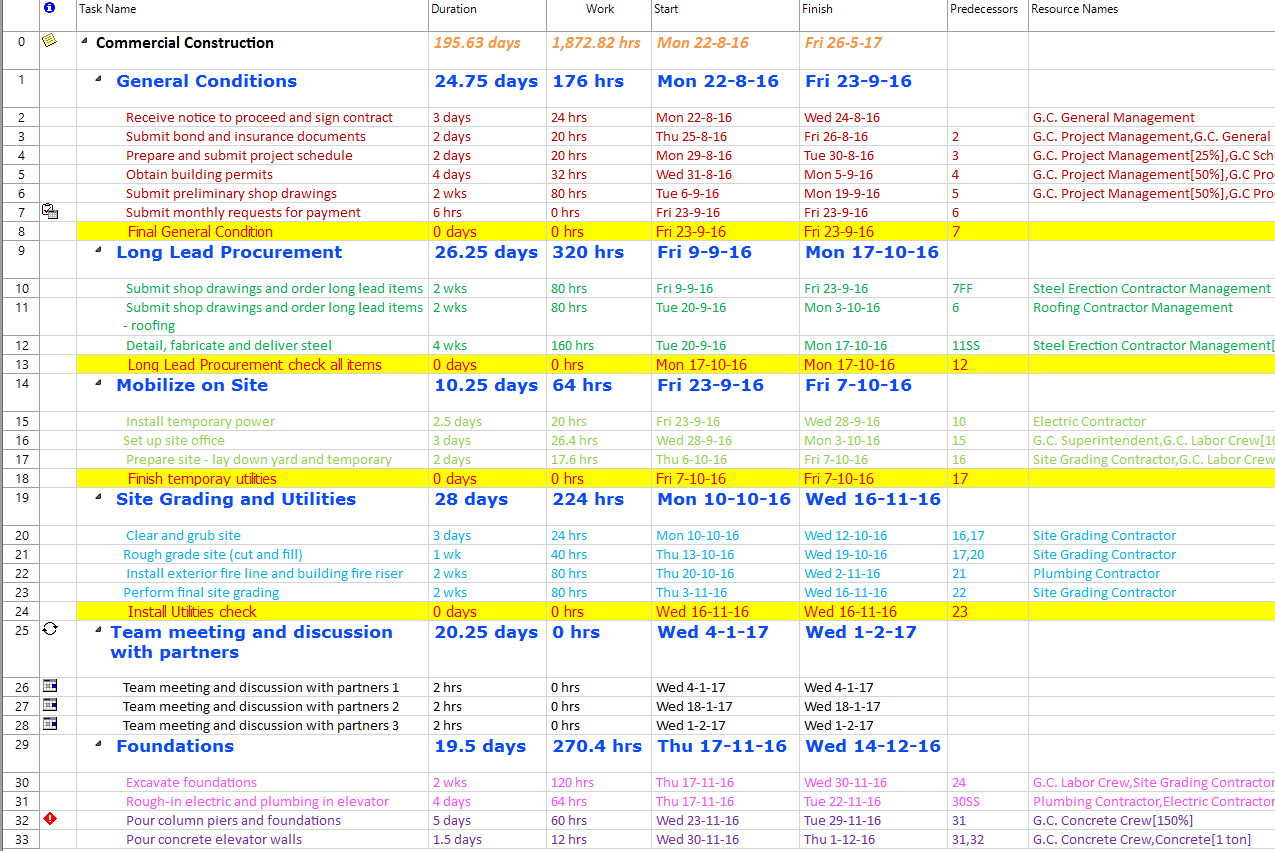
3. Besides that, you can select multiple rows at once using multiple selection and use a certain font and color to highlight them. Let’s select the rows from id = 2 to 7 and press on Font command. Use the SHIFT key for selecting consecutive rows in the grid. From the Font dialog select dark red as color to be used for displaying these rows.
Notice that all the text from the consecutive rows will be displayed with the same color.

4. Perform the same process for other consecutive rows, setting for them a different color for text. After these changes your project plan should look like this:
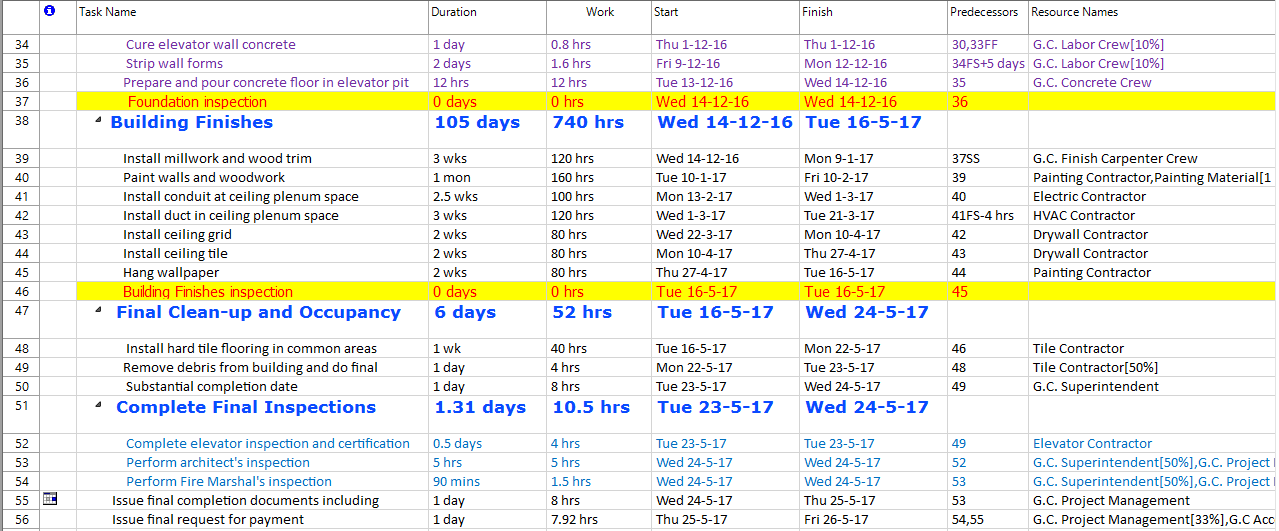
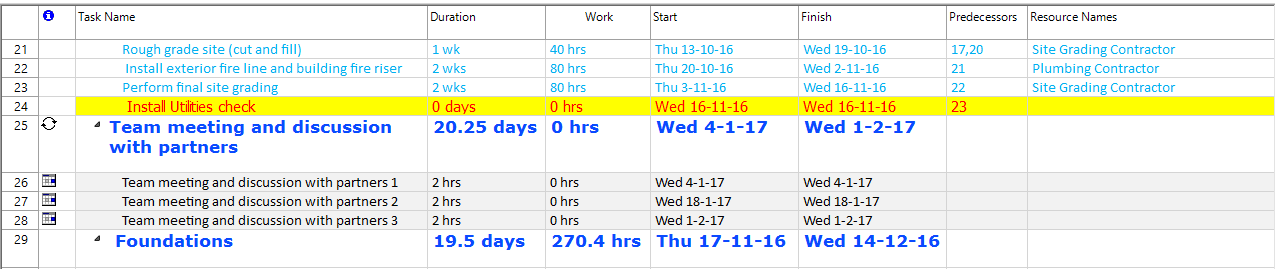
5. Now select the rows with ID = 26, 27 and 28, corresponding to the three team meetings and using the Font dialog, specify grey as background color:
As you can see, the three tasks under the recurring task are highlighted with a different background color:
 Video
Video
If you prefer to see things in action, rather than reading text, watch out this video, which covers some of the topics from this section.