

Erix AI Create Project
Online Help > Erix AI Create Project
What is Erix AI Create Project?
Erix AI Create Project is an AI-powered feature that helps users create complete project plans from a simple description. Based on the information you provide, Erix.AI generates a project structure that may include phases, tasks, subtasks, durations, dependencies, milestones, and scheduling information.
What information is required to create a project with Erix.AI?
To generate a project with Erix.AI, you must provide a Project Name and a Project Description. These fields are required and provide Erix.AI with the information needed to generate a project plan.
How do I access Erix.AI Create Project?
You can access Erix.AI Create Project from multiple locations within Project Plan 365, including:
- Right after creating an account and starting a trial you will get the option to create a new project using Erix.AI.
- By going to menu File – New – click on Create project with Erix.AI.
- Directly from the Erix conversation by clicking on Chat with Erix button from the Quick Access Toolbar then asking Erix.AI to create a project.
- Directly from the Create Project with Erix.AI Landing Page: https://projectplan365.com/create-project-with-erix-ai
How to create a new project using Erix.AI?
To create a project with Erix.AI, follow the steps below:
- Go to menu File – New – Create project with Erix.AI (or go to the Landing Page).
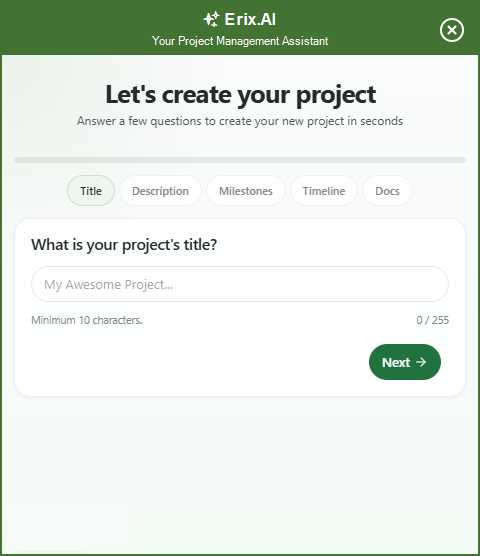
- In the form that appears, provide a Project Name – click Next.
- Enter a Project Description – click Next.
- Add milestones by typing in a name and selecting a date and clicking Add milestone button – then click Next. Note that this step can be skipped.
- Select a Project Timeline if needed and click Next. Note that this step can be skipped.
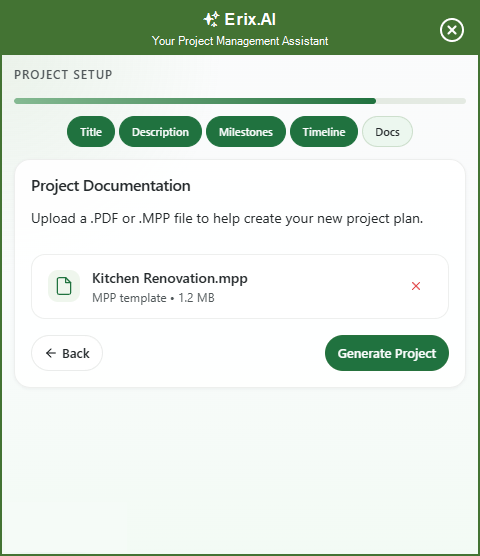
- Upload a MPP or PDF file and click Generate Project. Note that this step can be skipped.
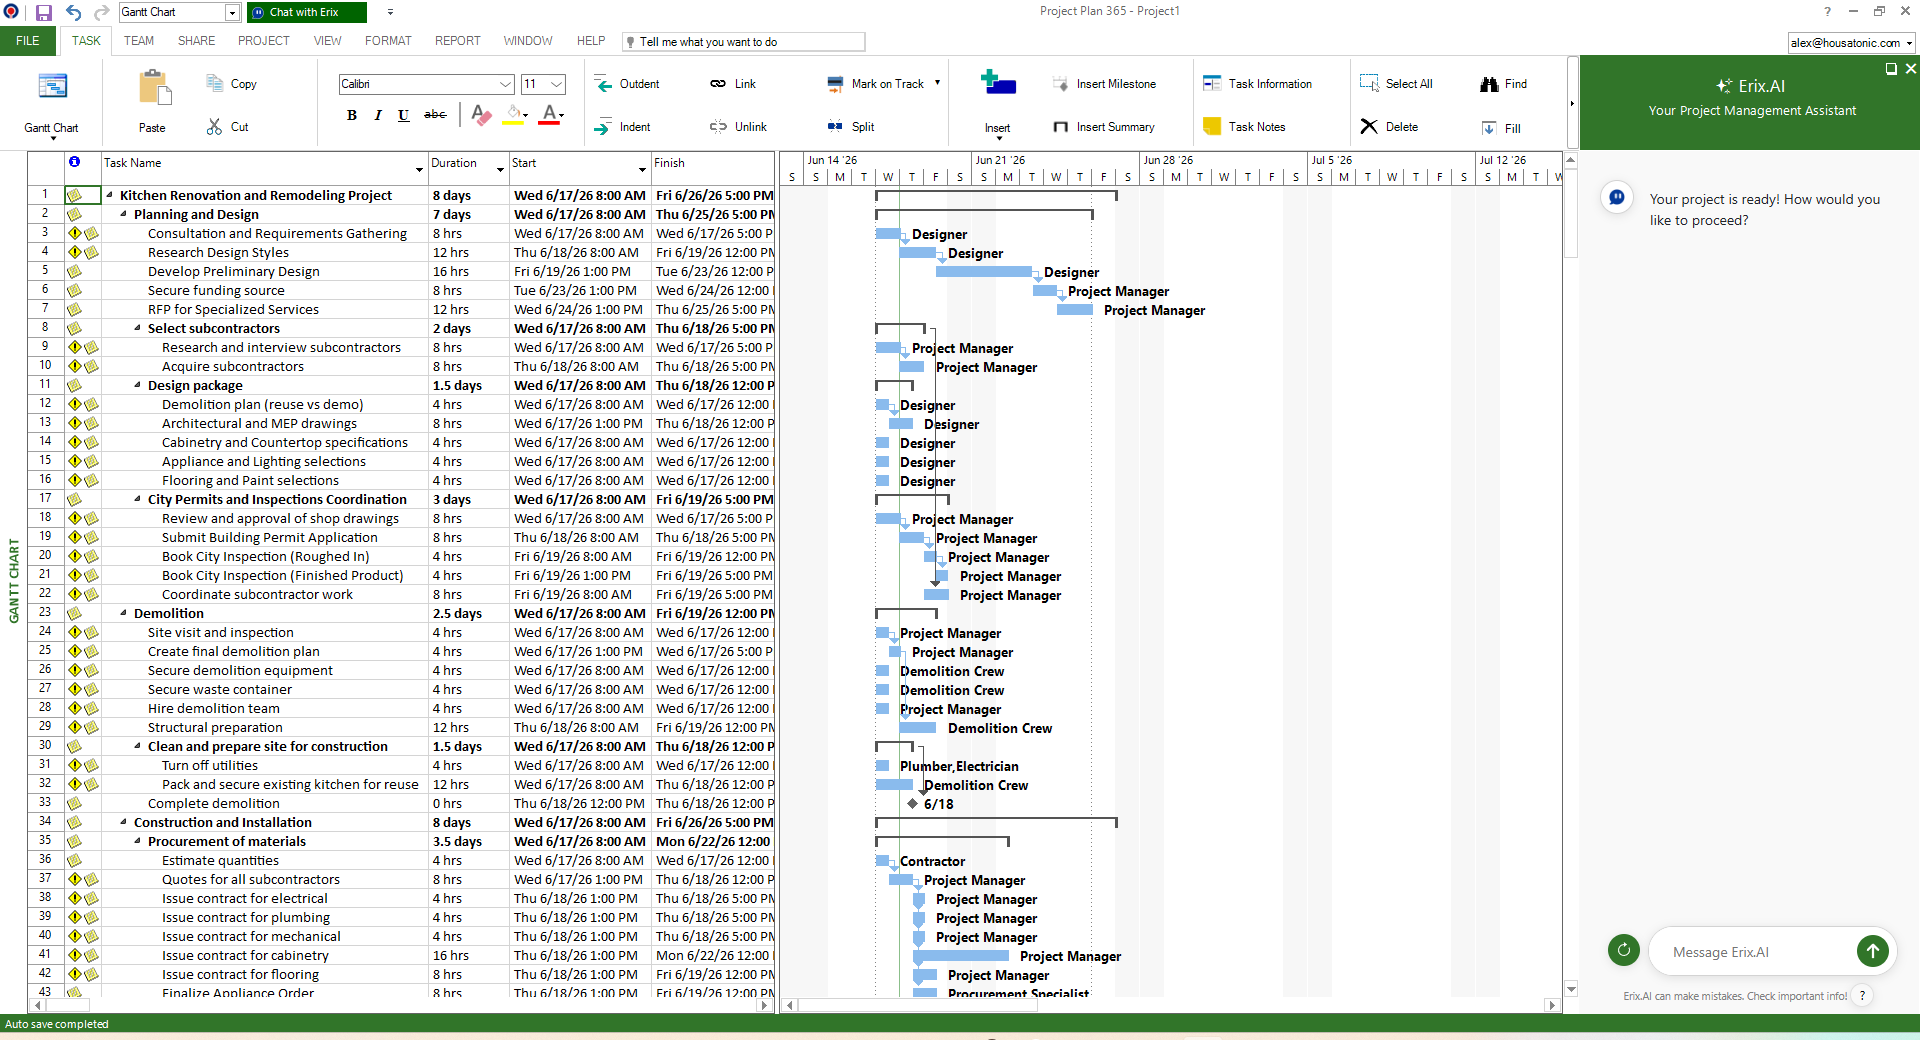
- The project will be generated and opened on the Gantt Chart View.
Note: If project was generated from the Landing Page, click on the Download button to save the project to your local device or you can click on the Continue editing button to save the project in Drive 365 which can then be opened from the app on any platform.
Do I need to add Milestones in Erix.AI dialog?
Adding milestones is optional. You can generate a project without defining any milestones. If milestones are provided, Erix.AI will consider them when creating the project structure and schedule.
What are Milestones used for by Erix.AI?
Milestones can be used to identify important project events, deliverables, approvals, or target dates. Providing milestones helps Erix.AI better understand the desired project outcomes and incorporate those checkpoints into the generated project plan.
How many Milestones can I add in Erix.AI dialog?
You can add up to 5 milestones during project creation. Each milestone can include a name and target date to help define key project objectives and deadlines.
Can I delete a Milestone after adding it in Erix.AI dialog?
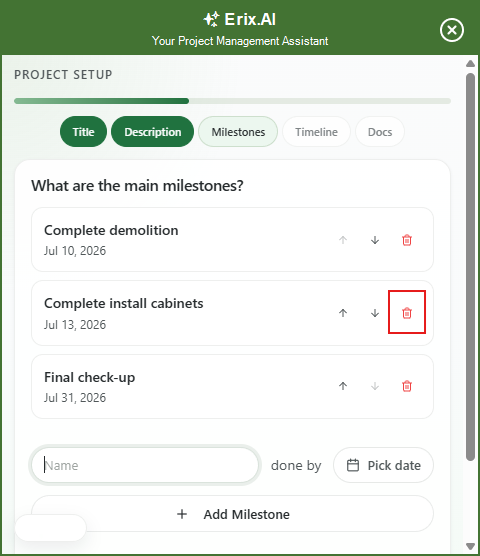
Milestones can be removed before generating the project. To remove a milestone, click the Delete icon associated with the milestone entry.
Can Erix.AI generate Milestones automatically?
Even if no milestones are provided, Erix.AI may generate milestones based on the project description, uploaded files, and project context.
Do I need to upload a PDF or MPP file?
File uploads are optional. You can create a project using only the required Project Name and Project Description fields.
What types of files can I upload in Erix.AI dialog?
Erix.AI supports:
- PDF files containing project requirements, specifications, or supporting documentation.
- Microsoft Project (.MPP) files used as project templates.
What happens when I upload a PDF file in Erix.AI dialog?
Erix.AI analyzes the content of the PDF and uses the information to generate tasks, phases, milestones, and project deliverables relevant to the provided requirements.
What happens when I upload an MPP file in Erix.AI dialog?
Erix.AI uses the uploaded Microsoft Project template as a reference when generating the project. The generated project may preserve elements such as project structure, hierarchy, phases, milestones, and scheduling information from the uploaded template.
What information should I include in the Project Description in Erix.AI dialog?
The Project Description should contain enough information for Erix.AI to understand the project scope and objectives.
For best results, include details such as project goals, major deliverables, project phases, business requirements, key features, constraints, important dates, or preferred project methodology.
Can I edit the generated project after it is created?
After the project is generated and opened in Project Plan 365, you can edit tasks, durations, dependencies, resources, milestones, calendars, and other project details using the standard Project Plan 365 features.
On what platforms is Erix.AI Create Project available?
Erix.AI Create Project is currently available on Windows and Mac platforms.
Can I skip optional sections during project creation?
The Milestones, Project Documentation, Project Timeline, and Project Template sections are optional and can be skipped during project creation.
How long does project generation take?
Project generation time depends on the amount of information provided and any uploaded files. Most projects are generated automatically within a short period of time.
Why did project generation fail?
Project generation may fail due to temporary connectivity issues, unsupported application versions, invalid uploaded files, or service availability issues. If generation fails, verify your internet connection and try again.
Can I continue working with Erix after project generation?
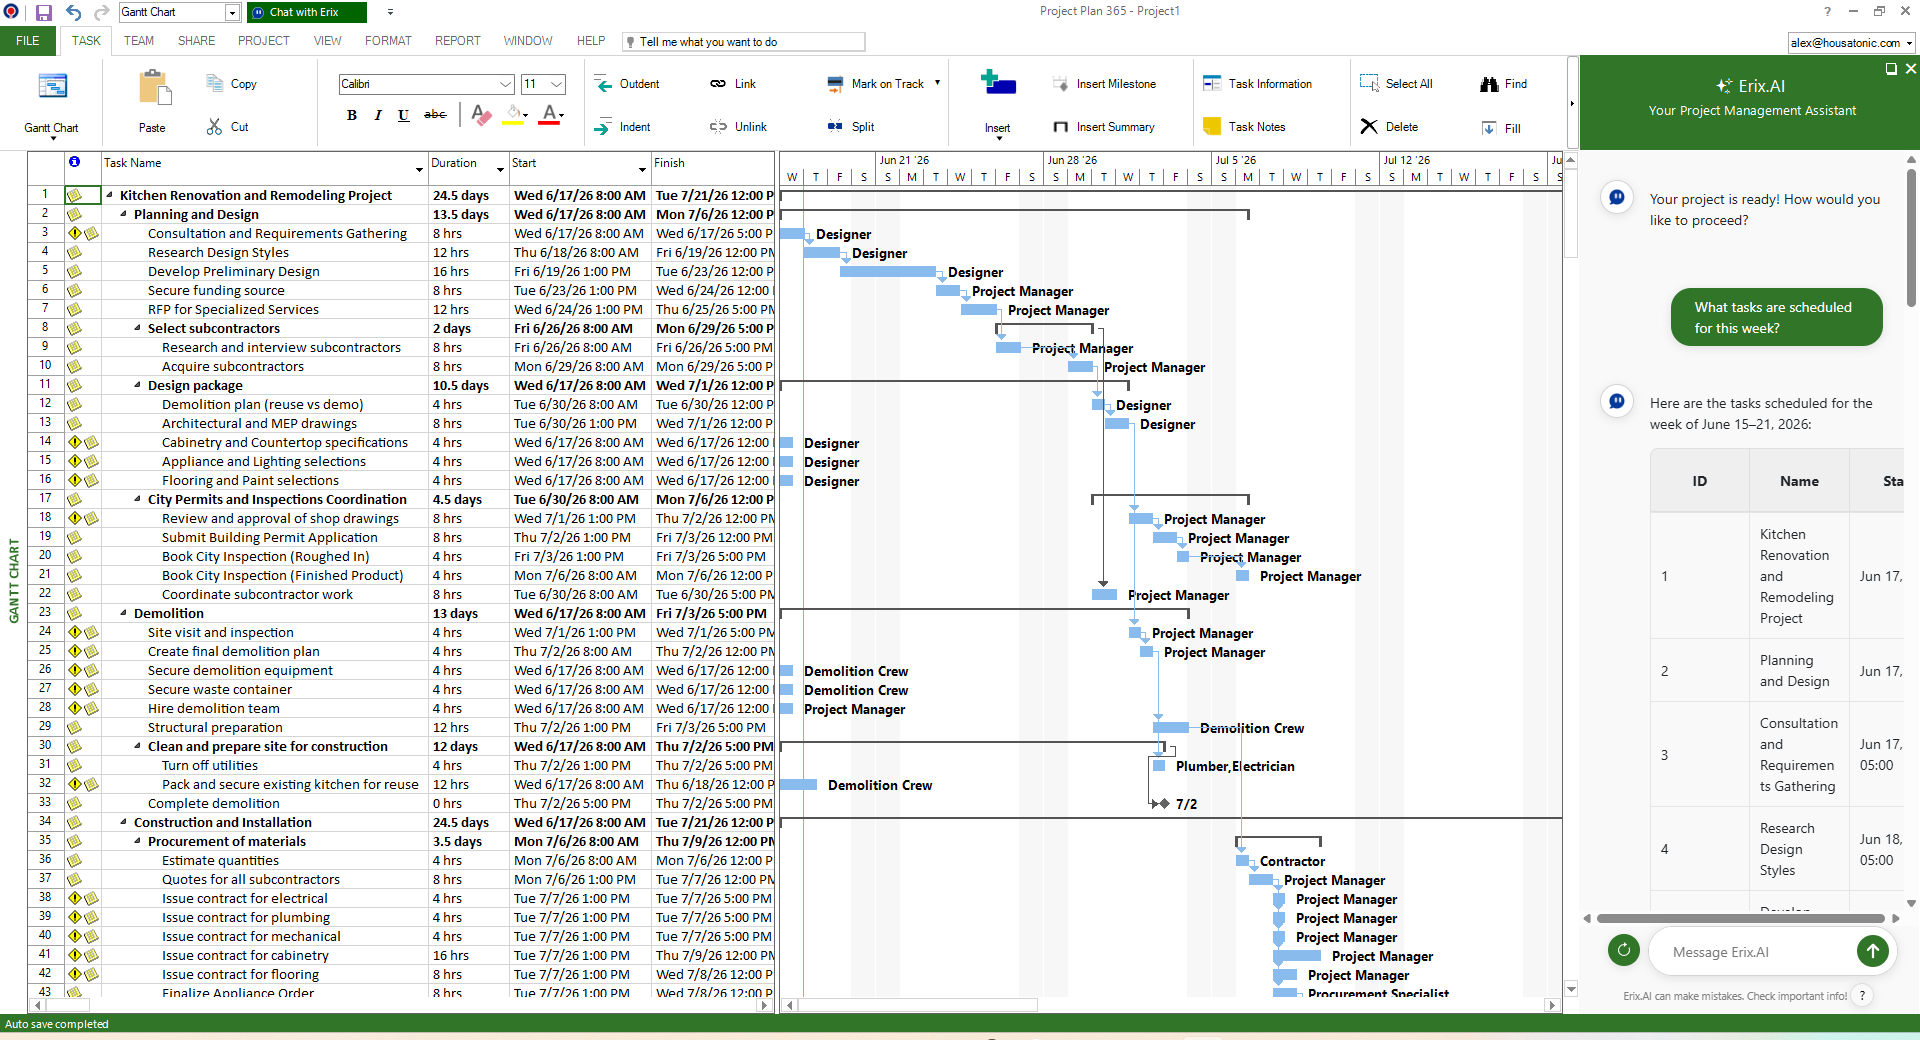
After a project is generated, Erix.AI automatically opens and can be used to continue discussing the generated project and ask additional project-related questions.
Step by step on how to access Erix.AI right after starting a trial:
1. Open Project Plan 365.
2. Click on Create Account.
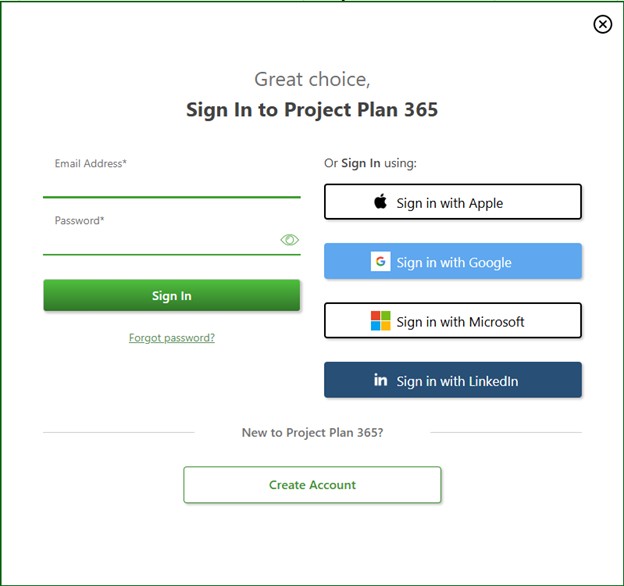
3. Type in an email address and password or select a third-party option.
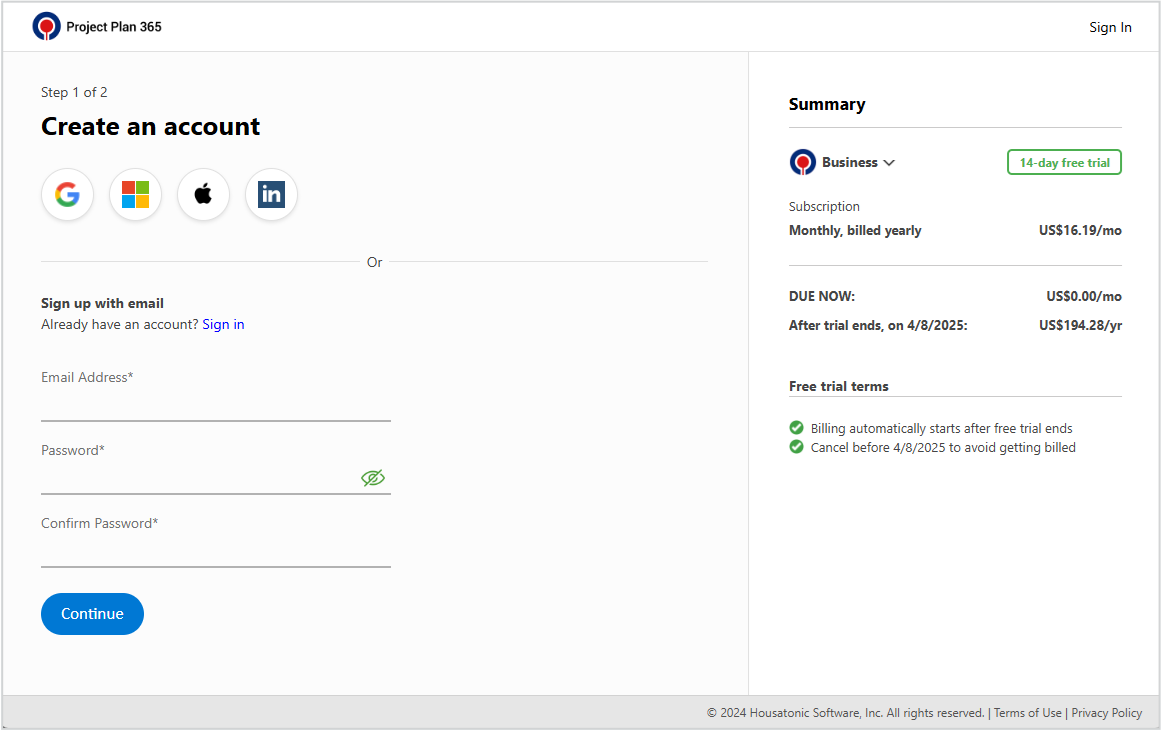
4. Select the payment option and click Start Trial.
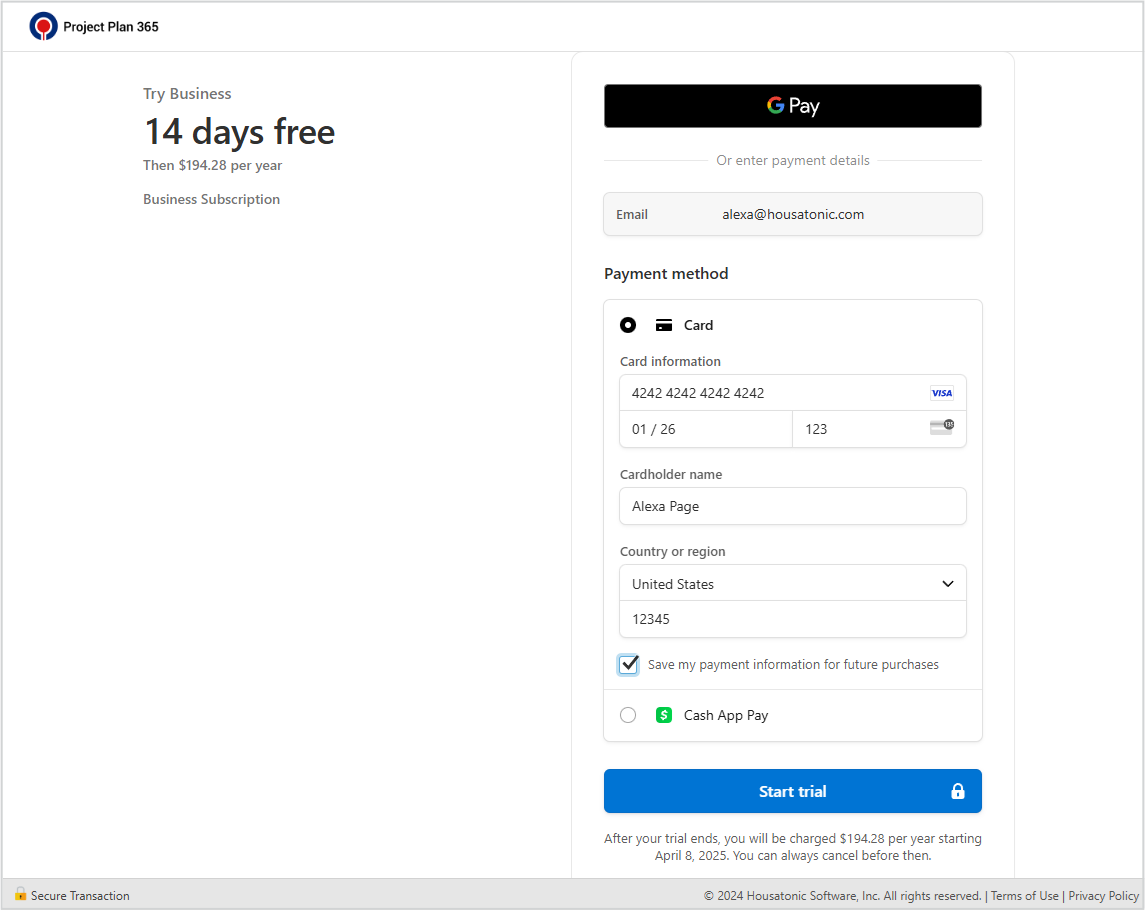
5. Return to the app.
6. Complete or skip the survey.
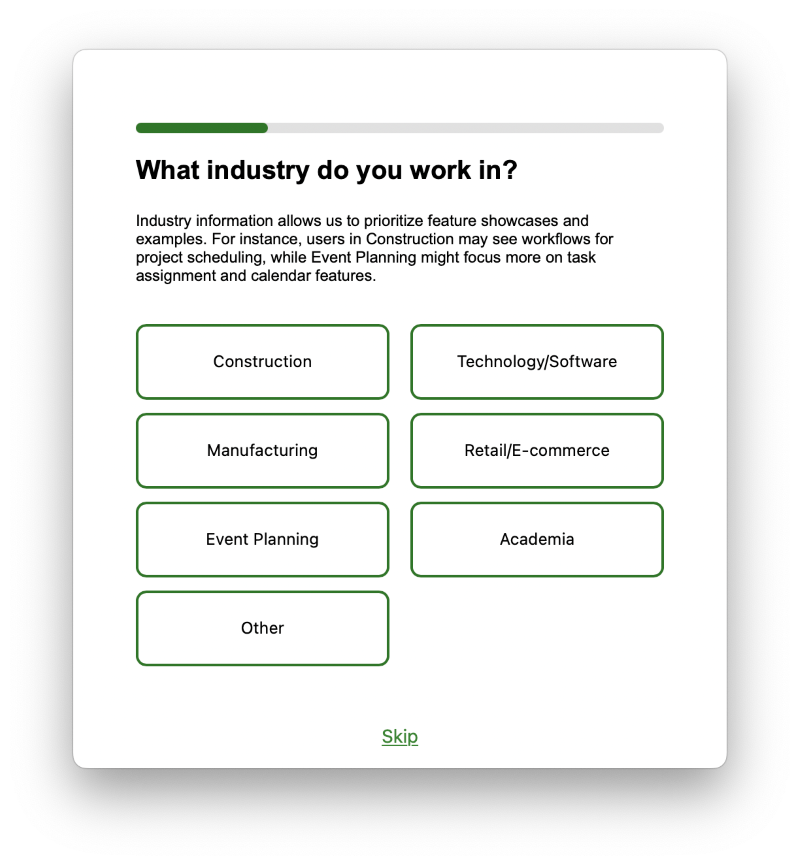
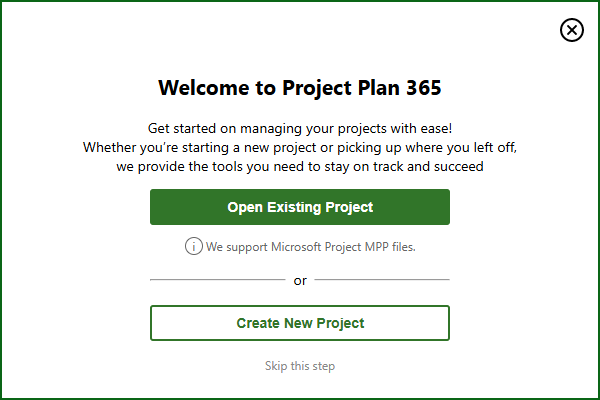
7. In the Welcome dialog, click on the Create New Project.
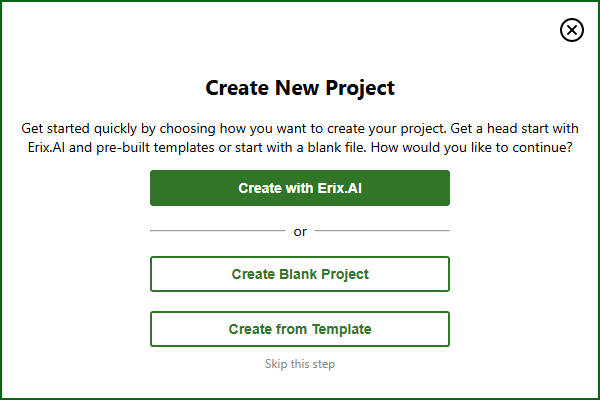
8. Click on Create with Erix.AI.
9. The Erix.AI Create Project form will be opened.
Step by step on how to access Erix.AI from the Backstage:
1. Open Project Plan 365.
2. Go to menu File – New.
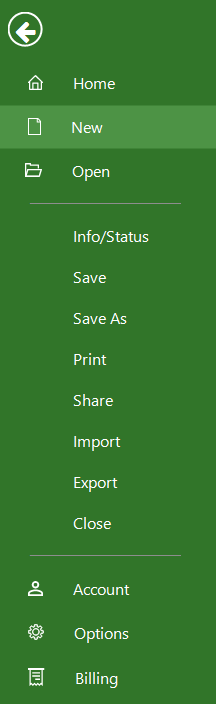
3. Click Create with Erix.AI.
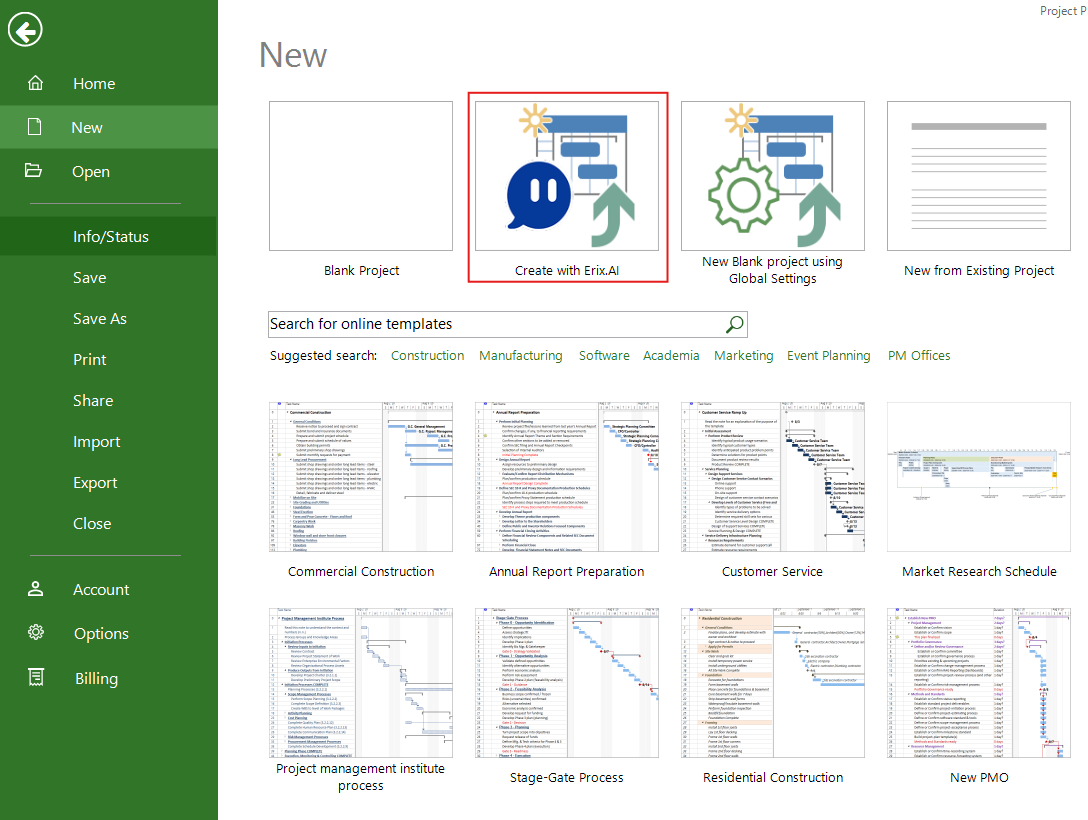
4. The Erix.AI Create Project form will be opened.
Step by step on how to access Erix.AI from Erix conversation:
1. Open Project Plan 365.
2. Click Chat with Erix.

3. Ask Erix to create a new project.
4. Click Create project with Erix.AI.
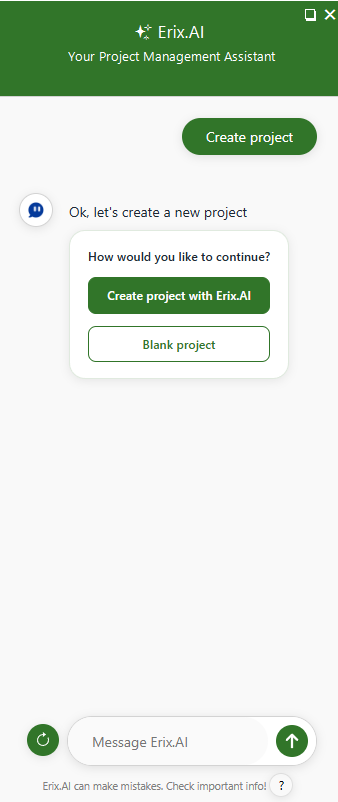
5. The Erix.AI Create Project form will be opened.
Step by step on how to create a project with Erix.AI from the local application:
1. Open Project Plan 365 app.
2. Access Erix.AI Create Project using the methods described above. For example from menu File – New – Create with Erix.AI.
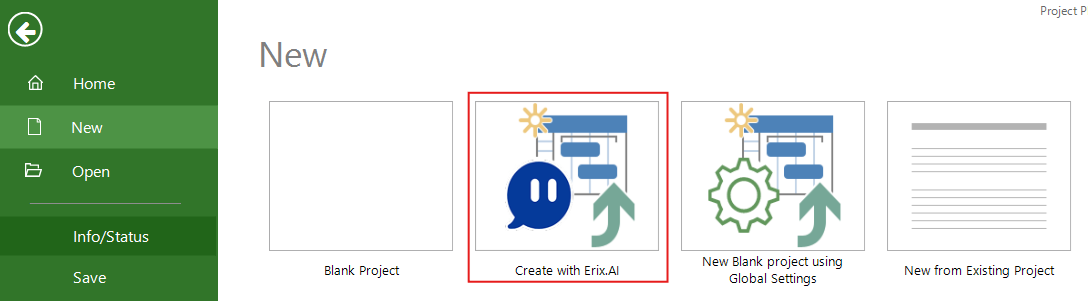
3. In the Erix.AI form, enter a Project Name and click Next.
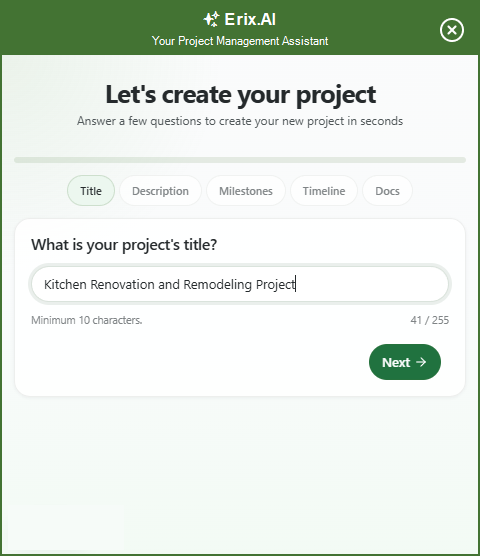
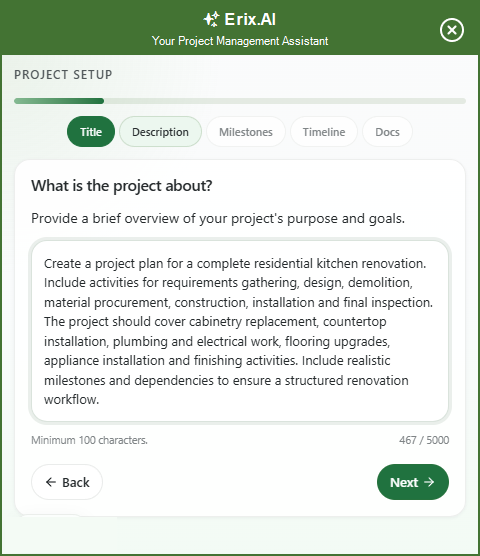
4. Enter a Project Description and click Next.
5. Add project milestones by typing in a name and pick a date then click Add milestone.
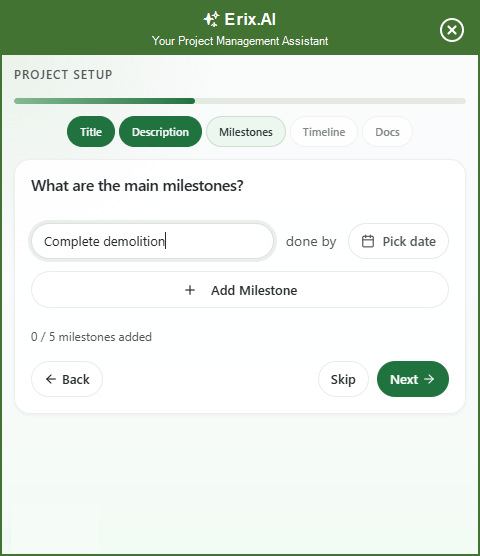
6. Click Next or Skip if no milestones are added.
7. Define a Project Timeline by opening the date picker and selecting a Start and Finish date.
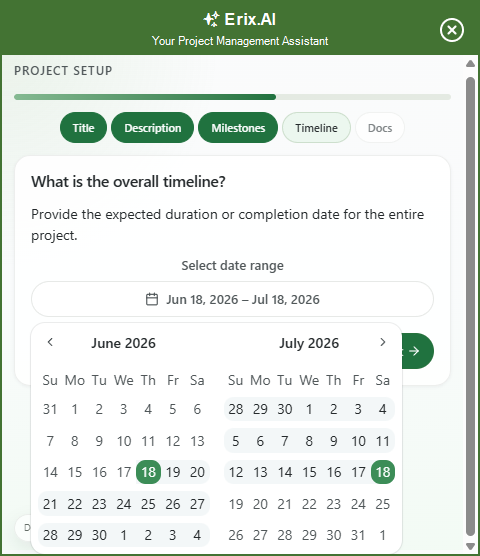
8. Click Next or Skip if no timeline is defined.
9. Upload project documentation or template (PDF or MPP) by clicking on the Upload section or by using drag-and-drop. This step is optional.
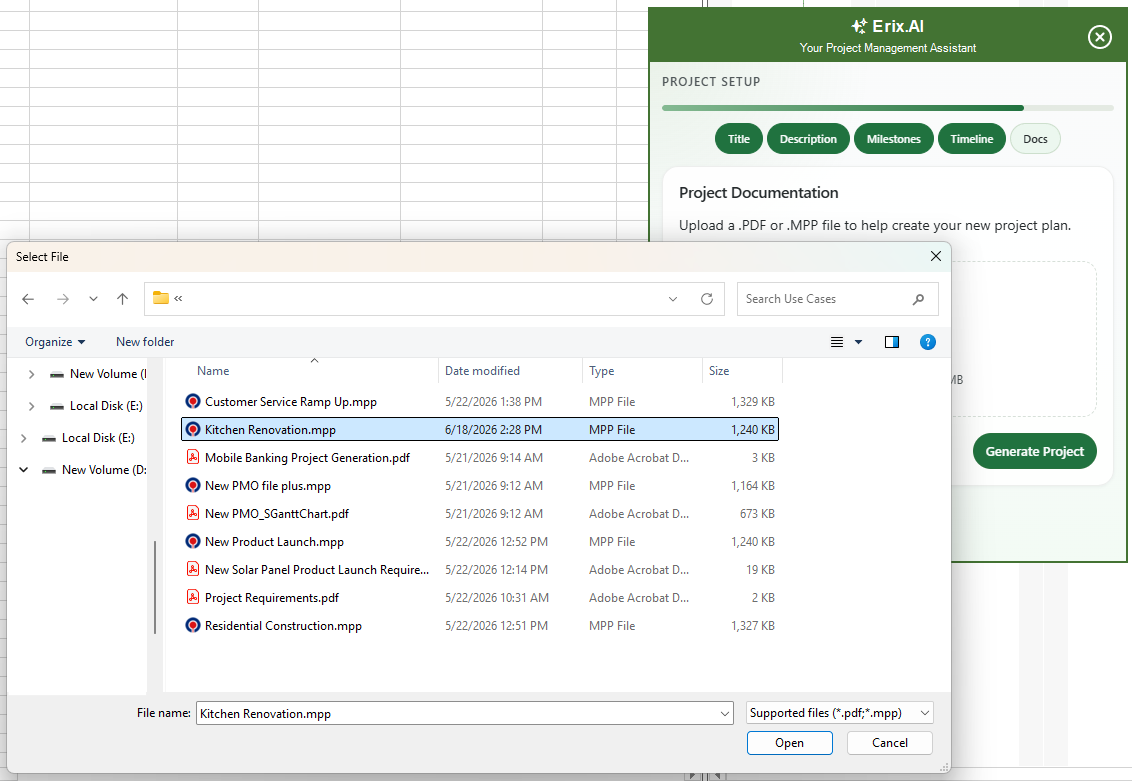
10. Click Generate Project.
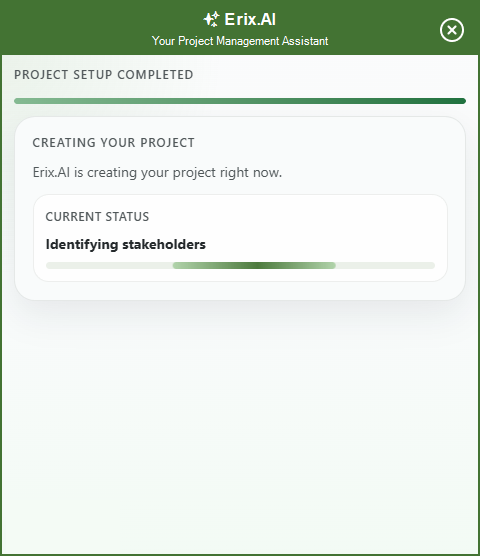
11. Wait for the generation process to complete.
12. The generated project opens automatically in Gantt Chart view.
Note: You can continue communicating with Erix.AI in the right panel after project generation, to find information about your project (e.g., assigned resources, what are the milestones, what tasks are scheduled next etc.) or you can ask it to generate a new project.
Step by step on how to create a project with Erix.AI from the Landing Page:
1. Open the Erix.AI Create Project landing page: https://projectplan365.com/create-project-with-erix-ai.
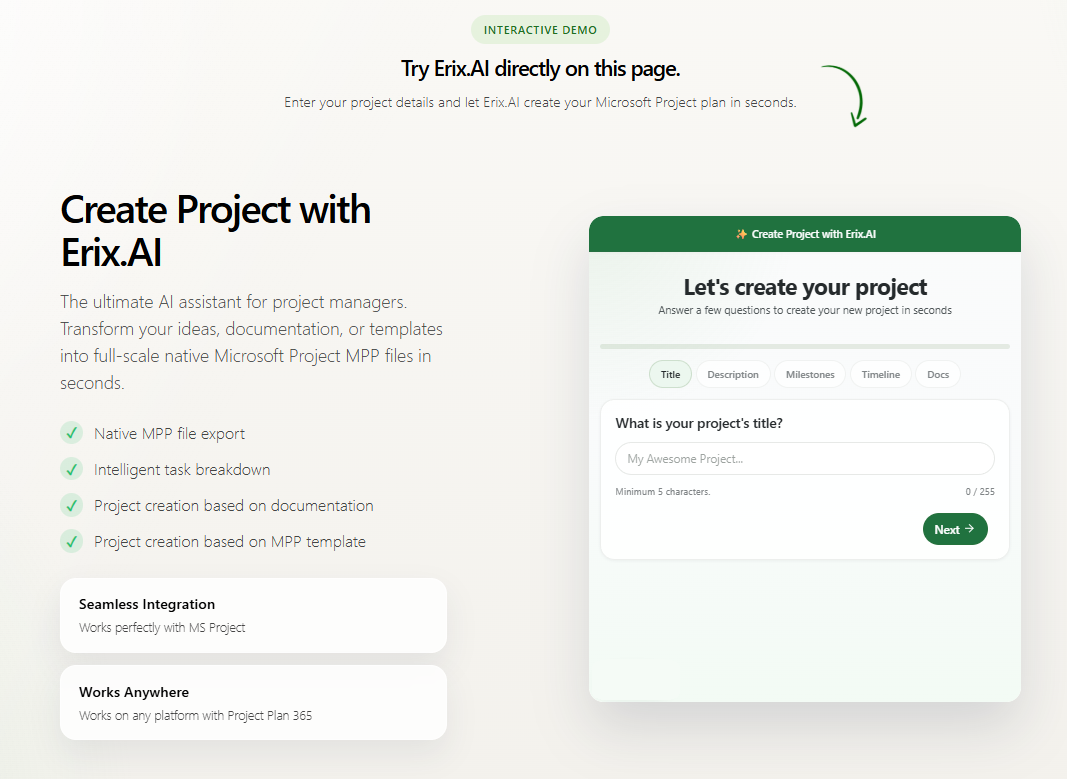
2. In the Erix.AI form, enter a Project Name and click Next.
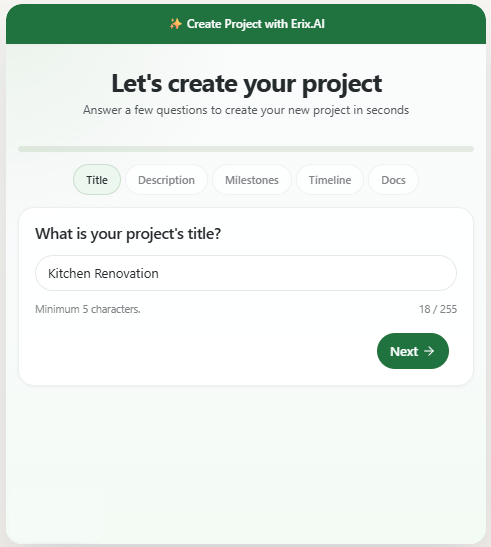
3. Enter a Project Description and click Next.
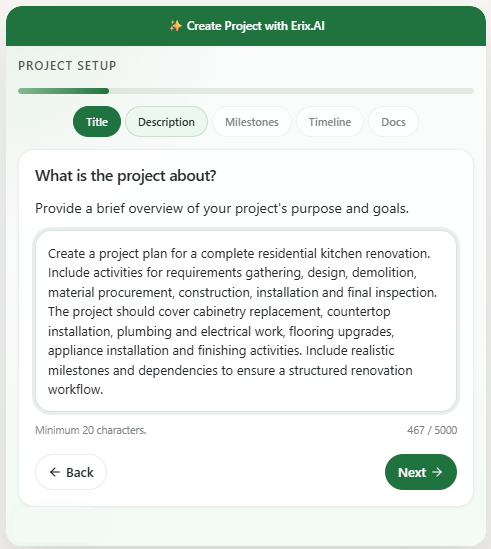
4. Add project milestones by typing in a name and pick a date then click Add milestone.
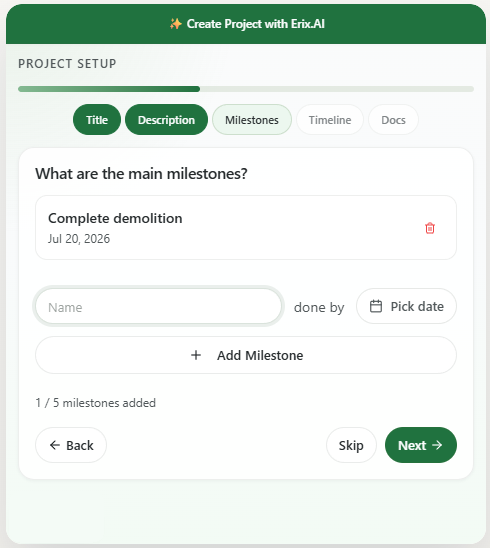
5. Click Next or Skip if no milestones are added.
6. Define a Project Timeline by opening the date picker and selecting a Start and Finish date.
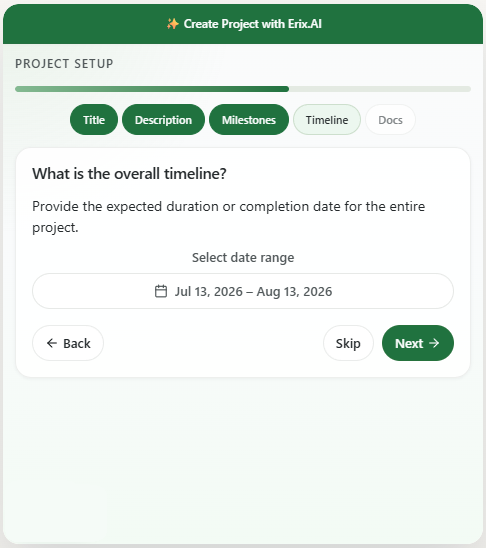
7. Click Next or Skip if no timeline is defined.
8. Upload project documentation or template (PDF or MPP) by clicking on the Upload section or by using drag-and-drop. This step is optional.
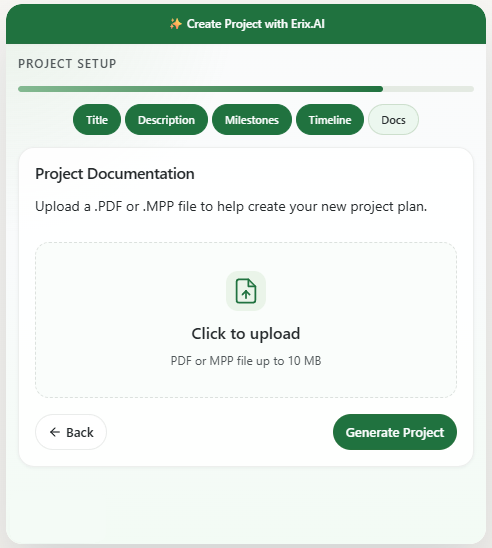
9. Click Generate Project.
10. Wait for generation to complete.
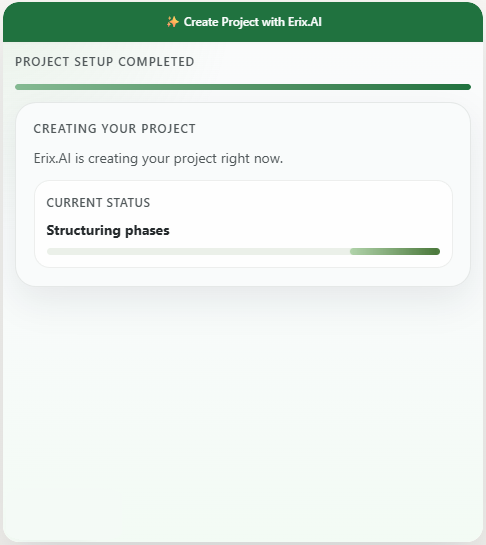
11. The generated project opens automatically in View-Only mode in Project Plan 365 Web app.
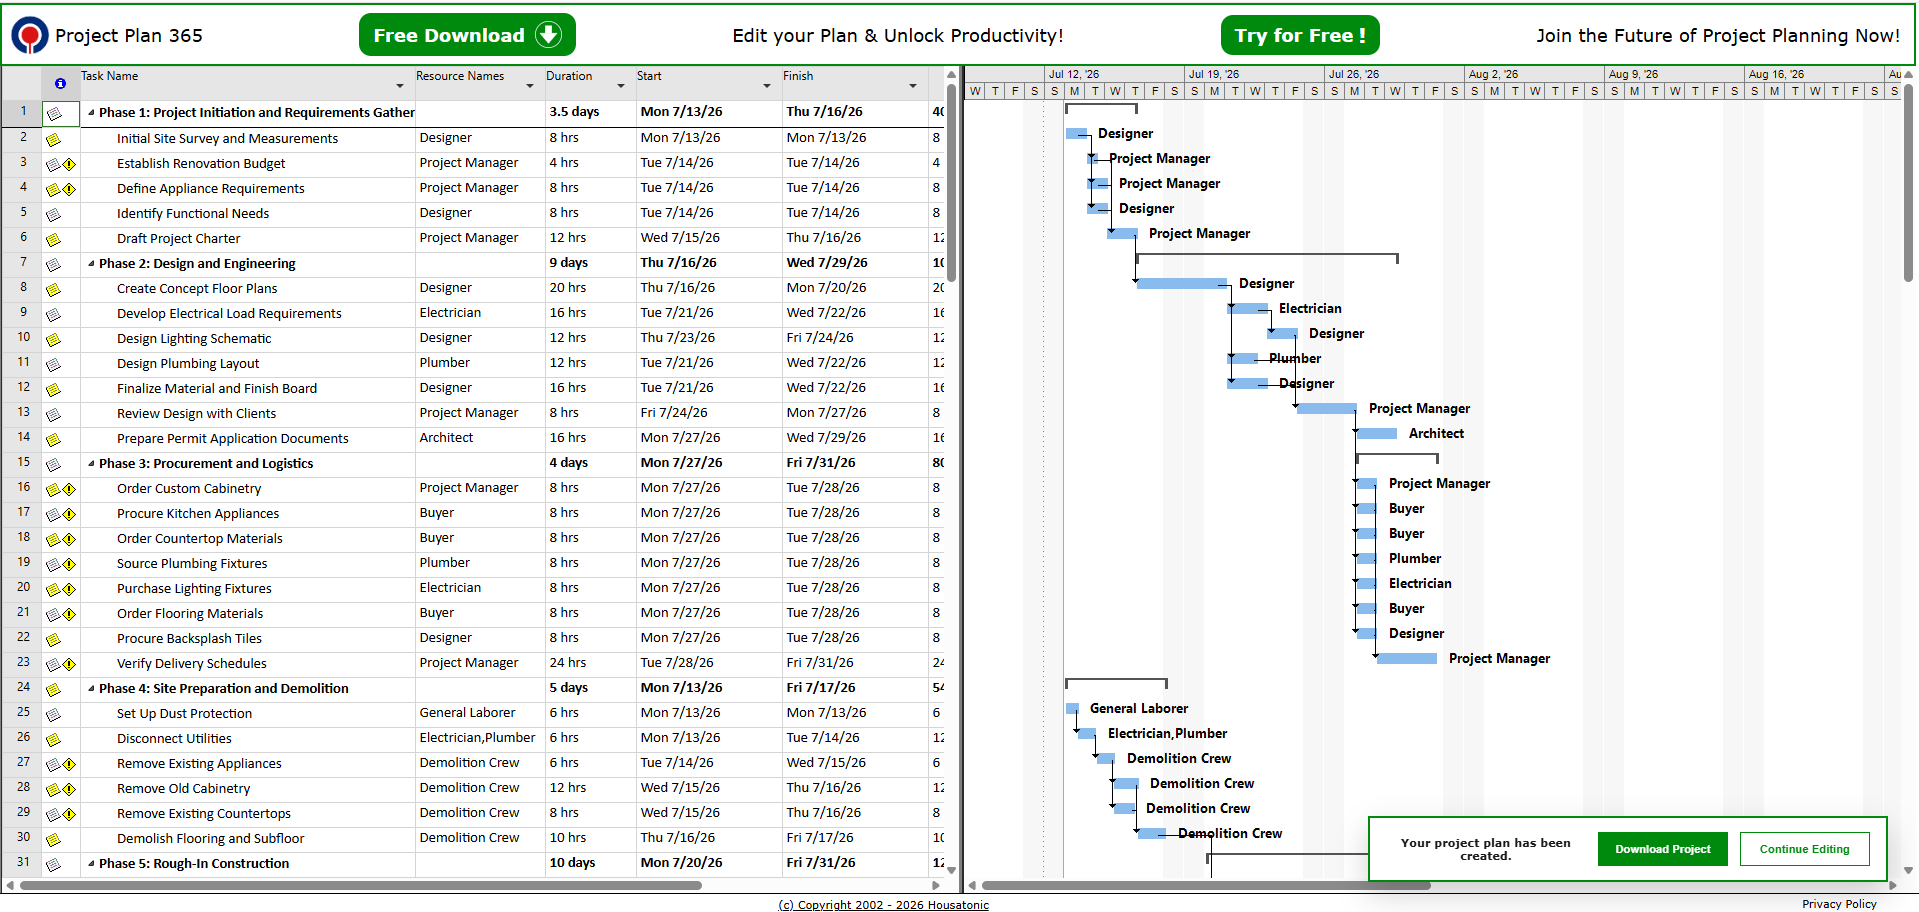
12. You can click on the Download button to save the project to your local device.

13. Or you can click on the Continue Editing button to save the project in Drive 365 which can then be opened from the app on any platform.
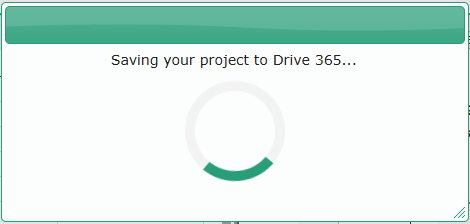
Note: You need to Sign In in order to continue editing the project.
Step by step on how to add/remove/reorder milestones in the Erix.AI Create Project form:
1. Access Erix.AI Create Project using the methods described above. For example from menu File – New – Create with Erix.AI.
2. In the Erix.AI form, enter a Project Name and click Next.
3. Enter a Project Description and click Next.
4. To add a project milestone, type in a name and pick a date then click Add milestone.
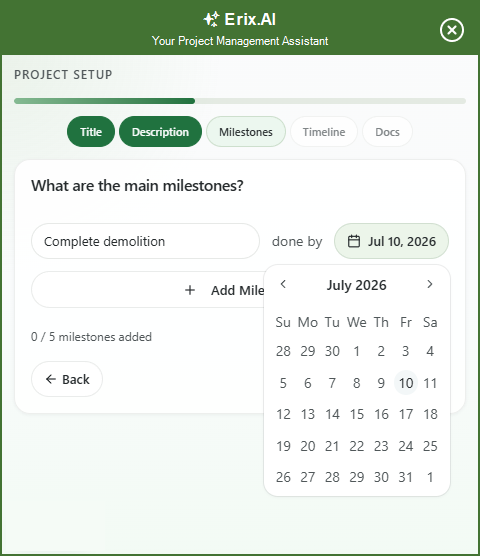
5. The milestone will be added in the list.
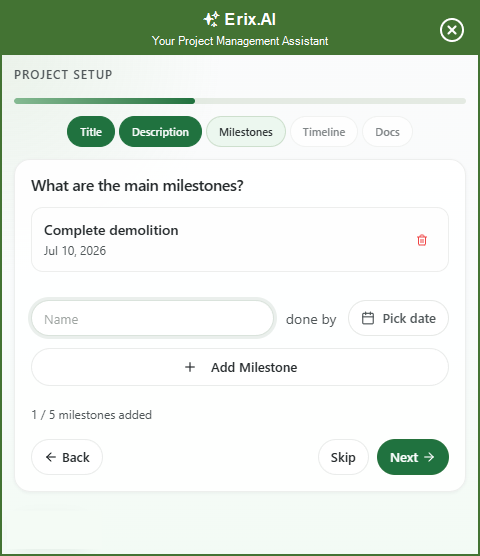
6. You can add up to 5 milestones.
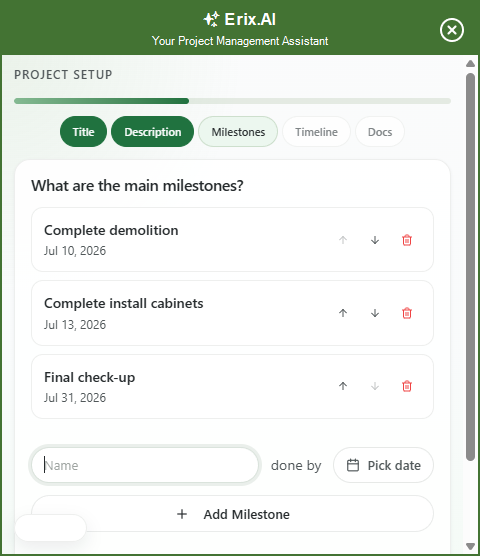
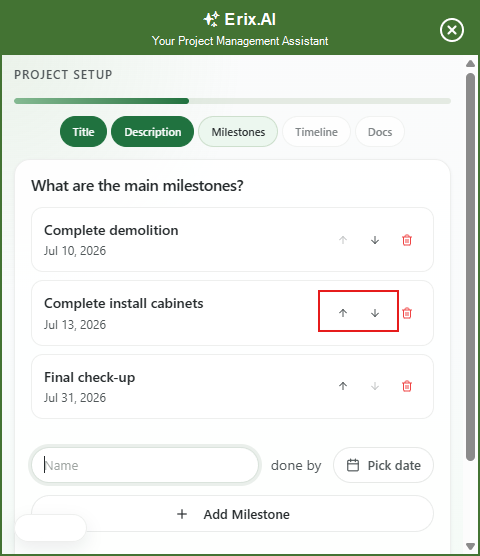
7. To reorder the milestones, click on the Up/Down arrows.
8. To delete a milestone, click on the Delete icon.
| Related | MS Project Copilot | Erix.AI Help | Microsoft Project Chat GPT | Project Plan 365 Assistant | Erix |
| Platform | Windows | Mac | iOS | Web | Android |
| ✔ | ✔ | ||||
| Product | Project Plan 365 | ||||
| Article ID | 412 | ||||
| Date | 7/22/2026 |


