
If you started your project in Excel but need to manage more complex schedules, resource sharing, and tracking, you’re probably ready to move your data into Project Plan 365.
What is Microsoft Excel?
Microsoft Excel is a software program used to create spreadsheets.
Can I import data from other than the first sheet in an Excel file?
The Import Wizard will, by default, import data from the first sheet in the Excel file. If your data is on another sheet, you will need to select in the Import Wizard the name of the sheet you want to use.
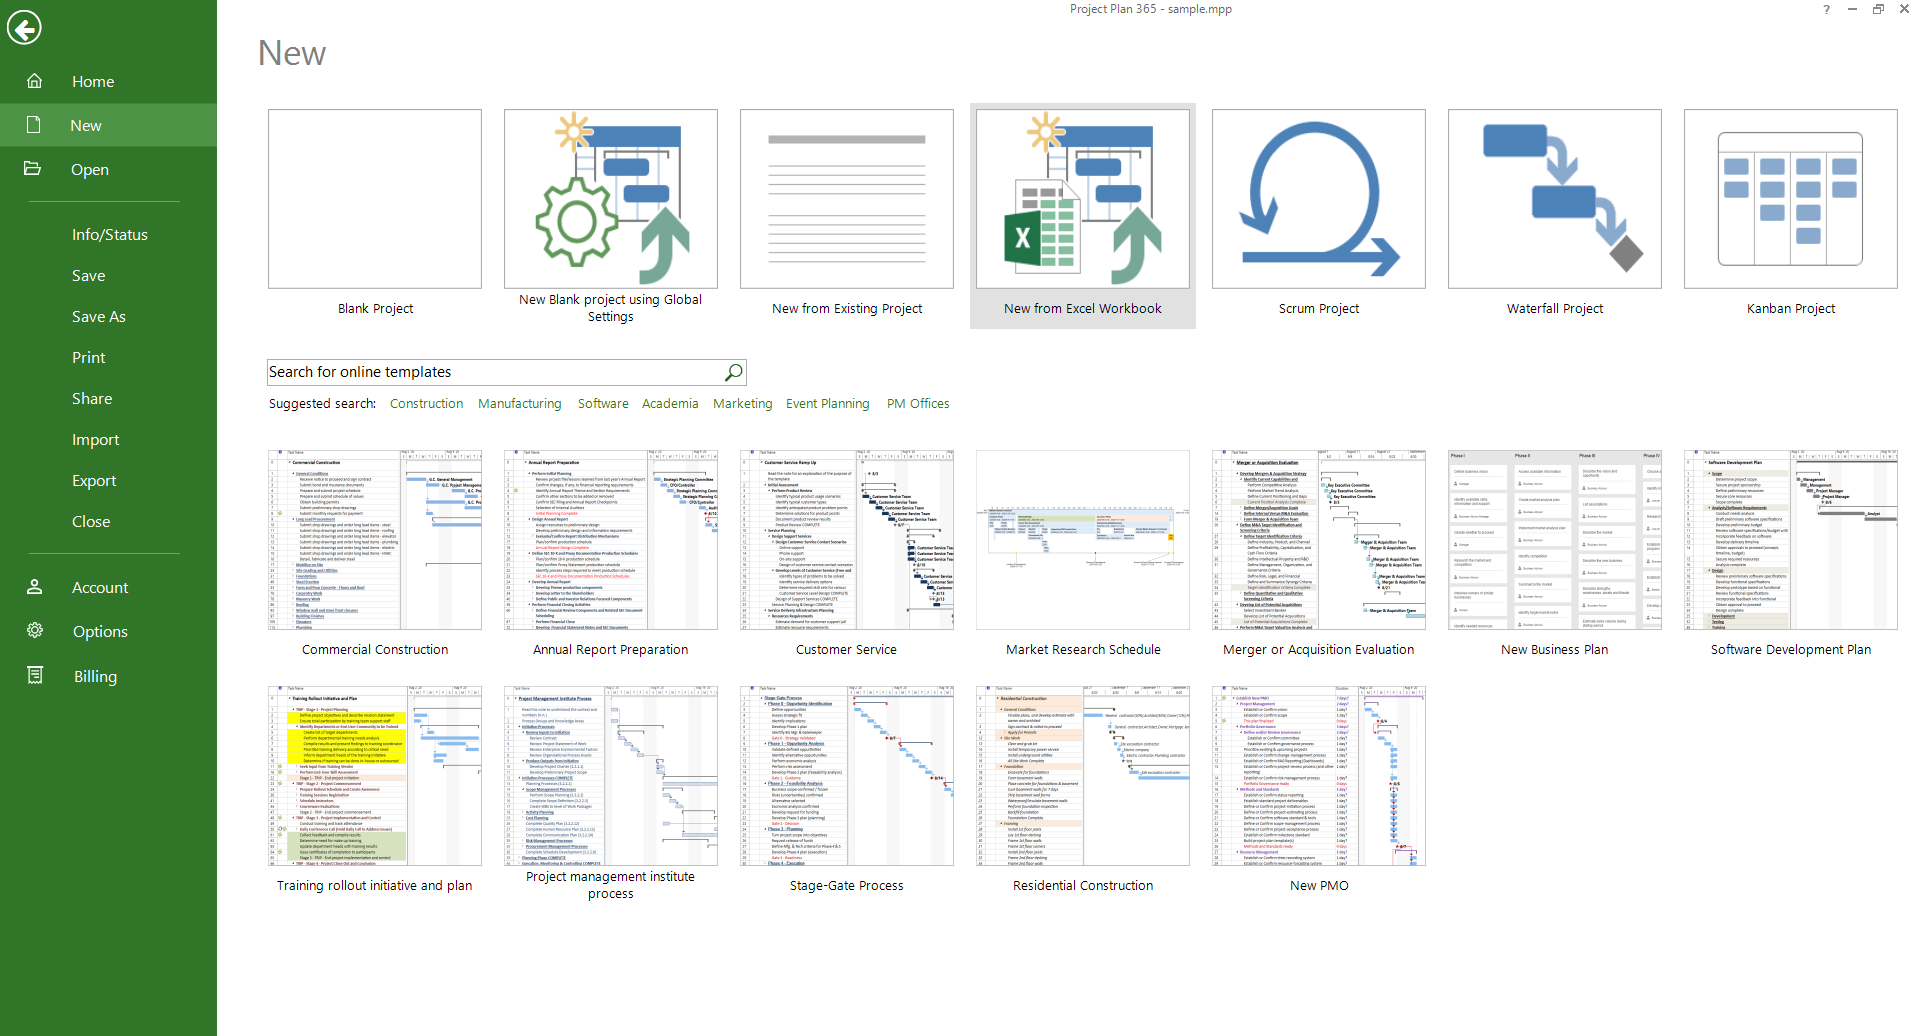
How do I create a project based on an Excel file?
To create a new project from an Excel Workbook, click File - New - New From Excel Workbook.
How can I open JIRA in Project Plan 365 app?
You can export the JIRA project to Excel/CSV and then import the file in our Project Plan 365 app. To do this go to File-Import-Import from Excel.
Why I can’t import an excel file?
If the application crashes please download and install our latest application from our website. If this did not solve the issue please submit a ticket at Contact Support.
How do I import both Tasks and Resources from Excel file?
Data is imported to 2 distinct data areas: Task or Resources.
Imports will not update more than one data area at the same time.
Excel datasheets will need to be divided into these areas of data.
For example, if you want to import information about both Tasks and Resources, your Excel file will need to have two sheets, one with information about tasks and one about resources.
What changes do I need to make to the excel file before importing it in Project Plan 365 app?
Before importing your Excel file in our application please make the following changes:
1. Create any customized fields before starting the import process.
2. Make sure the customized fields are of the same data type as the fields that will be imported from Excel. I.e.: Text into Text, Date into Date.
3. When possible, create the customized field names to match the names in the Excel file. Optional but helpful.
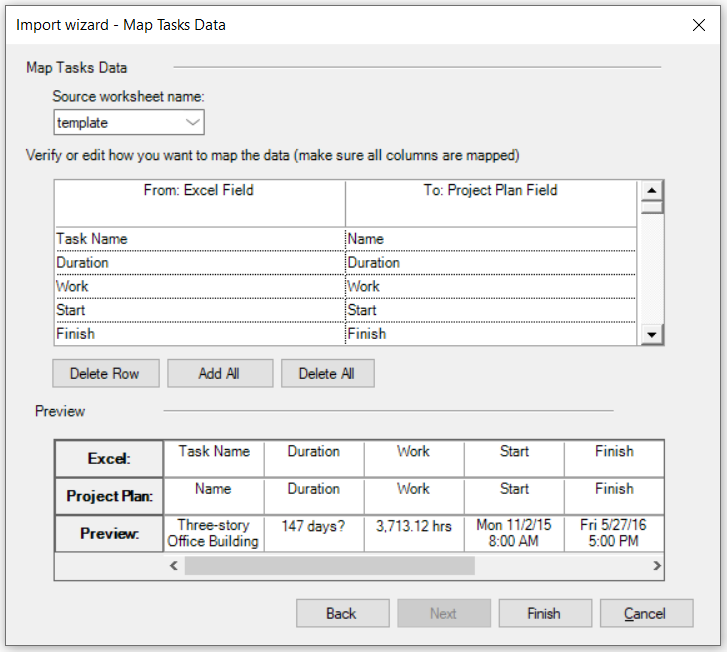
What should I know before starting to import the Excel file in Project Plan 365 app?
1. Be aware of which Excel file fields will be mapped to which Project Plan file fields before starting the Import Wizard.
2. Not all fields in the Excel field are required to be imported. When mapping the columns from your file you will have the opportunity to pick which fields you will import by deleting the unnecessary ones (using the Delete Row button).
3. Make sure you know which Excel file tab names will be imported into which data areas within Project Plan. e.: Task data, Resource data.
4. Be aware if your import file has column headers.
5. Blank lines in the Excel file will be imported as blank lines in the project file.
6. Start and Finish dates when imported into the Start and Finish fields in Project Plan 365 will create Start No Earlier Than constraints for the tasks.
Why can't I see all the columns imported from Excel file?
Data might have been imported to columns that are not being shown on the currently viewed table. Insert imported columns into any table to view the imported data.
Why Next button is disabled on Import wizard?
If the Next button is disabled in the Import wizard it means that some of the columns in your Excel files are not yet mapped. If you do not see the "(not mapped)" text in the mapping grid, scroll down because the not mapped columns could be at the end of the list.
Why Finish button is disabled on Import wizard?
If the Finish button is disabled in the Import wizard it means that you either have unmapped columns or you selected to import both Tasks and Resources and you only mapped the task fields. You should first press Next button if it is enabled, map the resource fields and then press Finish to finalize the import.
I don't want to import all columns from Excel. How to remove these columns?
If there are columns in your Excel or CSV file which you don't want to import, you can select the field in the mapping grid and then press Delete Row. If you removed a field by mistake you can press the Add All button in order to repopulate the mapping grid with all the columns from the Excel/CSV file.
Can I import from Excel file the tasks and resources if they are in the same sheet?
Importing a file from Excel or CSV will not update Resources and Tasks at the same time if they are on the same sheets. The excel file will need to have separate sheets for Tasks and Resources.
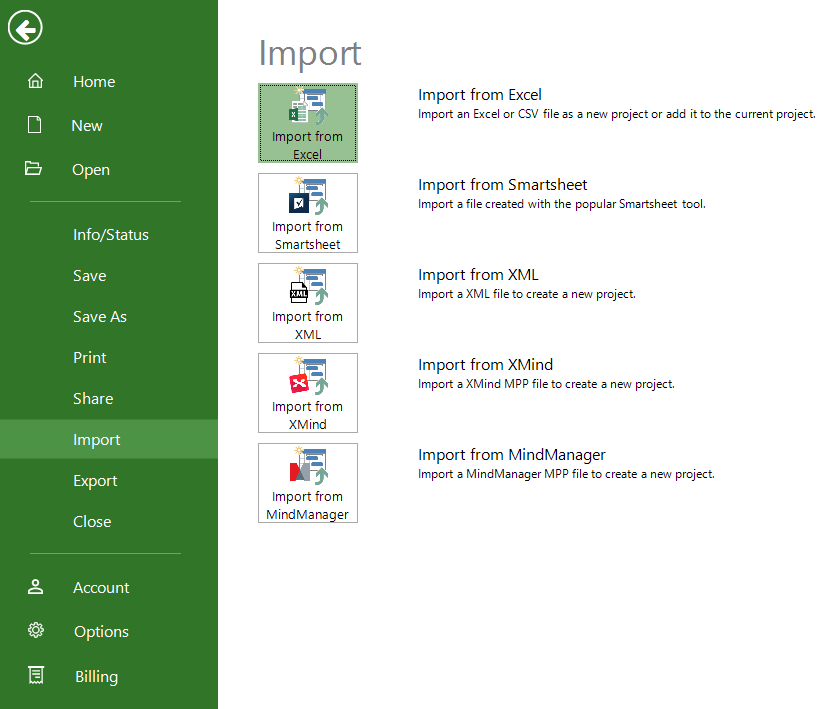
How do I import an Excel file?
To import a file from Excel or CSV go to File - Import - Import from Excel. Select the desired file and click Open. After managing the Import Wizard settings click Finish.
How to import information from another file?
In order to import information from another file, go to the File menu and select the Import option. Choose from the options available in our application, select the file and then press "Open".
What is Excel?
Microsoft Excel is a software program used to create spreadsheets.
How can I keep the outline structure when importing an excel file?
In order to keep the outline structure, you can insert the column “Outline Level” into your project and then export it to Excel. After that, when importing it, the project structure will be the same as the one before exporting the project.
In how many formats I can import my file?
Our application allows you to import files from Excel, SmartSheet, XML, Xmind and MindManager.
How can I import an Excel file with extension on XLSM?
Step by step on how to create a project based on an Excel file:
1. Click File - New.
2. Select New from Excel Workbook.
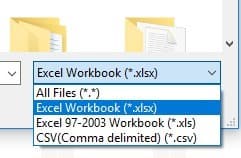
3. In the Open box, click the arrow next to Excel Workbook (*.xlsx), and pick the format in which your file is saved. Besides opening Excel files, you also have the option to import data from CSV.
4. Locate and select he workbook you want to import and click Open.
5. The Import Wizard will appear so you can get started on importing your data into Project Plan 365.
Step by step on how to Import an Excel or CSV file:
1. Click File – Import.
2. On the Import/Export page, click Import Files, and then Import from Excel.
3. In the Open box, click the arrow next to Excel Workbook (*.xlsx), and pick the format in which your file is saved. Besides opening Excel files, you also have the option to import data from CSV.
4. Locate and select the workbook you want to import and click Open.
5. The Import Wizard will appear so you can get started on importing your data into Project Plan 365.
6. This Import Wizard allows you to make some settings related to the resulting project and map the columns in your Excel or CSV file to Project Plan 365.
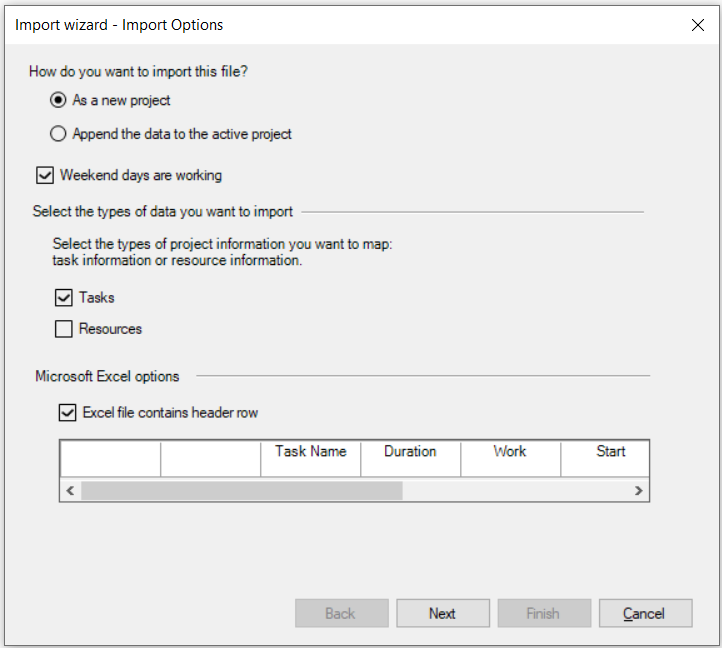
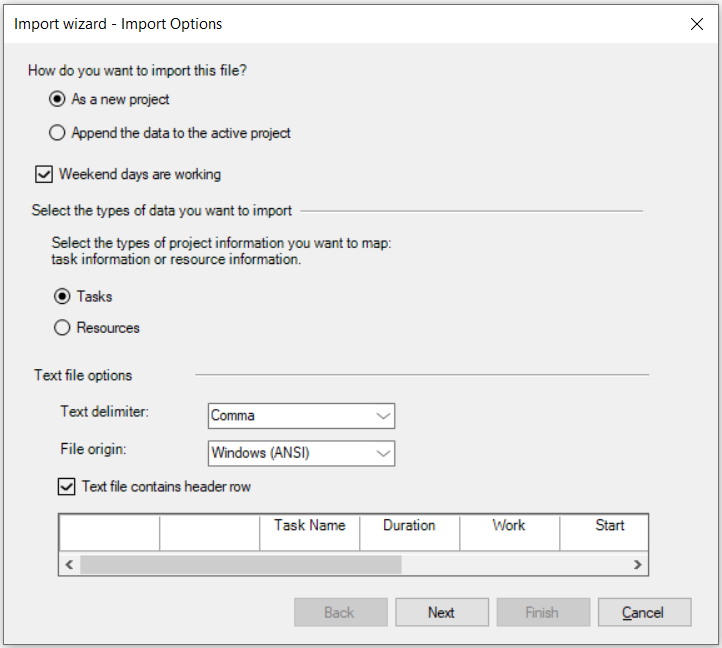
7. Decide if you want to import your data into a new project or the project you have open.
8. Pick the type of information you're importing so the wizard can map it from Excel to Project Plan 365, and click Next.
9. Verify the mapped fields, make adjustments as needed. Click Next if you decided to map both Task and Resources.
10. Press Finish to finalize the import process.
Note: When importing data from a CSV file you also have the option to select how the information is structured (what is the delimiter, I.e. comma, semicolon and what is the origin of the file).
Step by step on how to run the Import Wizard:
1. Open the Project Plan 365 file you would like to import the data into or create a blank file.
2. Click File - Open - Computer - Locate the file and click on it, click on Open, the Import Wizard will start.
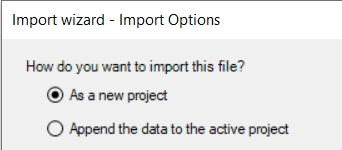
3. Select if the import will be bringing the data in a new file or append to the existing open file.
- If you select “As a New Project” a new file will be opened using default option settings and default blank project file.
- If you select “Append the data to the active project” the imported data will be placed at the end of the current open file
4. Select if Saturday and Sunday should be set to working days in your project.
![]()
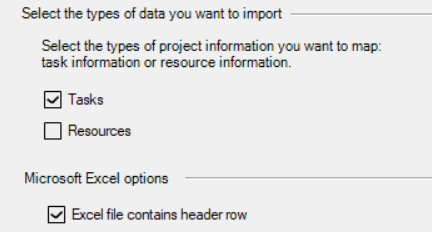
5. Select if the data will be directed toward Tasks or Resources. One or all may be selected.
6. Select if the imported file has column headers.
- If there are column headers in the Excel file this information will be used to match field names from the import file to field names in the Project Plan file. The header row will not be considered valid content data and will not be imported.
- If the imported data does not contain headers, column positioning will be matched with the fields on the import map.
7. Click Next.
8. Select the source worksheet – default is the first sheet in the Excel file.
- If the sheet is recognized, the data fields will appear with preview at the bottom of the view for the mapped fields.
9. The left side of the view will have the fields in the imported Excel file. Select field values on the right side of the view to map the Excel values to the Project Plan 365 fields on the right.
10. Click Next if you have other type of data to map (Resources) OR click Finish to finalize the import.
Note: Watch for error messages that occur during the import. They might be indicating scheduling issues with some of the imported tasks which might need attention.