
If you started your project in Smartsheet but need to manage more complex schedules, resource sharing, and tracking, you’re probably ready to move your data into Project Plan 365. You can do this by using the Import from Smartsheet functionality.
What is Smartsheet?
Smartsheet is a spreadsheet-based tool for simpler project management.
Why can't I see all the columns imported from Smartsheet file?
During the import process, data might have been imported to columns that are not being shown on the currently viewed table. After the import is completed you can insert imported columns into any table to view the imported data.
How do I import a project from Smartsheet?
To import a project created on Smartsheet click File - Import - Import from Smartsheet. Select the format (excel or XML). If you choose Excel, the Import Wizard will appear. If you choose XML the file will be automatically opened.
Step by step on how to import a project from Smartsheet:
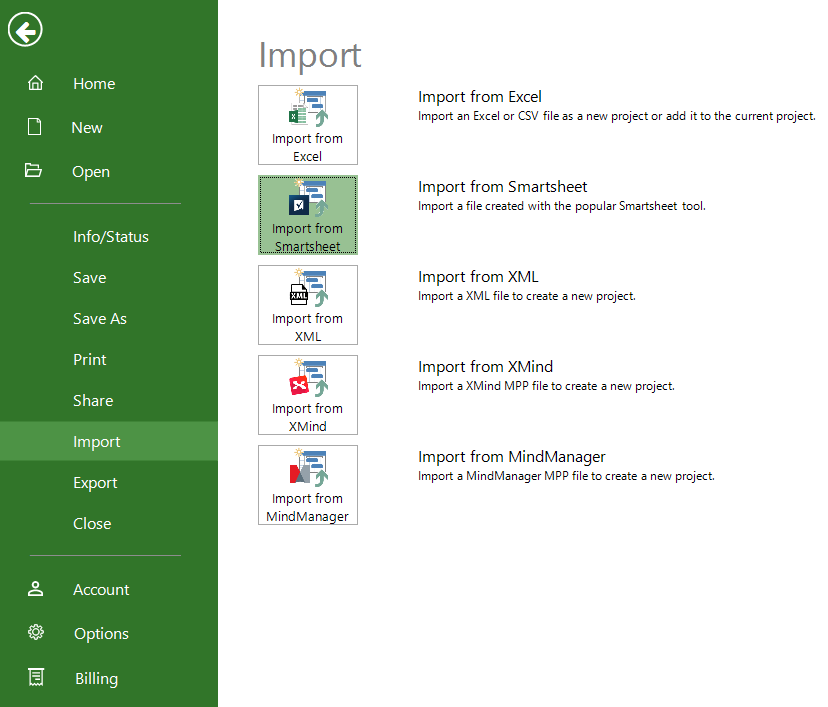
1. In Project Plan 365, click File – Import.
2. Select Import from Smartsheet.
3. In the Open dialog which appears you can either select Excel Workbook (.xlsx) or XML Format (.xml) depending on the format you have exported from Smartsheet.
- If you chose to import an Excel file, then an import wizard will appear. This wizard will guide you through the steps you need to make in order to import your data.
- If you chose to import a XML file, then the file will be automatically opened in Project Plan 365 so you can start to edit your project right away.
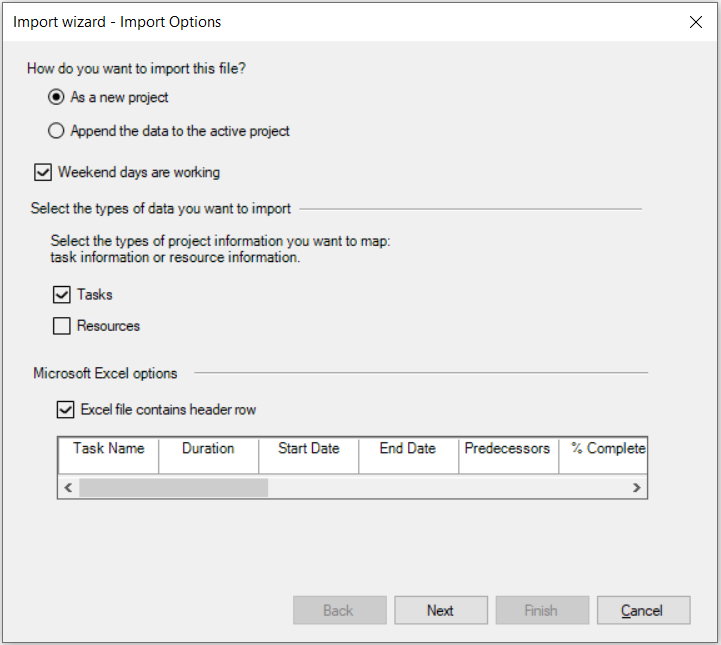
4. In the first window you must:
- Select if the import will be bringing the data in a new file or append to the existing open file.
- If you select “As a New Project” a new file will be opened using default option settings and default blank project file.
- If you select “Append the data to the active project” the imported data will be placed at the end of the currently opened file.
- Select if you want Saturday and Sunday to be working days (Weekend days are working option).
- Select if the data will be directed towards Tasks or Resources. (One or all may be selected)
- Select if the imported file has column headers.
- If there are column headers in the Excel file this information will be used to match field names from the import file to field names in the Project Plan file. The header row will not be considered valid content data and will not be imported.
- If the imported data does not contain headers, column positioning will be matched with the fields on the import map.
5. After making these settings you can advance to the next step by pressing the Next button.
- Select the source worksheet
- By default, the data will be imported from the first sheet of the Excel file. If your data lies in another sheet you can select its name from the Source worksheet control;
- The left side of the view will have the fields in the imported Excel file. You can select field values on the right side of the view to map the Excel values to the Project Plan 365 fields on the right.
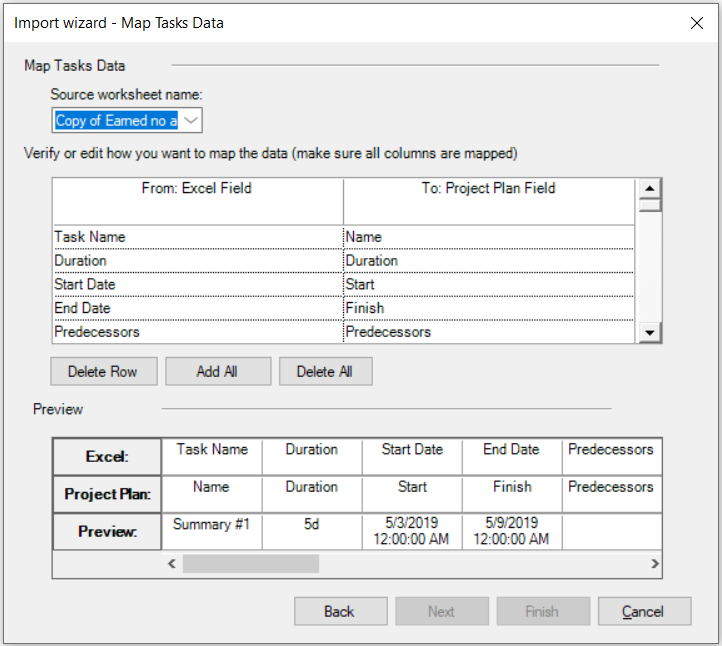
6. After you are finished with the mapping of the fields you can press Finish to start the import and create your project.