
An important aspect in project planning is to add holidays as non-working days and time-off periods for the resources involved in your project. Having a task complete on Christmas day is never likely to be a realistic expectation! Holidays, vacations, medical leave. People take time off. And keeping track of non-working time is critical for making sure your project meets its deadline. To make sure you never get caught out, you can add holidays (non-working time) to the project calendar. Calendars determine the standard working time and non-working time, such as weekends and holidays, for the project.
Calendars are used in Project Plan 365 to schedule your project and to identify working times to determine when resources in your organization are likely available to work on tasks in your project. Typically, calendars are assigned to resources so that the application can track when resources are available to work on tasks to which they are assigned. Take into account that you need to set up calendars for your project before you can assign them to resources. By default, tasks are scheduled based on the project calendar. To define unique or specific exceptions for working time and non-working time, you can create a task calendar.
There are four types of calendars:
- Base calendars: Project Plan 365 uses base calendars as a starting point for creating the other three types of calendars (project, task, and resource calendars). You can think of them as templates upon which other calendars are based. You can also choose a base calendar to be the project calendar, and you can apply a base calendar to tasks as a task calendar or as the default hours for a resource calendar
- Project calendars: The project calendar sets the default working times for all tasks in your project. For example, if most of the work on your project happens between 8 a.m. and 5 p.m. Monday through Friday, the out-of-the-box Standard calendar is the best choice for your project calendar. When you set the project calendar you are simply choosing what the default working times will be for tasks and resources in your project. You can modify working times for individual tasks and resources to reflect exceptions to the default hours. If resource calendars or task calendars are not used, tasks are scheduled during the working time based on the project calendar by default
- Resource calendars: Use resource calendars to track the schedules of individual resources. Resource calendars make sure that work resources (people and equipment) are scheduled only when they're available for work. For example, if a resource has a flexible work arrangement and works four 10-hour days instead of five 8-hour days, you can set that resource's calendar to reflect that schedule without changing the overall schedule for all other resources in the organization. By default, the working time settings in the resource calendar match the project calendar. However, you can customize the resource calendar to show individual schedule information, such as vacations, leaves of absence, or equipment maintenance time
- Task calendars: Task calendars are not often used, but they can be very powerful. Use task calendars to enter special days specific to individual tasks in your project. For example, if the task must happen over a weekend but your project calendar specifies weekends as non-working time, you can use a task calendar to call out that weekend as working time for just that task while leaving the rest of the project using the normal project calendar
Project calendars and task calendars are used to schedule tasks, and if resources are assigned to tasks, resource calendars are used as well.
Project Plan 365 supports 3 base calendars:
- Standard calendar: The Standard calendar is the default calendar used by Project Plan 365 to schedule your projects, and is the basis for resource calendars. This calendar reflects a traditional work schedule: Monday through Friday, from 8:00 A.M. to 5:00 P.M., with an hour off for break
- 24-Hours calendar: All time, from Sunday through Saturday, 12:00 A.M. to 12:00 A.M., is set as working time. The 24-Hours calendar reflects a schedule with no nonworking time at all. The 24-Hours calendar can be used when resources and tasks are scheduled for different shifts around the clock, or when equipment resources work on tasks continuously
- Night Shift calendar: The Night Shift calendar reflects a graveyard shift schedule of Monday night through Saturday morning, 11:00 P.M. to 8:00 A.M., with 3:00 A.M. to 4:00 A.M. designated as nonworking time for break
Note: When trying to develop a meaningful and realistic project schedule, keep in mind the following aspects:
- Avoid modifying the standard calendars: keep the default settings for the standard, 24-hour, and night-shift calendars. If you need to change any of the calendars from their default settings copy the calendar of choice to a new calendar which you can use as the basis for your project
- Unless you have a specific need to say a task finishes at a particular hour within a particular day, try to keep to an hours-per-day setting for your project calendar
- Do make sure you record non-working times for resources - Record things like vacation time and times out of office
- Be careful with creating too many task exceptions: if you truly have some task-level exception where you need to use a customized calendar then by all means do so, but beware that too many exceptions could make maintenance of your project a real pain
Step by step on how to set a Base Calendar as Project Calendar:
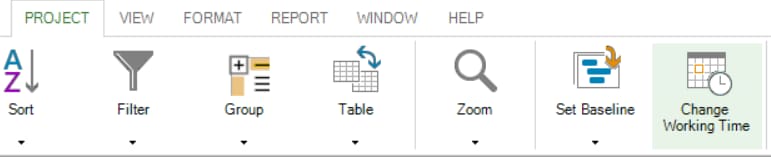
- Go to Project – Change Working Time.
- See that the project includes a few different base calendars, by default:
- Standard: 8AM to 5PM, with a one-hour lunch break at 12PM.
- 24 Hours: 12AM to 12AM, every day.
- Night Shift: 11PM to 8AM, with a one-hour break at 3AM.
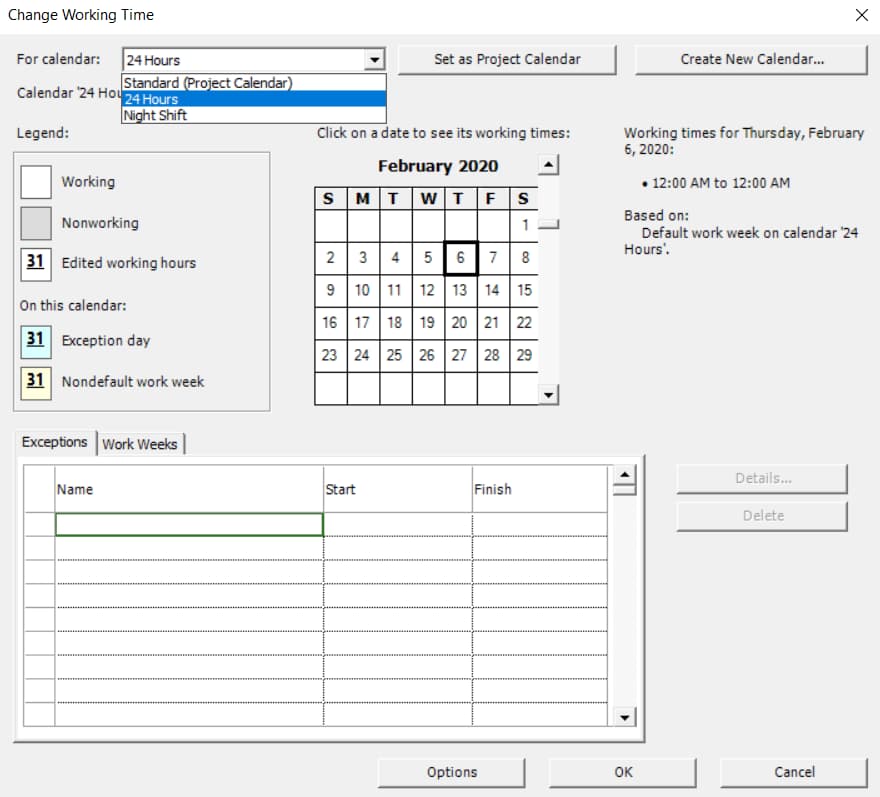
- Click Set as Project Calendar.
Step by step on how to create a Base Calendar:
- Go to Project – Change Working Time.
- See that the project includes a few different base calendars, by default:
- Standard: 8AM to 5PM, with a one-hour lunch break at 12PM.
- 24 Hours: 12AM to 12AM, every day.
- Night Shift: 11PM to 8AM, with a one-hour break at 3AM.
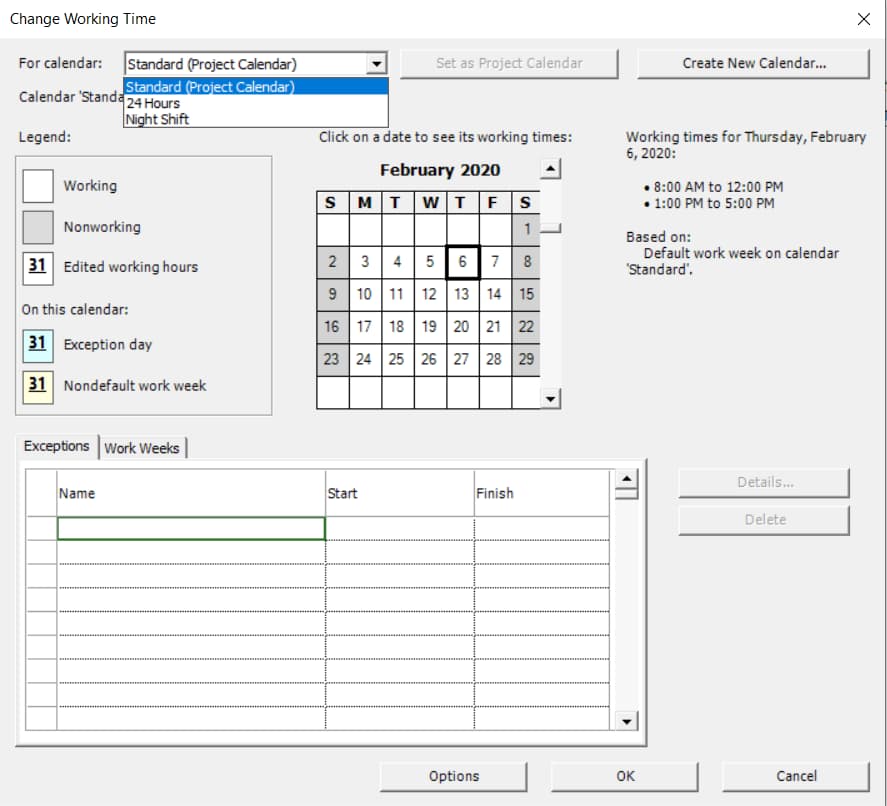
- If these calendars aren't quite working, you can adjust them for your project or create a new base calendar that others can also use. Click on Create New Calendar.
- Give the new calendar a Name, select Create new base calendar, and then click OK.
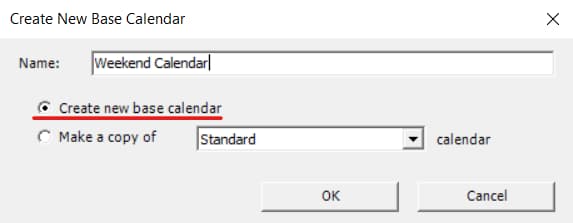
Note: To create a new base calendar based on an existing calendar, click Make a copy of and choose the calendar.
- After you have created a new Calendar, you can set general working days and time for the project to better match your organization's work.
 Practice
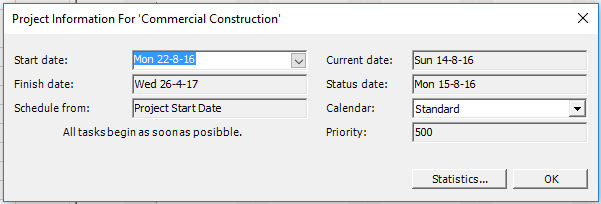
1. Check the type of base calendar that is used as starting point for the project calendar. If most of your tasks need to be completed during normal working hours, choose the Standard base calendar. If you go to the Project menu and press on Project Information you will notice that our project is using the Standard calendar, which will be the base calendar for our project.
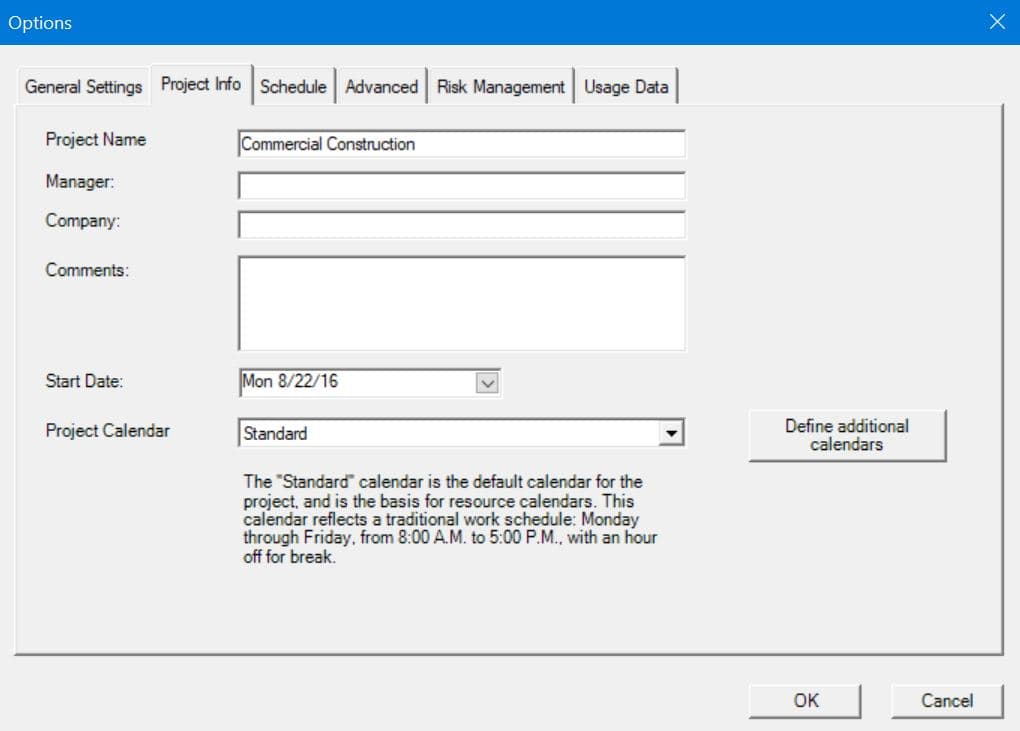
2. You can also check the type of base calendar that is used as starting point for the project calendar by heading to the File backstage menu and pressing on Options. Here select the Project Info tab, where you can see that for the Project Calendar is specified the Standard calendar. Down you can find a short description of it.
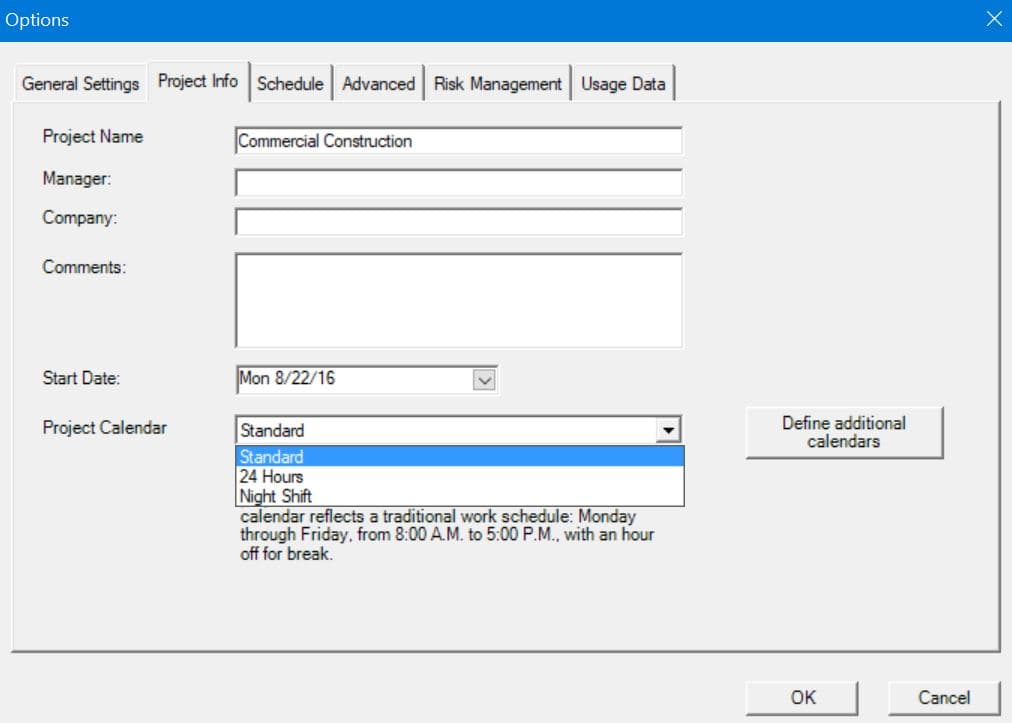
If you press the arrow from the right, in the opened list you will notice other 2 options (24 Hours and Night Shift), which are other available base calendars:
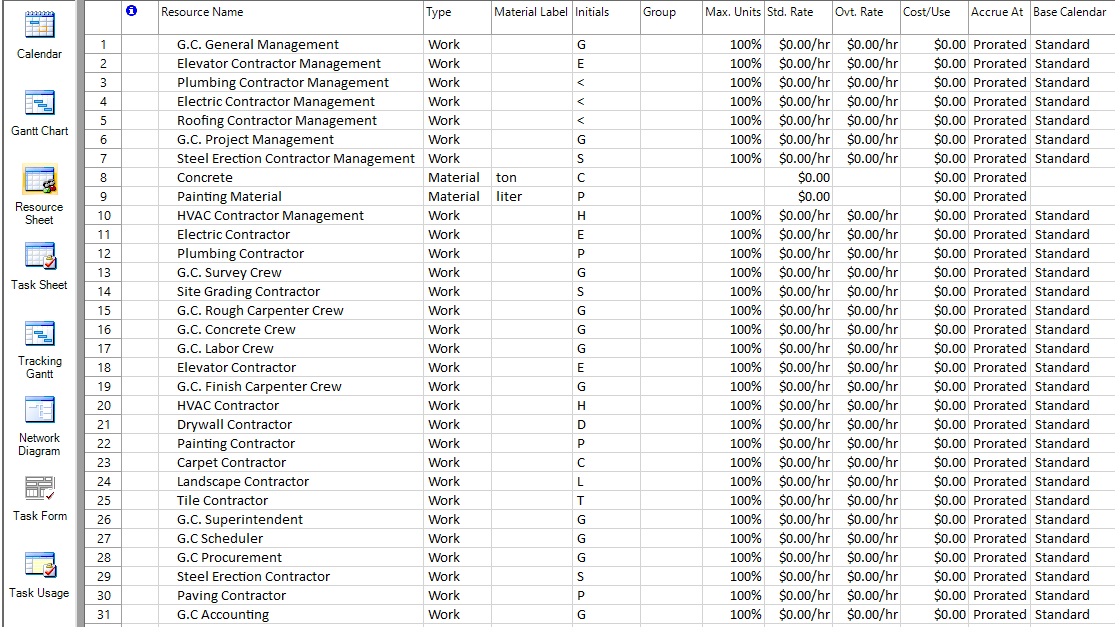
3. The base calendar is applied to all resources as you add them. However, you can assign a different base calendar to a resource, or you can modify the individual's resource calendar. If you switch to the Resource Sheet view, where are entered all the resources in our project, and look in the Base Calendar column, you will notice that all the work resources have Standard as the Base Calendar.
4. Another important piece of information related with calendars, that you should take into account are the calendar options. Go again to the File menu and press on Options, then select Schedule tab, which specifies different calendar options for the project. Here you will find some calendar settings such as: default start time and end time, hours per day, hours per week and days per month.

 Video
Video
If you prefer to see things in action, rather than reading text, watch out this video, which covers some of the topics from this section.