
By default, tasks are scheduled based on the project calendar. To define unique or specific exceptions (exception: An instance in which a task or resource calendar differs from the project calendar. An example is a resource that must work on Saturdays, but for which the project calendar does not include working time to cover these instances) such as machinery that runs during nonworking time, you can create a new base calendar for these specific cases.
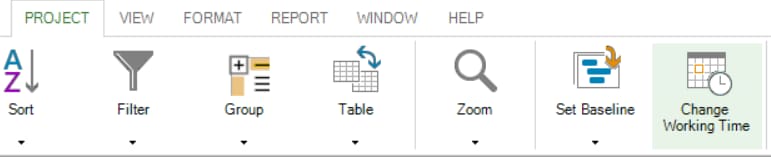
1. To create a new custom calendar, click Project, then click Change Working Time.
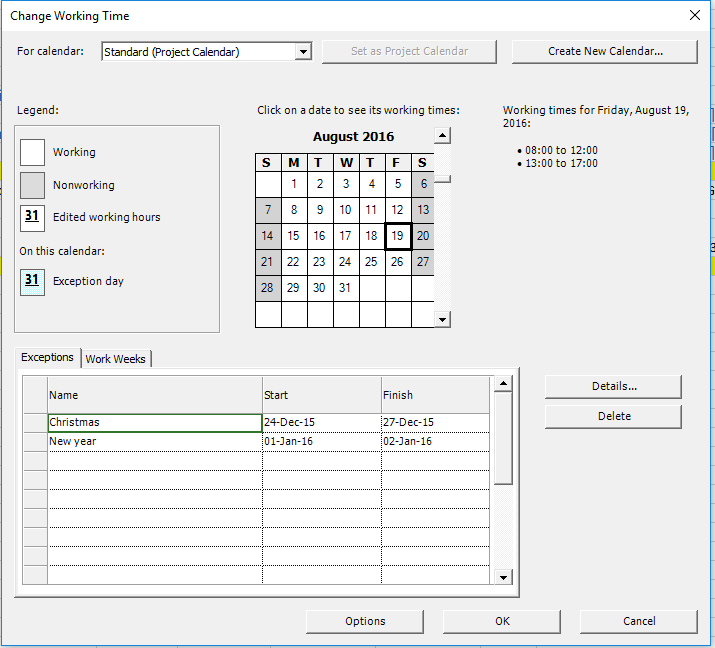
2. In the opened Change Working Time dialog, click on Create New Calendar.
3. In the opened dialog, in the Name box, type a name for your new calendar.
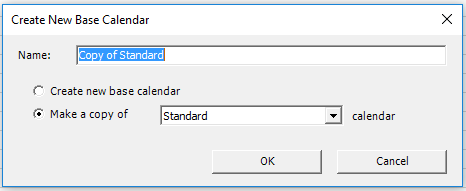
4. To create a new base calendar based on an existing calendar, select Make a copy of, and then choose the calendar name in the calendar drop-down list.
5. Then click OK to create the new base calendar.
 Practice
1. Let’s say that in our project we have resources that are working on a part-time basis, so they have a working pattern different than anybody else. A carefully attention should be given to the resources in your project that do not have a full-time availability. In this way, you can achieve a better management of your resources and their availability, and based on this, to better estimate the finish date of your project. Let’s suppose that our resource called Drywall Contractor works part-time, meaning only 6 hrs/day. In order to specify this, we will create a custom calendar called Part-time, that we will indicate later on as the base calendar for the resource. This is especially useful when you have in your project several resources that work on a part-time basis and you can reuse this custom calendar to model this specific working pattern across the resources in your project. To this end, head to the Project menu in the ribbon and press on Change Working Time option, to open the Change Working Time dialog.
2. To model this specific working pattern, we will create a custom calendar to specify the exact number of hours on a day the part-time resource can dedicate to our project. Rather than modifying the existing resource calendar, we will create a new one. You can do that by pressing on Create New Calendar... button from the top. A Create New Base Calendar dialog will show up. Check the Make a copy of Standard calendar option, to create a copy of the standard calendar. Also here, we will enter the name of our custom calendar. Let’s say Part-time.

After this, press OK button in this dialog.
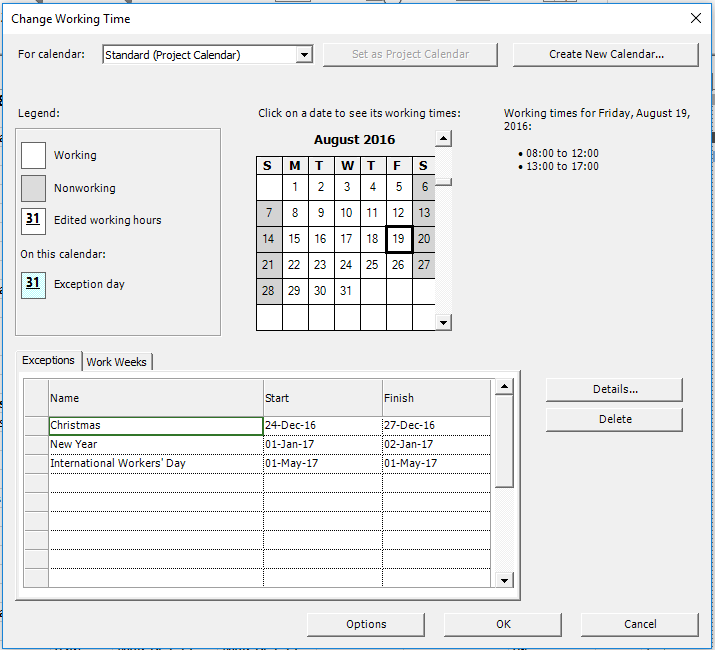
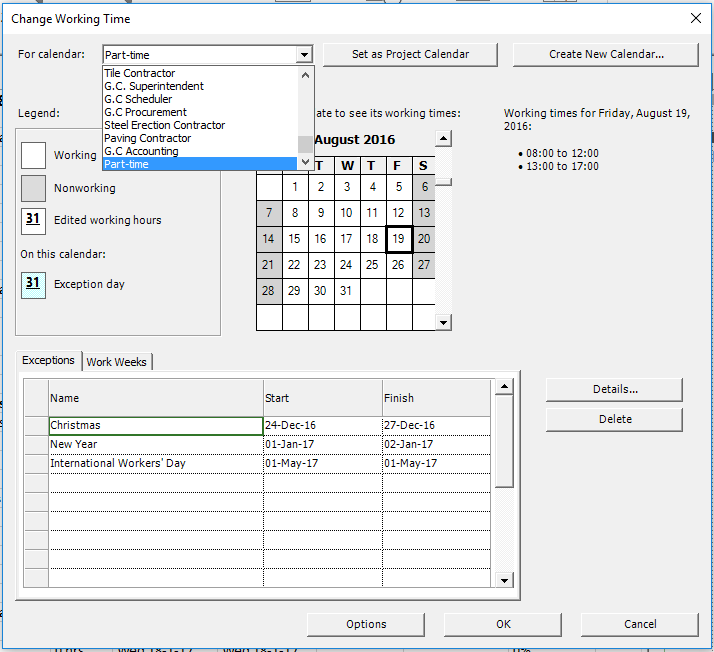
3. You will notice that in the top calendar list, I can found now the new calendar called Part-time, that we’ve just created. Since we've created a copy of the Standard calendar, the holidays in the project entered as exceptions are present as well in the Part-time base calendar.
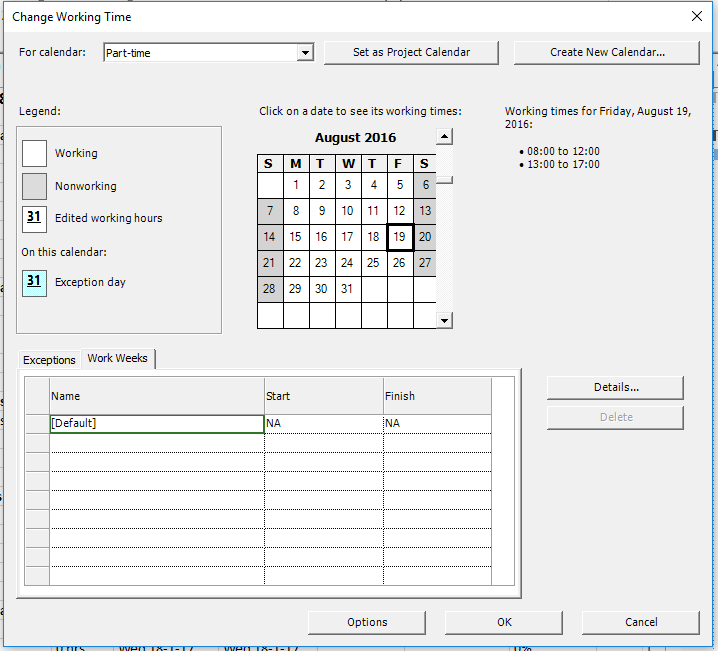
4. Now it’s time to modify the working pattern for this calendar. For this, press on the Work Weeks tab. Select [Default] entry and press on Details.
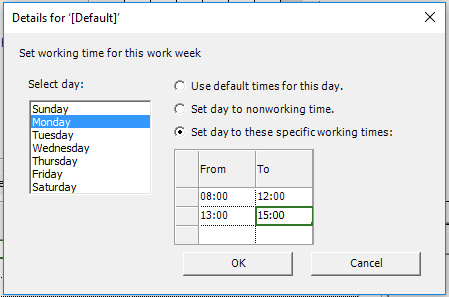
5. Using the displayed dialog, we can change the working pattern for every single day of a week. Select Monday in the left side and choose the Set day to these specific working times option in the right side. For the working time interval, leave the first row unchanged and edit the end time for the last second interval. More exactly, instead of 5 PM we will enter 3 PM, leading to 6 working hours on Mondays, with a break of 1 hour.
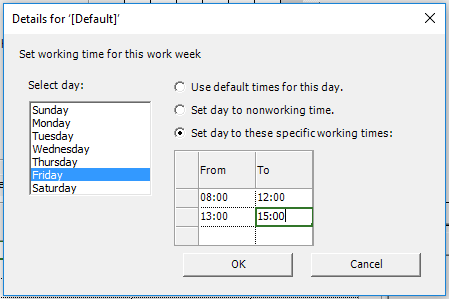
6. Proceed in the same manner for the rest of the work week days, selecting in turn Tuesday, Wednesday Thursday and Friday, and setting the same working time intervals as before. In this way, for each day, from Mondays to Fridays, the part-time calendar will limit the working time to only 6 hrs/day. After you finished with Friday, press OK in this dialog. Then press OK in the Change Working Time dialog to apply this change.
7. Now that we’ve finished setting our custom calendar, let’s assign it to our part-time resource called Drywall Contractor. To achieve this, in the Resource Sheet view, locate the row corresponding to Drywall Contractor resource. Drag to the right the Resource Name column to resize it and better see the resource names. For this particular resource, select the cell in the Base Calendar column and in the displayed drop-down list choose the Part-time calendar that we’ve just created, to assign it to the resource.
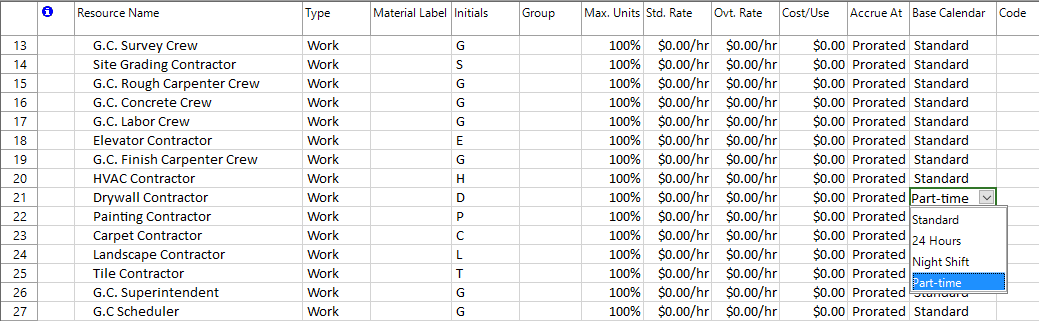
In this way, we base the resource's working times on the Part-time calendar, which specifies only 6 hrs/day from Monday till Friday.
 Video
Video
If you prefer to see things in action, rather than reading text, watch out this video, which covers some of the topics from this section.