
An important aspect in project planning is to add time-off periods for the resources involved in your project. Holidays, vacations, medical leave. People take time off. And keeping track of non-working time is critical for making sure your project meets its deadline. To make sure you never get caught out, you can add time-off periods (non-working time) for your resources.
Calendars determine the standard working time and non-working time, such as weekends and holidays, for the project. When trying to develop a meaningful and realistic project schedule, keep in mind to make sure you record non-working times for resources - record things like vacation time and times out of office. Calendars are used in Project Plan 365 to schedule your project and to identify working times to determine when resources in your organization are likely available to work on tasks in your project. Typically, calendars are assigned to resources so that the application can track when resources are available to work on tasks to which they are assigned. Take into account that you need to set up calendars for your project before you can assign them to resources.
A resource calendar is a calendar that specifies working and nonworking time for an individual resource. A resource calendar differs from a base calendar, which specifies working and nonworking time for more than one resource. Resources can either inherit the nonworking time from the base calendar, or override this time with nonworking time settings on the resource calendar. You can use resource calendars to define unique exceptions for individual resources, such as vacations, different working days, or different shifts. Use resource calendars to track the schedules of individual resources. Resource calendars make sure that work resources (people and equipment) are scheduled only when they're available for work. For example, if a resource has a flexible work arrangement and works four 10-hour days instead of five 8-hour days, you can set that resource's calendar to reflect that schedule without changing the overall schedule for all other resources in the organization.
By default, the working time settings in the resource calendar match the project calendar. However, you can customize the resource calendar to show individual schedule information, such as vacations, leaves of absence, or equipment maintenance time. You can change working time or nonworking time for specific resources or a set of resources, ensuring that resources are scheduled only when they are available for work.
Project calendars and task calendars are used to schedule tasks, and if resources are assigned to tasks, resource calendars are used as well. You can modify these calendars to define the working days and hours for the whole project, for individual resources, and for tasks. If you have changed working or nonworking time on a resource calendar and the resource is assigned to a task, the task is scheduled during the working time on the resource calendar. This may also affect the finish date of the task.
For each resource you enter, Project Pan 365 creates individual resource calendars based on the settings in the Standard calendar. You can create and assign resource calendars for individual resources or resource groups to indicate specific working hours; for example, you can assign a resource to the swing shift or night shift. You can edit resources' calendars to indicate nonworking time, such as vacations and leaves of absence.
Step by step on how to edit resource calendar:
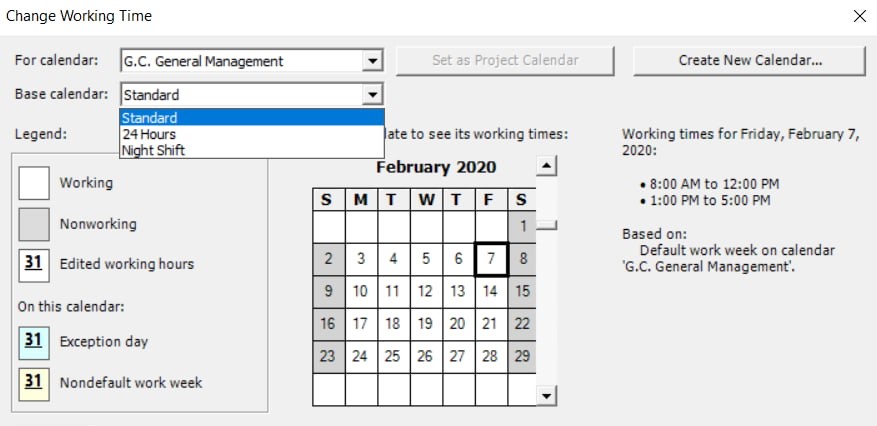
- Go to Project menu – Change Working Time.

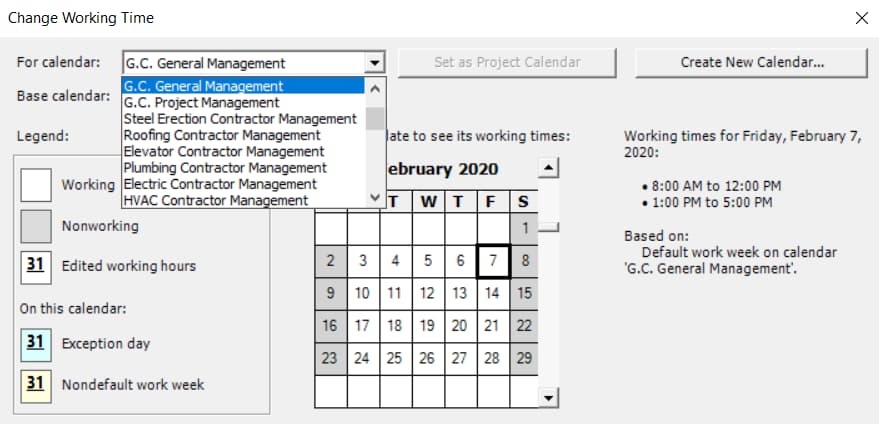
- Choose a resource from the For calendar list.

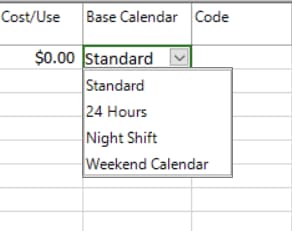
- Choose the right Base calendar for the resource.
- If the working times in the calendar aren't quite right for this resource, click the Work Weeks tab, and then click Details.
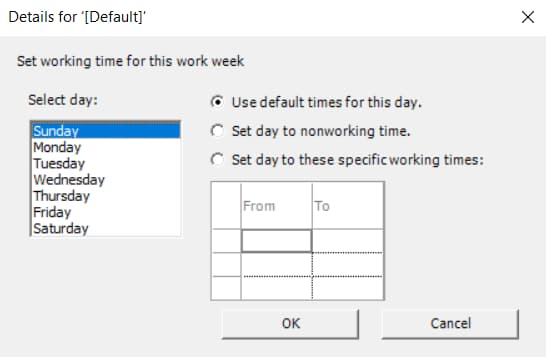
- Select the day(s) that you want to change the working times for, and then choose whether you want them to be working or nonworking time.
- If you chose Set day to these specific working times, use the From and To columns to set the working times for the selected days.
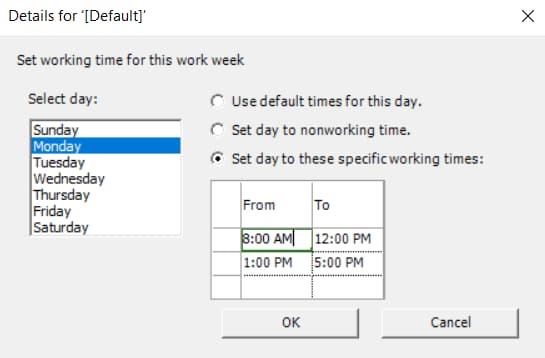
- Click OK to return to the Change Working Time dialog box, and then click OK.
Step by step on how to add a resource’s vacation time:
- Go to Project – Change Working Time.
- Choose a resource from the For calendar list.
- Select the vacation day(s) on the calendar. Use Shift + mouse click to select the start and finish date of the vacation.
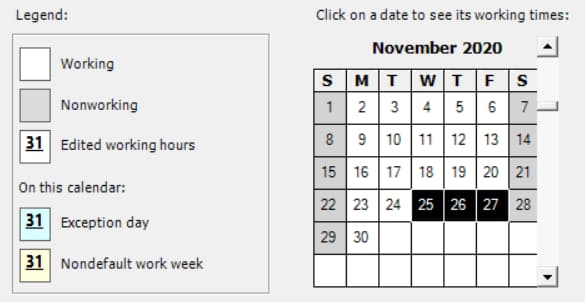
- On the Exceptions tab, type a Name for the vacation day(s), and then press Enter.
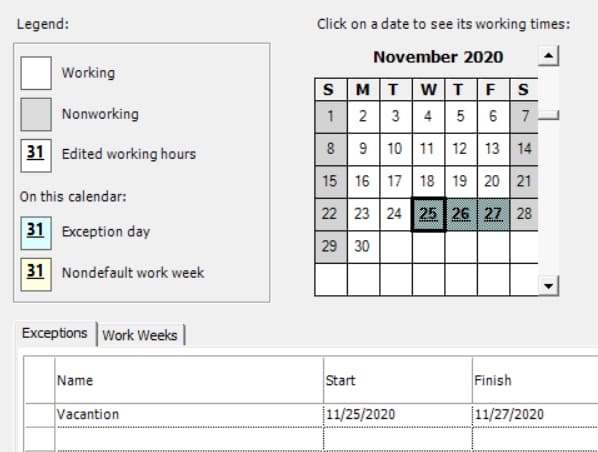
The Start and Finish dates are populated with what you had selected on the calendar, and the vacation is marked as nonworking.
- Click OK.
Step by step on how to set up repeating vacation days:
Some resources may have vacation time that regularly repeats during the project. For example, they may want every other Friday off.
- On the Change Working Time dialog box, select the vacation day you want to make recurring, and then click Details.
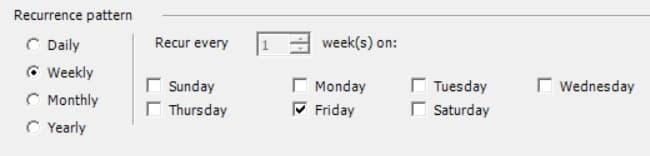
- Under Recurrence pattern, set how often the vacation day will repeat.
Tip: You can also set a Range of recurrence if the vacation happens repeatedly and then stops. For example, if the resource is taking every other Friday off over the summer but will resume a normal schedule in the fall.
- Click OK to return to the Change Working Time dialog box, and then click OK.
Step by step on how to assign a calendar to a resource:
- On the View menu, click Resource Sheet.
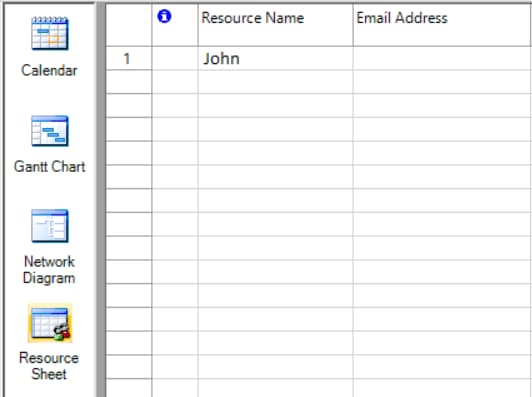
- In the Resource Name field, select the resource you want to assign a calendar to.
- In the Base calendar column, select the calendar you want to assign to the resource. For example, if the selected resource works the night shift, click Night Shift to assign this as the resource's base calendar.
Note: By default, the Standard calendar is the project calendar. The project calendar is applied to all resources as you add them. You can either assign a different base calendar to the resource, or you can modify the individual resource calendar.
Project Plan 365 reschedules tasks around the new non-working time.
 Practice
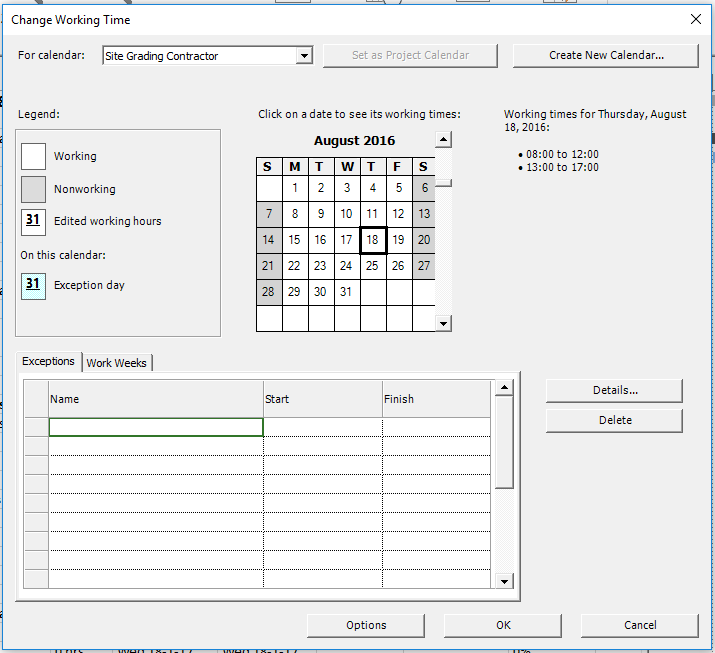
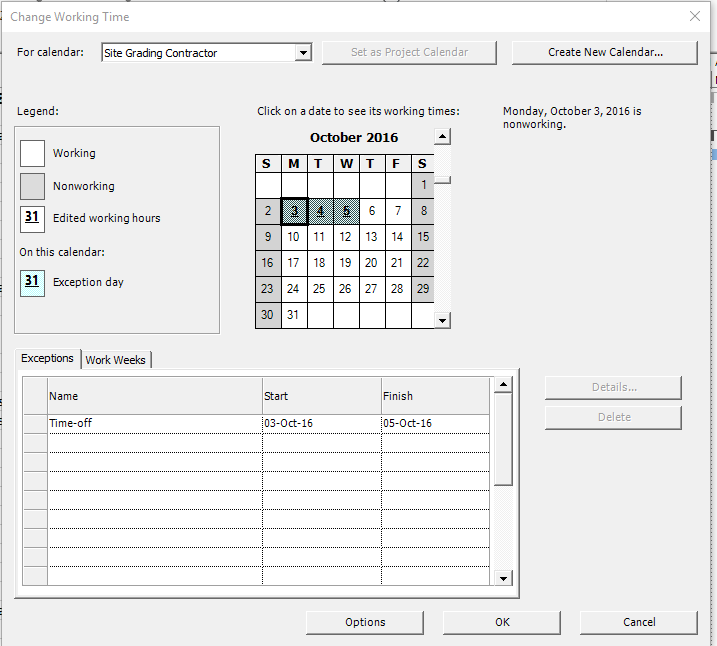
1. Typically, calendars are assigned to resources so that the application can track when resources are available to work on tasks to which they are assigned. Thus, we will specify time-off periods for some resources in our project by using the person's resource calendar. Let’s suppose that we want to indicate a time-off period for the resource called Site Grading Contractor. To indicate this, first open the Change Working Time dialog. The resource’s calendar has the same name as that person. Thus, we will select the calendar for Site Grading Contractor from the drop-down list.
2. In the Exceptions tab, enter Time-off as the name of the exception and specify the start and end date for the time-off period. Let’s say that the time-off takes place between 3th of October and 5th of October. In this way, using the resource calendar, we specified three days of time-off for the resource, as an exception to the individual resource working time.
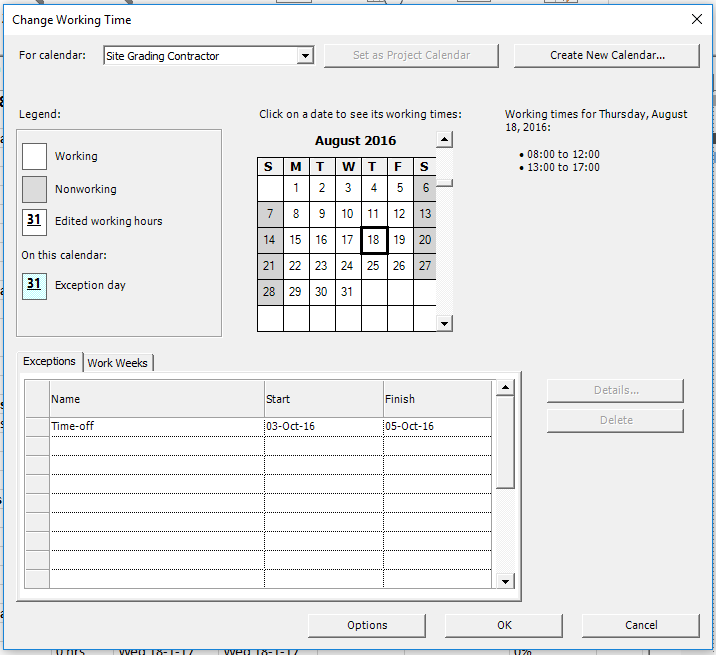
3. If you look in the calendar for October month, you will see that the days within the time-off period are marked as being non-working.
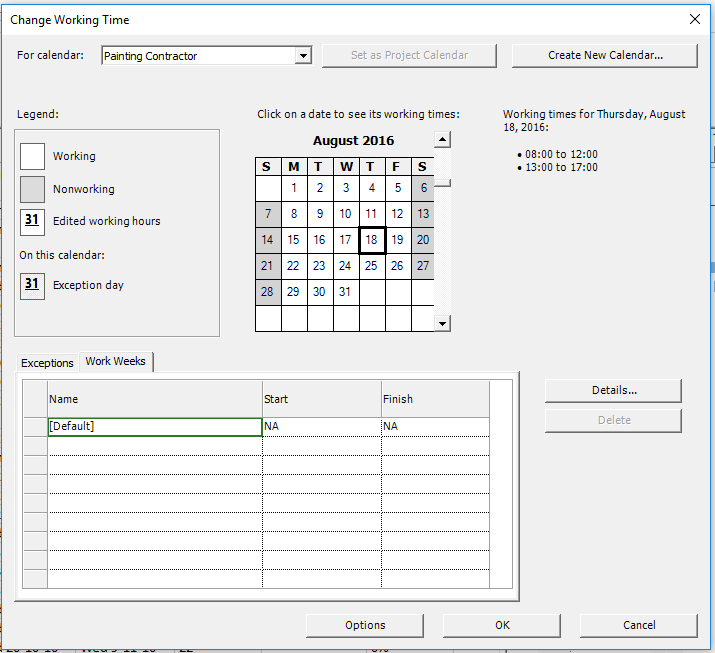
4. Besides setting exceptions for a resource calendar, you can also alter the calendar of a resource to indicate a working pattern different from the typical pattern of 5 working days in a week. For instance, we might have resources with different availability than the rest, such that they are not working on Mondays. Let’s suppose that this is the case of the resource called Painting Contractor. To specify this, open the Change Working Time dialog and in the drop-down list select Painting Contractor. To specify that all the days of a week are working days, except the Monday, select the Work Weeks tab. Then select the [Default] entry and press on Details… button.
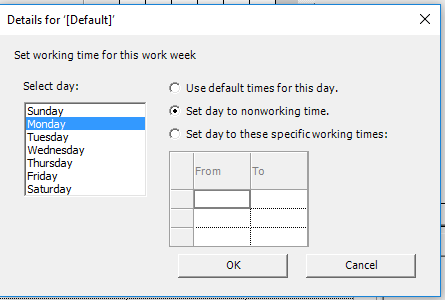
5. Once you’ve done this, a Details dialog will be shown, from where you can specify the working times for each day of a week from Sunday to Saturday. The only change we need to do is to select Monday in the left and in the right to select the option called Set day to nonworking time, in order to indicate that Monday is a non-working day. The rest of the days from the work week we will leave them as they are.
6. If you look in the calendar displayed for Painting Contractor resource, you will notice that Mondays are marked with grey background, indicating they are non-working days.
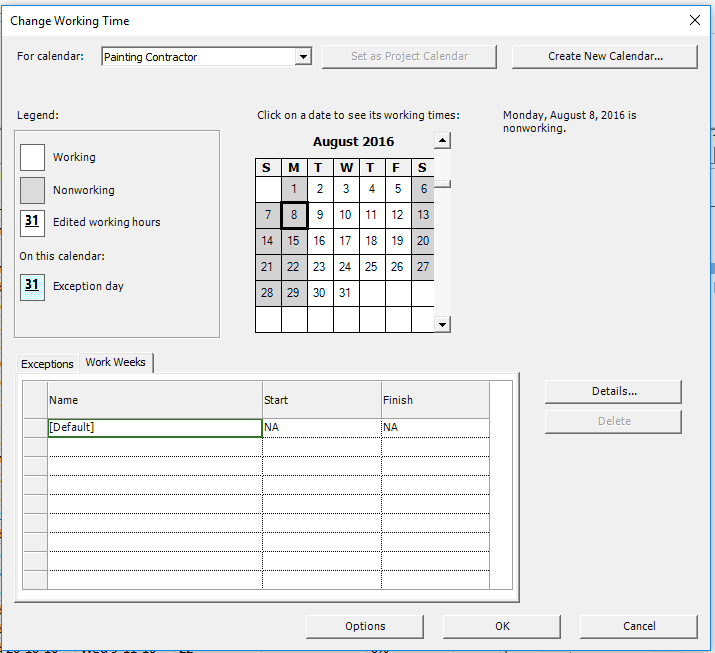
Press OK to apply this change and to close the dialog.
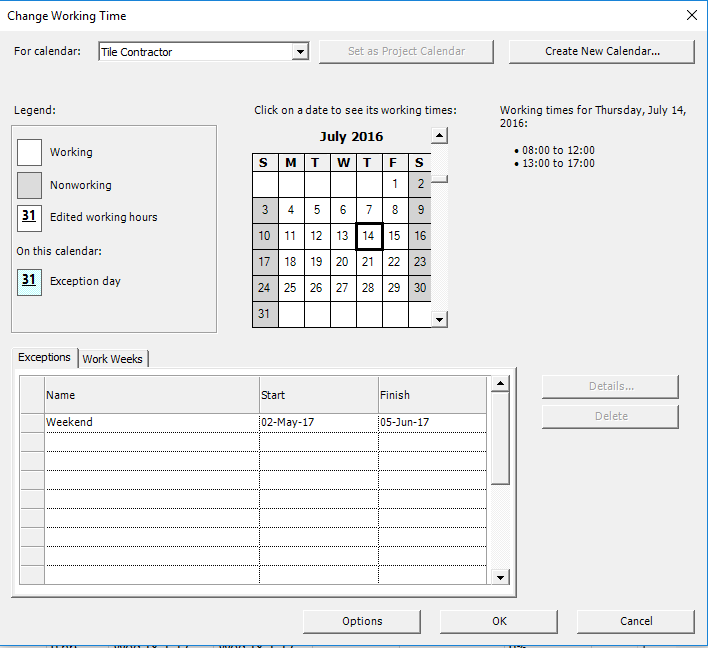
7. We can also indicate that some resources also work during the weekend, for instance on Saturdays which is typically a non-working day in the Standard calendar. Suppose this is the case for Tile Contractor resource, which during May and June months will work also on Saturdays, to speed up things a little bit. For this we will directly edit the calendar of Tile Contractor resource and indicate Saturday as working day. Open again the Change Working Time dialog and from the list select the calendar for Tile Contractor. In the Exceptions tab, add an exception called Weekend that takes place between 2 May 2017 and 5 June 2017. Select this exception by clicking on its name and click on Details... button.
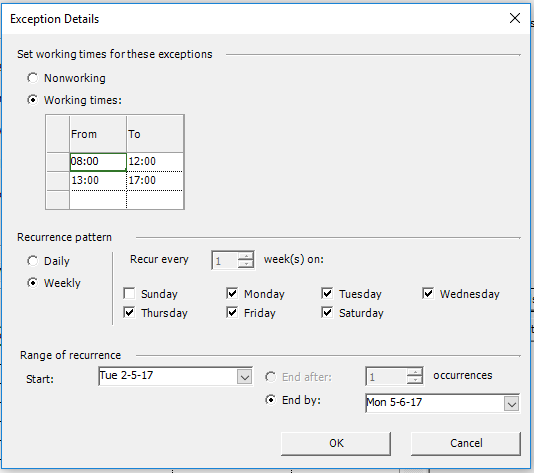
8. In the Details dialog, select Working times, then under the recurrence pattern choose Weekly and check all the week days, except Sunday. In this way, all the week days, except Sunday, will be indicated as working times, during which work can be performed by the resource. After this, press OK in this dialog.
9. When looking in the calendar displayed for May, you will notice that all the days, except the Sundays, are marked as being exception days.
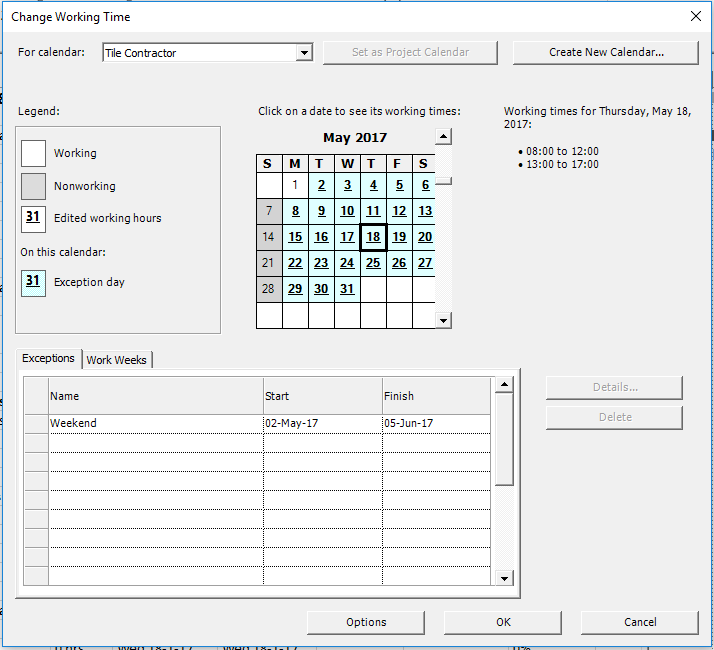
Press OK in this dialog, so that the changes will be applied.
Note
In order to see the changes made on tasks, set the Task Type to Fixed Units from Task Information dialog.
If you prefer to see things in action, rather than reading text, watch out thisvideo, which covers some of the topics from this section.