
Calendars are used in Project Plan 365 to schedule your project and to identify working times to determine when resources in your organization are likely available to work on tasks in your project. Task calendars are not often used, but they can be very powerful. These can be used to define working times for tasks outside the working times in the project calendar. A task calendar represent a base calendar that you can apply to individual tasks to control their scheduling, usually independent of the project calendar or any assigned resources' calendars. By default, all tasks use the project calendar as the base calendar. Use task calendars to enter special days specific to individual tasks in your project. For example, if the task must happen over a weekend but your project calendar specifies weekends as non-working time, you can use a task calendar to call out that weekend as working time for just that task, while leaving the rest of the project using the normal project calendar.
Tasks can have their own calendars. By default, tasks are scheduled based on the project calendar. To define unique or specific exceptions (exception: An instance in which a task or resource calendar differs from the project calendar. An example is a resource that must work on Saturdays, but for which the project calendar does not include working time to cover these instances) for working time and non-working time, such as machinery that runs during nonworking time or an office move that can occur only on a weekend, you can create a task calendar for individual tasks. A task calendar that is associated with a task overrides the project calendar. Project Plan 365 reschedules tasks around the new non-working time.
Project calendars and task calendars are used to schedule tasks, and if resources are assigned to tasks, resource calendars are used as well. When a task calendar is assigned to a task and the resource assigned to the task has different working times in its resource calendar, the task is scheduled for the overlapping working time of the two calendars. If no task calendar is specified for a task, the Project calendar will be used to schedule the task. You can modify these calendars to define the working days and hours for the whole project, for individual resources, and for tasks.
Step by step on how to create and assign a Task calendar:
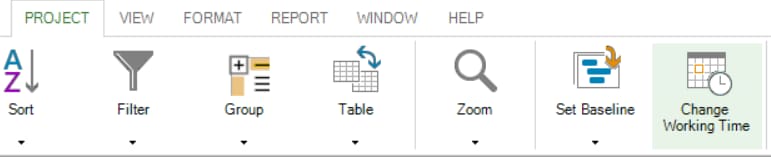
1. Task calendars are created like other calendars. To create a new base calendar to be assigned to a task, click Project, then click Change Working Time.
2. In the opened Change Working Time dialog, click on Create New Calendar.
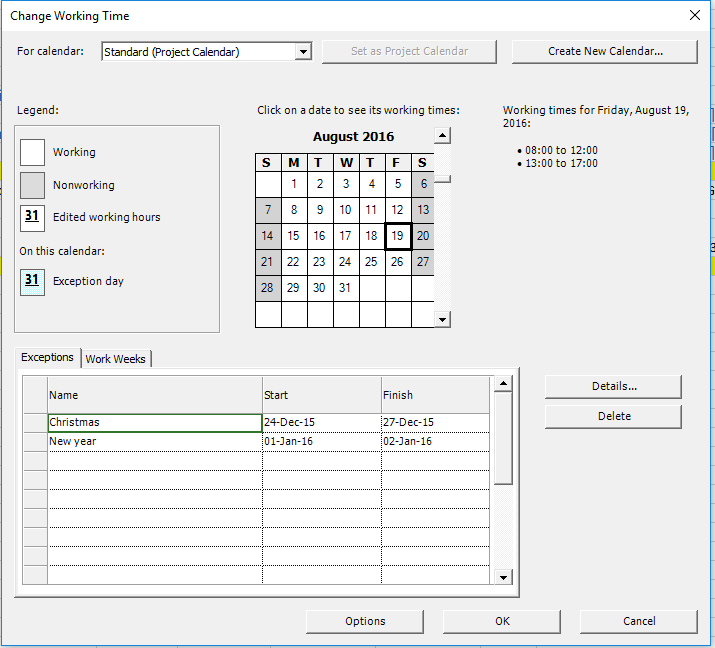
3. In the opened dialog, in the Name box, type a name for your new calendar.
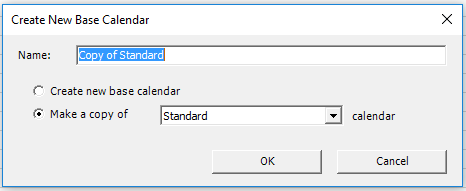
4. To create a new base calendar based on an existing calendar, select Make a copy of, and then choose the calendar name in the calendar drop-down list.
5. Then click OK to create the new base calendar.
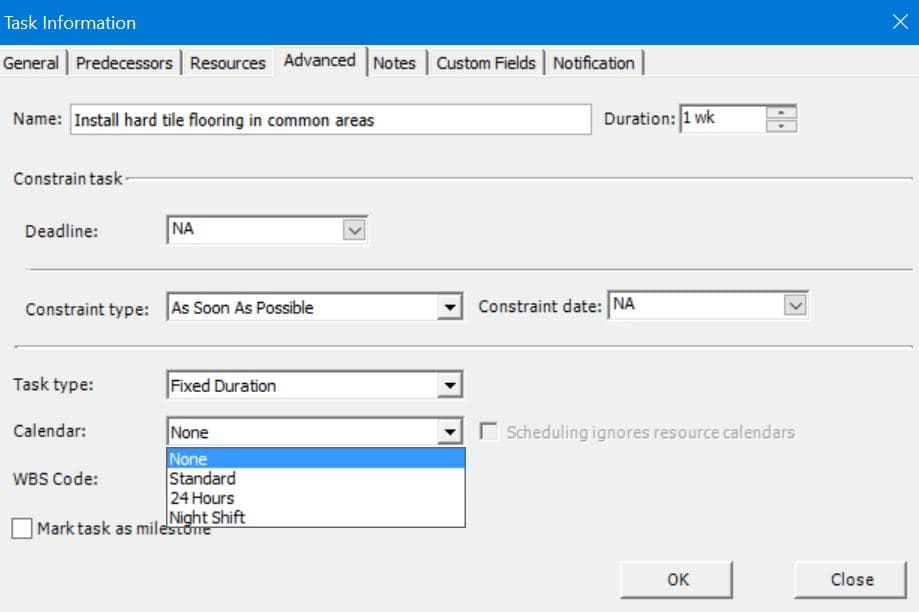
6. To assign a calendar to a task or to a recurring subtask, go to the Gantt Chart view and open the Task Information dialog for the desired task, to which you want to assign a calendar. Then in the Task Information dialog, go to the Advanced tab and In the Calendar box, click the calendar you want to use for the task.
 Practice
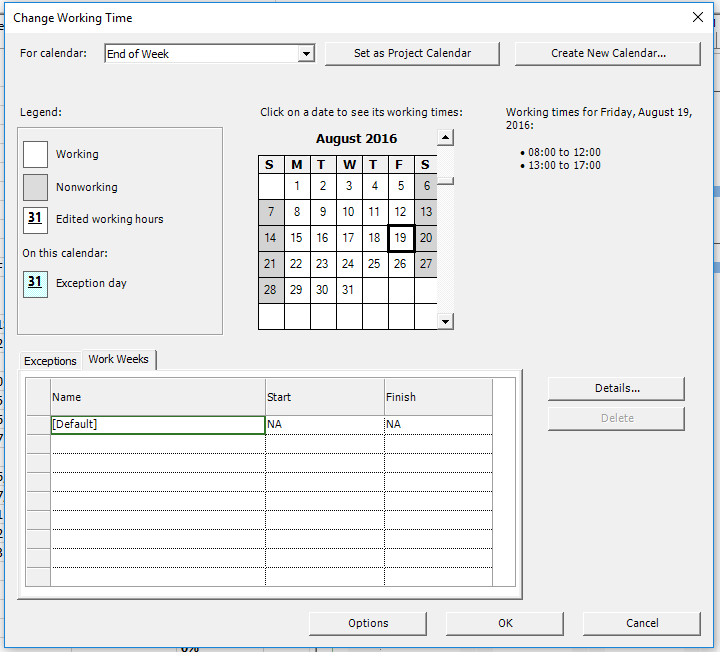
1. To assign a different base calendar to a task than the existing predefined ones (Standard, Night Shift and 24-Hrs), first we need to create the new base calendar. Then we will assign it to the particular task. For this, we will use the Change Working Time dialog that can be accessed by clicking on the Change Working Time option from the Project menu. Then in this dialog, press on Create New Calendar... button.

2. A Create New Base Calendar dialog will show up. Check the Make a copy of Standard calendar option, to create a copy of the standard calendar. Also here, we will enter the name of our custom calendar. Let’s say End of Week. Press OK in this dialog.

3. Now that we’ve created our task calendar called End of Week, we want to indicate that all the typical five days in a working week will be non-working time, except Fridays. To achieve this, head to the Work Weeks tab, select [Default] entry and press on Details… button.
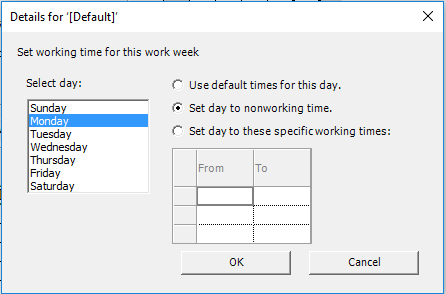
4. In the Details dialog, select Monday in the left and choose the option Set day to nonworking time in the right.
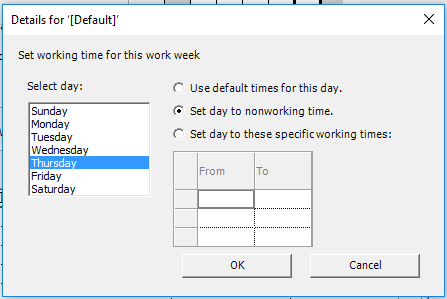
5. Proceed in the same manner for Tuesday, Wednesday and Thursday. After this, press OK button.
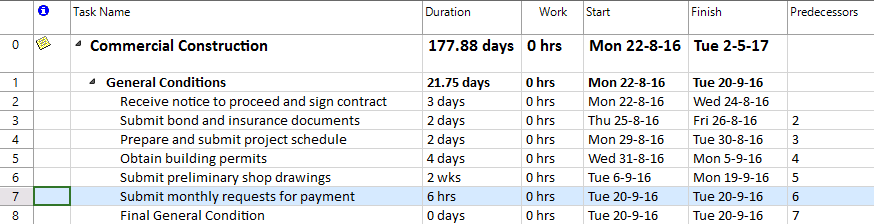
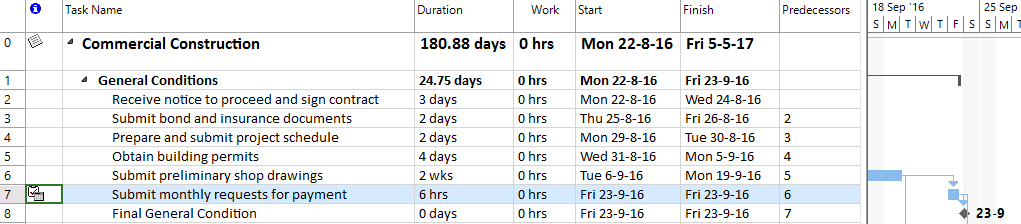
6. Press OK button in the Change Working Time dialog. Now that we’ve finished setting up our custom calendar, let’s assign it to the task in our project called Submit monthly requests for payment, that we want to take place at the end of a week, on a Friday. Notice that currently this task takes place on a Tuesday.
7. To assign a calendar to a task, press on the Task Information option from the Task menu, which will display the Task Information dialog corresponding to this task. Here, go to the Advanced tab, then look where it is mentioned Calendar. Now, you can see that appears None, which means that at this point of time, the task uses the same calendar that the project uses.
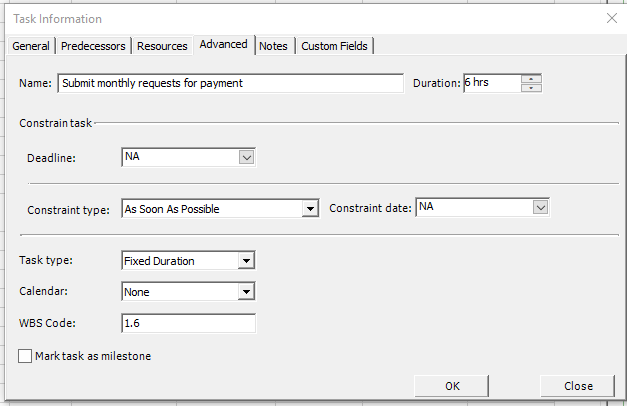
8. We are going to overwrite this, by selecting the End of Week calendar from the drop-down list. Then press OK button in this dialog.

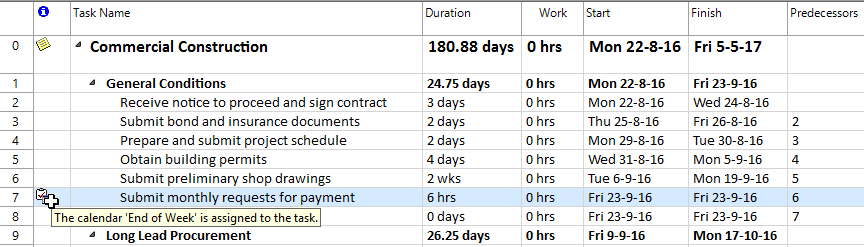
9. Once you’ve done this, you will notice that the task was moved to take place on a Friday, as you can also see when looking at its taskbar in the right of Gantt Chart. You can use the Scroll To option in the Task menu to see in the right side of Gantt Chart the bar corresponding to a task.
10. Also if you look in the Indicators column, you will notice a specific icon to mark that this task has associated a calendar. If you hover over this icon, a tooltip with information about the task calendar will be shown:
 Video
Video
If you prefer to see things in action, rather than reading text, watch out this video, which covers some of the topics from this section.