Project Plan 365 offers Export functionality, which allows you to export the task or resource information from the current view in different formats: MPP, XML, PDF, Excel, Image, and PowerPoint.
There is also the possibility to export a consolidated project plan to Dashboard.
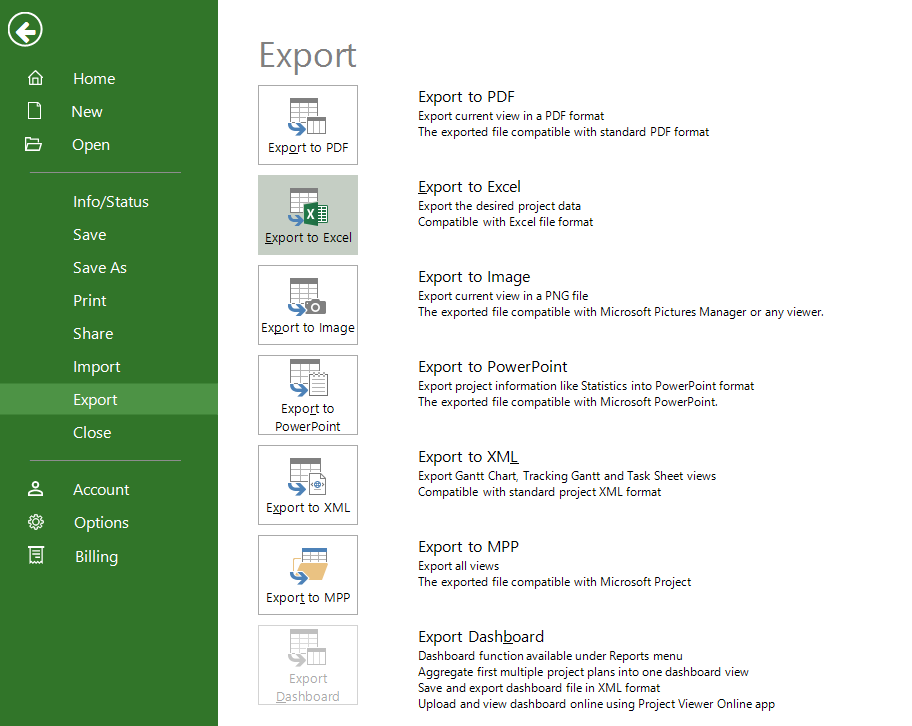
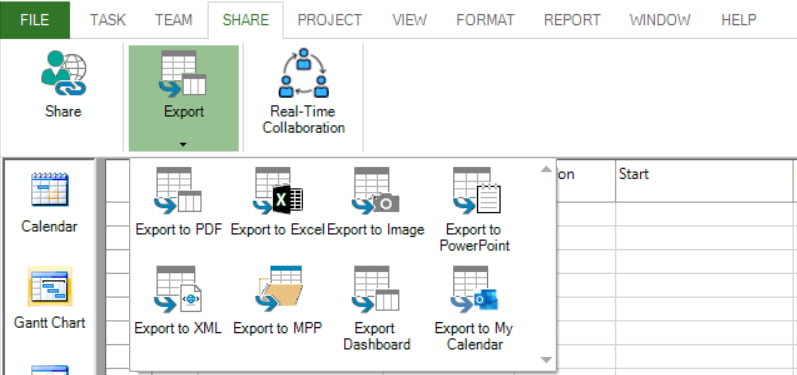
The Export options can be accessed from the File → Import/Export → Export Project menu or can be found under Share menu.
Export to MPP option can be accessed via menu File → Import/Export → Export Project → Export to MPP. It exports all views and information in an MPP file.
Export to XML option can be accessed via the menu File → Import/Export → Export Project → Export to XML, being available for Gantt Chart, Tracking Gantt and Task Sheet views. By using this option, the content of the list of tasks will be exported in xml format. Project Plan 365 and MSP support this file format, and you may open the file as a project plan. You also have the possibility to export a report of your project plan in XML format.
Export to PDF option can be accessed via menu File → Import/Export → Export Project → Export to PDF. Project Plan 365 has built-in support for export to PDF. It exports the information from current view displayed in PDF file. The generated PDF will take into account any settings that you specified under Page Setup dialog. The file exported can be opened in and printed in any compatibility application, like Adobe or other. When you save your project file as a PDF, you can share it with anyone who has a computer, even if they don't have Project Plan 365 installed. To this end, you must choose the view you want to export and then select the Export to PDF option under Export menu. You can also export your project plan to PDF format, by choosing to print your file to PDF format instead to send it directly to the printer. You also have the possibility to export a report of your project plan in PDF format.
Export to Excel option can be accessed via the menuFile → Import/Export → Export Project → Export to Excel, being available for Gantt Chart, Tracking Gantt and Task Sheet views. By using this option, the content of the list of tasks will be exported in a CSV format. It exports the information in a textual, comma-delimited format. Excel supports this file format, and you may open the file as an Excel sheet. You also have the possibility to export a report of your project plan in Excel format.
Note: On Windows platform, when exporting a file to Excel, after selecting the save location, you are prompted to an export wizard where you can select the desired export format, either using a Project Excel Template or by Selected Data. The file will be exported in a .XLSX format.
Export to Image option can be accessed via the menuFile → Import/Export → Export Project → Export to Image, being available for all views. By using this option, the current view will be exported in a PNG file. The exported file can be opened in and printed in any compatibility application, like Microsoft Pictures Manager or other. You also have the possibility to export a report of your project plan as an image in PNG format.
Export to PowerPoint can be accessed via the menu File → Import/Export → Export Project → Export to PowerPoint. It exports project information into a Microsoft PowerPoint file. A summary table will be created which contains statistics information. The file exported can be opened in and printed in any compatibility application, like Microsoft PowerPoint or other.
Export to Dashboard can be accessed via the menu File → Import/Export → Export Project → Export to PowerPoint. It exports the created dashboard as a project, so you can see it later on. Dashboard function, available under Report menu, first aggregates multiple project plans into one dashboard view, saves and exports the file in XML format. Upload and view dashboard using a compatible application like Project Viewer for Win Web/Server or Project Plan 365 for Win Web/Server.
 Practice
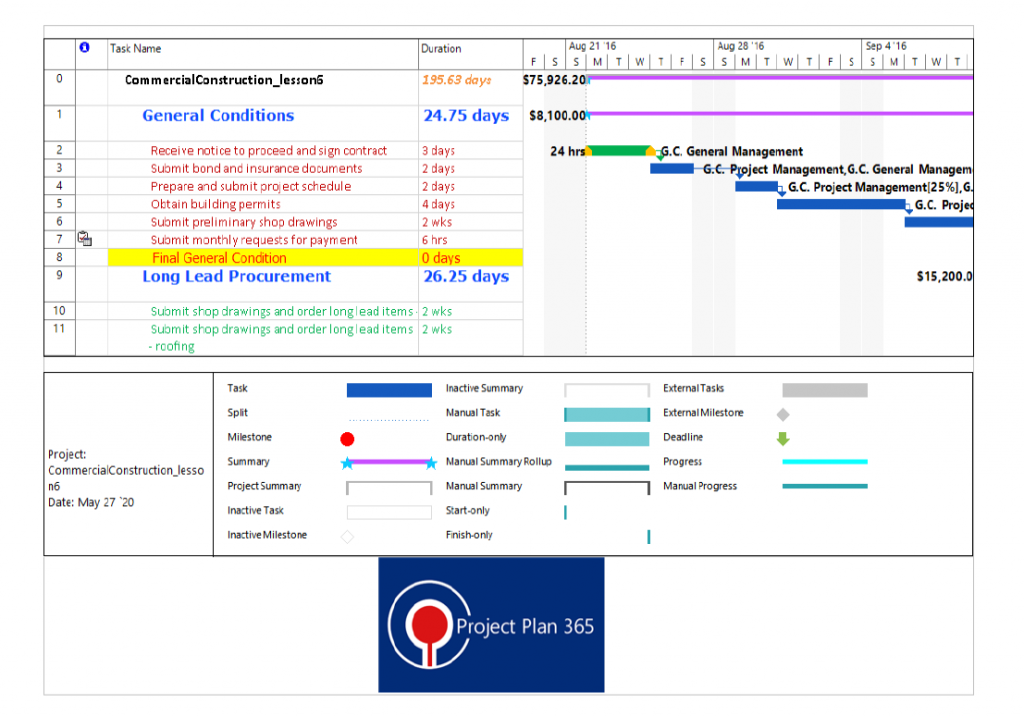
1. For the currently opened CommercialConstruction_lesson6 file, go to File → Import/Export → Export Project menu and select Export to PDF. A Save As dialog will appear where you can indicate the location where the generated PDF file to be saved on your disk.
Press Save button and then the generated PDF will be opened with a compatible application like Adobe Reader. It should look like below. Notice the company logo image that appears on the footer of the page, as it was set using Page Setup dialog:
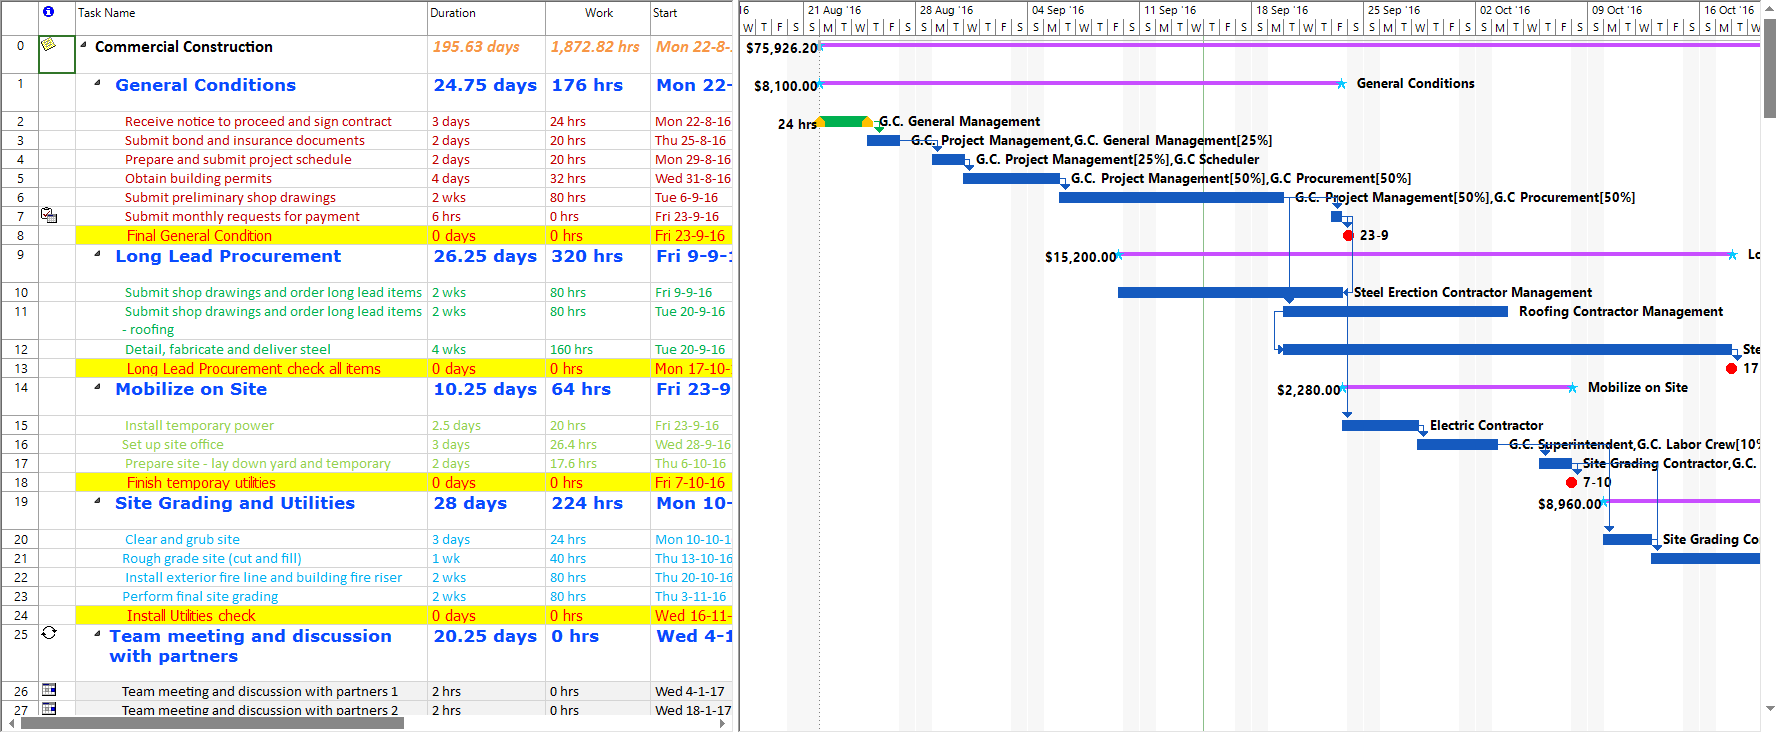
2. For the currently opened CommercialConstruction_lesson6 file, go to File → Import/Export → Export Project menu and select Export to Image. Choose to save the image on your Computer and then open it. It should look like below: