
Now that the planning phase of your project reaches its end and the schedule was defined, you can print it so you can distribute to your team members or other stakeholders of your project. This will aid in the process of mutual agreement and commitment to a plan that was acknowledged by all the involved parts.
In Project Plan 365 application you are not only able to view and create MPP files, but you are also able to print or email them to your partners, business associates, etc. Printing and emailing are easy to use and intuitive features.
Note: Print functionality is available on all platforms, i.e. Print for Windows, Print for Mac, Print for Web, Print for Android and Print for iOS.
The printing functionality on Windows can be accessed from File → Print menu. There are three options available for print: Page Setup, Print Preview and Print.
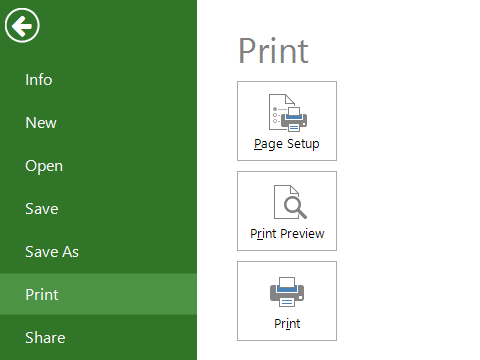
In order to print the current view, select Print from the File menu. You can customize the page options through the Page Setup form (File → Print → Page Setup) or verify the printed document through the Print Preview form (File → Print → Preview). After clicking on Print button, a PDF file will be generated that you can use to print or distribute.
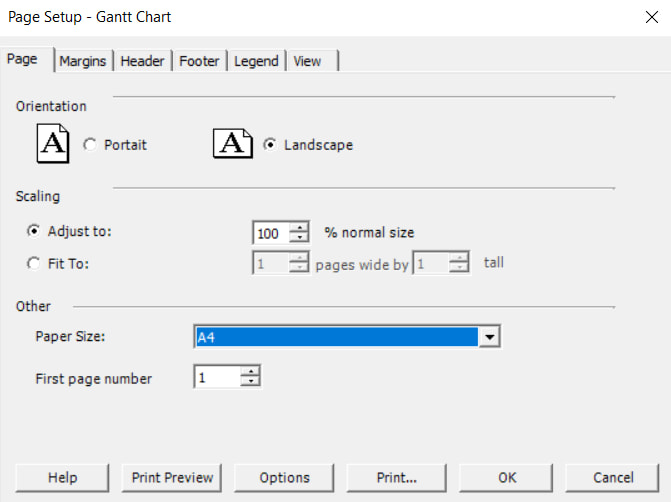
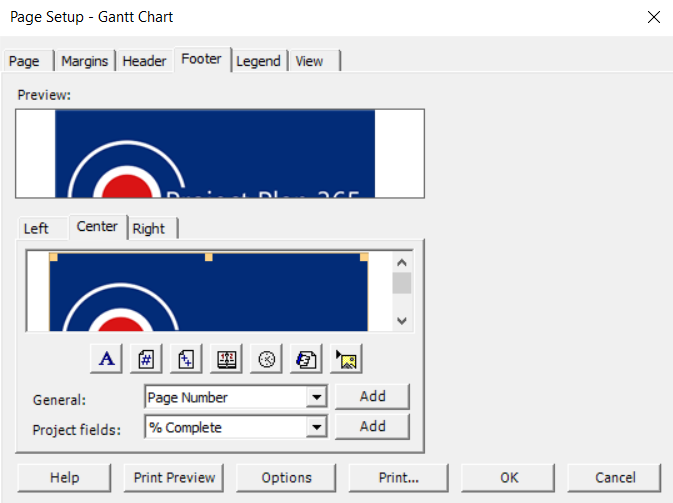
Before printing, you can customize the page options through the Page Setup form, setting different options regarding Page (e.g. page orientation, page scaling, page size), Margins (e.g. setting values for top, right, bottom and left margins), Header and Footer (allows you to type or add specific project information such as current date and time, file name or page numbers, insert a picture), Legend (allows you to specify if the legend will appear on every printed page, if it will be printed on a separately page or if the legend will not be printed) and View (e.g. print all sheet columns, print first "n" columns on each page, print Notes, print blank pages).
Certain options that you can specify for your project in Page Setup dialog are saved by Project Plan 365. These settings include: Orientation, Paper size, Adjust to, Scaling, Fit to, Borders (on every page / none), Print first X columns, Print all sheet columns, Print blank pages, Print notes. Note that these settings are saved only for Gantt Chart view.
When you click the Print Preview option a new window appears and the application generates the pages to be printed. The pages display the information in the exact format you set in the application: i.e. hidden columns, added columns, resized columns, resized panels etc. The pages follow the settings selected at Page Setup (paper size, margins, orientation).
 Practice
1. Go to File → Print → Page Setup, choose Landscape as page orientation and A4 as paper size.
In the Footer tab click on Insert Picture option and select a logo image to be displayed when printing your project plan.
2. In the opened dialog click on Print Preview button. You should get something like below:
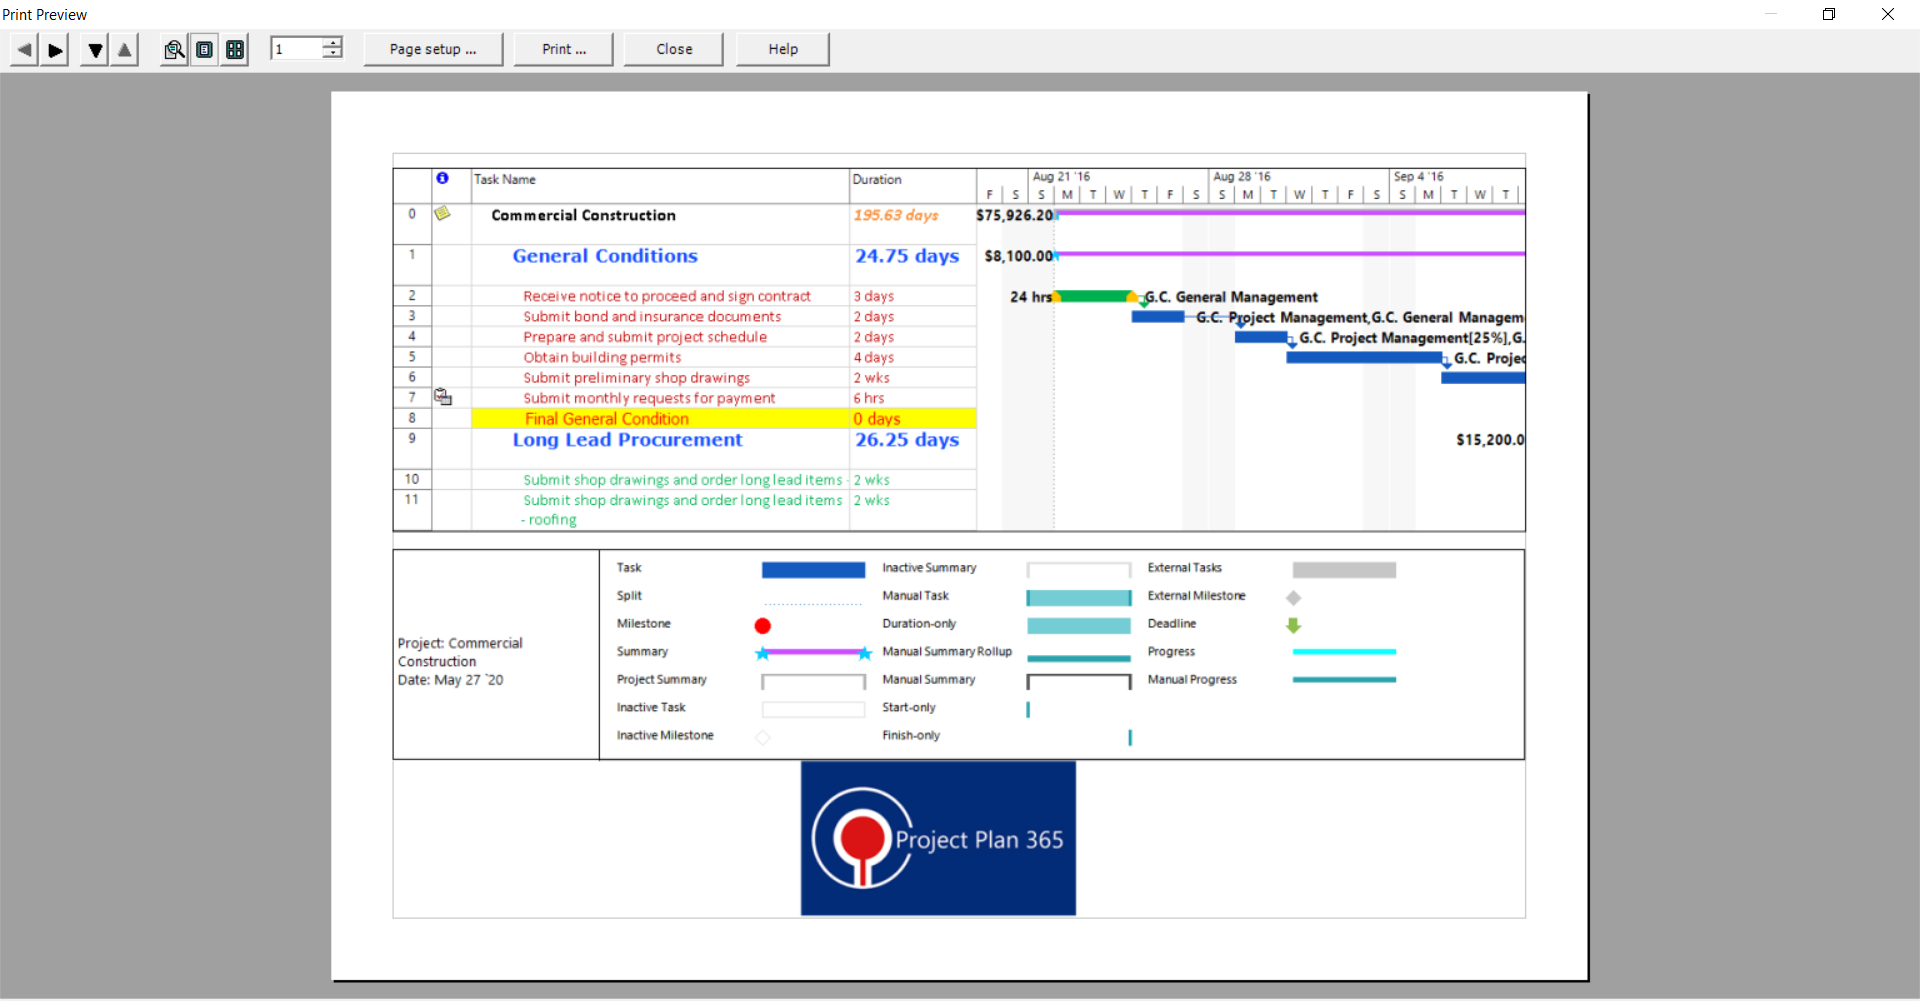
3. In the opened Print Preview dialog click on Print button. A Print dialog will be displayed. Click on OK button, if you want your project plan to be printed. It should look similar with the above Print Preview dialog.
Note: Click the Help button to find more about printing options.