


During the planning phase, you may need to add, remove, or reorganize tasks to keep your project schedule accurate and well-structured.
Moving and Copying Tasks
You can change the order of tasks in several ways. Tasks can be moved using Cut and Paste, or duplicated using Copy and Paste. You can also use drag and drop, which provides a quick way to reposition tasks without deleting and recreating them. When using drag and drop, it is important to keep in mind that if you move a summary task, all of its subtasks move together with it. It is also recommended to organize and arrange tasks before creating task links, as moving tasks after dependencies are established may disrupt those relationships.
Adding Tasks
New tasks can be inserted in multiple ways. You can select Task → Insert, press the Insert key on your keyboard, or right-click a task ID and choose Insert Task. Whenever a new task is added, Project Plan 365 automatically updates and renumbers the task IDs to maintain the correct sequence.
Deleting Tasks
Tasks can be deleted by selecting Task → Delete, pressing the Delete key, or by right-clicking a task ID and selecting Delete Task. To select an entire task row before deleting it, simply click on the task’s ID number. Be aware that deleting a summary task also removes all of its subtasks. After a task is deleted, Project Plan 365 automatically renumbers the remaining task IDs.
Step by step on how to delete a task from a project:
1. Go to menu View - Gantt Chart.

2. In the Task Name field, select the task you want to delete, or select the row in the Gantt grid that corresponds to the task that you want to delete.
3. Click on Delete button option under Task menu or press the Delete key on your keyboard or right click on the ID of the task and select Delete Task from the displayed contextual menu.
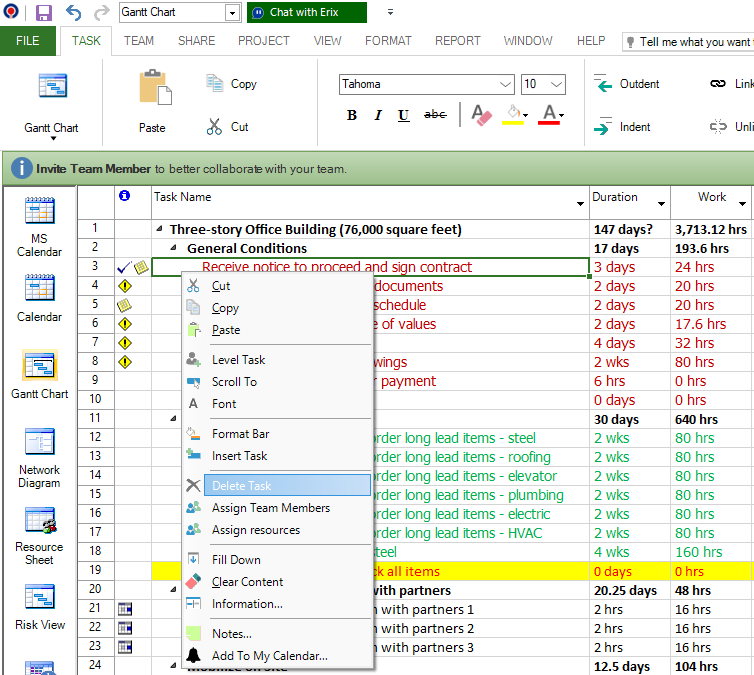
You can cut a task using the Cut option from the Task menu. This option allows you to cut a single task or multiple selected tasks.
Step by step on how to cut and paste a task or resource:
1. In the ID field, select the task or resource you want to move:
- To select one row, click its task or resource ID number.
- To select adjacent rows, hold SHIFT, then click the first and last ID numbers.
- To select non-adjacent rows, hold CTRL, then click the desired ID numbers.
2. Cut the selected task or resource using one of the following methods:
- click Cut from the Task tab
- use CTRL + X / Command + X
- right-click the task/resource ID and select Cut from the context menu.
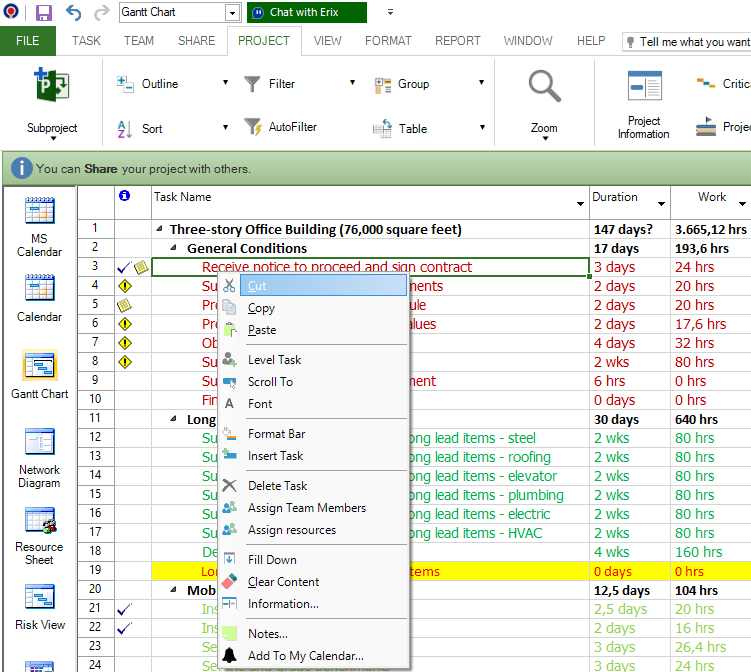
3. To paste a task or resource, select the row (in the ID field) where you want to insert it.
4. Click Paste.
You can use the Copy command to duplicate tasks or resources. The option is available under Task → Copy. Although you can copy or move tasks at any time, it is recommended to do this before creating task dependencies, since dependencies are not automatically preserved.
When you copy a task, the following information is included: task name, duration, start and finish dates, assigned resources and notes.
When you copy a resource, the following details are included: resource name, type, material label, initials, group, standard rate, cost/use, base calendar and code.
If a summary task is collapsed, all its subtasks are copied/cut. If a summary task is expanded, only the summary task row is copied/cut.
Use the Paste command together with Copy or Cut to insert the selected task(s) or resource(s).
- available under Task → Paste
- inserts the copied or cut items at the selected location
Step by step on how to copy and paste a task or resource:
1. In the ID field, select the task or resource you want to copy.
- To select adjacent rows, hold SHIFT, then click the first and last ID numbers.
- To select non-adjacent rows, hold CTRL, then click the desired ID numbers.
2. Copy the selected task or resource using one of the following methods:
- click Copy from the Task tab
- use CTRL + C / Command + C
- right-click the task/resource ID and select Copy from the context menu.
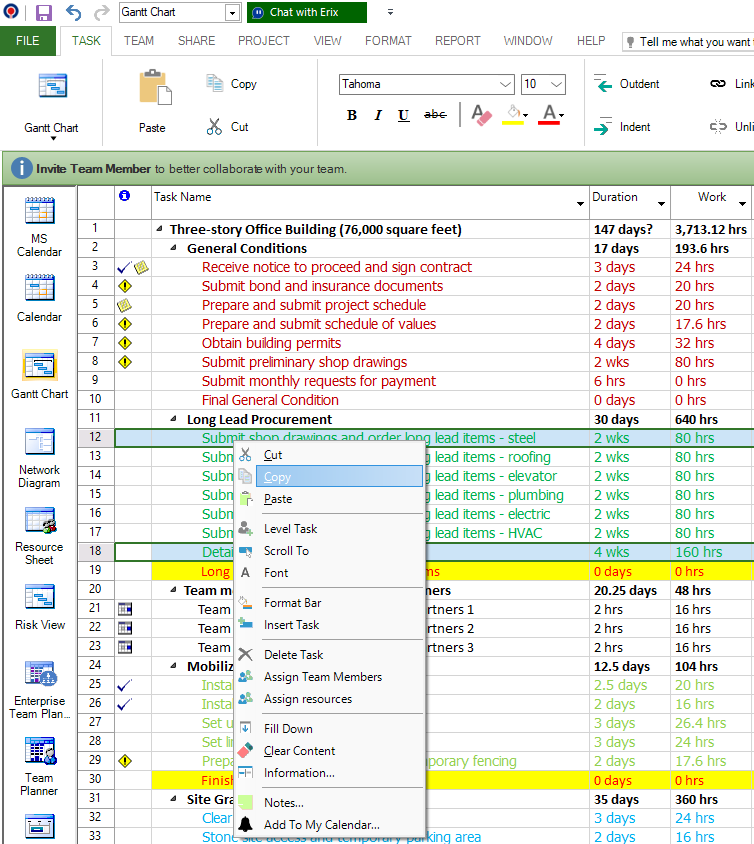
3. To paste a task or resource, select the destination row in the ID field where you want to insert it.
4. Click Paste, or use CTRL + V / Command + V.
Note: When moving tasks or resources using Cut and Paste, you can use Undo or Redo to reverse or reapply recent changes.
Project Plan 365 also supports copying and pasting from external sources (such as text files or CSV files) in the same way.
 Practice

1. Select the task with ID = 7 (Submit monthly requests for payment) using the Copy command and paste it before task having the name 'Perform Fire Marshal's inspection' (it can be found under the summary task called 'Complete Final Inspections'). To do this, select the task 'Construction final notice' and then click on Paste option from the Task menu.
You should obtain the following: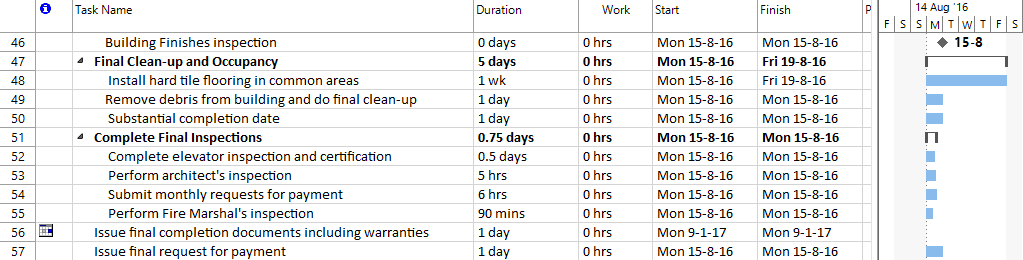
Press the Undo button to revert back your changes. Undo option resets the last applied action or set of actions on project file. Similar to Undo there is Redo command, that allows you to retrieve the last Undo change or list of undone changes made on your project file.
2. Suppose that we want to delete a summary task from our project. Let's say it's the task with ID = 9 (Long Lead Procurement). Since it's a summary task all of its subtasks will also be deleted. Select summary task Long Lead Procurement and press Delete key. This is what you will get:
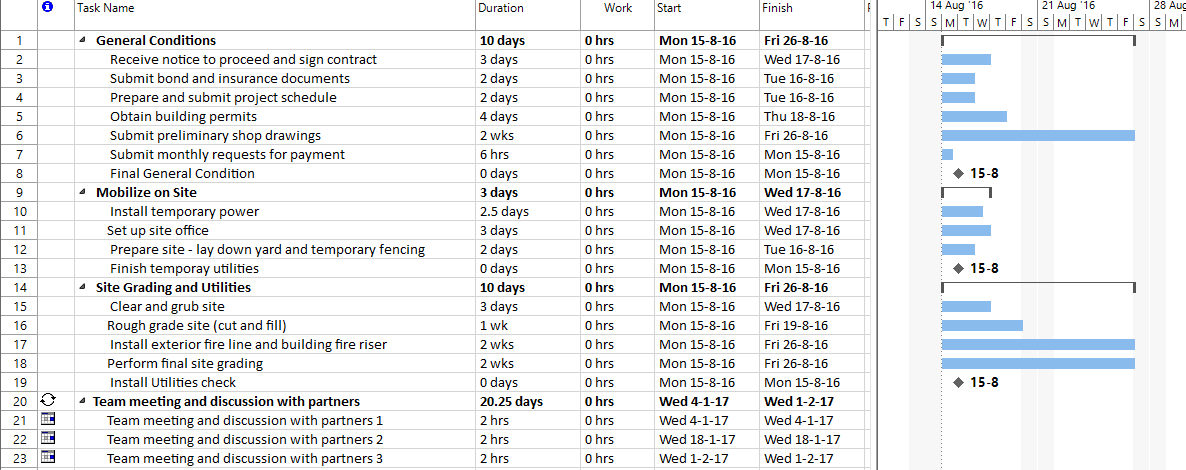
If you changed your mind and you want to bring back a deleted task, you can use Undo command, to restore the previously deleted task.
Let's suppose that we want to restore the Long Lead Procurement summary task that we deleted previously. Click on the Undo option and you will notice that the summary task together with its subtasks will be restored.
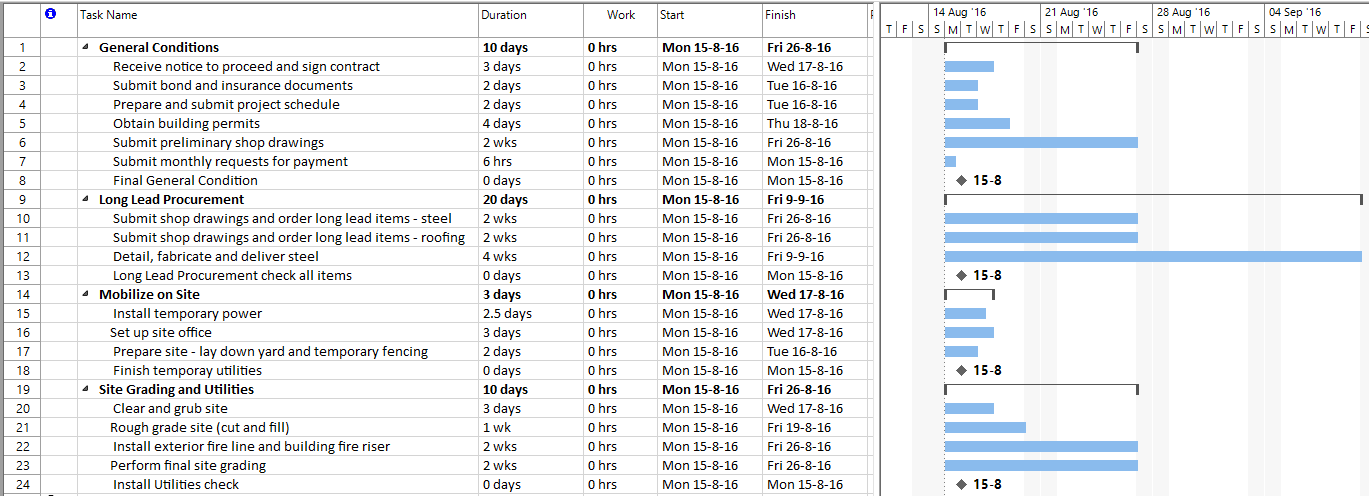
3. Let's suppose that we want to change the relative order of some of our tasks and we want to move the task with ID = 41 (Strip wall forms) under the summary task called Foundations after the task with ID = 34 (Cure elevator wall concrete). To achieve this, first select the entire row corresponding to the task by clicking on the cell containing the task ID:
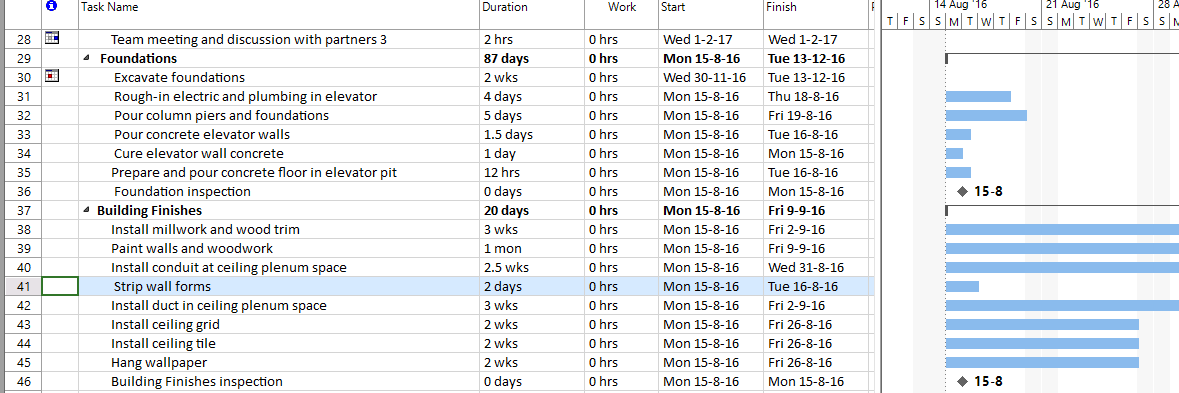
Drag the task to its desired position (after the task with ID = 34), indicated by a line cursor, and then drop the task at its new position. Now you can notice that the task called Strip wall forms is located on row with ID = 35.
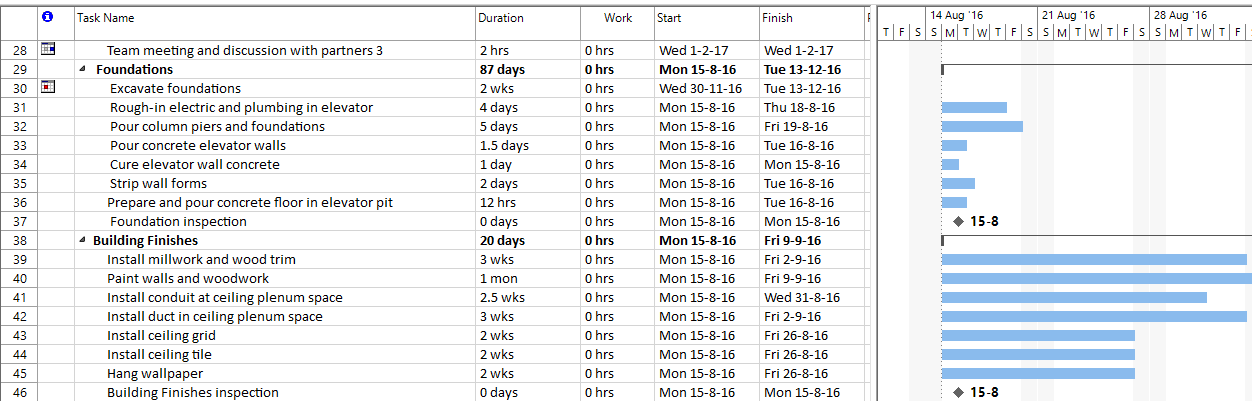
Also, if required, you can use the Undo option to move the task back to its original row.
 Video
Video

If you prefer to see things in action, rather than reading text, watch out this video, which covers some of the topics from this section.

