
What does the “Options dialog” functionality do?
The “Options dialog” functionality allows you to change the General Settings, Project Info, Schedule, Advanced or the Risk Management settings.
How can I access the Options dialog?
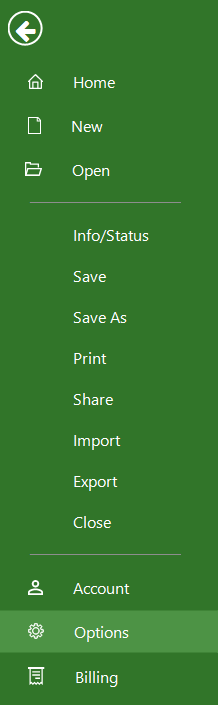
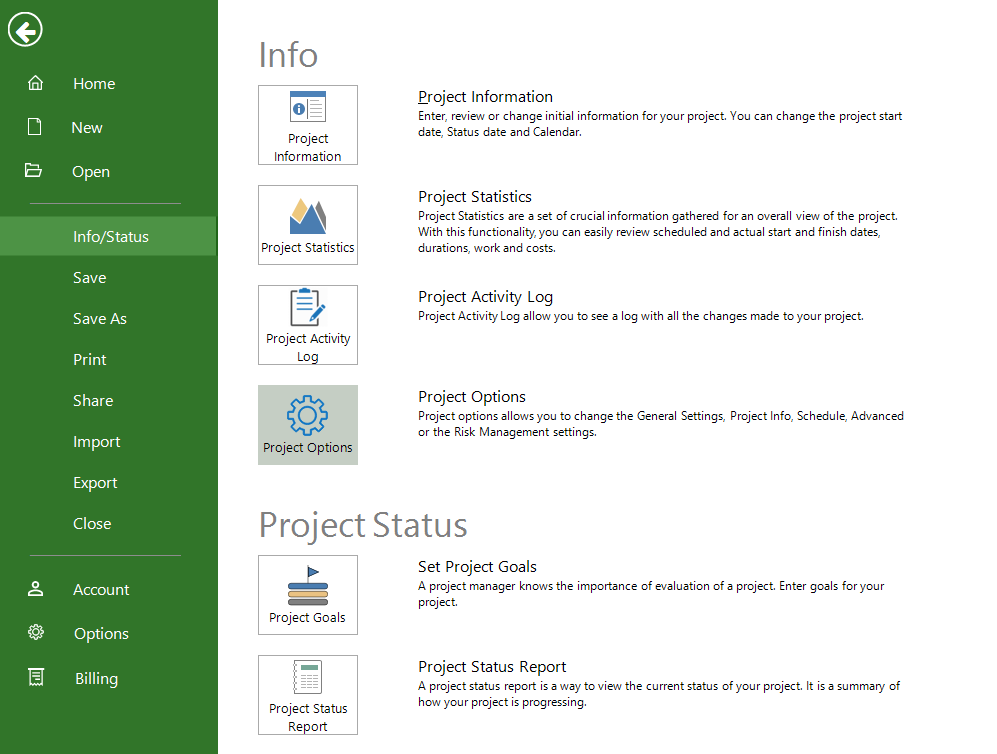
To access the Options dialog, go to menu File-Options. Or go to File – Info and click Project Options.
How can I see the total amount of time my project needs at any time?
You can see the total amount of time by creating a summary task that includes all other tasks.
How do I rename a project?
In order to rename a project, go to menu File - Options - Project Info (or go to File – Info - Project Options - Project Info) and insert the new name on Project Name field.
How to show the project summary task?
To see the Summary task for your project, click on File - Options – Advanced (or File – Info - Project Options -Advanced). Make sure the "Show project summary task" is selected and then click OK or by checking the “Project Summary Task” checkbox from the “Format” menu.
How to total up the duration?
In order to see the total project duration, please insert the Project Summary Task by going to menu File - Options (or File – Info - Project Options) and in Advanced tab check the Show project summary option or by checking the “Project Summary Task” checkbox from the “Format” menu.
How to add a project description?
You can add a description for your project in the Comments box. In order to do that, go to the File menu - Options dialog (or File – Info - Project Options). Select the Project Info tab and add your description in the Comments box and then click OK.
How to change the date format?
The date format is based on what region you set on your machine. However, to the set of date formats retrieved for the current language, some other standard formats that do not change when region is changed, are added for an easier use. These standard date formats are available on Windows, Mac and Web platforms.
If you are on Mac, to change the region, please go to System Preferences - Language & Region and select another region and language. Then, please restart your machine.
On our web application, the date format depends on the language set inside the application.
To change the date format, please go to menu File - Options (or File – Info - Project Options) and in the General Settings tab, select the desired Date Format.
How can I change the duration from days to weeks?
To change the duration unit, go to menu File - Options – Advanced tab (or File – Info - Project Options - Advanced) and on "Duration is entered in" field select the desired unit and click the OK button.
How can I highlight the cells?
To highlight cells, go to menu File - Options - Advanced tab (or File – Info - Project Options - Advanced) - Check Show Highlight.
What can I set in General Settings tab from Options dialog?
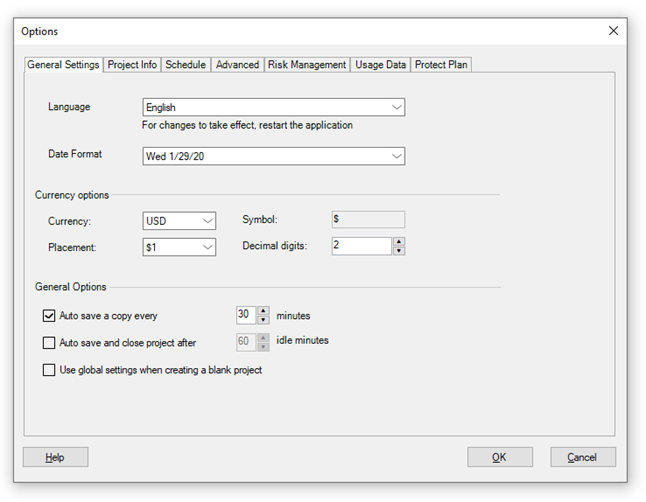
In General Settings tab from Options dialog you can set: Language, Date Format, Currency, Placement, Decimal digits, Auto save a copy every “x” minutes, Auto save and close project after x idle minutes and Use global settings when creating a blank project options.
What can I set in Project Info tab from Options dialog?
In Project Info tab from Options Dialog you can set: Project Name, Manager, Company, Comments, Start Date and Project Calendar.
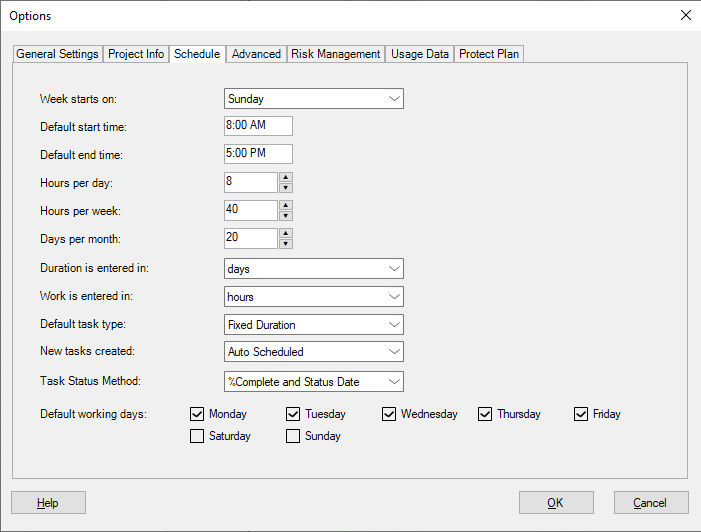
What can I set in Schedule tab from Options dialog?
In Schedule tab from Options dialog you can set: Week starts on, Default start time, Default end time, Hours per day, Hours per week, Days per month, Duration is entered in, Work is entered in, Default task type, New tasks created and Default working days.
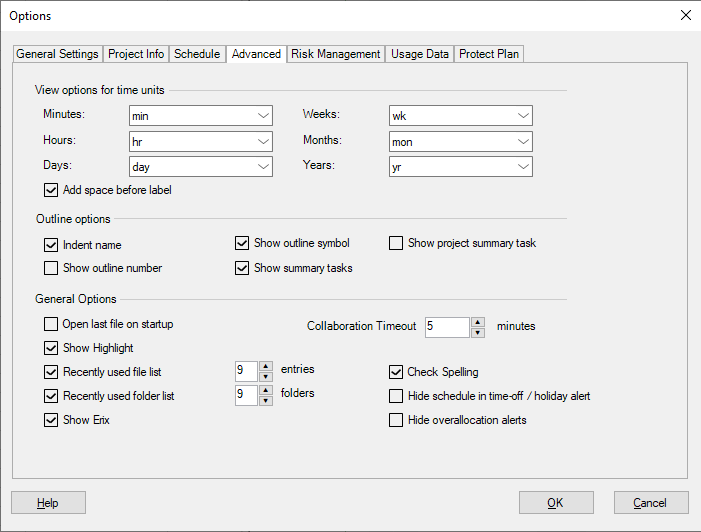
What can I set in Advanced tab from Options dialog?
In Advanced tab from Options dialog you can set View options for time units (minutes, hours, days, weeks, months, years), Outline options (Intent name, Show outline number/symbol, Show summary tasks, Show project summary task) and General Options (Open last file on startup, Show Highlight, Recently used file list, Recently used folder list, Collaboration Timeout, Check Spelling, Show Erix).
What can I set in Risk Management tab from Options dialog?
In Risk Management tab from Options dialog you can enable/disable the risk management feature and customize the risk management fields.
How can I change the start time of my project to 7:00?
In order to change the start time of your project, go to the File menu – Options (or File – Info - Project Options) , select the Schedule tab and in Default Start time box, type the desired time and click OK.
How to change the duration format?
To change the duration units, go to the File menu – Options (or File – Info - Project Options) and select Schedule tab. From "Duration is entered in" select the desired option and then click "OK".
To change the abbreviations for duration units, go to the File menu - Options and select Advanced tab (or File – Info - Project Options - Advanced). From "View Options for time units" select the desired option and then click "OK".
How to change the work format? I want work to be displayed only in months.
To change the work units, go to the File menu – Options (or File – Info - Project Options) and select Schedule tab. From "Work is entered in" select the desired option and then click "OK".
To change the abbreviations for work units, go to the File menu - Options and select Advanced tab (or File – Info - Project Options - Advanced). From "View Options for time units" select the desired option and then click "OK".
How can I change the "Hours per week"?
In order to change the "Hours per week", please go to the File menu – Options (or File – Info - Project Options). Select "Schedule" tab and from "Hours per Week" field, select the desired value and then click "OK" in the dialog for changes to take effect.
How do I open the last file on startup?
To open the last file on startup, please go to menu File - Options and in Advanced tab (or File – Info - Project Options - Advanced) check the “Open last file on startup” option, then click OK.
What does the “Help” button inside the “Options” dialog do?
The “Help” button inside the “Options” dialog redirects you to the “Options Dialog” article in our Online Help page.
Why did the time settings not change automatically even though I changed it from the Options dialog?
The “Default End/Start” times are used when the user does not set a time for the dates he writes in “Finish/Start” fields.
Related to the fact that you have to change the values also in “Change working time”, this is also advised in Microsoft Project. This is encouraged because even though the settings are not equivalent, the values from default end time and project calendar end times should be the same to avoid confusions.
How do I set the start of the week to Monday?
In order to set the start of the week to Monday, go to the File menu - Options, click on "Schedule" tab and from "Week Starts On" field select "Monday" and press "OK" for the changes to take effect.
How do I change the schedule mode for all the tasks in an existing project?
We are sorry but changing the schedule mode for all the existing tasks in a project isn’t possible in our application at this point.
What does the “Protect Plan” tab inside the “Options” dialog do?
The “Protect Plan” tab inside the “Options” dialog contains the “Protect Editing” and “Allow Edit Fields” buttons that allows you to lock certain fields for editing and protect these fields or the whole project with a password.
For more information, please check the Restrict Project Editing Online Help Article.
What is the “Recently used file list” checkbox and how to enable/disable it?
The “Recently used file list” checkbox allows you to set to either have a list with recently opened files in the File menu – Open tab or not. You can also set how many recently opened files to be shown by clicking the arrows in the field next to the checkbox.
To enable the “Recently used file list” just check the checkbox and click the “OK” button. To disable it, uncheck the checkbox and click the “OK” button.
What is the “Recently used folder list” checkbox and how to enable/disable it?
The “Recently used folder list” checkbox allows you to set to either have a list with recent folders to where projects were saved in the File menu – Save As tab or not. You can also set how many recently used folders to be shown by clicking the arrows in the field next to the checkbox.
To enable the “Recently used folder list” just check the checkbox and click the “OK” button. To disable it, uncheck the checkbox and click the “OK” button.
How to remove the project summary task?
To remove the Summary task for your project, click on File - Options – Advanced (or File – Info - Project Options -Advanced). Uncheck the "Show project summary task" option and then click OK or uncheck the “Project Summary Task” checkbox from the “Format” menu.
Step by step on how to change the General Settings:
1. Click File - Options.
You can also go to File – Info – Project Options.
2. Select General Settings tab.
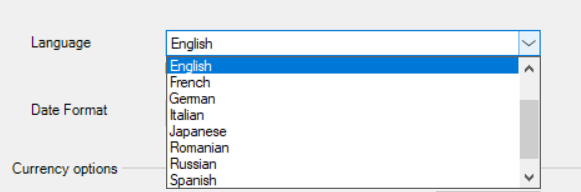
3. Change the Language.
You can change the active language of the application by selecting a language from Language dropdown. The supported languages are the following: English, French, German, Spanish, Italian, Japanese, Chinese, Czech, Sweden, Dutch, Russian, Romanian and All Languages combined. After you selected the preferred language, restart the application.
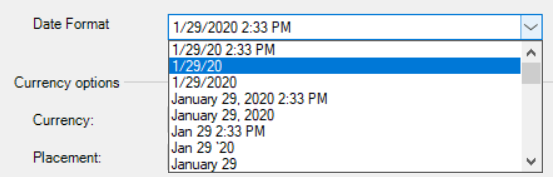
4. Change the Date Format.
There are two types of Date Formats available in our application.
- The date formats that are based on the system date format. For example, if you enter a date as 2/3/03, this will be interpreted as either February 3rd, or March 2nd, depending on the system's regional setting for date formats;
- The standard date formats that aren’t based on the system date format. That means that they don’t change when the region of your machine is changed. These standard date formats are available on Windows, Mac and Web platforms.
To change the Date Format, expand the Date Format dropdown and pick the format you want. In this way, you can change the date format in all the views of the application by choosing from a list of available formats.
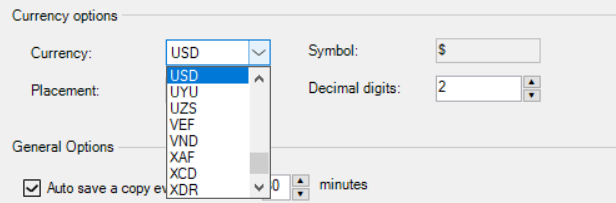
5. Change the Currency Options.
From the Currency combo box, select the name of the currency that you want to use and the corresponding symbol will be automatically updated.
In the Placement box, select the position that you want the currency symbol to occupy.
In the Decimal digits box, select the number of digits after the decimal that you want to display.
Notes
You cannot use more than one currency per project. Before consolidating projects with different currency settings into one project file, you need to change the settings in each individual project to a common currency and update the cost values accordingly.
Changing the currency settings only affect the current project.
6. Change the General Options.
By default, Project Plan 365 saves a copy of your plan every 30 minutes. You can change this time using the up and down arrows or editing the field.
On Windows the copy is saved in C:\Users\{username}\AppData\Roaming\Project Plan 365\recovery.mpp
On Mac the copy is saved in /Users/{username}/Recovery.mpp
The {username} is the user that is logged in.

Check the Auto save and close project after x idle minutes check box in order for the project you are working on to autosave and close if no actions are made in the project for the set ide minutes.

Check the Use global settings when creating a blank project box in order to use the default settings set by Admin users for the new organization projects.

Step By Step on how to change the Project Info settings:
1. Click File - Options.
2. Select Project Info tab.

3. Project Name - specifies the project title.
4. Manager - specifies the manager name.
5. Company - specifies the name of company.
6. Start date
From date picker select start date for current project. The application calculates the project finish date based on your entered start date and assigns the default constraint of As Soon As Possible (ASAP). Task durations, dependencies, constraints, and other scheduling factors are also scheduled from the start date. By default, the project start date is set to the current date.
7. Project Calendar
The Project Calendar field specifies the base calendar that will be used for the project. The project calendar is used to calculate working times for the project in order to help the Project Manager to build the schedule. The project calendar is used to calculate the duration of summary tasks and lead time and lag time on task dependencies, especially when no resources are assigned.

"Define additional calendars" button will open the Change Working Time dialog.
Step by step on how to change the Schedule settings:
1. Click File - Options.
2. Select Schedule tab.
3. Week starts on - specifies the first day of the week
4. Default start time - specifies the start time for a working day
5. Default end time - specifies the end time for a working day
6. Hours per day - specifies the total working hours per day
7. Hour per week - specifies the total working hours per week
8. Days per month - specifies the total working days per month
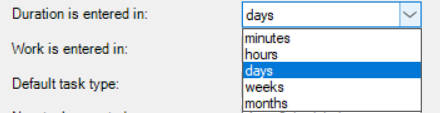
9. Duration is entered in
To change the duration unit, expand the “Duration is entered in” dropdown and select the desired unit. The following units are available: minutes, hours, days, weeks, months.
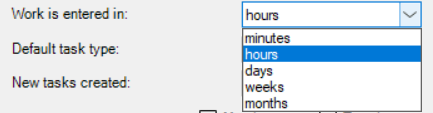
10. Work is entered in
To change the work unit, expand the “Work is entered in” dropdown and select the desired unit. The following units are available: minutes, hours, days, weeks, months.
11. Default task type - specifies the default task type: Fixed Units, Fixed Duration, Fixed Work.

12. New tasks created - specifies the default task mode for your new created tasks: Manually Scheduled or Auto Scheduled.

13.Task Status Method - choose whether to return the status of a task or the entire project depending on '% Complete and Status Date' or 'Deadline and Max Cost'.

14. Default working days - specifies the default working days

Step by step on how to change the Advanced settings:
1. Click File - Options.
2. Select Advanced tab.
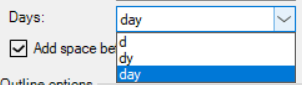
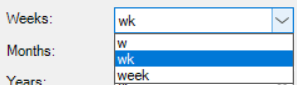
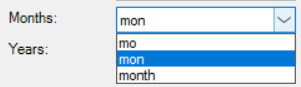
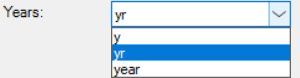
3. View options for time units
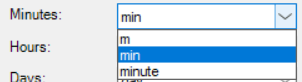
You can specify the abbreviations for time units. The available abbreviations are:
For minutes: m, min, minute.
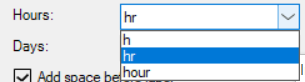
For hours: h, hr, hour.
For days: d, dy, day.
For weeks: w, wk, week.
For months: mo, mon, month.
For years: y, yr, year.
4. Add space before label
This option adds/removes a space between the number and the unit.
5. Outline Options
- Indent name
- Show outline number
- Show outline symbol
- Show summary tasks
- Show Project Summary task
6.General Options
- Open last file on startup
- Show Highlight
- Recently used file list
- Recently used folder list
- Collaboration Timeout
- Check Spelling
- Show Erix
For how to use the Risk Management tab, please read the following article: Risk Management
Step by step on how to apply Project Editing Restriction from the “Protect Plan” tab:
1. Click File - Options.
2. Select “Protect Plan”

- Click on the “Protect Editing” button if you want to protect from editing the entire project with a password.
- Click on the “Allow Edit Fields” button if you want to protect specific fields from editing with a password.
To find out more about how the “Project Editing Restriction” feature works, please check the Restrict Project Editing Online Help Article.
Note that if you lose or forget the password, it cannot be recovered. It is advisable to keep a list of passwords and their corresponding project in a safe place.