Getting to Microsoft Project – on a Mac!

Getting to Microsoft Project - on a Mac!

If you are a project manager using Apple devices, then you know that a PC-bias still exists in the software industry, especially when it comes to anything Microsoft Project. But in 2019, we have options. 

While most all software manufactures provide versions of their apps and services that work on both Macs and PCs, Microsoft does not have a macOS version of Project, making your team project work awkward, indeed. To restore harmony in this fractured computer-verse (Mac vs. PC, Apple vs. Google, iOS vs. Android, Siri vs. Alexa, etc.), there are a number of ways for you and your project team to get to Microsoft Project plans:

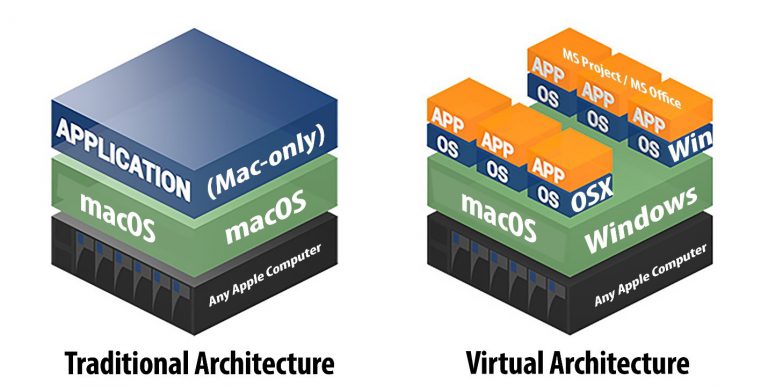
  1. The long road, where you use an app to create a “virtual” second computer onboard the hard drive of your MacBook, iMac or MacPro (called a virtual machine), and then you install Microsoft Project within a virtual Windows.
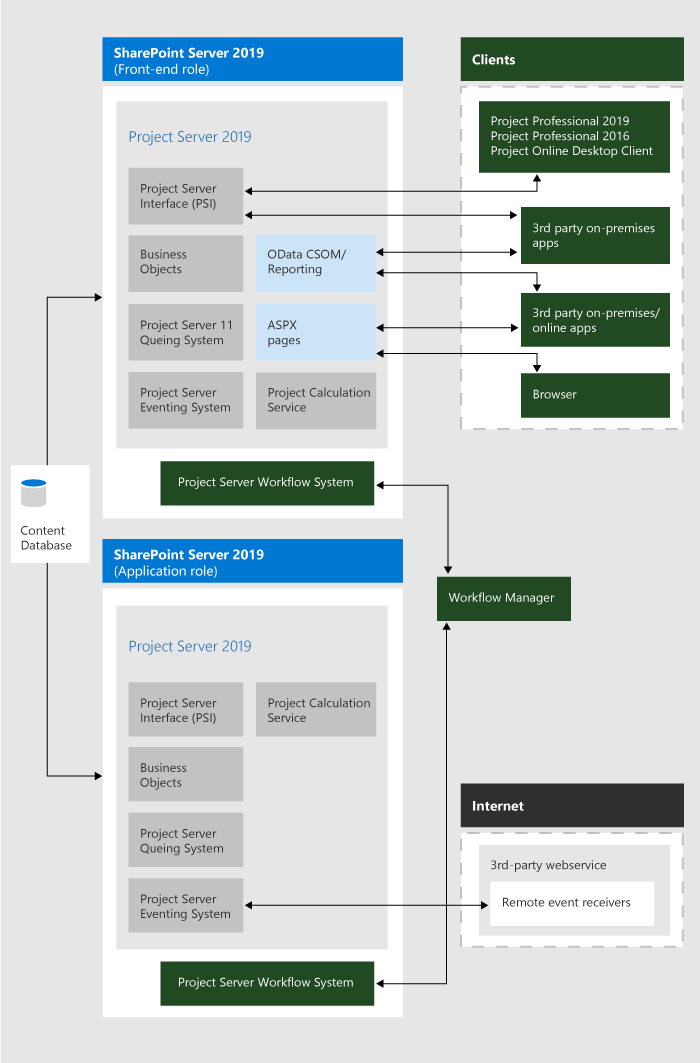
  2. The winding road, where you meander from Safari to the Project Online website (through an Office 365 subscription), or you are directed to some other project website running SharePoint with a Project Server, and that’s where you do all of your project work - from within a web browser.
  3. The short cut 

This article discusses the long and winding road (and reveals the shortcut) in terms of pros and cons, as well as providing estimated “travel” costs for your journey…

1) The Long Road: Virtualizing your Mac to run Microsoft Windows + MS Project

What may sound like a quick jog (just run windows on your Mac) this is actually the road less traveled, and for good reason. This slog involves subscribing to one of many providers of a virtualization layer (Parallels Desktop, VMware, etc.) used before you install any flavor of Microsoft Windows that you may have on hand - and finally, once that’s all up and running, then can you install Microsoft Project and get to your work on an Apple device.

1) The Long Road: Virtualizing your Mac to run Microsoft Windows + MS Project

PROS

  • In addition to running Microsoft Project, you can install and run any Windows app that you want.
  • If something goes wrong with Windows or Project (as things sometimes do), you can just “blow away” that virtual machine and use your automatically created backup copy.

CONS

  • Requires one more subscription to a software service (for example, Parallels or VMWare).
  • Adds another layer to your Mac that needs a bit of worrying about (in addition to everything else that worries you).
  • Creates files so large (after all, there’s an entire computer stuffed inside) you may have to upgrade your Mac’s internal hard drive to something gigabytes bigger.

2) The Winding Road: Using Project Online and all the rest to get there....

There are many reasons that you might want to take the meandering path of using your Mac’s web browser to access Microsoft Project data, but simplicity would not be one of them. If all you want to do is to open, edit or create new Microsoft Project files, then don’t install SharePoint Server or any other servers just to do that – that would be silly and overly complex in this age of cloud computing and software-as-a-service (SaaS). Just jump to #3 for a much shorter path.

winding road

PROS

  • This setup may be essential to your large enterprise (in other words, you have no choice but to follow this path).

CONS

  • If you work anywhere that the internet doesn’t, you are out of luck.
  • If you are a small-to-mid sized business, the expense of it all may bust your bottom line.
  • If you are the Project Manager for your team without dedicated IT support, this could be trouble.

    (It’s easier to raise children then to manage all of these systems.)

3) The Shortest Distance Between Two Points: Project Plan 365

If all you want to do is to collaborate with other folks sharing or creating Microsoft project data, then just download the free 30-day trial of either Project Plan 365 for Mac or Project Plan 365 for iOS. This gives you the flexibility to work on any Microsoft Project-created data file, regardless of your hardware or internet connection. Both apps allow you to do exactly the same thing: open, edit or create any Microsoft Project file (.MPP) with no conversions or imports from other odd formats, like .XML or .XLSX - or any other type of file where things can go wrong and mess with your precious project data. This is by far the “shortest distance between two points” for any Project Manager wanting to work on a Mac.

Current users of Microsoft Project will instinctively know how to use Project Plan 365, as the interface is virtually the same – no learning curve here to slow you down.

In addition, by subscribing to the Business (PMO) plan, project managers (especially those working in small-to-medium sized businesses) can augment their Microsoft Project experience as well, by using such Project Plan 365 features as real-time collaboration, portfolio and resource management and more. In short, a Project Management Office (PMO) can be set up on the cheap and within a few hours after your team subscribes to this plan.

PROS

  • The simplest solution for the stated problem.
  • The cheapest solution for the stated problem.
  • Adds even more to the experience of being a Microsoft Project user, and gives your team more capabilities as you roll out your projects.

CONS

  • None to speak of 🙂 

The Bottom Line...

The bottom line depends on how far you are willing to go, just to get to a Microsoft Project file, or to collaborate with your team who are all using the same set of Microsoft Project data. Must your team use Project Online / SharePoint / Project Server because your management team has made that edict? Well, we feel for you… perhaps a new Microsoft laptop is in your future, leaving your shiny new Mac in the dust. But if not, taking the shortcut (#3 above) is going to save you time and money: 

Road Taken...

1. The long road:

2. The winding road:

3. The shortcut:

Cost per user, per year (in USD)

Approximately $1000

Mega-bucks in Enterprise dollars!

$200

Which solves the problem? #1 yes, #2 not really and #3, sure thing! 

In addition to user cost savings per year, other intangibles are gained, such as the convenience of working on your project plans (or having someone else updating your plan) no matter where in the world you or anyone on your team is working (say on the plains of the Sudan, the beaches of Fiji or atop Mt. Everest) – you will always have a way to edit your Microsoft Project plans on your favorite Apple device.

Project Plan 365 also allows you to take Microsoft Project files and go well beyond what you can do within the Microsoft app; for example, with Project Plan 365 you can build a PMO on the cheap, manage and report on your entire portfolio of projects, and store your files in a private and secure cloud - without having to purchase expensive software servers or buy any more new hardware. 

Mind-Mapping Your Way to Better Project Plans

How to use mind maps to create a WBS...

Mind-mapping (or as it is also known, concept mapping) is a proven method and technology for organizing your thinking, no matter what you are thinking about. Students learn this technique in school these days, so that term papers and research reports are better thought out and organized for their professors. Writers use this technique to better prepare and organize articles for their editors and project managers also benefit from this easy-to-do technique when designing project plans and schedules. Here’s why: 

1. Creating a mind-mapped WBS is a great way to collaborate with others…

Mind maps are easier to jigger in real time than in a project schedule or Excel spreadsheet, and much easier to share within a group of collaborators who are watching on-screen as you jointly break down the work. So when first designing your project, you can present your mind-map in the form of a Work Breakdown Structure, and quickly adjust for changes suggested by your team. For a lengthy example on how this is done, see this YouTube tutorial.

2. Some mind-mapping tools have a one-click export, and some PM apps have a one-click import…

MindJet’s MindManager or Xmind Pro are two mind-mapping applications that are great for creating a project WBS, especially when first designing a new project and when breaking down the work. You can re-arrange an idea for a project by using drag and drop, and with a minimal of clicks, you can map out a WBS in no time flat. When done, it’s usually just a one-click export to your PM app, or a one-click import if using Project Plan 365. There are several other mind-mappers that export to the .mpp file format, and a review of the most common software packages can be found here.

3. You are new to your PM App, or you don't like to (or know how to) manipulate dozens or perhaps thousands of rows of tasks within your PM application, just to make your plan organized…

So you are not distracted by the mechanics of your PM app when designing the schedule, you should use a mind map instead, allowing you to focus on the organization of the project without the distraction of a thousand or more click options staring you in the face. And you can drag and drop much more easily within a mind-mapping app then any PM app. Once you have created the structure of a plan within a mind-mapping tool, you can focus on the actual mechanics of the PM app to do what you need to do.

4. You want to design a project plan using a visual design tool…

Even for old-timey project planners, using a visual tool to design projects can be a most welcome change from starting a project plan from scratch within a PM app - or from a canned template that needs lots of editing before you can even begin.

After all, science says this process is more effective. In other words, it is always better to combine your thinking with something visual, and keep that activity separate from say the analytical task of manipulating a PM application.

Ok, let's build one!

To begin building a plan using a mind mapping tool, you can start with this simple process:

Step 1. Name your project as the central topic of the mind map

All mind mapping tools work just about the same; you start with a central topic and develop a hierarchy of sub-topics. In the case of project work, the central topic is simply the name of the project, while the sub-topics are phases and tasks found in your typical plan. There are rules for the breakdown, so see this article for those.

Step 2. Breakdown your work into topic / subtopic branches in the map’s “tree”

During project work, mind-map topics are treated as tasks, with the largest set of tasks organized in the order they would be implemented. So for example, you might have a project defined by phases titled: “Planning,” “Delivery” and “Post-Delivery”:

Mind Mapping in PP365

These high-level project phases are no more than three topics attached to the mind map’s central topic. To break down the phases further, subtopics are added to each phase, with each representing another task or group of tasks:

Mind mapping in PP365

Mind-mapping tools all include selective disclosure “twisties” just like PM apps do, so you can selectively work on parts of your WBS without being distracted by all the rest. Using this method, you can break down your project work into as small or as large bits as you need to, and display what you need depending on the context.

Step 3. Hold a collaborative meet-up with partners, stakeholders, and worker-bees

Now the beauty of this approach becomes apparent, as instead of reviewing a printed Gantt chart or live project plan with your collaborating team, you can review a WBS in mind-map format, which is much easier to change on the fly. Folks not familiar with Gantt charts or your PM app’s interface will easily understand your mind map, making for a much more productive review meeting.

During this meet-up, you can confirm the overall design of the plan, and also begin to collect other needed bits of data, such as: estimated costs, proposed resources, approximate durations and all the rest – remembering that the better the design is up front, the more efficient the execution will be later on down the road (goodness in - goodness out).

Step 4. Prepare your reviewed WBS for export or import to your PM application

During the collaborative meeting, you don’t want to define dependencies and constraints between tasks and subtasks (Finish-Start, Start-Finish, Start-Start, Finish-Finish, and actual dates). But after the meeting you do, and it’s best to do all of that inside of your PM application itself. However, it is possible to define all of the above inside of MindJet’s MindManager for example, but that’s not recommended (see list of gotchas below). What is recommend is that you annotate your map before export to your PM app using the app’s “notes” feature. Preserve as much data as possible this way, and you won’t have to type it all over again later.

Other features that can be exported without fear of data corruption are priority designations, marking tasks as a milestone, and resource listings.

Step 5. Export your mind-map into your PM app, and then tailor to suit

Once exported or imported, your mind-map (now WBS) can be further developed within your app, using all the wonderful functions found there. For example, you should now add all the “linking” and task constraints that you need to make your project work in real life:

Tips, gotchas and bugaboos...

While we primarily use MindManager or Xmind as a design tools to front-end Project Plan 365, other mind-mapping tools may also have some difficulties during export or import to your PM app of choice; so here are a few implementation tips:

  • Let your PM app handle all dates and the scheduling. In other words, don’t input dates into a mind-mapped WBS, but instead, do all the scheduling from within your PM application, whether that be Project Plan 365, Microsoft Project or other application.
  • Task Dependency linking is possible within many mind-mapping tools, but it is much easier to do that task within your PM application. Let your PM app do all this heavy lifting, and only use the mind-mapper of choice to visually layout the plan.
  • Other features of your mind-mapping tool - such as adding images, icons and calculations – may not translate into any terms that your PM app can understand. So again, just use your mind-mapping tool to layout your plan and create the WBS during the beginning stages of your project planning.

If purchasing a mind-mapping tool like MindManager or Xmind for the purpose of creating a WBS, get the Windows version, as in most cases only the Windows version has the ability to export a .mpp file. However, if using Project Plan 365 as your PM app, you can import the native files for both MindManager and Xmind - regardless of platform - so no need to worry here.

Closing notes...

Well, as you can see, using a mind map to front-end your next project plan is a more efficient and effective way to prepare the initial work break-down for your next project – and giving it a try is easy enough to do. Just download a 30-day trial of a mind-mapper and follow the steps listed above to begin mind-mapping your way to better project plans and schedules. Then, if you are looking for a great PM app that imports maps in just one click, then download a trial of Project Plan 365 to see how it all works – together and better!

The Essential Toolkit for PM Education

Calling all Project Management Students & Educators!

If you are a student at university or enrolled in any other Project Management (PM) training, then this article is for you. For example, if you are a PMI student striving for PMP® certification or a graduate student studying for the Georgetown Master's in Project Management degree, then this read provides insight into getting through your academic program with the help of a leading edge PM tool.

This article also explains how to excel tool-wise during your PM studies, without having to rely on sub-par tools like Microsoft Office to get all your PM-related homework done.

What any PM Student Needs, Tool-wise…

Throughout our academic careers, we have usually carried a toolbox to class that is full of essentials; in primary school it may have been a backpack stuffed with a pencil box, notebooks and a pocket calculator. In high school, we might have upgraded our toolkit with an iPad or smartphone to help us through our studies - and in college, we might have a high-powered laptop loaded with Microsoft Office to help us through the day. However, for anyone studying the art and science of project management, much more is needed in regards to our generic daily kit.

For starters, any PM student needs a sharper pencil than Microsoft Office to get real work done. For example, if you are preparing a project network diagram, you could use Microsoft Visio to knock one out, but the data used will not be linked to a project schedule or project budget, at least not without a lot of additional make-work. Same goes for when you need a Gantt chart; you could use Microsoft Excel and a template to prepare one, but again, your original data is orphaned, making it harder to say, prepare a resource accounting for all the work planned.

In short, you need an all-in-one and dedicated PM tool complete your class assignments more efficiently.

Attributes of a Good All-In-One PM Tool

A good all-in-one PM tool will include the following:

  1. A visualizer for laying out projects (think mind maps) and for breaking down the work (think WBS) - or a way to easily import visualizations constructed in other products, into the PM tool itself.
  2. A database for all related project data - for linking the essentials - such as risk management plans, project charters and scope statements.
  3. A PM data engine that can perform PM-related calculations like critical paths, over allocations and cost tables without a fuss, and on simple devices such as smartphones.
  4. A scheduler, to build schedules automatically based on project data, such as task durations and resource availability.
  5. A report & dashboard generator, to communicate project progress and to highlight milestones achieved.

In addition to the above key attributes, a good all-in-one PM tool 1) works on whatever device you do, such as tablets and smartphones, 2) works on the PC and Mac platform 3) can exchange data easily with enterprise tools such as Microsoft Project Server and others.

Project Plan 365: The PM Student Tool of Choice

PMI Project Schedule
Sample PMI project file opened in Project Plan 365

Project Plan 365 is a popular all-in-one PM tool that has been used worldwide for years by professional project managers during their day-to-day PM work. In addition, Project Plan 365 is used by thousands of students because of 1) its ability to work on Apple devices, 2) the low cost of entry and 3) the simplicity of design and compatibility with tools used by larger learning institutions. For example, many universities will use enterprise tools like Oracle Primavera or Microsoft Project Online / Server to facilitate large groups of students studying Project Management or related studies; and these tools are quite complex and expensive to run. In this scenario, once the PM student has graduated, they are left in the cold.

Enter Project Plan 365, which is compatible with enterprise PM tools, but costs just a hundred dollars or so vs. tens of thousands of dollars to own and operate. In addition, Project Plan 365 is easy to install and to learn, and anyone familiar with Microsoft Office can easily master this tool in a matter of days. Furthermore, with Housatonic’s unique licensing program for education (see below), students can use this tool for life - at no cost whatsoever!

For Educators & Administrators: the Project Plan 365 University Licensing Program

Housatonic Software offers all universities and colleges who graduate or certify future PM professionals a free licensing scheme that works like this:

  1. The university or certifying organization first sends us a request using this contact form.
  2. On acceptance, Housatonic provides the organization with a block of licenses that students can use for one year, and which allows access to all Project Plan 365 apps (for PCs / Macs / Android & iOS smartphones and tablets, and the Web app).
  3. The institution then distributes the licenses to eligible students (any student currently enrolled in a PM-related program). This license allows students to use Project Plan 365 apps for one year, and this license can be renewed on request; students who complete their studies can request a lifetime renewal. If your institution does not currently offer this licensing, we encourage you to ask your school to contact us today.

For more information on the licensing program, see this page on our site.

How any PM instructor or student can tryout Project Plan 365 - for free!

  1. Download and install the Project Plan 365 trial for whatever platform or device that you prefer (feel free to try one, or all).
  2. Either a) Start a new plan, or b) open an existing plan [any .MPP file] or c) use the built-in starter template named Project management institute process.
  3. Edit your plan and save to any convenient cloud location like Dropbox, OneDrive, Google Drive, etc.

For even more help, see the Project Plan 365 support library or check out this popular Quick Start video; and best of luck on your next exam!

New, existing or template dialog box