Keeping Track with Agile

Keeping Track with Agile... Using Project Plan 365!

Why Agile?

Agile project management is an iterative and incremental approach to delivering requirements throughout the project life cycle. Mainly used in software development, it has gained momentum in many other industries due to its emphasis on collaboration, flexibility, continuous improvement, and high-quality results. It uses popular project management frameworks such as Scrum (which uses Sprints that are time-boxed iterations, typically two weeks long and used to organize tasks and for quick goal shifting) and Kanban (which uses Backlog and Board status to manage work in progress).

Agile is great for teams who are looking for adaptiveness, clear and measurable deliverables, and a flexible approach to project delivery.

Why Project Plan 365?

Project Plan 365 supports both the Agile and Waterfall PM methodologies, all within the same app. That means you don’t have to choose one over the other - you get the best of all worlds - all in one place. With Project Plan 365, you can easily switch between Scrum and Kanban boards - with no disruption to data.

Project Plan 365 is especially data-flexible, meaning your data files can also be opened using Microsoft Project apps - as well as others - and Project Plan 365 actually extends the functionality of Agile planning over using Microsoft Project alone.

This tutorial will show you how to create your first Agile plan, and will also show you how to convert your Scrum to Kanban, in just one click. A practice file is available online, in case you want to follow along. If unfamiliar with Scrum & Kanban (and the difference between the two), see this cheat sheet from Development That Pays. Ok, let’s get started…

To start tracking your first Scrum...

1 Click on File/New, and choose Scrum Project.

Project templates are available for both Scrum and Kanban

2 The Sprint Planning Board displays, allowing you to add project tasks (as board items - just like sticky notes). Once added, you can move tasks into different Sprint cycles; just drag and drop to suit.

To start, an empty board…

3 To create a new board item, click on New Task, and then fill in the task description, then click Add. Repeat for any sprint task you would like to create.

Once board items are created, you can arrange them into Sprints using drag & drop

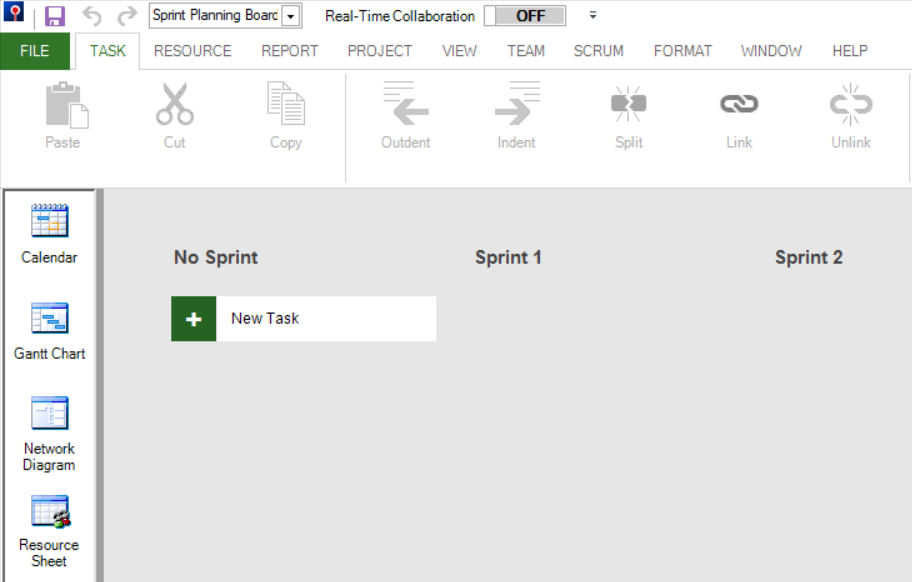
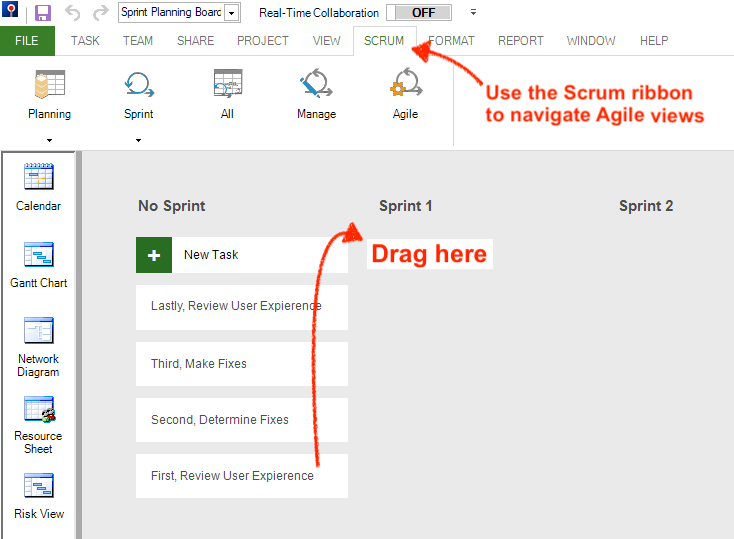
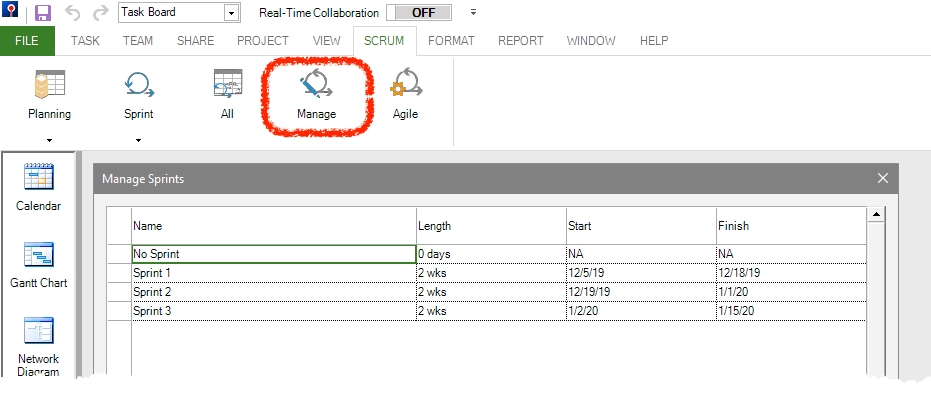
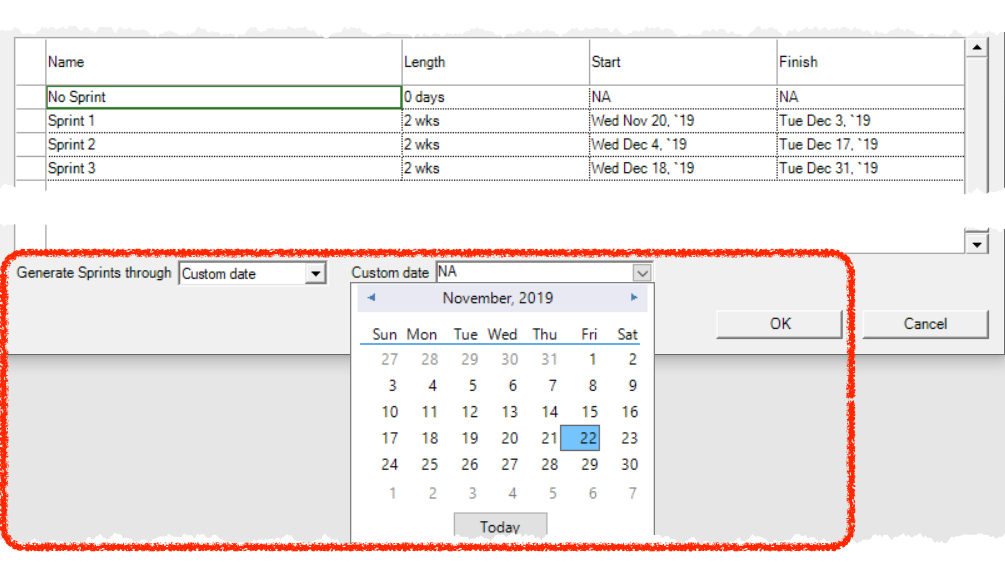
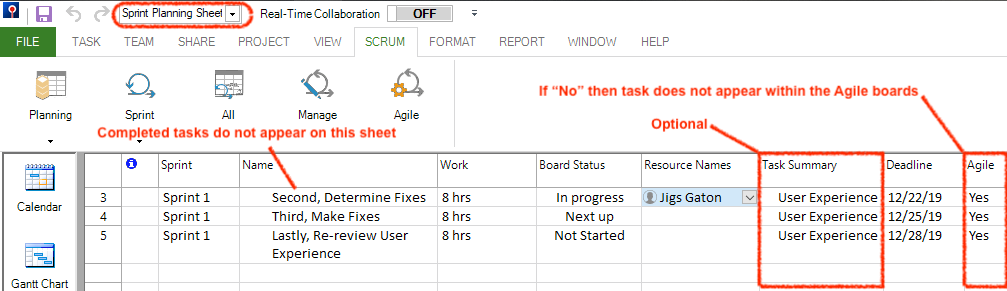
As you create the list of tasks, you sort them into Sprints (by default, three are included; Sprint 1, Sprint 2 and Sprint 3). In Agile methodology, a Sprint is a fixed time frame for work to be completed. By default, Project Plan 365 includes three sprints, with each sprint lasting 2 weeks (you can always add more; that's explained soon). As a result, the default Agile project duration is 6 weeks (3 sprints x 2 weeks):

You can change default Sprint durations by clicking Manage on the Scrum ribbon

Behind the scenes, as you add tasks to Sprint boards, they are also added to the Project Schedule. From these planning boards and sheets, you can always switch to any other view to see your data within different contexts. Go ahead, try it!

With the Manage Sprints sheet, you can set your Sprint durations (which can vary) and specify the start date of your first Sprint. All the other Sprints will be automatically calculated based on this first Sprint date. By default, Project Plan 365 generates Sprints through to the project’s finish date. But you can also specify a custom date:

Setting a custom date for Sprints

At this point, the task dates are not updated within the Gantt Chart View to reflect the sprint dates – but we know the dates of each sprint by looking at the Manage Sprints sheet.

4 To move tasks between sprints, you can drag and drop them within the Sprint Planning Board:

Creating Sprints on the Spring Planning Board

And you can also sequence tasks using the Current Sprint Board:

Sequencing Sprints on the Current Sprint Board

5 You can complete task details for Sprint board items by using either the Current Sprint Sheet or the Sprint Planning Sheet; there you can add resources, deadlines, work estimates, as well as reassigning Sprint numbers or changing the board status for each task:

Filling in task details using the Sprint sheets (Current and Planning; note that each differ slightly)

Both sheets are similar, with the major difference being that the Sprint Planning Sheet does not show completed tasks, and does show the Agile column by default.

You can add or hide columns to any view in Project Plan 365, for example you can hide the Task Summary column or add the Agile column anywhere you’d like. Also, setting Agile=No will remove that task from all Agile views.

6 You can further customize your sheets by, say, adding the % Complete column, and then tracking progress here:Both sheets are similar, with the major difference being that the Sprint Planning Sheet does not show completed tasks, and does show the Agile column by default.

Adding the % Complete column is very useful

7 You can also customize your boards by, say, adding/deleting/re-naming/moving board columns, or by deleting tasks, assigning resources, marking 100% completes, etc.

Adding, deleting, renaming or moving columns with a right click
Manipulating tasks with right-clicks

Switching between the two Agile flavors...

If you want to switch between the two flavors of Agile (Scrum or Kanban), you can do this from the Scrum ribbon/Agile, from the Project ribbon/Agile, or from the Kanban ribbon/Agile.

Just hit the button you need!
Kanban boards and sheets - just like with Scrum!

When switching to Kanban, you will see very similar features to Scrum. Kanban is all about visualizing your work, limiting work in progress, and maximizing efficiency (or flow). In contrast, Scrum has a Sprint Planning Board that allows you to select which tasks belong to each Sprint. You will not find this when switching to Kanban. Here you use the Backlog Board and Backlog Sheet instead (which is the similar to the Current Planning Board within Scrum).

In conclusion...

To sum up, in this tutorial we learned how to:

  1. Start a Scrum from scratch.
  2. Add tasks to the Sprint Planning Board.
  3. Sequence tasks using the Current Sprint Board
  4. Add details to tasks and manipulate columns in both the Current Sprint Sheet and in the Sprint Planning Sheet.
  5. Switch between Scrum and Kanban displays of the project plan.
For help with this - or anything else PM-related at all - please complete a support ticket and we’ll get right back to you. 

To learn more...