Putting Face-to-Face Meetings on Pause

Putting Face-to-Face Meetings on Pause: A How-to for Project Managers

pandemic covid-19 remote work at home

Tips for Running a Successful Remote Project Meeting

One of the biggest advantages of a face-to-face project meeting is that you and your team are collaborating in real-time, full-frontal, leaving little room for misunderstandings or misinterpretations. For example, in a traditional meeting, you and you team work to add, change, or delete tasks, assess risks, discuss dates, assign resources, etc. etc. Afterwards, everyone leaves the meeting with an updated and accurate plan. Easy.

However, during a remote project meeting (either by audio link, video link or both), certain challenges arise that you may not be comfortable with, or you might not have ever experienced. So here is quick head's up on how to get the most out of your next remote project meeting... 

How to read body language, without a body... 

When in person, and you ask a team player about a milestone or deadline, you can read the person's face to collect the "meta" information on the response. You know, that pained expression or the glint of joy in their eye; but when on the phone, you don't get any of that. As a PM, you now use your built-in sonar. Listen for silence. Either engage the silent one, or have a quick follow up after the meet is over.

When having a voice-only meeting, or a mixed video and phone meeting, make sure every attendee is engaged. One tip from native culture is the idea of passing a talking stick, where each attendee is given the stick, and a certain amount of time to "hold" the stick and talk uninterrupted. Try playing with an idea like this to ensure that everyone on the other end is alive, well and contributing.

The fashion trend of "Dress for Success" just changed... 

Don't be surprised if your co-workers have shed Gucci for Nike, now that most of your team is working from home - you can even revel in the fact that your team is probally even more comfortable than ever! Being comfortable within a virtual meeting is absolutely important, but as your new role as moderator of a remote project meeting, realize that even in tees and shorts, that your team may be feeling anxious or uncomfortable within an online format. 

When first starting a remote project meeting, allow time for everyone to just share what's going on in their lives, and to let loose about working from home. Again, make sure everyone gets a turn, and gently encourage those shy online to participate.

...Meeting strangers online is now ok...

Acting as a PM moderator, make sure everyone on the line (or on the feed) is properly introduced. You can prepare a few words on each person attending, and also allow each attendee a chance to introduce themselves. For folks new to the team, make sure there is a mechanism in place to share the "distribution" list to all, and that all know how to contact each attendee of the meeting. 

When first starting a remote project meeting, allow time for everyone to just share what's going on in their lives, and to let loose about working from home. Again, make sure everyone gets a turn, and gently encourage those shy online to participate.

Whiteboard it! 

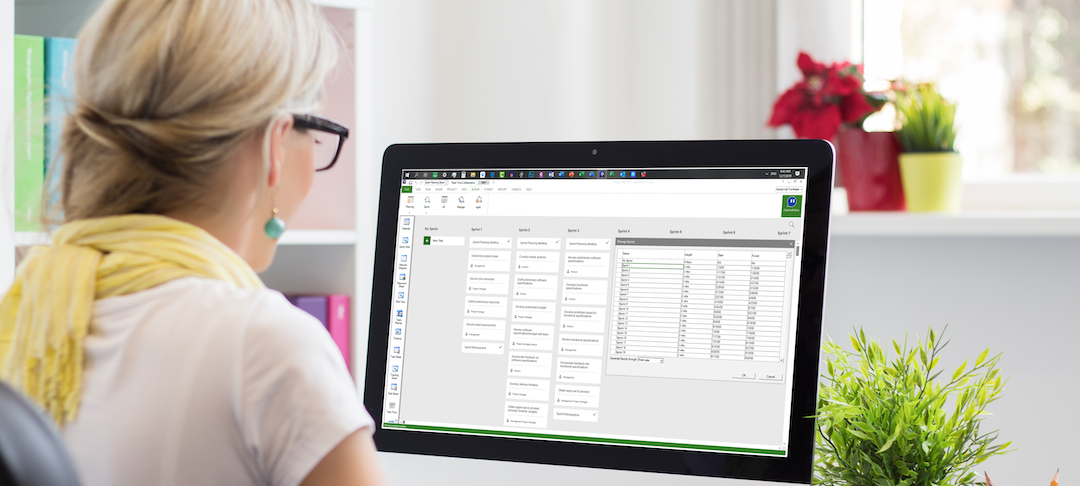
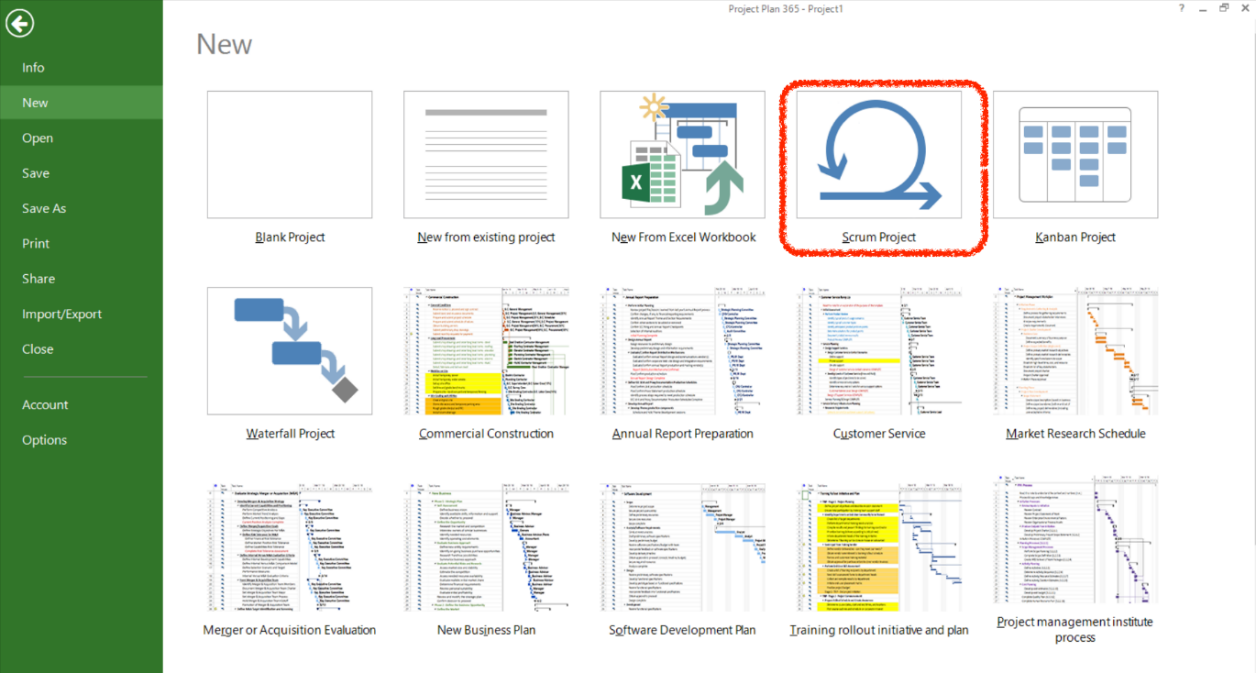
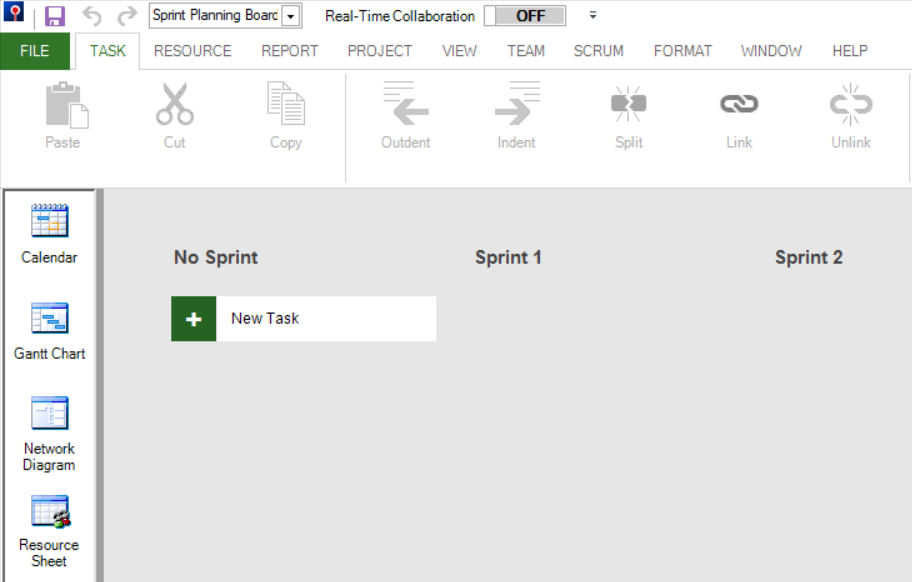
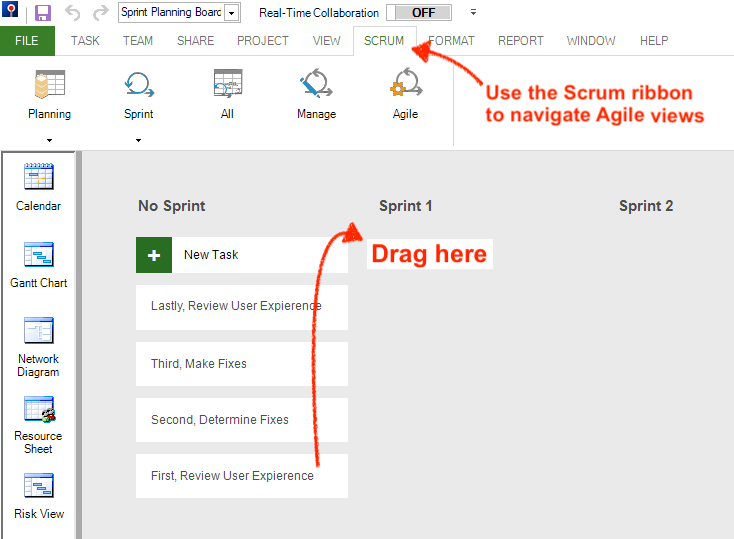
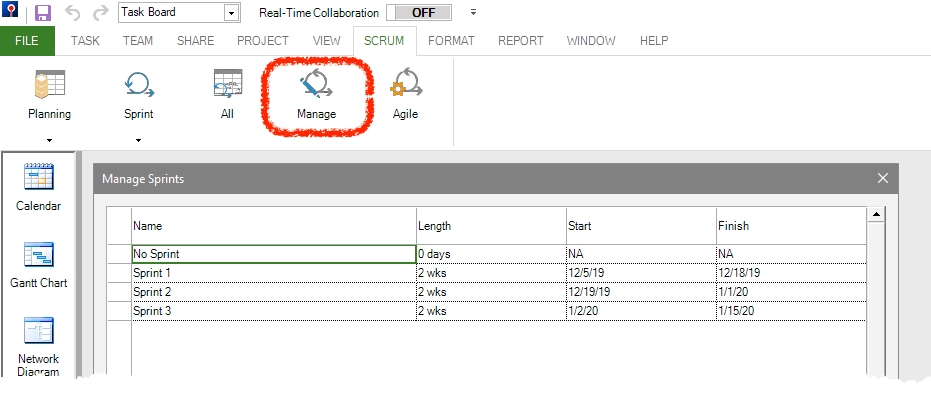
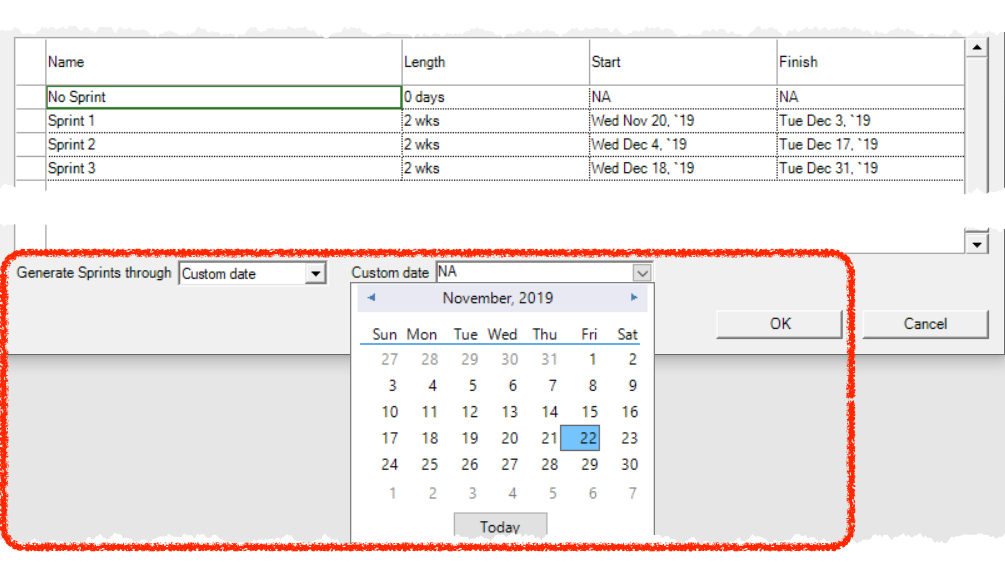
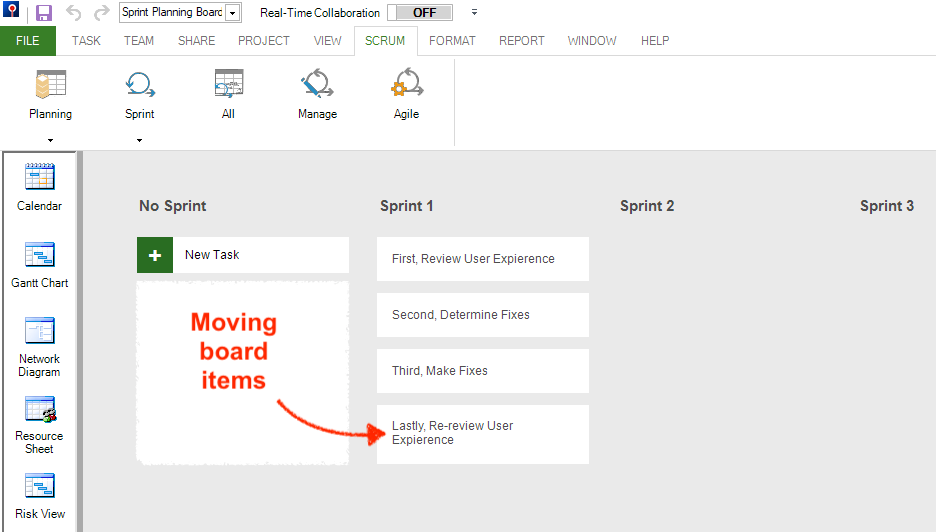
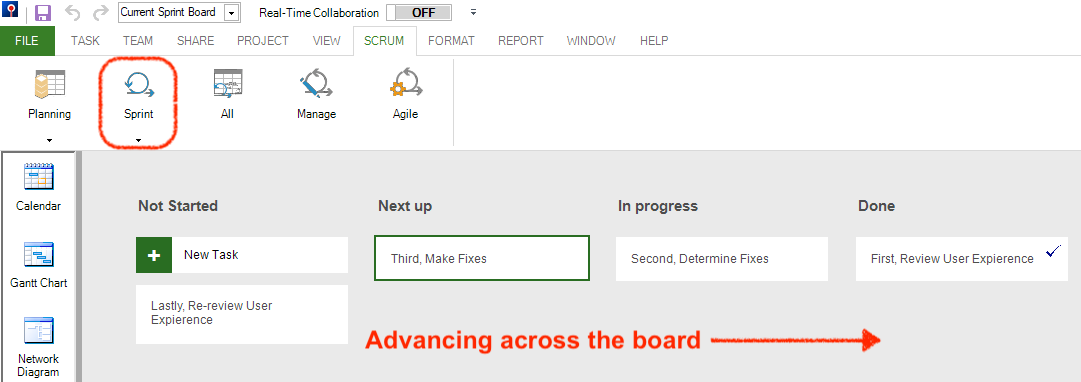
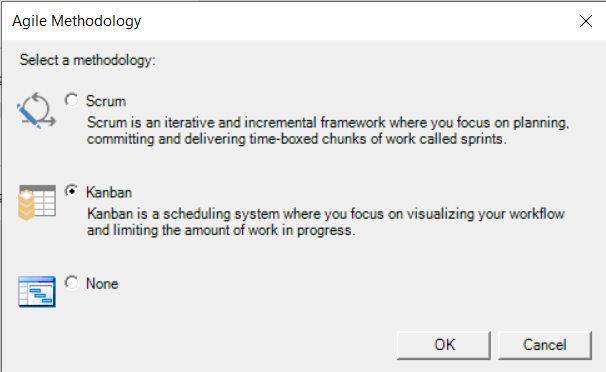
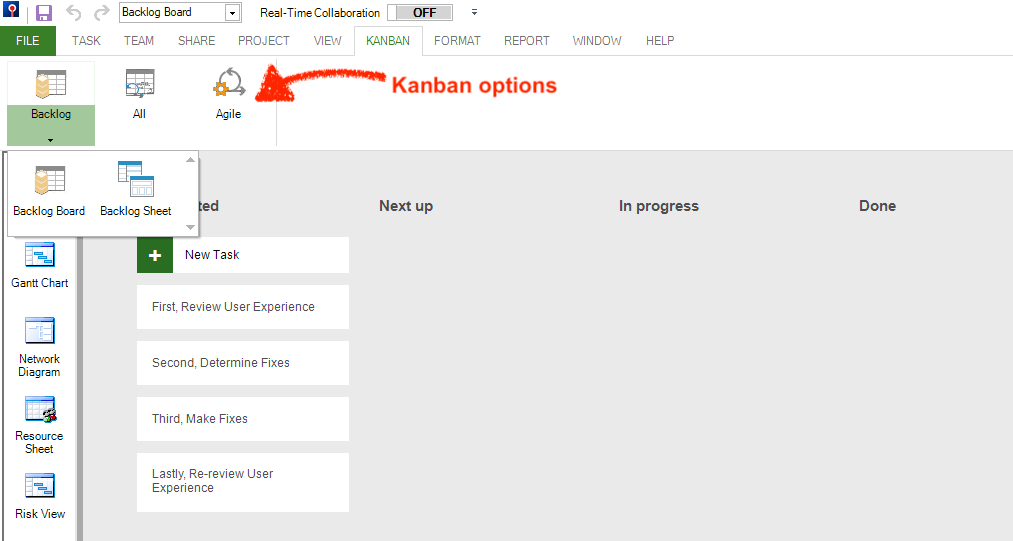
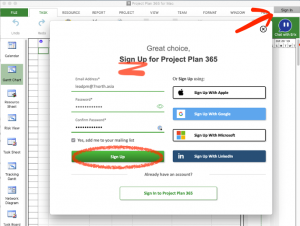
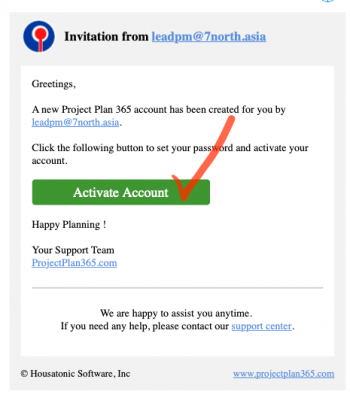
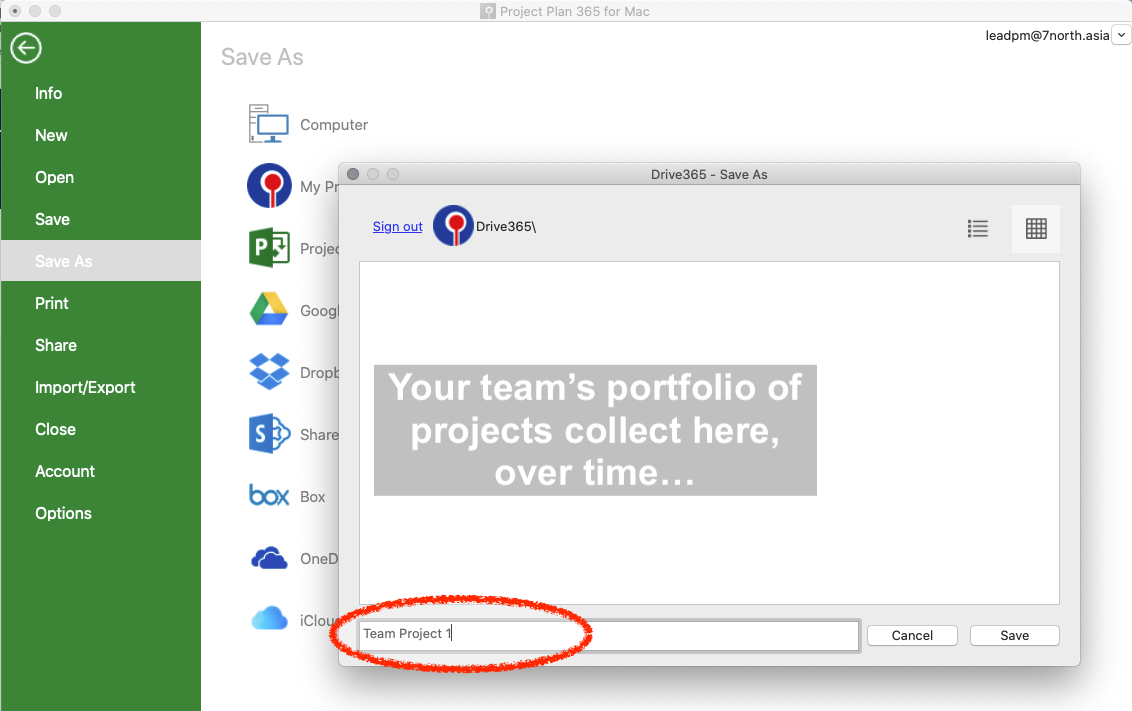
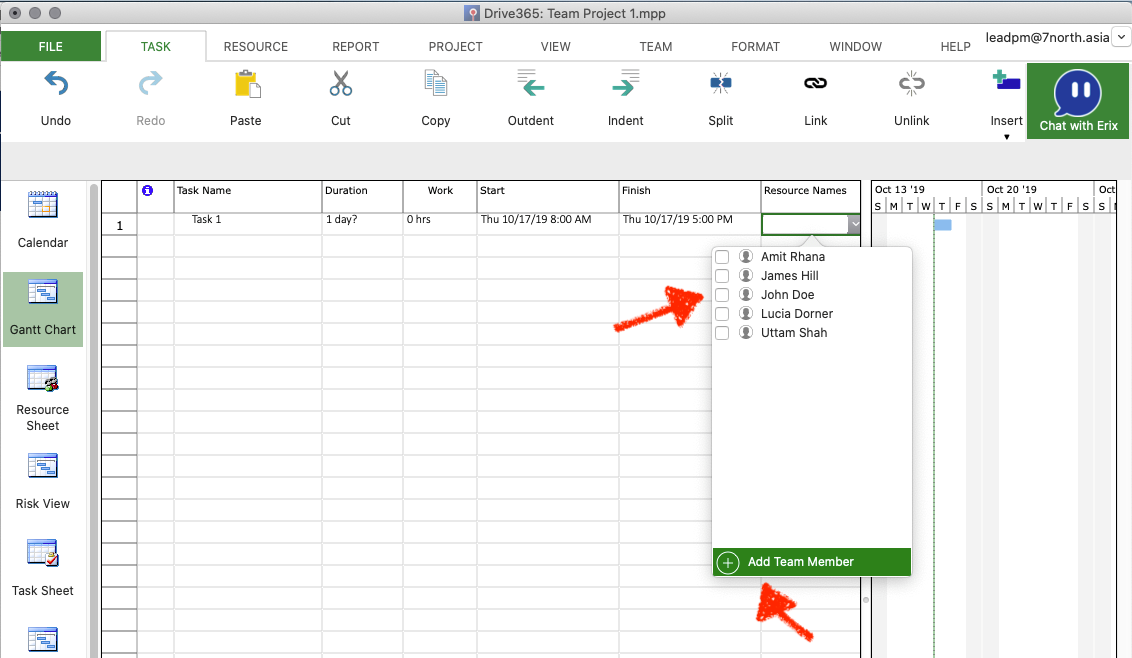
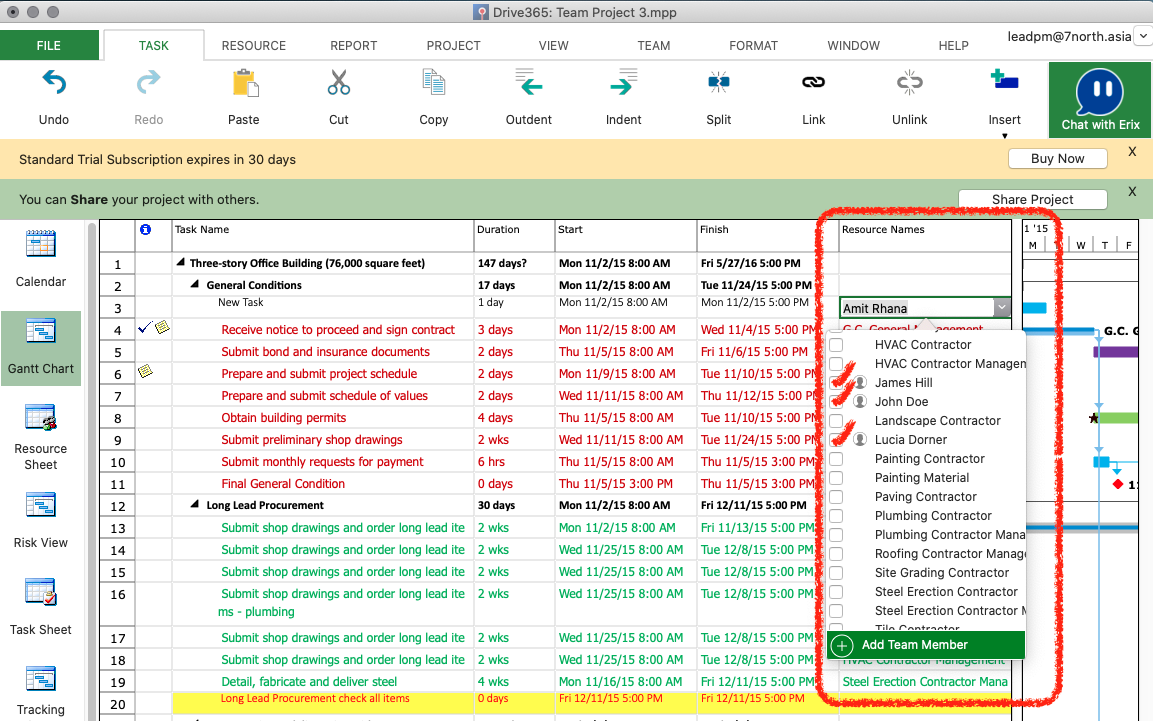
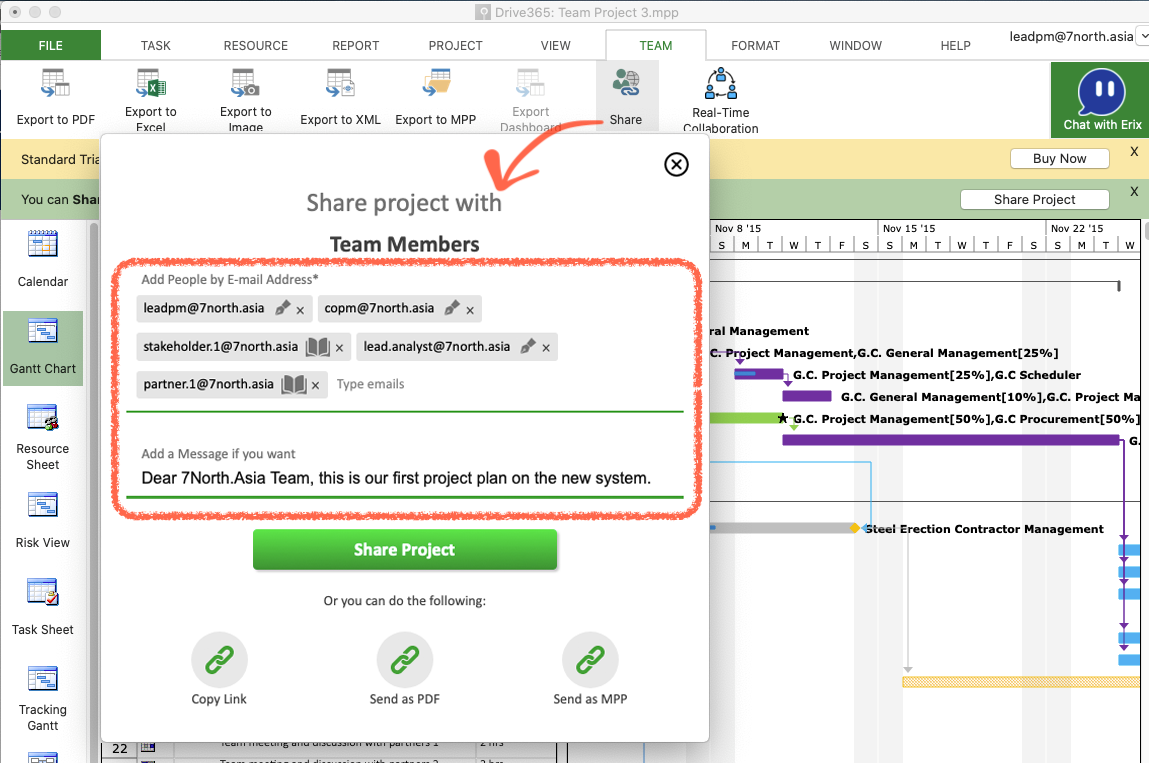
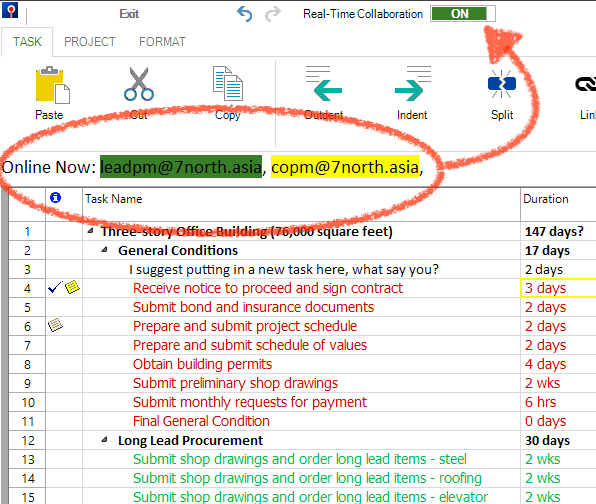
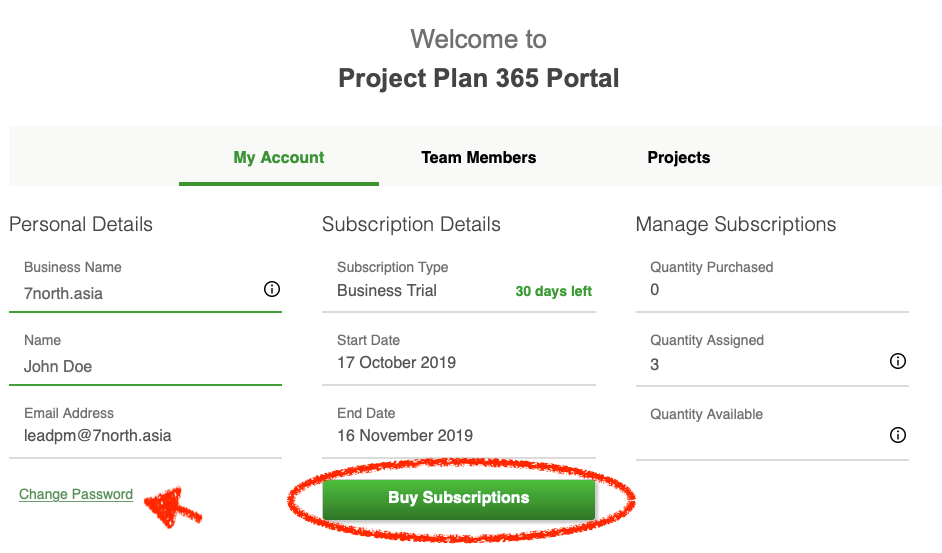
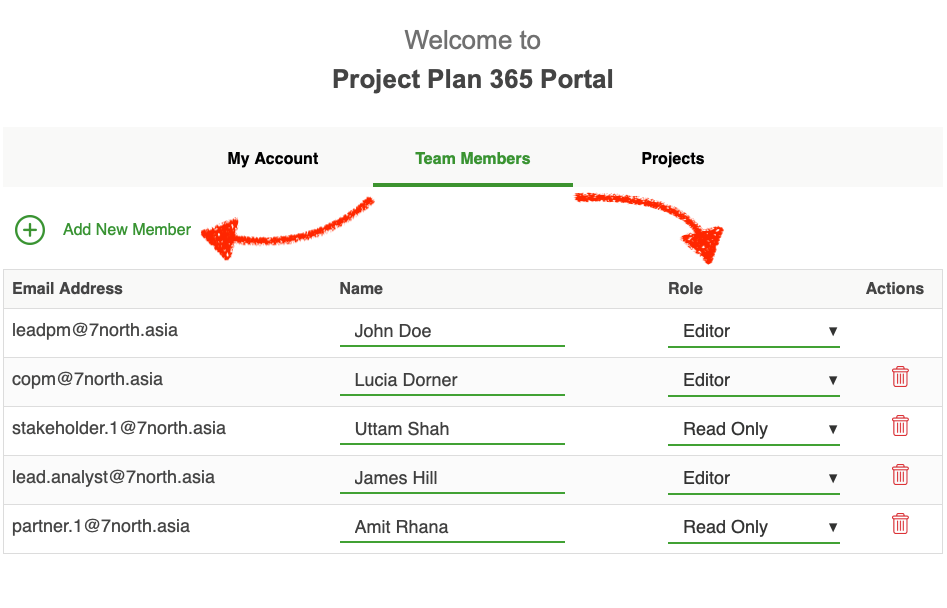
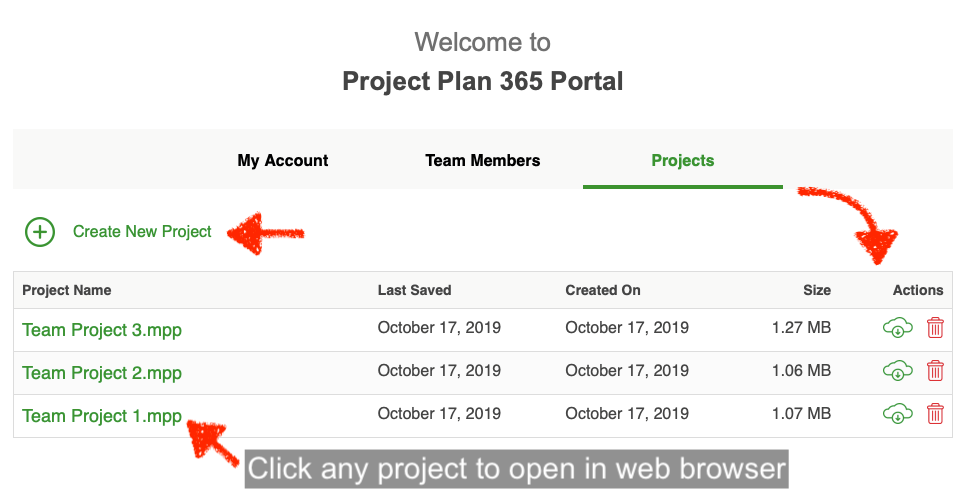
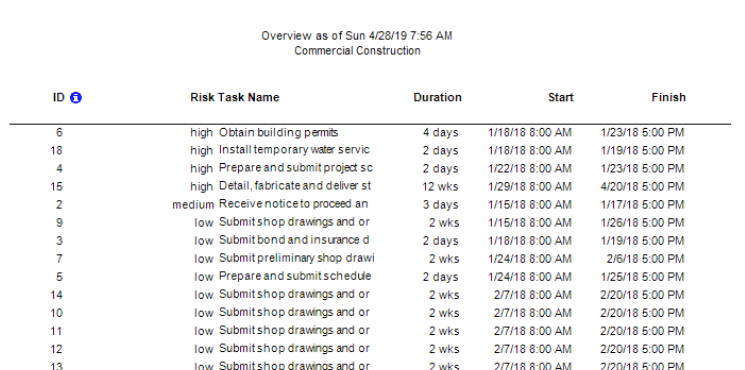
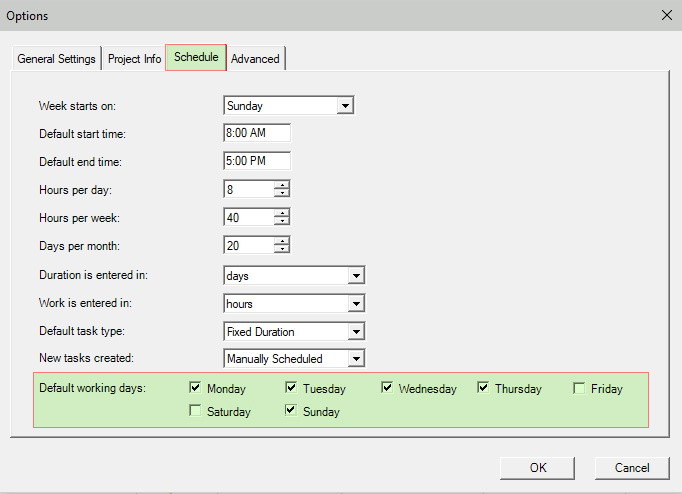
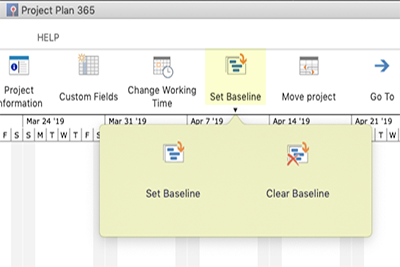
It's really surprising the amount of new tech involved with remote meeting apps and software! Interactive Whiteboards are great for brain-storming during your project meeting, and look for the feature that just captures the entire conversation - automatic meeting notes! In addition, tools like Project Plan 365, Microsoft Project or Microsoft Excel can be used in rTc mode (real-time collaboration) to update a project plan in real-time. 

Do whatever you can to reduce any "new tech" anxiety or stress amongst your team. You may even have to have a training session first, on any new tools, before you start having official remote project meetings.

What to do when difficulties arise...

A myriad of difficulties can come up before, during and after a remote project meeting, but your most important action as moderator is to stay calm and carry on. Issues, technical or otherwise, can still be resolved on another call, either with a single team member or a smaller group. Be upfront with your team, as this may be all be new to all of you - honesty and patience goes a long way online.  

Many obstacles can be mitigated ahead of time, using the tried and true approach of proper preparation. For remote meetings, this may mean a bit more time spent preparing for the meeting than you normally would (no longer can you dash from your desk to the meeting room carrying everything that you need). 

Humor is highly encouraged... don't worry too much about "wasting" time, as a bit of light-hearted play might be just what a tense situation needs.

In conclusion...

Project meetings once held face-to-face, can now be just as successful when held remotely, but certain challenges will arise; for example: 

  • Communicating remotely, where you may only be able to hear your team speaking, might take some adjustment. But have faith, back in the '50s this was the way everything was done. 
  • As a PM conducting remote project meetings, you have, in a sense, become an online moderator. Any google resources on becoming better at that, is well worth your time. 
  • Remote Meeting Technology is a blessing, but can be challenging to those new to the environment. Patience and prior training is key. Make sure you put those tasks in the plan!
  • Making team members comfortable and keeping the meeting relaxed is the perfect recipe for success. 
  • Above all, keep calm and carry on!

To learn more...

Keeping Track with Agile

Keeping Track with Agile... Using Project Plan 365!

Why Agile?

Agile project management is an iterative and incremental approach to delivering requirements throughout the project life cycle. Mainly used in software development, it has gained momentum in many other industries due to its emphasis on collaboration, flexibility, continuous improvement, and high-quality results. It uses popular project management frameworks such as Scrum (which uses Sprints that are time-boxed iterations, typically two weeks long and used to organize tasks and for quick goal shifting) and Kanban (which uses Backlog and Board status to manage work in progress).

Agile is great for teams who are looking for adaptiveness, clear and measurable deliverables, and a flexible approach to project delivery.

Why Project Plan 365?

Project Plan 365 supports both the Agile and Waterfall PM methodologies, all within the same app. That means you don’t have to choose one over the other - you get the best of all worlds - all in one place. With Project Plan 365, you can easily switch between Scrum and Kanban boards - with no disruption to data.

Project Plan 365 is especially data-flexible, meaning your data files can also be opened using Microsoft Project apps - as well as others - and Project Plan 365 actually extends the functionality of Agile planning over using Microsoft Project alone.

This tutorial will show you how to create your first Agile plan, and will also show you how to convert your Scrum to Kanban, in just one click. A practice file is available online, in case you want to follow along. If unfamiliar with Scrum & Kanban (and the difference between the two), see this cheat sheet from Development That Pays. Ok, let’s get started…

To start tracking your first Scrum...

1 Click on File/New, and choose Scrum Project.

Project templates are available for both Scrum and Kanban

2 The Sprint Planning Board displays, allowing you to add project tasks (as board items - just like sticky notes). Once added, you can move tasks into different Sprint cycles; just drag and drop to suit.

To start, an empty board…

3 To create a new board item, click on New Task, and then fill in the task description, then click Add. Repeat for any sprint task you would like to create.

Once board items are created, you can arrange them into Sprints using drag & drop

As you create the list of tasks, you sort them into Sprints (by default, three are included; Sprint 1, Sprint 2 and Sprint 3). In Agile methodology, a Sprint is a fixed time frame for work to be completed. By default, Project Plan 365 includes three sprints, with each sprint lasting 2 weeks (you can always add more; that's explained soon). As a result, the default Agile project duration is 6 weeks (3 sprints x 2 weeks):

You can change default Sprint durations by clicking Manage on the Scrum ribbon

Behind the scenes, as you add tasks to Sprint boards, they are also added to the Project Schedule. From these planning boards and sheets, you can always switch to any other view to see your data within different contexts. Go ahead, try it!

With the Manage Sprints sheet, you can set your Sprint durations (which can vary) and specify the start date of your first Sprint. All the other Sprints will be automatically calculated based on this first Sprint date. By default, Project Plan 365 generates Sprints through to the project’s finish date. But you can also specify a custom date:

Setting a custom date for Sprints

At this point, the task dates are not updated within the Gantt Chart View to reflect the sprint dates – but we know the dates of each sprint by looking at the Manage Sprints sheet.

4 To move tasks between sprints, you can drag and drop them within the Sprint Planning Board:

Creating Sprints on the Spring Planning Board

And you can also sequence tasks using the Current Sprint Board:

Sequencing Sprints on the Current Sprint Board

5 You can complete task details for Sprint board items by using either the Current Sprint Sheet or the Sprint Planning Sheet; there you can add resources, deadlines, work estimates, as well as reassigning Sprint numbers or changing the board status for each task:

Filling in task details using the Sprint sheets (Current and Planning; note that each differ slightly)

Both sheets are similar, with the major difference being that the Sprint Planning Sheet does not show completed tasks, and does show the Agile column by default.

You can add or hide columns to any view in Project Plan 365, for example you can hide the Task Summary column or add the Agile column anywhere you’d like. Also, setting Agile=No will remove that task from all Agile views.

6 You can further customize your sheets by, say, adding the % Complete column, and then tracking progress here:Both sheets are similar, with the major difference being that the Sprint Planning Sheet does not show completed tasks, and does show the Agile column by default.

Adding the % Complete column is very useful

7 You can also customize your boards by, say, adding/deleting/re-naming/moving board columns, or by deleting tasks, assigning resources, marking 100% completes, etc.

Adding, deleting, renaming or moving columns with a right click
Manipulating tasks with right-clicks

Switching between the two Agile flavors...

If you want to switch between the two flavors of Agile (Scrum or Kanban), you can do this from the Scrum ribbon/Agile, from the Project ribbon/Agile, or from the Kanban ribbon/Agile.

Just hit the button you need!
Kanban boards and sheets - just like with Scrum!

When switching to Kanban, you will see very similar features to Scrum. Kanban is all about visualizing your work, limiting work in progress, and maximizing efficiency (or flow). In contrast, Scrum has a Sprint Planning Board that allows you to select which tasks belong to each Sprint. You will not find this when switching to Kanban. Here you use the Backlog Board and Backlog Sheet instead (which is the similar to the Current Planning Board within Scrum).

In conclusion...

To sum up, in this tutorial we learned how to:

  1. Start a Scrum from scratch.
  2. Add tasks to the Sprint Planning Board.
  3. Sequence tasks using the Current Sprint Board
  4. Add details to tasks and manipulate columns in both the Current Sprint Sheet and in the Sprint Planning Sheet.
  5. Switch between Scrum and Kanban displays of the project plan.
For help with this - or anything else PM-related at all - please complete a support ticket and we’ll get right back to you. 

To learn more...

Build a Team and Get More Work Done!

Build a Team, and Get More Work Done!

We know that teamwork is important, whatever the project. We've learned to work with others, communicate better and in general, work collectively. But does your software help you facilitate team-building? Well, Project Plan 365 does just that, right out of the box. 

Watch the video and/or read on to find out how to build a team in just a few minutes, no matter where you are within Project Plan 365.

This short tutorial will help you gather your team within the app, and then lets you use what you do know about team work to the best of your team's abilities. In other words, we have added a bit of team-building automation in our latest update...

Gathering the Troops...

First off, all you need to build a team within Project Plan 365, are the email addresses that your team members use. Easy! Here's an example: 

Meet the 7North.Asia team: a lead and co-project manager, an analyst, a partner and a stakeholder.

If you want to follow along and you are brand new to Project Plan 365, then go here to download a 30-day Free Trial.  Here’s how the 7North.Asia team did just that:

1) The Lead PM downloads and installs the Free 30-day Trial for whatever platform the PM is using (in this case, Apple’s MacOS).

2) Now the Lead PM opens the app and then signs up using the new integrated Sign In screen, choosing any of the credential options offered. Apple, Google, Microsoft and LinkedIn accounts can be used – whatever is the most convenient!

3) Once signed in, the Lead PM is prompted to create a new team, as well as identify the business. At this point, one could cancel (X) the team-building workflow and get right to work on the project plan; however, since the Lead PM of 7North.Asia already has a team assembled in the wings, this is the perfect time to get everyone on board.

Note: we do not sell your personal information – or any other information – to third parties; everything entered on our system is considered confidential and kept that way!

Adding Team Members to your Workspace...

4) To identify your team within Project Plan 365, you simply create a list of human resources that can be called upon when needed – just follow the prompts on the “Add Individual Team Member pop-up.”

Here you assign a Project Plan 365 “role” to each team member. In this case, the co-PM for this project is assigned the role of Editor, meaning this PM has more functionality within the app, and more often than not, becomes a paid subscriber when the 30-day Trail expires.
 
When the role of “Read Only” is assigned, that just means that the team member is not expected to make editorial changes to the plan, and will become a free subscriber when the 30-day Trial expires.
 
Repeat this step for each team member you wish to initially add...
 
Note: Roles can be changed at any time using the updated Project Plan 365 Management Portal (see below), and there you can also Add and Delete team members as well.

As new team members are added, they are notified (by email) that they are now part of this team, and each is provided instructions on how to proceed.

Sample email sent to each new member of the team.

5) At this point, the project team is defined, and the Lead PM is sitting in front of a blank project. We recommended immediately saving this blank project to the included My Projects - Drive 365 (a cloud-based drive used for teamwork).

Saving teamwork to the included cloud drive.

6) With the team project plan saved to Drive 365, the Lead PM can now easily assign team members to tasks (as the plan is being developed) using the Resource Names dropdown list: 

Assigning team members to tasks, from a global list of resources. The drop-down also allows the PM to add new members on the fly, right from the drop-down!

Note to Microsoft Project / Project Plan users: existing project plans (with resources defined) that are saved on Drive 365 will enable you to add these resources to the global resource list, and all your projects will then display any added global resources in any resource-related drop-down list.

It is now possible to add human resources from any project, even those created in Microsoft Project!

7) Once your project plan is drafted and ready to be shared with others, you can easily share the plan with your project team by going to TEAM on the ribbon, and then selecting Share:

Sharing with the Team has never been easier - just one click away!

That's it, your done! But read on for more even more team-building help... 

A Note on One-Click Upgrades...

With the Project Plan 365 October 2019 Update, it is now possible to upgrade your subscription plan, on the fly, and just when you need an upgrade feature - such as Real Time Collaboration, Portfolio Dashboards and more. In the following example, our Lead PM @ 7North.Asia has decided to collaborate (in real-time) with other members of the project team, and needs to upgrade to the Business Plan to set that up:

The 30-day Free Trial is automatically upgraded to the Business Plan, so you can check out all the features of Project Plan 365 during your first month.

Two team members collaborating on the project plan in real-time, after upgrading to this Business Plan feature.

Note: you will find several more advanced features such as this within the app, and you don't need to upgrade until you do 🙂 

In Case You Need More Team...

The new portal can be accessed from within the app (see upper right corner) or on the web; just point your browser here to sign in!


Now that the 7North.Asia team is up and running and working on project plans, let’s take a look at a new portal that will help the Lead PM manage the system as project work continues...

To manage subscriptions and to change the administrative password, use the My Account panel:

To manage team members (add, subtract or change roles), use the Team Members panel:

Likewise, to manage projects created by you and your team, flip to the Projects panel to download, delete or otherwise view any project in your portfolio – without ever leaving your browser:

To remove a project from the team's cloud drive, download a copy to store locally (as a backup) and then delete from the portal.

In Union there is Strength....

The Ancient Greek philosopher and storyteller Aesop once said, "In union there is strength" and thousands of years later, we know he was right. That's why the latest version of Project Plan 365 endeavors to strengthen your team-building abilities as best it can. So why not try it out? 

What’s New in the October 2019 Update

What's New in the October 2019 Update...

Hello World!

In 1978, programmer Brian Kernighan coined the now famous digital characters ‘Hello, World’ in his landmark book on how to better code software. Since then, developers have learned to incessantly look for better ways to write code, and to provide better software - version after version – improving over time.

The Project Plan 365 October 2019 Update represents just such an iteration, a “Hello World” moment, so to speak. We’ve packed our free & paid viewer, free trial editor & paid editor, and everything else in between into this update - redefining the user workflow, making it easier to upgrade to new features, providing improved management tools – all to help customers get from the free 30-day trial to a fully-resourced & working project plan as soon as possible. This is great news for any budding PMO, regardless of team size.

Brian Kernighan, author of “The C Programming Language,” 1978.

Now it’s easier to setup a project team and to all begin planning together, all on the same sheet, no matter what device or platform everyone is using. In addition, new team members can be added on the fly, allowing a project manager to increase team resources without any fuss; resource management is essentially built in - from day one! The following walk-through follows a newly created team from the 7North Corporation, who has just opened up a project office in Nepal, and is wanting to have the team begin work on a new project using Project Plan 365…

Meet the 7North.Asia team: a lead and co-project manager, an analyst, a partner and a stakeholder.

Streamlined Free Trial Flow

It is now easier than ever to go from the 30-day Free Trial to a fully working project plan, in a matter of minutes. Here’s how the 7North.Asia team did just that:

1) The Lead PM downloads and installs the Free 30-day Trial for whatever platform the PM is using (in this case, Apple’s MacOS).

2) Now the Lead PM opens the app and then signs up using the new integrated Sign In screen, choosing any of the credential options offered. Apple, Google, Microsoft and LinkedIn accounts can be used – whatever is the most convenient!

3) Once signed in, the Lead PM is prompted to create a new team, as well as identify the business. At this point, one could cancel (X) the team-building workflow and get right to work on the project plan; however, since the Lead PM of 7North.Asia already has a team assembled in the wings, this is the perfect time to get everyone on board.

Note: we do not sell your personal information – or any other information – to third parties; everything entered on our system is considered confidential and kept that way!

Easier Team Building, from the Get Go

During the sign-up process is a great time to build your project team – all you need are the email addresses of your team members.

4) To identify your team within Project Plan 365, you simply create a list of human resources that can be called upon when needed – just follow the prompts on the “Add Individual Team Member pop-up.”

Here you assign a Project Plan 365 “role” to each team member. In this case, the co-PM for this project is assigned the role of Editor, meaning this PM has more functionality within the app, and more often than not, becomes a paid subscriber when the 30-day Trail expires.
 
When the role of “Read Only” is assigned, that just means that the team member is not expected to make editorial changes to the plan, and will become a free subscriber when the 30-day Trial expires.
 
Repeat this step for each team member you wish to initially add...
 
Note: Roles can be changed at any time using the updated Project Plan 365 Management Portal (see below), and there you can also Add and Delete team members as well.

As new team members are added, they are notified (by email) that they are now part of this team, and each is provided instructions on how to proceed.

Sample email sent to each new member of the team.

5) At this point, the project team is defined, and the Lead PM is sitting in front of a blank project. We recommended immediately saving this blank project to the included My Projects - Drive 365 (a cloud-based drive used for teamwork).

Saving teamwork to the included cloud drive.

6) With the team project plan saved to Drive 365, the Lead PM can now easily assign team members to tasks (as the plan is being developed) using the Resource Names dropdown list: 

Assigning team members to tasks, from a global list of resources. The drop-down also allows the PM to add new members on the fly, right from the drop-down!

Note to Microsoft Project / Project Plan users: existing project plans (with resources defined) that are saved on Drive 365 will enable you to add these resources to the global resource list, and all your projects will then display any added global resources in any resource-related drop-down list.

It is now possible to add human resources from any project, even those created in Microsoft Project!

7) Once your project plan is drafted and ready to be shared with others, you can easily share the plan with your project team by going to TEAM on the ribbon, and then selecting Share:

Sharing with the Team has never been easier - just one click away!

One-click Upgrades, in-app!

With the Project Plan 365 October 2019 Update, it is now possible to upgrade your subscription plan, on the fly, and just when you need an upgrade feature - such as Real Time Collaboration, Portfolio Dashboards and more. In the following example, our Lead PM @ 7North.Asia has decided to collaborate (in real-time) with other members of the project team, and needs to upgrade to the Business Plan to set that up:

The 30-day Free Trial is automatically upgraded to the Business Plan, so you can check out all the features of Project Plan 365 during your first month.

Two team members collaborating on the project plan in real-time, after upgrading to this Business Plan feature.

All New Management Portal

The new portal can be accessed from within the app (see upper right corner) or on the web; just point your browser here to sign in!

Now that the 7North.Asia team is up and running and working on project plans, let’s take a look at a new portal that will help the Lead PM manage the system as project work continues...

To manage subscriptions and to change the administrative password, use the My Account panel:

To manage team members (add, subtract or change roles), use the Team Members panel:

Likewise, to manage projects created by you and your team, flip to the Projects panel to download, delete or otherwise view any project in your portfolio – without ever leaving your browser:

To remove a project from the team's cloud drive, download a copy to store locally (as a backup) and then delete from the portal.

Need Assistance with Anything? Ask Erix!

Also included in the Project Plan 365 October 2019 Update, is a first for PM applications – a built-in AI Project Management Assistant that answers basic project planning questions. Erix is currently being trained to answer any question you may have, in regards to our app, or project management in general. Just open up a chat box to say “hello” (or anything else). For more info on Erix, see this page.

Hello World Forever…

Ever since Brian Kernighan published his seminal work “The C Programming Language,” generations of developers have strived to refine their software iteratively, release after release. The Project Plan 365 October 2019 Update follows this tradition, and introduces a streamlined workflow for teams of planners, analysts, stakeholders, etc. – allowing all of them to collaborate on and share plan data, from day-zero to the final conclusion of the project, all with a minimum of expense and fidgeting from the team. We hope you find this update useful, and as we are user-driven in our updates, feel free to let us know what you like or want to see changed in the future. We are here for you – 24x7!

The PMO, Reimagined

The PMO, Reimagined

Historically speaking…

The Project Management Office, or as known in the biz as a PMO, has been evolving within large and medium-size organizations for centuries. However, as with everything else corporate, new technologies are changing the face and features of the typical PMO found within. PMOs are now popping up within small companies, and on an ad-hoc or one-off basis, with small projects being managed by one or two managers in the same fashion as projects tasking hundreds. But before examining this latest trend in the world of project management, let’s take a look at where and why they came to being…

The very first record of a PMO dates back to the 1800s, when the British Parliament established a management group to provide governance over the agricultural industry, with a focus on improving productivity, refining taxation policies and increasing exports. This PMO, like all future ones, cross-cut through multiple departments and management teams, and reported directly to the top. Fast forward to the early 1900s in America, where we find the US Government using the PMO concept to control costs and improve transparency within civil engineering endeavors.

By the 1950s, government administrations had established PMOs within NASA, the Coastguard and the National Science Foundation. Most other gov’t agencies began to follow suit, with American corporations mimicking this model as well. Within these 20th century corporations, PMOs were formed to specifically benefit the org by:

Early PMO Benefits

  • Established closer relationships with clients and other stakeholders.
     
  • Enhanced the org’s ability to deliver projects on time, within budget


  • Standardized governance processes and facilitating the sharing of resources, methodologies, tools and techniques 
  • Established best-practices, and increasing the capture and sharing of institutional knowledge.

PMO design and structure developed concurrently with the model of project management we find in use today – the “Iron Triangle” of time, cost and quality. As the practitioner community developing this model of project management grew, so did the literature on (and practice of) PMOs expand. For example, by the third edition of the PMBOK Guide (the PM bible compiled by the Project Management Institute), the establishment of a PMO for any project, regardless of size or duration, is recommended by the institute and detailed as a best practice for all organizations doing project work.

The Modern PMO…

With that backdrop, we can better understand the wide variety of PMO structures that provide different services within so many organizations. Sometimes called a Centre of Excellence, Performance Office, or Portfolio or Programme Management Office, the PMO usually consists of lead project managers overseeing the org’s work effort and monitoring output in terms of time, cost and quality. Today’s PMOs work hand in hand with HR, Finance, QA and C-Level departments to provide them with the estimation, monitoring and reporting that they all need. In addition, PMOs support the personnel doing the work (for example, construction, engineering, manufacturing and production professionals). PMOs act as a hub for standards and guidelines, as well as data-driven best-practices and software tools.

However, the modern PMO is not without problems, despite the benefits described above. In most cases of today’s PMOs, they have become part of the political landscape of the organization, and in some cases, a commodity (to be touted or blamed for project performance). Often, a PMO may become just another silo within an organization, hindering its ability to complete a charter of understanding the complex relationships between strategies, projects and organizational structures. (See The Project Management Office: it’s just not what it used to be, International Journal of Managing Projects in Business 9(2):282-308 · April 2016.)

In addition, running a PMO can be expensive and when itemized as overhead, subject to budget cuts and other revenue anomalies. As a political body, a PMO is also subject to C-Level criticism when projects go awry, or do not perform as predicted (deservedly or not).

Partially to blame for PMO woes, is the fact that the very best practices for running a PMO originate from a very loud echo chamber of business books, blogs and professional organizations – all mimicking each other, and producing practices that may not be based in science (where a list of functions is selected by successful traits). In other words, PMOs are often established and run based on dubious and unscientifically collected data. So, its no wonder that some small, light-weight and nimble companies often opt to forgo the formation of a PMO altogether – often to their own detriment.

The PMO, Reimagined for the 21st Century

By 2015, it was estimated that more than 75 percent of all small businesses (<$100 million in revenue) had established a PMO, while 95 percent of large businesses (>$1 billion) lead the way. So there is no doubt that the benefits of having a PMO within your small business would include:

Modern PMO Benefits

  • Increases your bottom line

  • Improves customer satisfaction

  • Enhances stakeholder participation


  • Helps you better understand portfolio performance
  • Standardizes what works and rules out what doesn’t 

Some ask, “Is a major hiring initiative, a large budget and tons of software really needed to realize these benefits?” One member of the Microsoft Project User Group (MPUG.org) thinks not, and PM Gaton expresses his views on a PMO-in-a-Box design here. Basically, his idea is to smartly use software to automate more of the functionality of a PMO, without all the people and expense of hosting a traditional 20th century one.

The idea of providing a low-cost and tools-based PMO environment, where anyone with task-leading abilities could slot into a virtual PMO is not new however, and today, many leading software developers are trying (and failing) in this regard. Examples of new-age virtual PMO environments pop up on the web almost daily, and include the likes of Basecamp, Monday, Trello, Smartsheets, Wrike and a host of others – all attempting to mimic the PMO environment of yesteryear, yet each adding 21st century innovations. These innovations include social networking and cloud computing.

Taking What Works and Making it Better, Cheaper and more Inclusive

Arguably, the most successful project management software of all time is Microsoft Project, which started out as a DOS character-based system back in 1984. Now, after more than a dozen iterations, Microsoft supplies a very elaborate “PMO-in-a-Box” design, known as Project Server / Project Online. The base tool (Project) allows anyone to develop project schedules, assign resources to tasks, track progress, manage budgets, and analyze workloads in many ways traditionally performed by highly specialized PMO personnel.

In addition, Project Server (in conjunction with SharePoint Server and other requirements), creates a platform that many large-scale PMO deployments use to manage portfolio and project data in a distributed and customizable way. However, because of an astronomically high price-tag and burdensome IT-staff requirements, smaller businesses with limited capital are left in the cold, fending off project dilemmas on their own.

Enter Project Plan 365…

Project Plan 365 Business & Enterprise solutions take what’s best from a MS Project Server-based PMO experience, and delivers a like experience more affordable and better suited for very small- to medium-sized business. In addition, Project Plan 365 apps allow Apple users to contribute to the PMO, just like their Microsoft-based brothers and sisters – a support feature that Microsoft dropped way back in 1991.

This allows the small biz owner to achieve PMO goals just as the titans of industry do today, all using a standardized format for their project data. Project Plan 365 users can communicate directly with Microsoft Project users via a single project management “language” and protocol. Considering that over the decades, that wealth of project data worldwide has grown into the petabytes, this common data format has profound implications for big-data mining and other AI possibilities – making the PMO of the 2020s one of the leading influencers in all future business to come.

For more information on starting your own small-business PMO, see www.projectplan365.com.

Are You Managing Risk? You Should Be.

Risk Management

Are You Managing Risk? You Should Be.

Risk management is a fundamental part of any project management regimen, and if you are not following a process for managing any potential risks you may encounter along the way, you are in serious risk yourself; as risk not mitigated during the rollout of a project is a primary cause of project failure today.

But what is “risk” in the first place?

Simply put, risk is any uncertain event, task or condition that impacts at least one of the project’s objectives as it occurs.

Fortunately for planners, there is a well-documented protocol for incorporating risk taking (and risk management) into your daily project-management routine. This article covers a basic risk management protocol, provides templates to follow that protocol, and then describes how you can use Project Plan 365 to help you mitigate risks along the way. While Risk Management is a well-documented discipline in itself, by following a simple procedure and creating a document or two, anyone can successfully prepare for and mitigate risks as they present themselves…

Risk Management Basics

First, the process of risk management for any project goes like this:

  1. Plan for any potential risks you may encounter during the life of your project (create a Risk Management plan, specific to the project on hand). A downloadable template is provided here to get you started.
  2. Layout a process for risk identification, analysis, response, monitoring and reporting within the newly created plan. In addition, any contingency plans for the identified risks should be documented here, along with those responsible for carrying out the prepared mitigations (command & control).
  3. Develop a risk register to identify risks, where you rate the likelihood that the risky situation will occur, the seriousness of each risky situation, and the impact on the project if that risk were to go unchecked. A downloadable template is provided here to help you out.
  4. Maintain a risk log, documenting any interventions and follow-ups as needed.
  5. In your planning software, identify risky tasks and review them periodically as your project is rolled out. Also, update your project plan based on any risk mitigations performed, or new risks encountered.

Now, for those using Project Plan 365, the following tutorial will get you started recording and displaying risk within your plan.

Note to Microsoft Project Users:
If you are a Microsoft Project user, you can use this procedure as well, but you must first use Project Plan 365 to set things up within your .MPP file. Then, when you open up your project file in MS Project, you should see any identified risk as described below (just add a column containing Outline Code7 and rename the column to Risk).

Identifying Risky Tasks within Project Plan 365

Project Plan 365 offers a simple yet effective way of tracking and managing the risks you have identified in your Risk Register (from your Risk Management Plan). Just follow these steps to get started:

1 ) To turn on the Risk Management feature within Project Plan 365; just go to Backstage | Options | Risk Management and click the Enable Risk Management System checkbox, and then tap OK.

2 ) Once the Risk Management System is enabled, switch your plan to the Risk View, where you can identify any risky tasks in your plan by changing values in stored in the Risk column: *

* To learn how to insert a Risk column into any view, see our online training (click Support above).

The Risk View is handy, as this view allows you to go through your entire plan to quickly “tag” tasks with a risk value, and then this view will automatically sort all tasks by the value selected (in this case: low, medium, high or No Value).

3 ) You can also add your Risk column to any view you desire, for example, to the Gantt Chart View:

Any view can contain your Risk column.

4 ) Using the Risk column (by clicking the twisty), you can filter out the values you don’t want to see. In this example, we are filtering on just the high values. Once filtered, the view will only show tasks with a high-risk value:

Filtered list of high risk tasks.

In addition to filtering risky tasks to display just what you want, you can also customize the default risk labels to display anything you want, such as labels used in your Risk Management Register, Logs, or Plan. Just edit the Risk Level grid found under Options to suit your requirements:

Customize your risk labels here, to suit your needs.

Risk Reporting Within Project Plan 365

Once Risk values are added to tasks, a Risk Report can be generated by navigating to the Report ribbon and selecting one of the available reports:

Resulting Overview report

Summing Up...

By synchronizing a Risk Management Plan right alongside your project plan, you can track risky tasks within your schedule, and stay on top of any activity that may go wrong during the course of your project rollout. In addition, you can produce Risk Reports or otherwise use your project schedule to control and mitigate risks as they materialize, all according to plan.

To start managing project risk today, subscribe to the Project Plan 365 Business Plan without delay!

Risk Management the easy way - subscribe to Project Plan 365 today!

For more information about Risk Management within Project Plan 365, see this help page.

Simple Calendaring in Project Plan 356

Simple Calendaring in Project Plan 356

When scheduling a project in either Microsoft Project or Project Plan 365, you can change the calendar for your project, i.e. the days your work is ongoing – or not! In fact, you can tailor calendars in many ways, for example, you can have unique calendars for people (resources), for tasks and for the project as a whole. Having all these custom calendaring options is great, but can be a bit complex and confusing to set up (see here). 

What if all you need to do is change the days of the week everyone is working, for example if your project locale is somewhere Friday & Saturday is considered weekend time off (or, if you are lucky enough to just work 4 days a week instead of 5)? In these simple cases, the latest version of Project Plan 365 provides a much easier way to change your project calendar.

And what if you just want to extend the default work week (M-F) by one day, perhaps to finish up some work left over from Friday, using Saturday to get that done. Here too, Project Plan 365 provides a quick way to change the project calendar to reflect that one extra day of work.

Case 1 – Changing the Default Work Week

In the case where all want to do is adjust the work days within a week, for example, to indicate your project is being rolled out Sunday through Thursday, instead of the usual Monday through Friday, then just follow these steps:

1 ) Open Project Plan 365 and go to the File menu to select Options:

2 ) In the Options dialog, go to the Schedule tab and check or uncheck the desired-working days from the Default working days group:

A default work week, for example, used in most Muslim-oriented countries.

In the example above, we’ve changed the default work week, and have also updated the default project calendar all in one go.

3 ) Click OK. 

Case 2 – Changing a Single Day

In the case where all want to do is extend or limit your work by a single specific day, for example to finish up some work left over from Friday - on Saturday, then just follow these simple steps:

1 ) Within your plan, open the date-picker from anywhere within in the Start/Finish column and click on any non-working day that you wish to change (in this case, Sat):

2 ) When clicking a non-working day (or a working day for that matter), an Alert message appears, from which you have these three options:

If you selected a non-working day (in this example, Saturday the 7th) and then hit the Make this a working day radio button, clicking OK makes that Saturday a working day.

3 ) Here you can also Adjust the default working days (just as we did in Case 1 above), i.e. if you decide you are working all Saturdays from here on out, you can just select the Saturday checkbox to make that so:

TIP: You can also use this alert to MOVE a task to the next working day (by selecting any task and hitting the radio button named the same).

4 ) Click OK, and you’re done.

Summing Up...

For these common cases of calendaring adjustments, you can simply use Options / Schedule to change the default work week, or just click on a Start/Finish date (from any view) to make changes to a particular day. This technique greatly simplifies tailoring your work days to the days you are actually working - or not!

Note: Of course, you can always do all of this the “hard” way (by using the Change Working Time dialog), but the two cases described here do not need such heavy lifting, and this simple method allows Project Plan 365 users to make the most common calendar adjustments in the shortest amount of time. (Sorry Microsoft Project users, this feature is not available to you.)

To start calendaring the easy way, subscribe to Project Plan 365 right away!

Taking Snapshots, the Project Management Way

What is a Baseline?

A baseline is generically known as a value or condition against which future measurements can be compared. Within the context of project management, these values and conditions are the project’s scope, cost and schedule. A project baseline can be thought of as a “snapshot” of a project’s initial condition, just before work begins.

Baselines are used to evaluate project performance over time, by comparing an initial project snapshot with any subsequent images captured while your project progresses. Baselines are also used to quantify any variances from the original plan while the plan is in motion.

You can also think of a project baseline as a “sanity check,” in the sense that project sanity is defined as not making the same mistake over and over again while hoping for a better result!

Once your project is designed, capturing an initial project baseline is the first step taken to ensure better project performance — and PM sanity – over time. The baseline draws a line in the sand that says, “This is what we thought was going to happen, vs. what actually happened.”

Most decent project management tools have a feature for capturing the initial baseline and displaying any variances from that initial line in the sand. Project Plan 365 & Microsoft Project are no exception. Both can store and display up to 10 baselines for any given project (or for a select group of tasks). The typical baseline metrics most project managers use are: baseline duration, work and cost. However, many other metrics can be defined and then displayed.

When setting up a project plan, it is important to remember to set the initial baseline before putting the schedule into play. In other words, this step needs to be taken before work begins, but after you have designed your project plan and when you are ready to roll.

Note: Forgetting to set an initial baseline is a common mistake, and this boo-boo can’t easily be rectified once your plan is in motion.

>>> To work along with the following tutorial, download this sample plan (and Project Plan 365, if you don't have already) <<<

To visualize how a baseline is used, let’s take this simple three-day, three-task, three-person project as an example, before the initial baseline has been set:

Step 1. Open a plan in Gantt Chart view for a project  with no baseline set:

Step 2. Navigate to the Project ribbon / Set Baseline and set the baseline there:

Once you have set an initial baseline, the app begins crunching numbers and updating baseline values in fields and on the Tracking Gantt chart, as each change is made:

Step 3. Now with a baseline set, you can begin tracking and then see the changes made to your plan. Let’s assume that our three-day, three-task, three-person project was completed, but with Team member 1 — being the slowpoke that he is — is taking two days to complete the one-day task as planned. The resulting display in our project plan now shows this variance, using actual values and baseline values - and displaying a baseline “shift” in the Tracking Gantt chart:

Variances (baseline shift) are shown in baseline fields and on the Tracking Gantt chart. Baseline shifts are an important indicator of project performance over time and should be employed by every project manager when evaluating project metrics.

A quick way of seeing these shifts in your plan, is to use the Project ribbon to view Project Information / Project Statistics, which are updated in real-time. Project Statistics shows basic baseline values and variances from the actuals:

-- This article first appeared on MPUG.org on November 21, 2017 and appears here with permission of the author.

To begin implementing baselines within your plans, simply subscribe to Project Plan 365 today!

Innovations in Sub Building – and PM!

How New Technology, Better Collaboration, Simulations and Modular Designs Make for Project Success: An Examination of Nuclear Submarine Building

Some of the largest and most expensive projects completed of late have been fraught with huge time & cost overruns. These unexpected delays and expenses cause partial or full project failures with much hardship for all involved! Yet there have been a few cases where multi-billion dollar projects have been completed on time, under budget and beyond all odds - with a minimum of rework. Well, reasonably so…

The development of the USA’s Virginia-class nuclear submarine – a collaboration between two fierce competitors (General Dynamics and Newport News Shipbuilding) – is just such a success story. This US DOD project produced modernized submarines that cost far less to build and maintain than the previous model then in service (the Seawolf-class submarine). There were four key innovations that contributed to the Virginia-class project success:

1. Virginia-class submarines were designed using the then new technology – CAD (computer-aided design) – eliminating the mountain of paper blueprints needed to begin the project.

2. Resources from two competing companies were employed in order to cut down on build time – placing them in anunnatural collaboration.

3. A simulator was built to test the design of crucial command components – before installation on the submarine assembly.

4. The interior of the submarine was built in modular parts (some the size of a small house) that could be slid in and out of the hull later on down the road, thus extending overall life expectancy of the class.

By examining these innovations more closely, we can glean our own lessons-learned likely applicable to our own projects, no matter how large or small.

How innovations in technology helps any project manager…

It may seem obvious to use the latest & greatest technology when starting a new project, but that is not always the case. Sometimes project managers like to stick with what they know (works), and also like to play it safe, “If it ain’t broke, don’t fix it.”

This wasn’t the case for Virginia-class planners, as they knew they needed to use technology innovations to bring their project in under budget, and under the intense political scrutiny of 1990’s defense-budget reviews. So they took a gamble, used the new CAD software and went completely paperless for their build plans.

Now while today’s planning tools have made great strides in the elimination of all sorts of paper previously employed (by just using our beloved software), we should also follow the Navy’s lead and hold technology reviews. Since new tech arrives almost daily, we should examine new developments in technology before the start of every new project.

For example, if one were starting a project today and haven’t upgraded to Project Plan 365 (Business or Enterprise plan) - or Microsoft Project 2019 - then some thought should be given to upgrading. But no matter what technology you are using to plan and rollout your projects, it’s important to know that the tech is changing all the time.

How innovations in collaboration can turbo-charge project finish-times…

As project managers, we are always talking about collaboration (one of the most famous buzzwords of the 21st century), but from what I’ve seen, we rarely innovate in this regard before the start of each new project. We suggest a “collaboration review” before the start of your next project, where your team spends some time discussing how to better work together on the next new thing – take the Navy’s lead here and consider something outrageous and uncomfortable, like collaborating with the competition. That’s what the US Navy did when rolling out the Virginia-class project, and they shaved years off delivery times.

Another good idea is to take a look at Real-Time Collaboration (rTc), which is a feature of Project Plan 365 that puts all the players together - from design to final wrap-up. 

How innovative modular designs can save you time and money…

We tend to think of modularization as something that happens during manufacturing processes, like building “plug & play parts” for phones or cars. But have you ever thought of building project plans in a modular fashion? Fortunately for Project Plan 365 and Microsoft Project users, this is such an easy thing to do – if some foresight is used.

Project Plan 365 users that have subscribed to either the Business (PMO) or Enterprise (EPM) plans, can build parts of a plan, manipulating either individual parts or the whole plan at will. Likewise, Microsoft Project users can use the Master Project / Subproject feature to build modular parts of a plan, and those parts can be easily re-used later on down the line.

Hint: Subprojects are the reusable bits. That’s what the Navy did with reusable parts of  the submarine, so surely we can do that with our projects. The end result will be less time spent reworking old plans to fit new projects, and in short, we’ll just save a lot of time and money.

How innovative simulations can make any project more risk-resistant…

The Virginia-class engineers knew they had no time to design components that would later have to be redesigned because they didn’t quite work when actually installed in the final product. So they built a simulator to test critical component-designs before actually putting them into action. (As an added benefit, personnel who would later have to operate those components, had a shorter learning curve.)

Use Project Plan 365 / Microsoft Project to do the same – by conducting what-if scenarios during any initial project plan design. It’s so easy to do: just run simulations by changing draft plan values inside of the app – thus simulating various scenarios, like unexpected changes in resource allocations, schedules or budget. 

Similar to what Navy engineers did with their simulator, project managers can make their project plans more efficient and less risky by first spending some time running project-plan simulations – before ever putting the plan into play!

So you’re not planning on building a nuclear submarine anytime soon…

Of course, most of us are not planning on building a replacement for the Virginia-class submarine, or any kind of billion-dollar submersible for that matter, but by taking the lessons learned from those that did, we can see how the innovations deployed on that project can lead to our own – even if our projects are much smaller and less costly.

By innovating our use of technology, new collaboration techniques, modular plan designs and simulations, we too can roll out projects as successful as the Virginia-class nuclear submarine.

-- This article first appeared on MPUG.org on November 21, 2017 and appears here with permission of the author.

To begin leveraging innovation in tech, collaboration, modularization and simulaton, simply subscribe to Project Plan 365 today!

What is a Work Breakdown Structure?

What is a Work Breakdown Structure (WBS)?

A work breakdown structure or WBS is a common term in project management. The concept is used each time a new project is designed — and is best thought out before entering any data into a .MPP file. Yet even though the WBS is an important construct to project managers, creating and using a WBS in the project design phase does not occur with the regularity that you might expect.

Some of this lack of use of the WBS stems from the complicated definition; a 243-page specification published by the United States Department of Defense (MIL-STD-881C) was initially developed back in the 1960s to help NASA and the U.S. military better manage mega-projects, like building rocket systems or getting to the moon. Yet for those outside of the US government, no one wants to adopt a practice that takes 243 pages to describe.

It doesn’t have to be that difficult.

A WBS is really just a visual breakdown of a project into smaller components — think hierarchy – which makes planning for (and creating) the required deliverables easier to accomplish for any project team.

The benefits of designing a project that incorporates a WBS are multifold:

  • The WBS helps define key deliverables and sub-components of deliverables before work is scheduled and started, resulting in a smoother rollout during the project. The scope of your project is captured in the WBS, helping to prevent mission- or scope-creep later.
  • The WBS provides a much-needed collaborative tool that can be reviewed early on with project teams, management and other stakeholders before a plan is locked in.
  • The WBS gives everyone a clear, visual representation of a project, without having to wade through the minutia and tedium of other types of project metrics or documentation.
  • Through use of a numbering schema, the WBS identifies parts of a plan numerically (often called WBS codes), which can be used in many ways during the execution of your project. For example, a repetitive deliverable that is identified by number can be easily resourced, costed or scheduled programmatically from within Project Plan 365 (or many other scheduling tools).

To develop a WBS for your next project, just follow these three golden rules:

First, the 100% Exhaustive & Mutually Exclusive Rule provides that within every level of your WBS, everything you need to deliver is represented within that level. For Level 1 of your hierarchy, for instance, you should find everything that you need to deliver for your project in totality. Within level 2 of that hierarchy, everything you need to deliver for that subcomponent of your project is included (and nothing else). There should be no overlap in scope between the various levels of your WBS. Just the act of creating the WBS exposes deliverables or events that may detrimentally overlap in your plan — and therein lies the beauty of employing a WBS. This figure shows a sample WBS structure set up in a “mind map” format.

Figure 1. First "branch" of a WBS showing a breakdown as levels within a plan.

Second, the Make a Logical Structure Rule provides that you make a visible representation of your WBS in a hierarchy that makes sense, and is easy to read. In olden times, this was often done in PERT charts. In today’s world of simplification, a much more recognized and modern visualization tool is the ubiquitous mind map, as shown in the figure above.

Note: the numbering schema that goes along with this hierarchy can be automatically generated within Project Plan 365 (see Figure 2 for an example), and WBS codes should be generated this way instead of typing them within the Task Name.

Figure 2. An automatically-numbered schema can be created within the .MPP - just add the WBS column to any view and BOOM - you're done!

Third, Grammar Rules should be followed, but don’t worry, this grammar is easier than you think! Here’s how you do it:

  1. Use descriptive nouns to describe all your deliverables and sub-deliverables
  2. At the lowest levels, use action verbs to describe what’s needed to make each sub-deliverable “happen.” Figure 3 shows WBS grammar rules in action.
  3. Use row #1 to name the project and set the title of the plan.
Figure 3. Syntax of a best-practice WBS.

In summary...

By following these three golden rules, your WBS will become an invaluable tool throughout your project planning experience: from the initial design collaboration – to the actual scheduling in Project Plan 365 — you will surely come to depend on having a WBS prepared for every project that you manage.

To give Work Breakdown Structures a try, simply subscribe to Project Plan 365 today!