
What does the “Global Settings” functionality do?
The Global Settings functionality allows you to easily change the default settings for new projects for all organization members.
Is the “Global Settings” feature available for Standard Subscription?
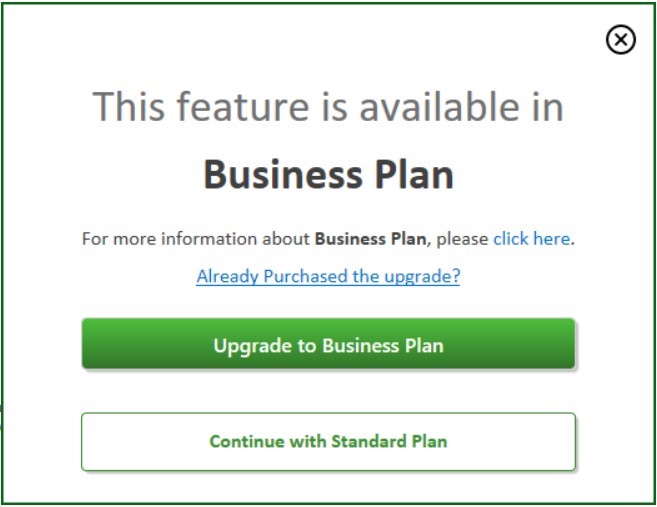
The Global Settings feature is available only for Business Subscription. If you have a Standard Subscription and you want to use this feature, you must upgrade to Business Plan.
What global settings can be set directly from Online Portal?
From Online Portal you can set the following Project settings:
- Week start day
- Currency
- Default task type
- Default task mode
- Holidays
- Show project summary
- Risk management
- Working days
- Divisions
And the following Resource settings:
- Schedule – Full time, part-time, custom
- Custom schedule – Number of working hours per day
Are the set global settings from Online Portal applied in the application?
Any customization from Online Portal will be automatically applied to the projects for all organization members. For example, if you set the Show project summary task to Yes from Online Portal – Options tab, the project summary task will be displayed in each organization project.
How do I add a holiday for my organization from Online Portal?
To add a holiday to your organization project plans from Online Portal, go to Options tab and click on Add New Holiday. A dialog will be displayed that allows you to set holiday’s Name, Start Date, End Date and Yearly option. To save the holiday, click on Add Holiday and the changes will be applied to the projects for all organization members.
How do I customize the schedule for an organization team member from Online Portal?
In order to customize the schedule for an organization team member from Online Portal, go to Team – Schedule and from the drop-down select Custom. A dialog will be displayed where you can set the Number of working hours per day. Click on Set Schedule for the changes to be applied.
I have set the global settings, but when I create a blank project the settings are not applied.
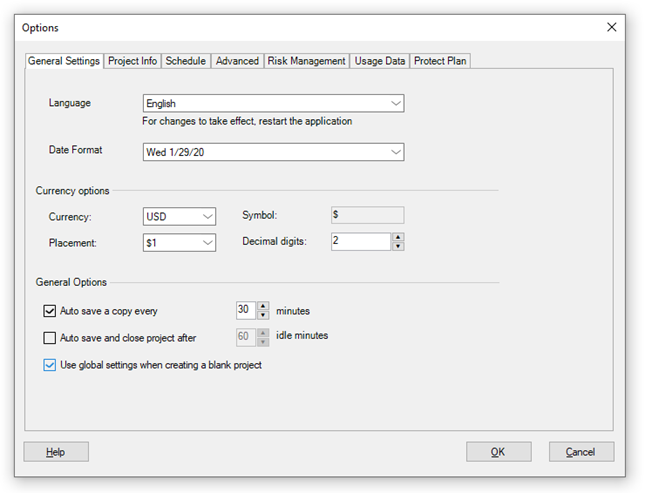
For the settings to be applied when creating a blank project, go to File menu – Options and under General Options check the “Use global settings when creating a blank project” checkbox.
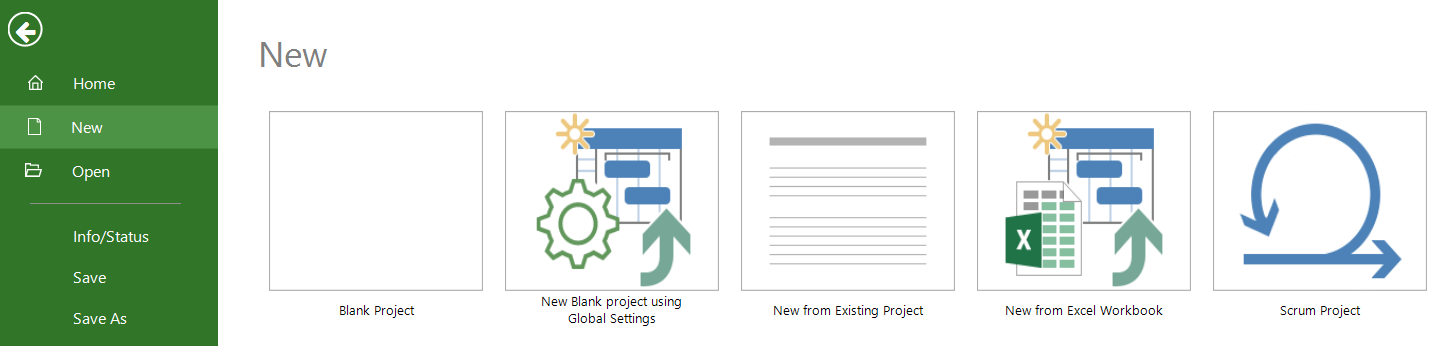
Or, if you are using the Project Plan 365 for Mac or Windows application, you can create projects using the New blank project using Global Settings option from Home / New menu.
I have created a calendar for a project, can I use it in another organization project?
You can use a new created calendar in all your organization projects. For this, you should go to File menu – Account – Organization Information – Global settings – Organizer tab. From there all you must do is to select and copy your new created calendar from your project to Global.
How do I add a holiday for my organization from app?
To add a holiday to your organization project plans from Project Plan 365 app, go to File menu – Account – Organization Information and click the Global Settings button. In the Global Settings dialog select Holidays tab and set holiday’s Name, Start Date, End Date and Yearly option. To save the holiday, click on OK and the changes will be applied to the projects for all organization members.
How do I add a yearly holiday for my organization from app?
To add a holiday to your organization project plans from Project Plan 365 app, go to File menu – Account – Organization Information and click the Global Settings button. In Global Settings dialog select the Holidays tab and set holiday’s Name, Start Date, End Date and select Yes to the Yearly option. To save the changes, click on OK and the changes will be applied to the projects for all organization members and the holiday will repeat yearly.
How do I delete a holiday for my organization from app?
To delete a holiday from your organization project plans from Project Plan 365 app, go to File menu – Account – Organization Information and click the Global Settings button. In Global Settings dialog - Holidays tab select a holiday and click the Delete Holiday button. To save the changes, click on OK and the changes will be applied to the projects for all organization members.
What does “Organizer” mean?
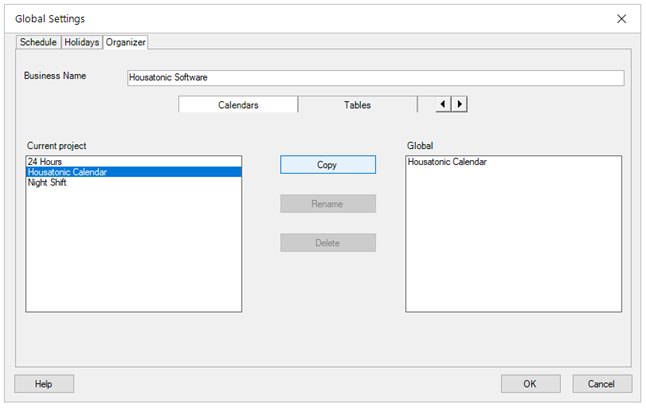
The Organizer dialog can be used to view, copy, rename and delete elements from Global in the current file.
What does “Global” mean in Organizer tab?
The global template is a special template that is associated with every project file.
What information does the Organizer contain?
The Organizer, on the left side contains a list of all elements from the global template file, whereas on the right side there is a list of all elements available in the currently opened project file.
How do I delete a custom Calendar?
To delete a custom calendar, go to File menu - Account – Organization Information – Global Settings – Organizer tab, on Calendars tab, select the desired Calendar and press on Delete button.
How do I delete a custom Table?
To delete a custom table, go to File menu - Account – Organization Information – Global Settings – Organizer tab, on Tables tab, select the desired Table and press on Delete button.
How do I delete a report from Global?
To delete a visual report from organizer, go to File menu - Account – Organization Information – Global Settings – Organizer tab, on Reports tab, select the desired Report and press on Delete button.
How do I copy a custom Calendar in Global?
To copy a custom calendar in Global, go to File menu - Account – Organization Information – Global Settings – Organizer tab, on Calendars tab, select the desired Calendar from the current project and click Copy button to copy it to Global.
How do I copy a custom Table in Global?
To copy a custom table in Global, go to File menu - Account – Organization Information – Global Settings – Organizer tab, on Tables tab, select the desired Table from the current project and click Copy button to copy it to Global.
How do I copy a report in Global?
To copy a report in Global, go to File menu - Account – Organization Information – Global Settings – Organizer tab, on Reports tab, select the desired Report from the current project and click Copy button to copy it to Global.
How do I rename an existing Calendar used by my organization?
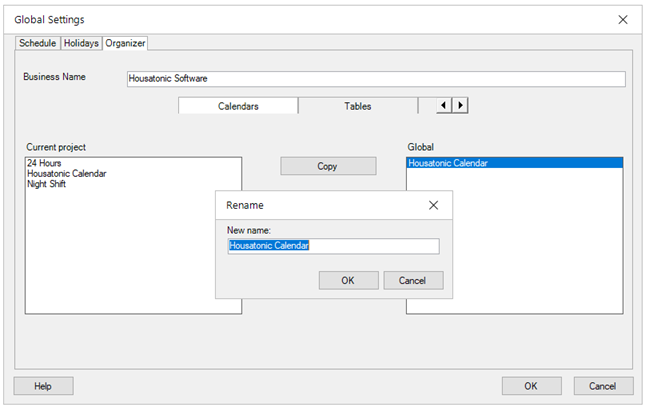
To rename an existing calendar used by your organization, go to File menu - Account – Organization Information – Global Settings – Organizer tab, on Calendars tab, select the desired Calendar and click Rename button. Enter the new name and click OK.
How do I rename an existing Table used by my organization?
To rename an existing table used by your organization, go to File menu - Account – Organization Information – Global Settings – Organizer tab, on Tables tab, select the desired Table and click Rename button. Enter the new name and click OK.
How do I rename an existing Report used by my organization?
To rename an existing report used by your organization, go to File menu - Account – Organization Information – Global Settings – Organizer tab, on Report tab, select the desired Report and click Rename button. Enter the new name and click OK.
How do I customize the schedule for the organization team members from Project Plan 365 app?
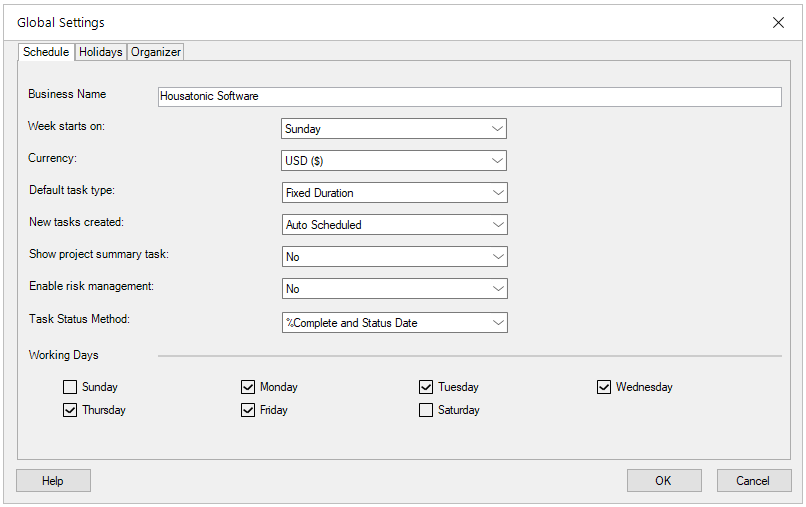
In order to customize the schedule for the organization team members from Project Plan 365 app, go to File menu - Account – Organization Information – Global Settings. In Schedule tab you can set the day on which the week starts, the currency used in organization project plans, the default task type, the task mode, the “Show project summary task” option, enable risk management and set the working days for your organization.
Why can’t I customize the global settings?
To customize the global settings for your organization you must have Admin rights.
How do I add time off for a team member?
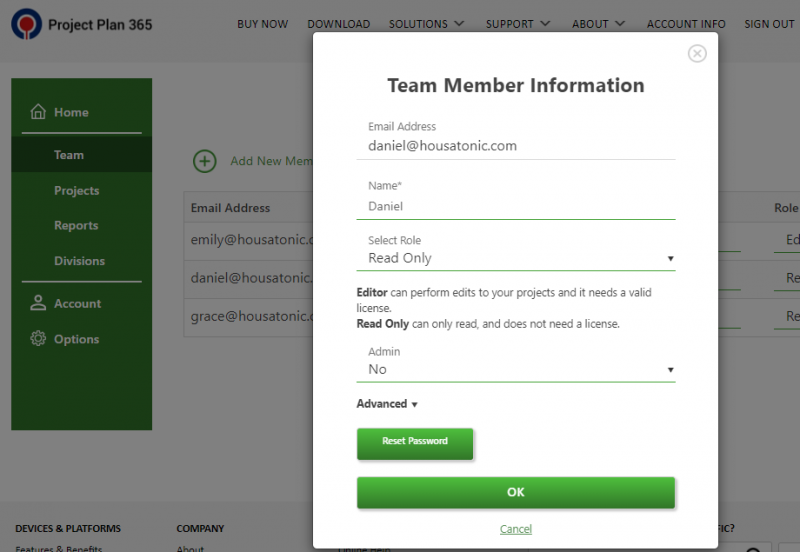
To add Time Off for a team member, go to Team menu – Manage Team, select a team member and click Open Team Member Information. In Team Member Information dialog, in the Time Off section, add the Name, Start Date and Finish date for the Time Off and press “OK”. Note that you must have Admin rights to perform this operation.
How do I set part time schedule for a team member?
To add set Part Time schedule for a team member, go to Team menu – Manage Team, select a team member and click Open Team Member Information. In Team Member Information dialog, choose Part Time for the Schedule field. Note that you must have Admin rights to perform this operation.
How do I set full time schedule for a team member?
To add set Full Time schedule for a team member, go to Team menu – Manage Team, select a team member and click Open Team Member Information. In Team Member Information dialog, choose Full Time for the Schedule field. Note that you must have Admin rights to perform this operation.
How do I set custom schedule for a team member?
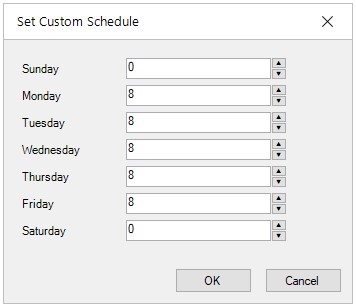
To add set Custom schedule for a team member, go to Team menu – Manage Team, select a team member and click Open Team Member Information. In Team Member Information dialog, choose Custom for the Schedule field. The Set Custom Schedule dialog will be displayed, where you can set the working hours per day. Click OK in both dialogs to save the changes. Note that you must have Admin rights to perform this operation.
Can I add a time off for a team member if I have a Standard subscription?
Adding a time off and setting a schedule for a team member is available only for Business subscription.
Can I set the Task Status Method for all my organization projects?
To set the Task Status Method for all your organization projects, go to menu File – Account – Organization Information – Global Settings – Schedule Tab and from the Task Status Method field select the desired method.
Note: To have these settings applied to all your organization projects, make sure you create projects using the New blank project using Global Settings option from Home / New menu.
Please know that this option is currently available only for the Project Plan 365 for Mac and Windows applications.
Step by step on how to set the organization Global Settings:
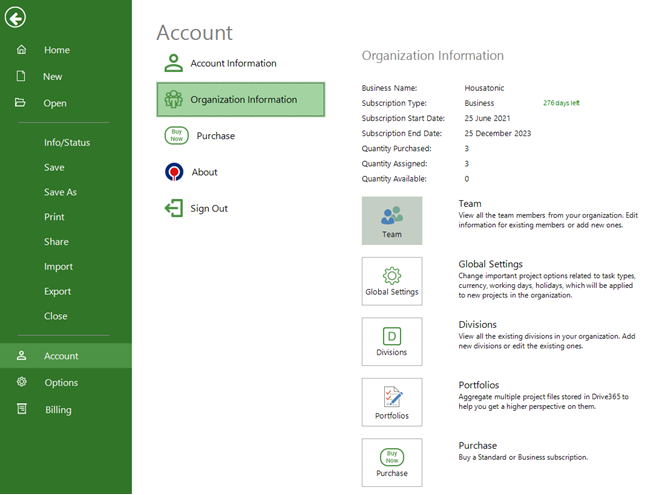
1. Go to File menu – Account - Organization Information.
2. Click Global Settings;

Note: The Global Settings feature is available only in Business Plan. If you have a Standard Subscription and you want to use this feature, you must upgrade to Business Plan. Also, you must have Admin rights in order to set the global settings.
3. Customize the organization Schedule options. You can:
- Change the Business Name;
- Set the day on which weeks starts (Week starts on);
- Set the organization Currency;
- Set the organization Default Task Type;
- Set the organization default task mode (New tasks created);
- Set the Show project summary task option;
- Enable risk management;
- Set Task Status Method;
- Set the organization Working days.
4. Add organization Holidays. Type a Name, a Start and an End date for the holiday. Set “Yes” to “Yearly” option only if you have a holiday that will happen each year on a specific date.

Note: Some of these settings can also be set in the Options tab from the Project Plan 365 Online Portal.
5. Choose the Calendars and Tables your organization needs from the Organizer tab. In order to add new organization Calendars/Tables/Reports, select and Copy your new created calendar/table/report from your project to Global.
Note: You can also Rename or Delete a Calendar/Table/Report.
Check Delete Calendar article for Step by Step on how to delete a calendar.
6. Click OK button to save the changes.
7. For the changes to be applied in each new organization blank project, you must check the “Use global settings when creating a blank project” option from File menu – Options dialog. The Global Settings will be the same for all team members that are in the same Organization.
Or, if you are using the Project Plan 365 for Mac or Windows application, you can create projects using the New blank project using Global Settings option from Home / New menu.

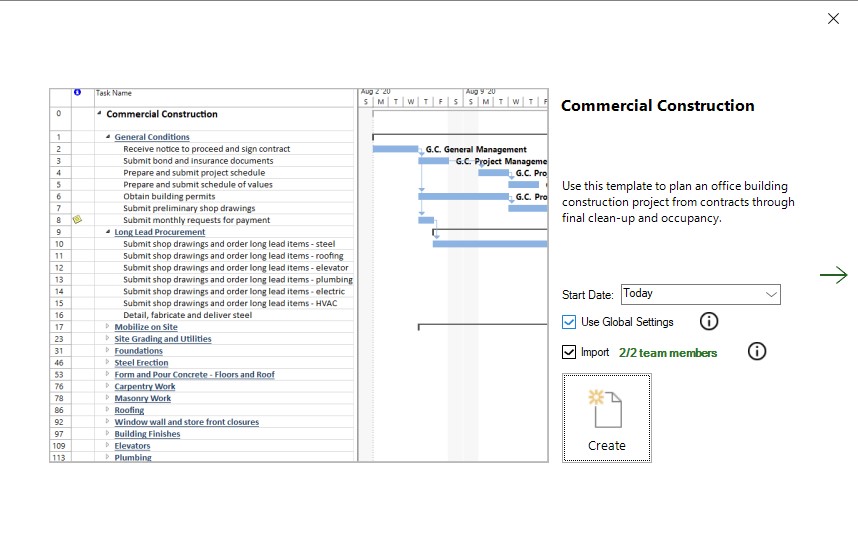
8. If you want to use the Global Settings in a project created from a new template, you must check the “Use Global Settings” in the template dialog, before clicking Create button.
Step by step on how to set the scheduling settings for organization team members:
1. Go to File menu – Account - Organization Information.
2. Click Team;
3. Team dialog will appear showing all the organization team members;
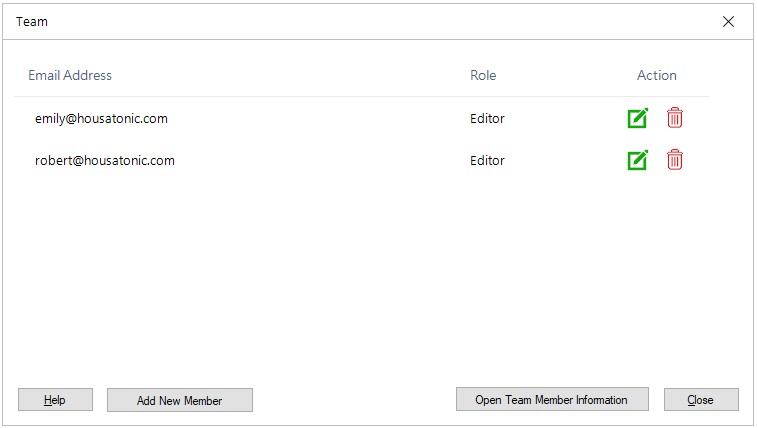
4. Select a team member and click Open Team Member Information;
5. Choose Custom from the Schedule drop-down;
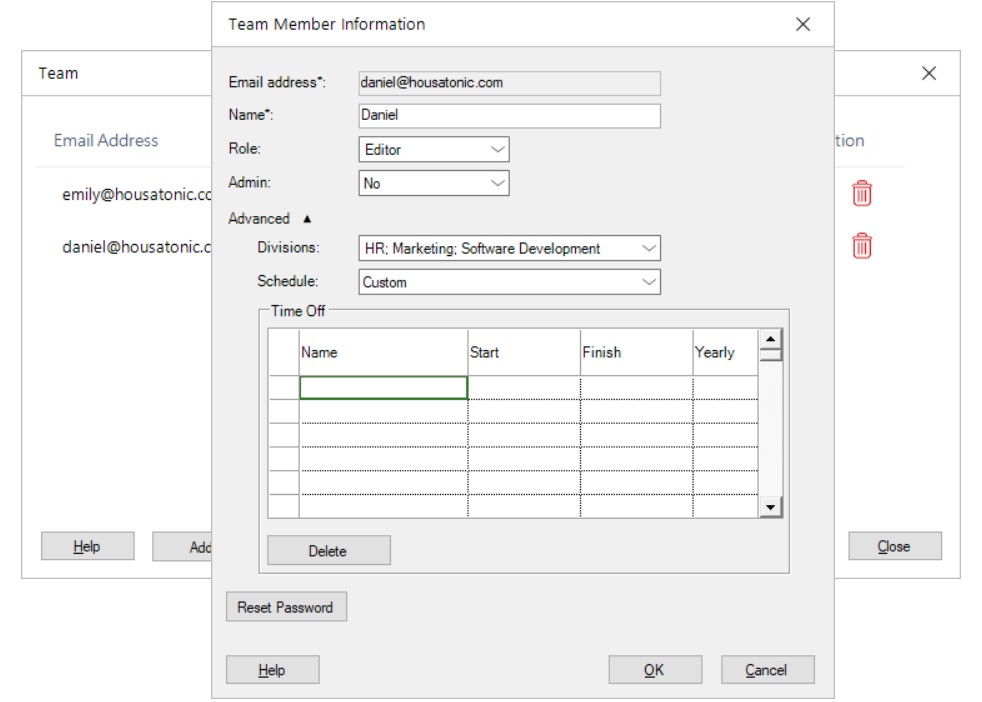
6. The Set Custom Schedule dialog will be displayed where you can set the Number of working hours per day.
7. Click OK;
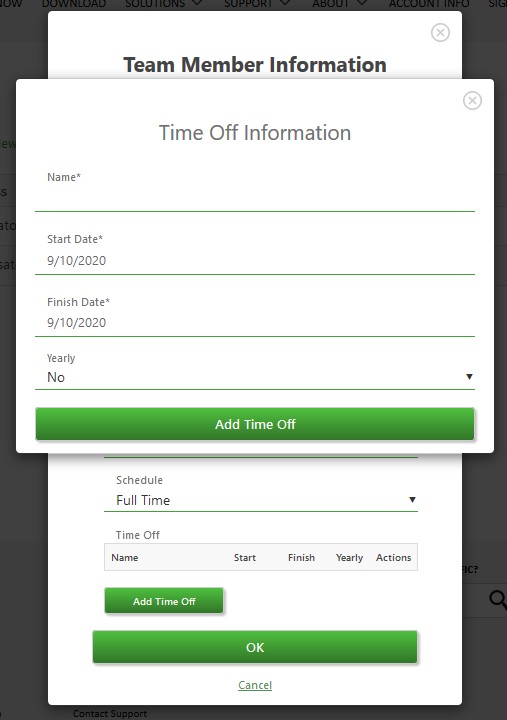
8. You can also set a Time-Off period for the team member by typing a Name, Start and End date in Time Off section.
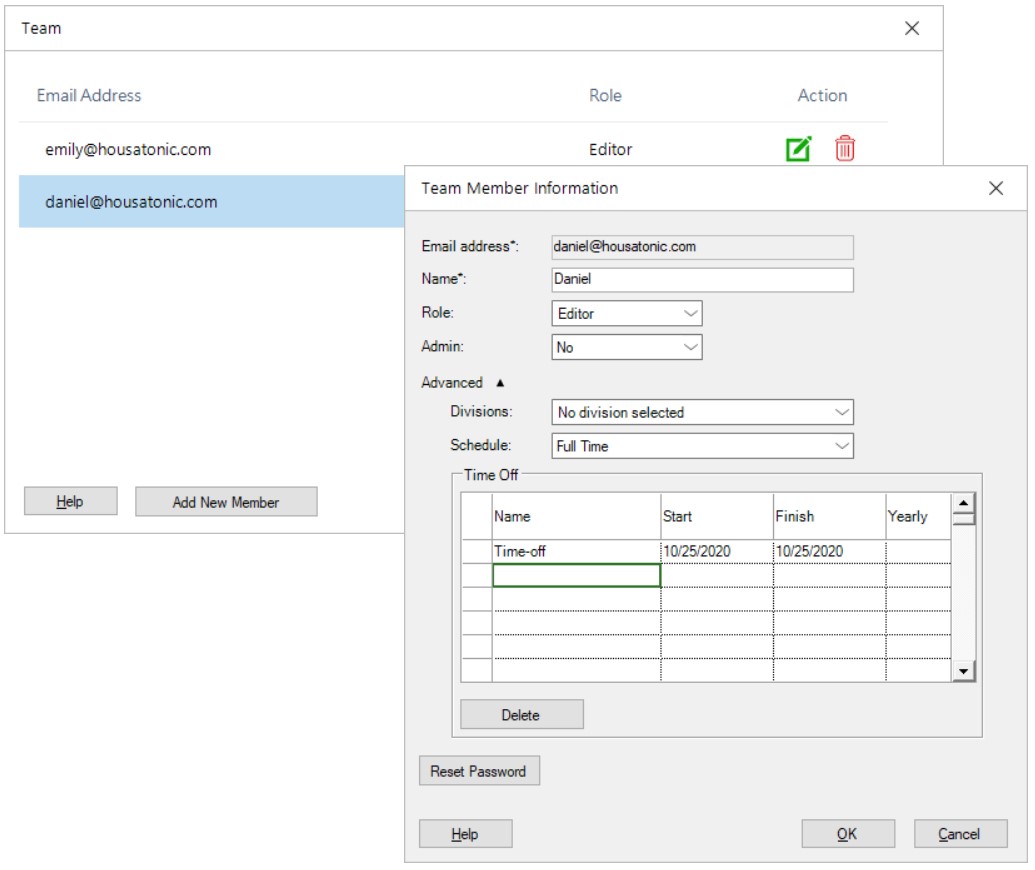
9. Click OK to save the changes.
Note: Remember to check the “Use global settings when creating a blank project” option from File menu – Options dialog for the changes to be applied in each new organization blank project.
Or, if you are using the Project Plan 365 for Mac or Windows application, you can create projects using the New blank project using Global Settings option from Home / New menu.
Step by step on how to customize organization team member’s schedule from Online Portal:
1. Go to our Online Portal page – Team tab.
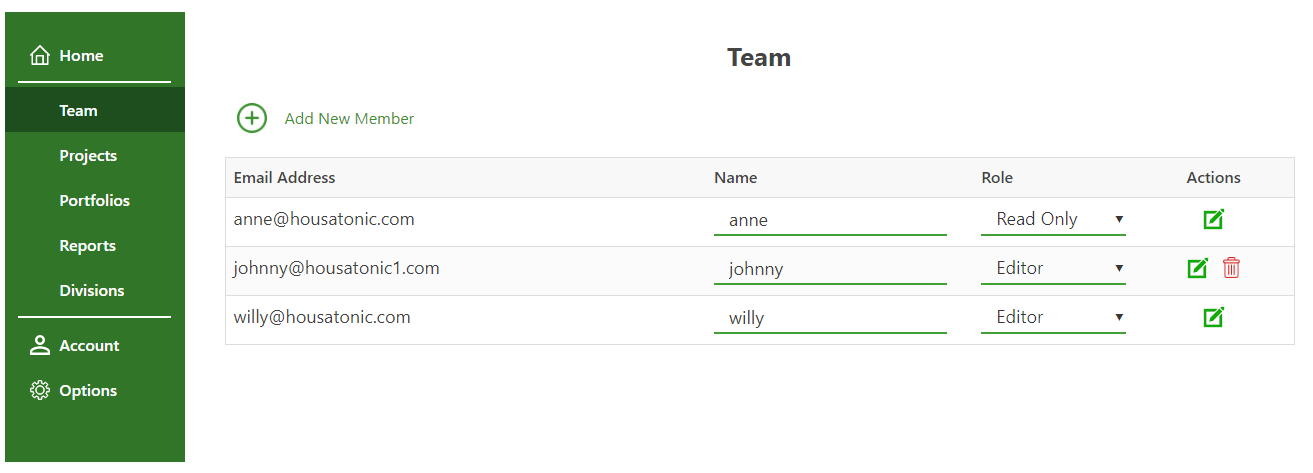
2. Click the Edit icon for a team member.
3. Click the Advanced arrow;

4. Choose Custom option from the Schedule drop-down list.
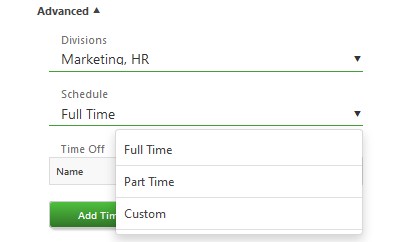
5. A Set Custom Schedule dialog will be displayed where you can set the Number of working hours per day.
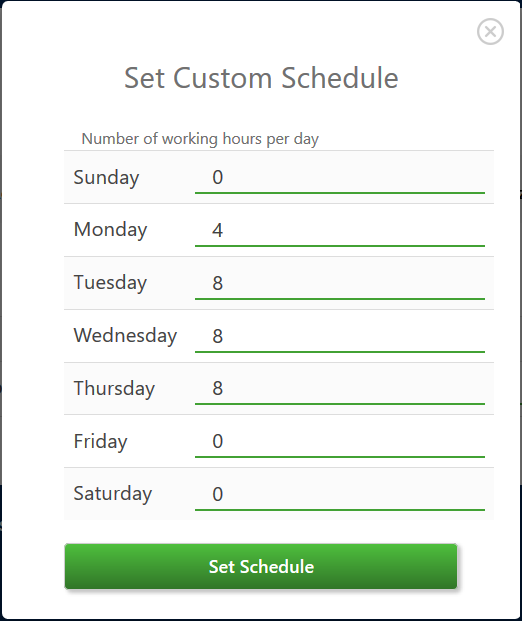
6. After you set Number of working hours per day, click on Set Schedule button for the changes to be applied.
7. You can see all the information about the team member, and you can also set a Time-Off period for the team member clicking Add Time Off and by typing a Name, Start and End date in Time Off Information dialog.
8. Click OK to save the changes;
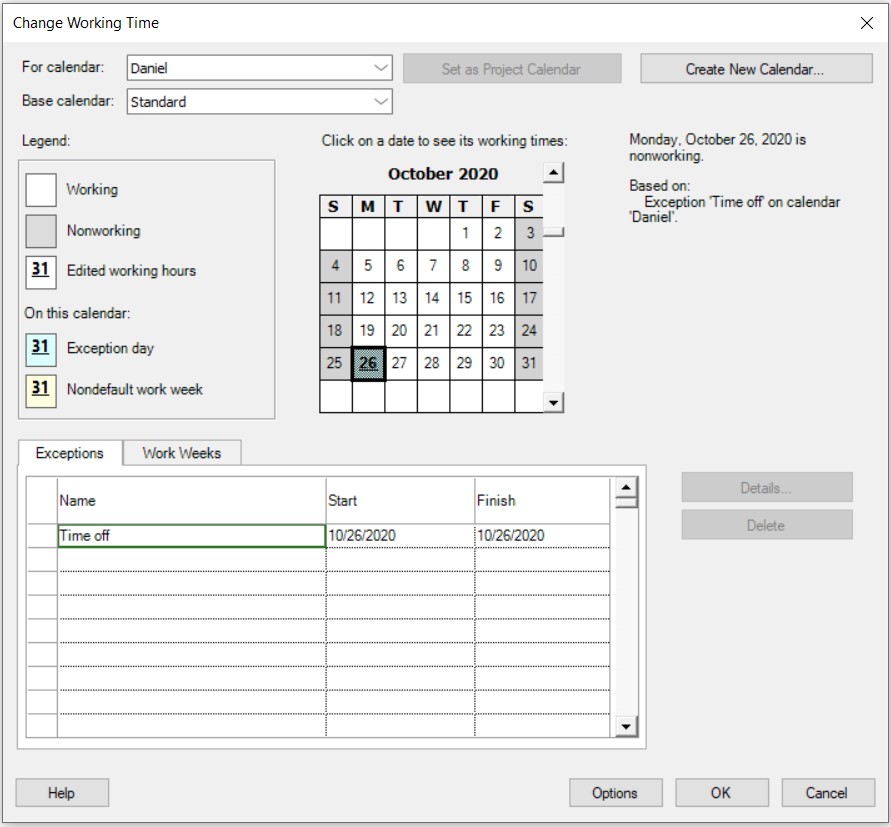
9. In order to see the changes when creating a blank project, make sure that “Use global settings when creating a blank project” from File – Options dialog checkbox is checked. And then, in Project menu - Change Working Time dialog, you will notice the applied changes in the team member’s Calendar.
Step by step on how to add a new holiday from Online Portal:
1. Go to our Online Portal page – Options tab.
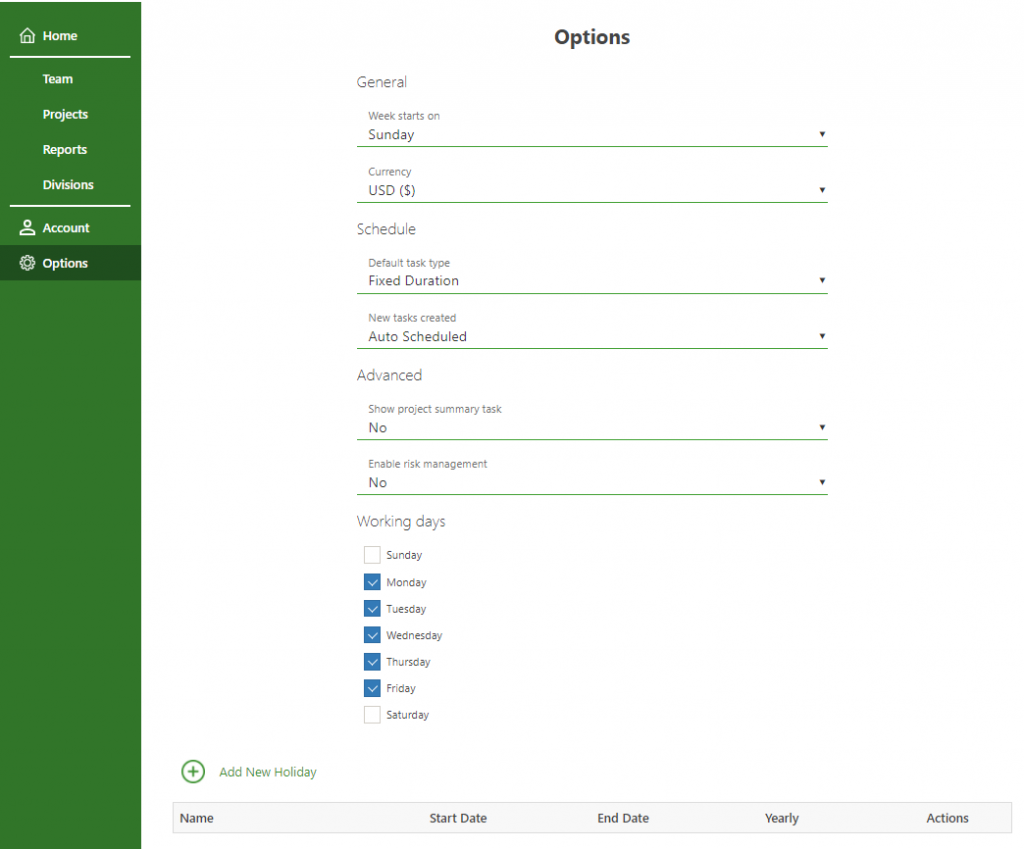
2. Click on Add New Holiday.

3. A dialog with the “Add new holiday” option will be displayed where you can set holiday’s Name, Start Date, End Date and Yearly.
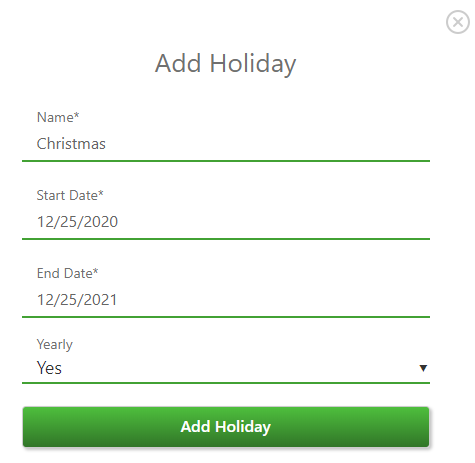
Note: Use the “Yearly” option only if you have an Exception day that will happen each year on a specific date.
4. Click on Add Holiday so save the changes.
Note: You can also delete the holiday anytime you want by clicking on Delete icon.
5. To see the changes in the app, create a new blank project and then, in Project menu - Change Working Time dialog, you will notice the applied changes in standard Calendar.
Note: In order to see the changes when creating a blank project, make sure that “Use global settings when creating a blank project” from File – Options dialog checkbox is checked.
Or, if you are using the Project Plan 365 for Mac or Windows application, you can create projects using the New blank project using Global Settings option from Home / New menu.