
What does the “Time Entries” functionality do?
The "Time Entries" functionality allows you to record, track, and review the hours worked by you and your team members across projects and activities. It provides visibility into how time is spent and helps teams monitor workload, productivity, and effort distribution.
With what subscription type is the “Time Entries” functionality available?
The Time Entries functionality is available only with a Business Subscription.
How can I access the “Time Entries” functionality?
To access the Time Entries functionality, go to our Online Portal and sign in at then navigate to the Time Entries page.
What views are available in “Time Entries”?
The following views are available:
- My Entries – displays only the time entries created by you.
- Team Entries – displays time entries for all team members (available only to Admin users).
What is a Category in Time Entries?
A Category in Time Entries is a group that helps organize activities.
For example, the “Administration” category can include activities like Meetings, Training.
What is an Activity in Time Entries?
An Activity in Time Entries is a specific type of work that people record time for. Each activity belongs to a category.
For example, the “Development” category, activities could be Coding, Code Review, or Testing.
What is a Custom Field in Time Entries?
A Custom Field in Time Entries is an extra column that a team can add to time entries to collect more information. It appears together with the standard fields like Date, Hours, Activity, and Comments.
For example, “Project Phase” (text or dropdown) or “Client Name” (text).
What fields are available in the “My Entries” table?
The following fields are available in the My Entries table: Date, Hours, Activity, Comments, and any Custom Fields configured by your team.
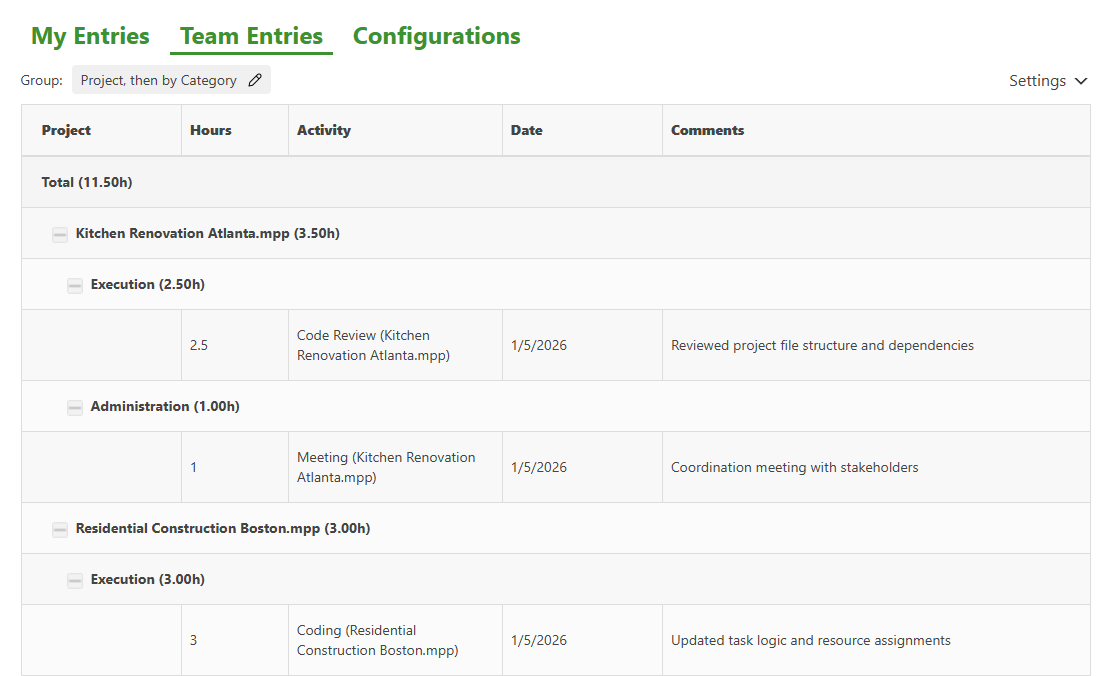
What fields are available in the “Team Entries” table?
The Team Entries table displays Date, Hours, Activity, Project, Team Member, Category, Comments, and any Custom Fields configured by the team, grouped and summarized based on the selected settings.
How can I add a new time entry?
To add a new time entry, in our Online Portal go to the Time Entries page, stay in the My Entries view, click the Add New Entry button, complete the required fields (Date, Hours, Activity), and click Save.
How can I edit a time entry?
To edit a time entry, go to the My Entries view, click the Edit icon next to the desired entry, update the information, and click Save.
How can I delete a time entry?
To delete a time entry, go to the My Entries view, click the Delete icon next to the entry, and confirm the action.
Can I add time entries for other team members?
No, you can only add time entries for yourself. Each team member must add their own time entries.
Do team members have to be Admins to add time entries?
No, team members don’t have to be Admins to add time entries.
Do team members need to be Editors to add time entries?
Yes, team members have to be Editors to be able to add time entries.
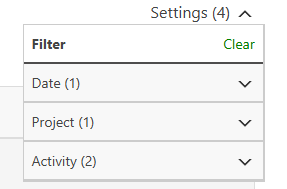
How can I filter time entries in “My Entries” view?
To filter time entries in My Entries view, click the Settings option and select the desired filters, such as Date range, Project, or Activity. The table will update to show only matching entries.
How can I view time entries for the entire team?
To view time entries for the entire team, in our Online Portal go to Time Entries page and switch to the Team Entries view. If you do not have permission, the list will not appear.
How can I group time entries in “Team Entries” view?
In Team Entries view, click Settings and select the desired grouping order. You can group entries by Category, Activity, Team Member, and Project, with up to four grouping levels.
How to create an Activity in Time Entries?
To create an Activity in Time Entries, in the Online Portal, go to Time Entries page – click Configurations – Categories – click “Add New Activity” – type in a Name – select a Project and Category and click Save.
How to create a Category in Time Entries?
To create a Category in Time Entries, in the Online Portal, go to Time Entries page – click Configurations – Categories – click “Add New Category” – type in a Name and click Save.
How to create a Custom Field in Time Entries?
To create a Custom Field in Time Entries, in the Online Portal, go to Time Entries page – click Configurations – Custom Fields – click “Add New Field” – type in a Name – select the desired Criteria and click Save.
How to show a custom field in the time entries table?
To show a custom field in the time entries table, in the Online Portal, go to Time Entries page, go to Team Entries – Settings – in the Group section from the Show list check the fields you want to be shown in both the My Entries and Team Entries tables.
Can I delete an activity, category or custom field?
You can delete an activity, category or custom field by going to the Online Portal, go to Time Entries page – Configurations – click on Activities/Categories/Custom Fields – for the desired option in the table click on the Delete icon.
Who can manage Activities, Categories, and Custom Fields?
Only Admin users can manage Activities, Categories, and Custom Fields from the Configurations section.
What platforms is the Time Entries functionality available on?
The Time Entries functionality is available in our Online Portal.
How can I export all data from the My Entries tab?
If you want to export all data from the My Entries tab, go to our Online Portal page and navigate to the Time Entries tab. Make sure you are in the My Entries tab, then click the Export Data button in the top-right corner. In the dialog box that appears, select the Export All Data option, then click Download to complete the export.
How can I export filtered entries from the My Entries tab?
If you want to export filtered entries from the My Entries tab, go to our Online Portal page and navigate to the Time Entries tab. Make sure you are in the My Entries tab, then click the Export Data button in the top-right corner. In the dialog box that appears, select the Export Filtered Entries option, then click Download to complete the export.
How can I export all data from the Team Entries tab?
If you want to export all data from the Team Entries tab, go to our Online Portal page and navigate to the Time Entries tab. Make sure you are in the Team Entries tab, then click the Export Data button in the top-right corner. In the dialog box that appears, select the Export All Data option, then click Download to complete the export.
How can I export filtered entries from the Team Entries tab?
If you want to export filtered entries from the Team Entries tab, go to our Online Portal page and navigate to the Time Entries tab. Make sure you are in the Team Entries tab, then click the Export Data button in the top-right corner. In the dialog box that appears, select the Export Filtered Entries option, then click Download to complete the export.
Step by step on how to access the “Time Entries” functionality:
1. Go to our Online Portal page – Time Entries.

2. The "My Entries" view will appear, showing all entries added by you.

3. Switch to "Team Entries" to view a table containing the time entries the entire team.

Step by step on how to add a new time entry:
1. Go to our Online Portal page – Time Entries.
2. Click Add New Entry.

3. Select a Date.

4. Enter the number of Hours.

5. Select an Activity.
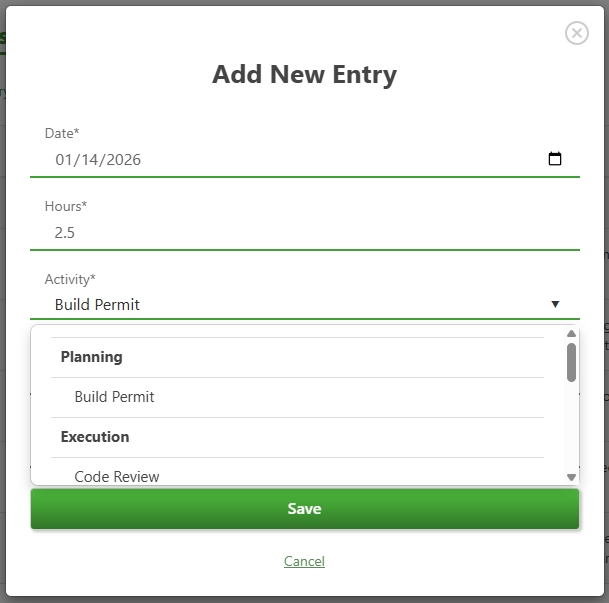
6. Add Comments or Custom Field values if needed.

7. Click Save.
Step by step on how to edit a time entry:
1. Go to our Online Portal page – Time Entries.
2. In My Entries, locate the desired entry.
3. Click the Edit.

4. Update the necessary fields.
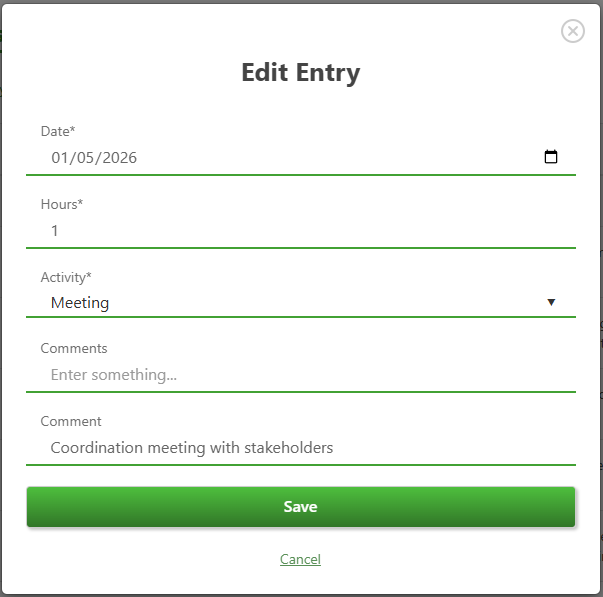
5. Click Save.
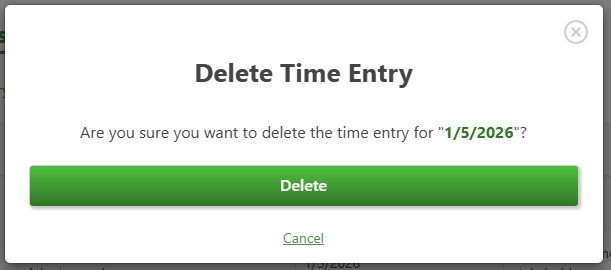
Step by step on how to delete a time entry:
1. Go to our Online Portal page – Time Entries.

2. In My Entries, locate the desired entry.
3. In My Entries, click the Delete icon next to the entry.
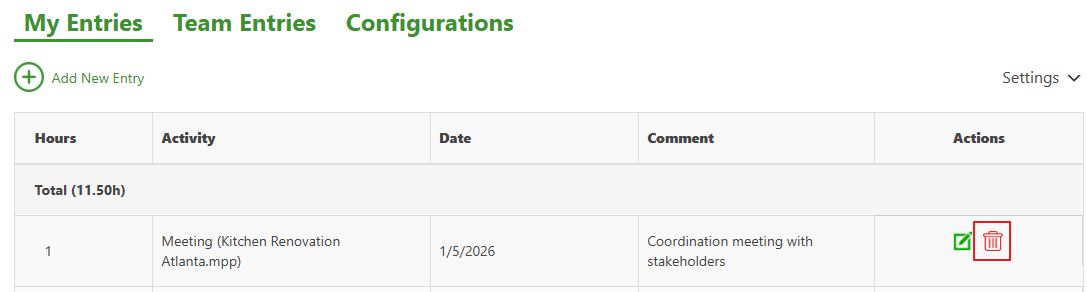
4. Confirm the deletion.
Step by step on how to filter your time entries:
1. Go to our Online Portal page – Time Entries.
2. In My Entries view, click on the Settings.

3. Select the desired filters for the Date, Project and Activity.

4. The table will update automatically.

Note: Clear the filters by clicking on the “x” button for each category or click on Settings – Clear.
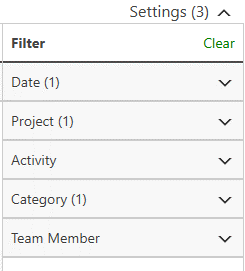
Step by step on how to filter team time entries:
1. Go to our Online Portal page – Time Entries.
2. Go to Team Entries view and click on the Settings.

3. From the Filter section, select the desired filters for the Date, Project, Activity, Category and Team Member.

4. The table will update automatically.
 Note: Clear the filters by clicking on the “x” button for each category or click on Settings – Clear.
Step by step on how group team time entries:
1. Go to our Online Portal page – Time Entries.
2. Go to Team Entries view and click on the Settings.
3. From the Group section, select the desired grouping order and what fields to show.
4. The table will be updated automatically.
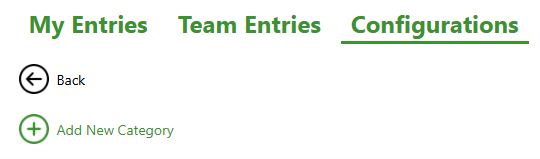
Step by step on how to create an Activity in Time Entries:
1. Go to our Online Portal page – Time Entries.
2. Go to Configurations tab and click on Activities.

3. Click “Add New Activity”.

4. Type in a Name – select a Project and Category and click Save.

Note: To delete an activity click on the Delete icon for the desired option.
Step by step on how to create a Category in Time Entries:
1. Go to our Online Portal page – Time Entries.
2. Go to Configurations tab and click on Categories.
3. Click “Add New Category”.
4. Type in a Name and click Save.

Note: To delete a category click on the Delete icon for the desired option.
Step by step on how to create a Custom Field in Time Entries:
1. Go to our Online Portal page – Time Entries.
2. Go to Configurations tab and click on Custom Fields.
3. Click “Add New Field”.

4. Type in a Name and select the desired Criteria and click Save.
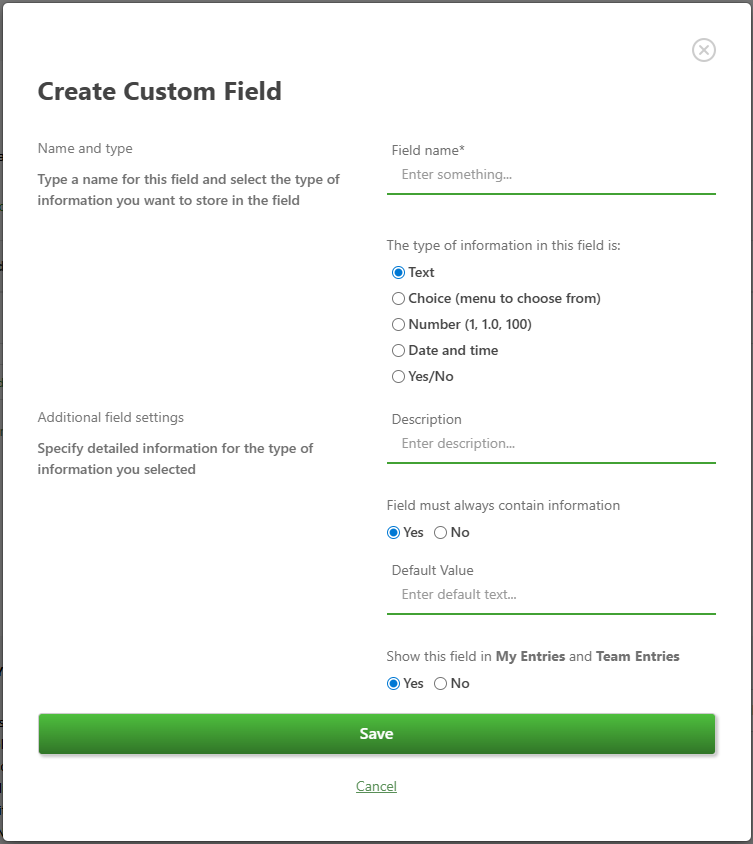
Note: To delete a custom field click on the Delete icon for the desired option.
Step by step on how to export all data from “My Entries”:
- Go to our Online Portal page – Time Entries

- Make sure you are in the My Entries tab and click on the Export Data.

- In the dialog box that appears, select Export All Data and click on the Download button;


