

Are You Managing Risk? You Should Be.
Risk management is a fundamental part of any project management regimen, and if you are not following a process for managing any potential risks you may encounter along the way, you are in serious risk yourself; as risk not mitigated during the rollout of a project is a primary cause of project failure today.
But what is “risk” in the first place?
Simply put, risk is any uncertain event, task or condition that impacts at least one of the project’s objectives as it occurs.
Fortunately for planners, there is a well-documented protocol for incorporating risk taking (and risk management) into your daily project-management routine. This article covers a basic risk management protocol, provides templates to follow that protocol, and then describes how you can use Project Plan 365 to help you mitigate risks along the way. While Risk Management is a well-documented discipline in itself, by following a simple procedure and creating a document or two, anyone can successfully prepare for and mitigate risks as they present themselves…
Risk Management Basics
First, the process of risk management for any project goes like this:
- Plan for any potential risks you may encounter during the life of your project (create a Risk Management plan, specific to the project on hand). A downloadable template is provided here to get you started.
- Layout a process for risk identification, analysis, response, monitoring and reporting within the newly created plan. In addition, any contingency plans for the identified risks should be documented here, along with those responsible for carrying out the prepared mitigations (command & control).
- Develop a risk register to identify risks, where you rate the likelihood that the risky situation will occur, the seriousness of each risky situation, and the impact on the project if that risk were to go unchecked. A downloadable template is provided here to help you out.
- Maintain a risk log, documenting any interventions and follow-ups as needed.
- In your planning software, identify risky tasks and review them periodically as your project is rolled out. Also, update your project plan based on any risk mitigations performed, or new risks encountered.
Now, for those using Project Plan 365, the following tutorial will get you started recording and displaying risk within your plan.
Note to Microsoft Project Users:
If you are a Microsoft Project user, you can use this procedure as well, but you must first use Project Plan 365 to set things up within your .MPP file. Then, when you open up your project file in MS Project, you should see any identified risk as described below (just add a column containing Outline Code7 and rename the column to Risk).
Identifying Risky Tasks within Project Plan 365
Project Plan 365 offers a simple yet effective way of tracking and managing the risks you have identified in your Risk Register (from your Risk Management Plan). Just follow these steps to get started:
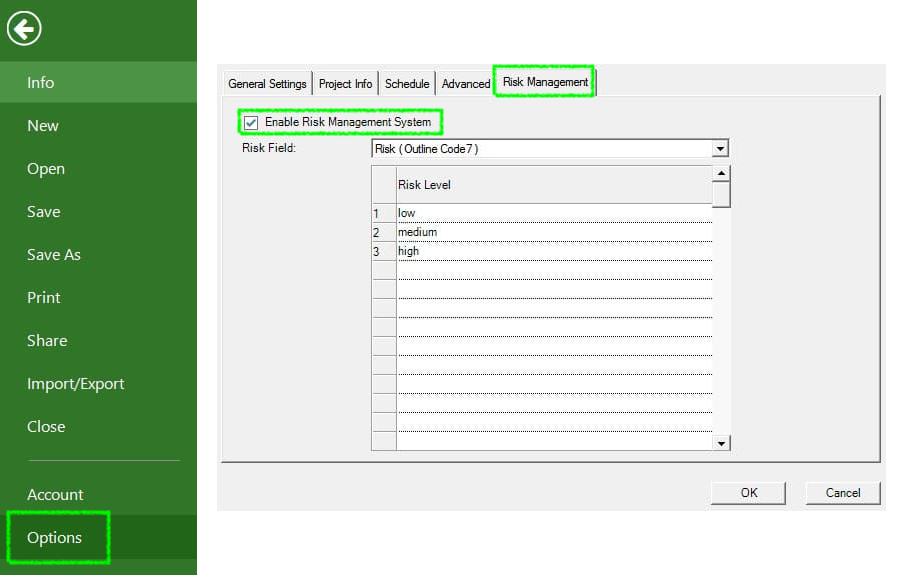
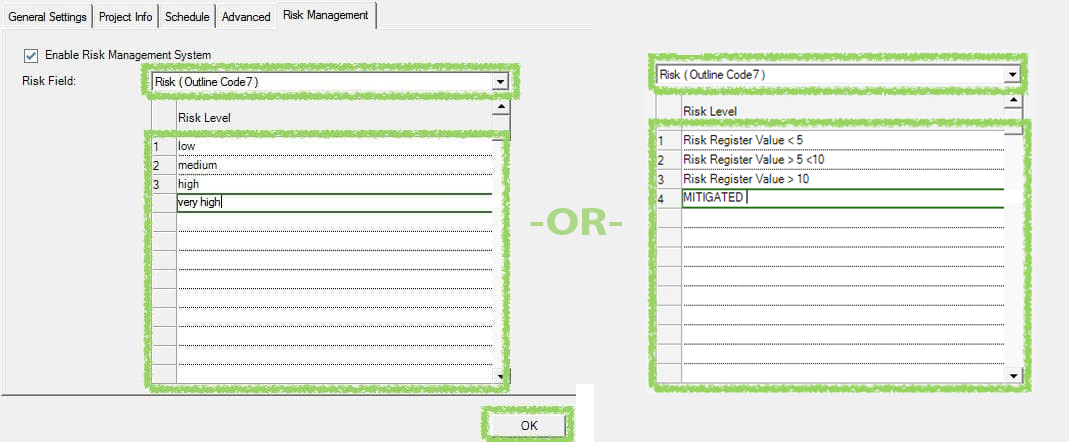
1 ) To turn on the Risk Management feature within Project Plan 365; just go to Backstage | Options | Risk Management and click the Enable Risk Management System checkbox, and then tap OK.
2 ) Once the Risk Management System is enabled, switch your plan to the Risk View, where you can identify any risky tasks in your plan by changing values in stored in the Risk column: *
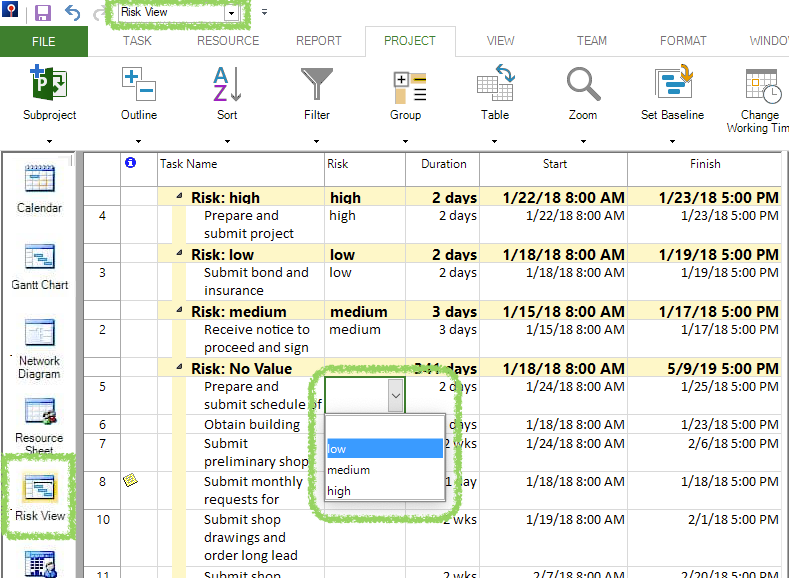
The Risk View is handy, as this view allows you to go through your entire plan to quickly “tag” tasks with a risk value, and then this view will automatically sort all tasks by the value selected (in this case: low, medium, high or No Value).
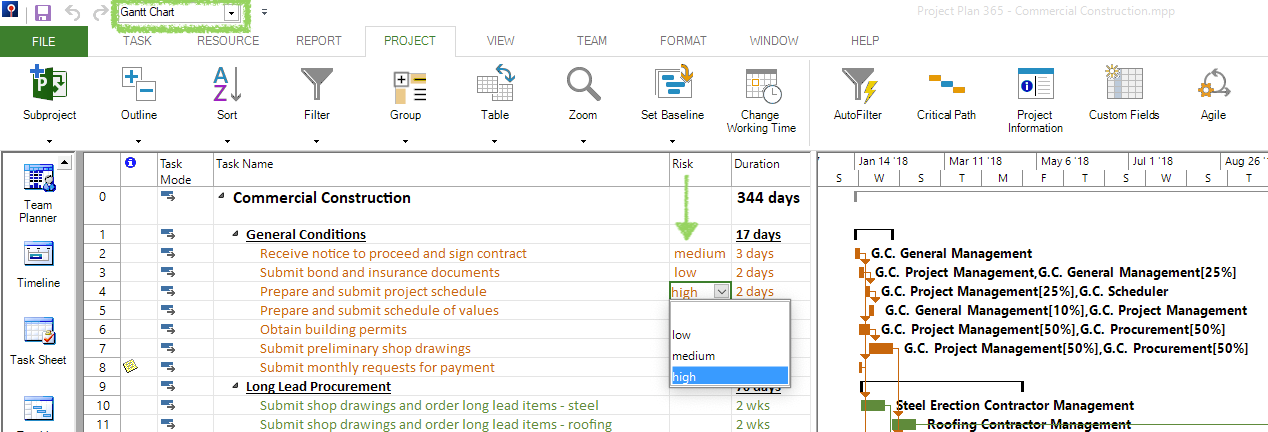
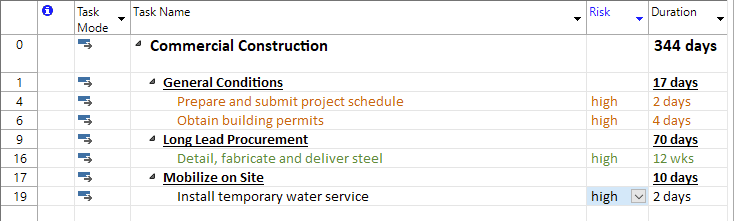
3 ) You can also add your Risk column to any view you desire, for example, to the Gantt Chart View:
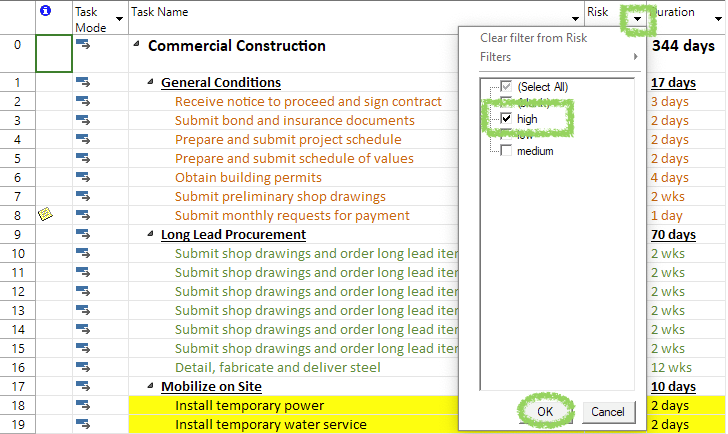
4 ) Using the Risk column (by clicking the twisty), you can filter out the values you don’t want to see. In this example, we are filtering on just the high values. Once filtered, the view will only show tasks with a high-risk value:
In addition to filtering risky tasks to display just what you want, you can also customize the default risk labels to display anything you want, such as labels used in your Risk Management Register, Logs, or Plan. Just edit the Risk Level grid found under Options to suit your requirements:
Risk Reporting Within Project Plan 365
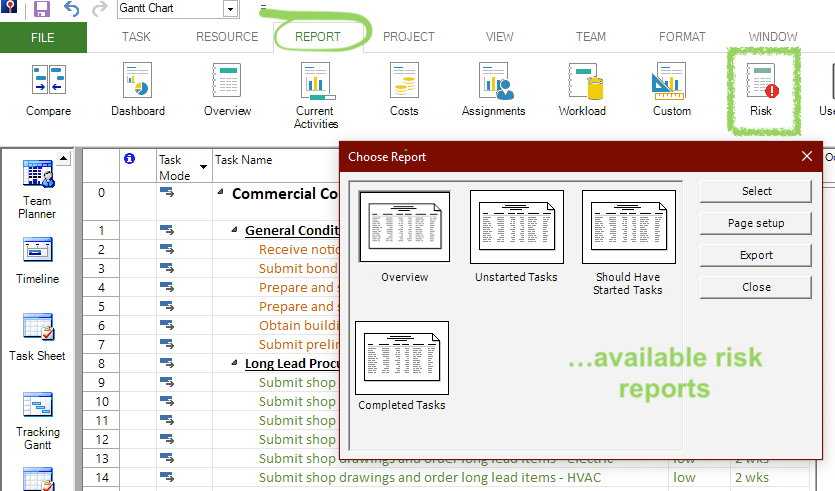
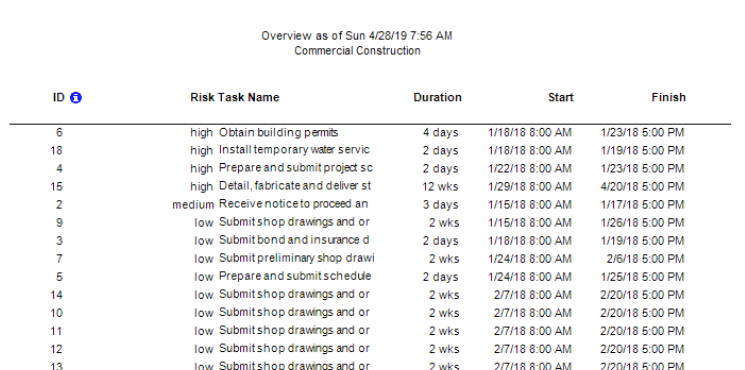
Once Risk values are added to tasks, a Risk Report can be generated by navigating to the Report ribbon and selecting one of the available reports:
Summing Up...
By synchronizing a Risk Management Plan right alongside your project plan, you can track risky tasks within your schedule, and stay on top of any activity that may go wrong during the course of your project rollout. In addition, you can produce Risk Reports or otherwise use your project schedule to control and mitigate risks as they materialize, all according to plan.
To start managing project risk today, subscribe to the Project Plan 365 Business Plan without delay!
Risk Management the easy way - subscribe to Project Plan 365 today!
For more information about Risk Management within Project Plan 365, see this help page.